...
| Table of Contents |
|---|
Your current theme
The first section of the page serves as a reminder of which theme you are currently using, with its details:
- Theme name and version.
- Theme author's name.
- Thumbnail for the theme.
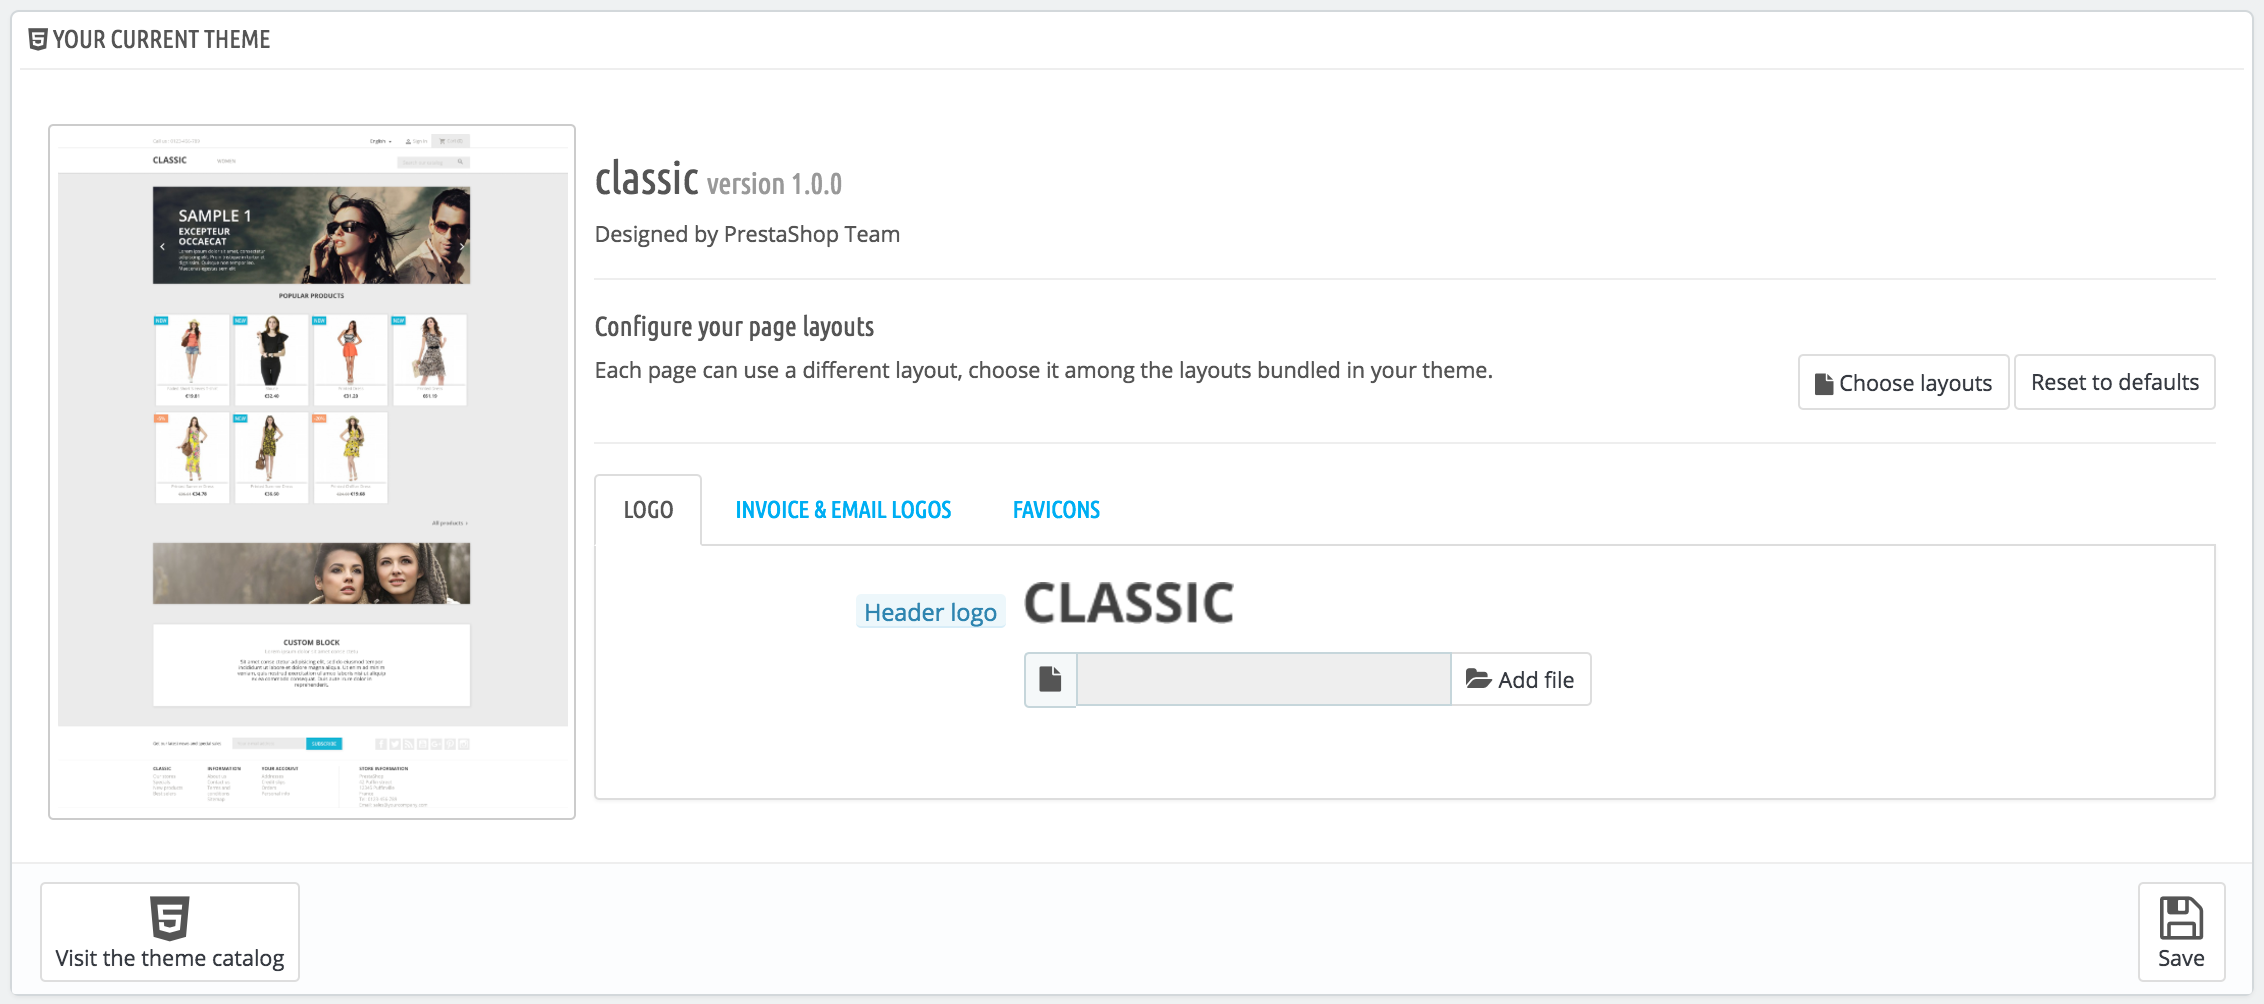
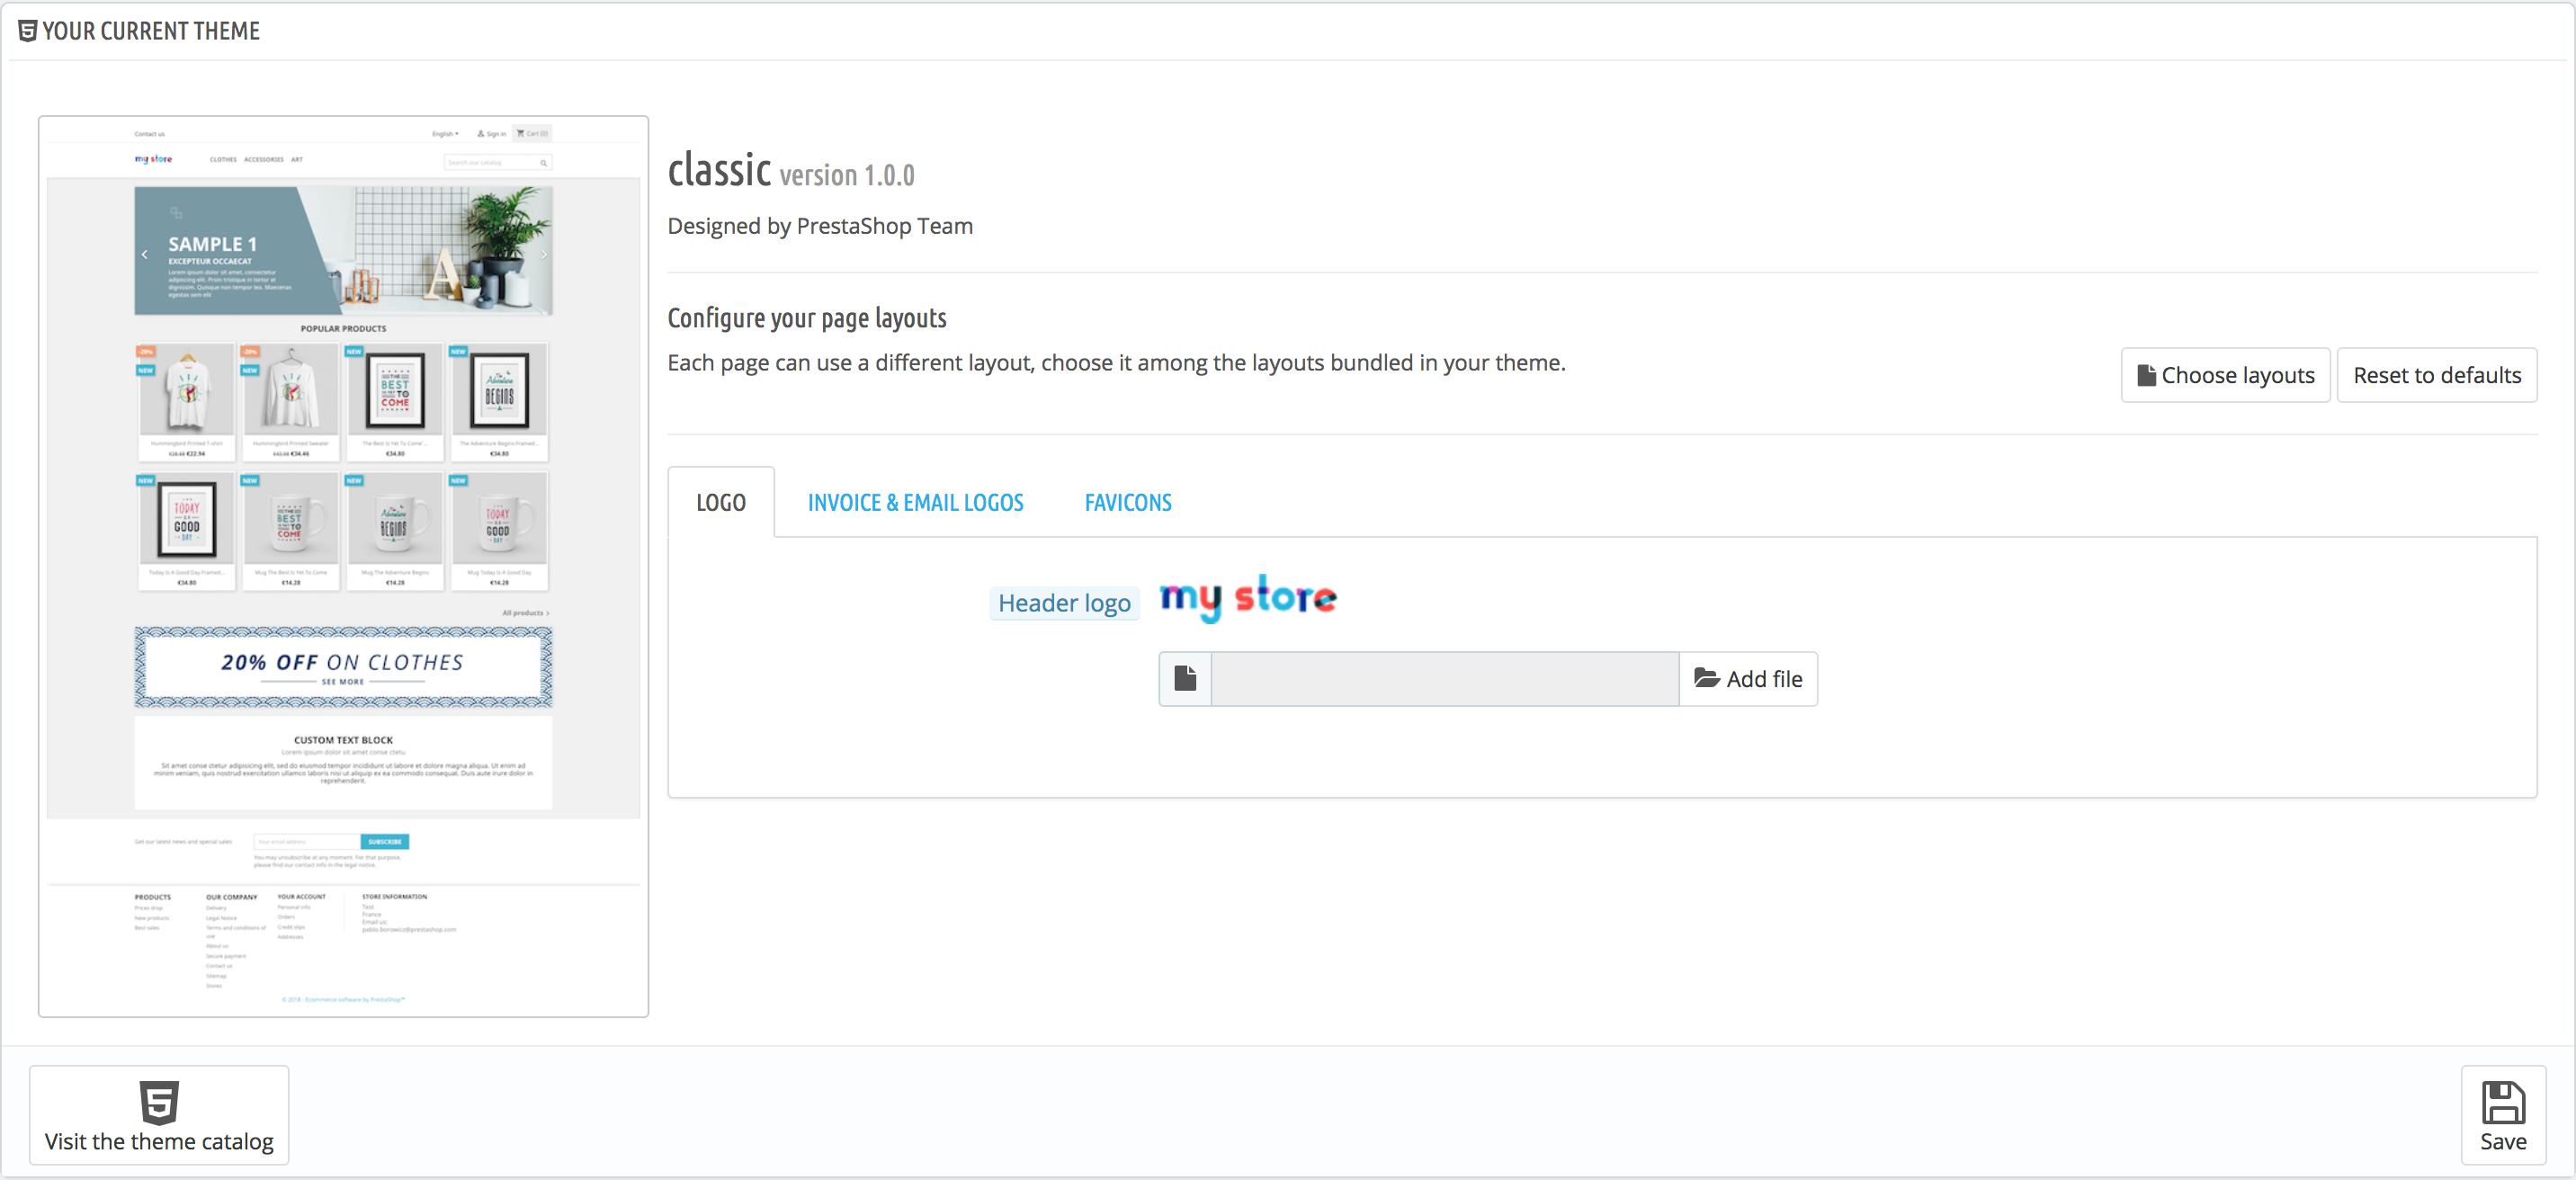
This section also gives you access to a handful of tools, which helps you to quickly customize the current theme: header logo, mail logo, invoice logo, favicon, store icon and even the navigation pipe can be easily modified from there.
...
By clicking on "Choose layouts", you will see a new page listing all the kinds of pages available on your site (category, product, cart, etc...). For each page, you can change the default layout.
...
- Header logo. The logo that will appear on all the pages of your shop.
- Invoice & email logos. The logos that will respectively appear in your shop's email notifications, and its invoices.
- Favicons. Your shop's favicon. This is the small image displayed at the left of the web browser's address bar and on the browser's tabs.
| Warning |
|---|
The default theme uses a "Classic" logo and PrestaShop's own logo as a favicon. It is strongly recommended to change all of the instances of these logos and use yours instead! |
...
Just below the logo section, on the right, the "Visit the theme catalog" opens a new page to the PrestaShop Addons marketplace, where you can find more themes.
Select a theme for your "[name]" shop
This section is only displayed if you have at least two themes installed. It presents you with the other available themes on your PrestaShop installation beside the already-enabled one.
This section simply shows the thumbnails of the available themes, with their names.
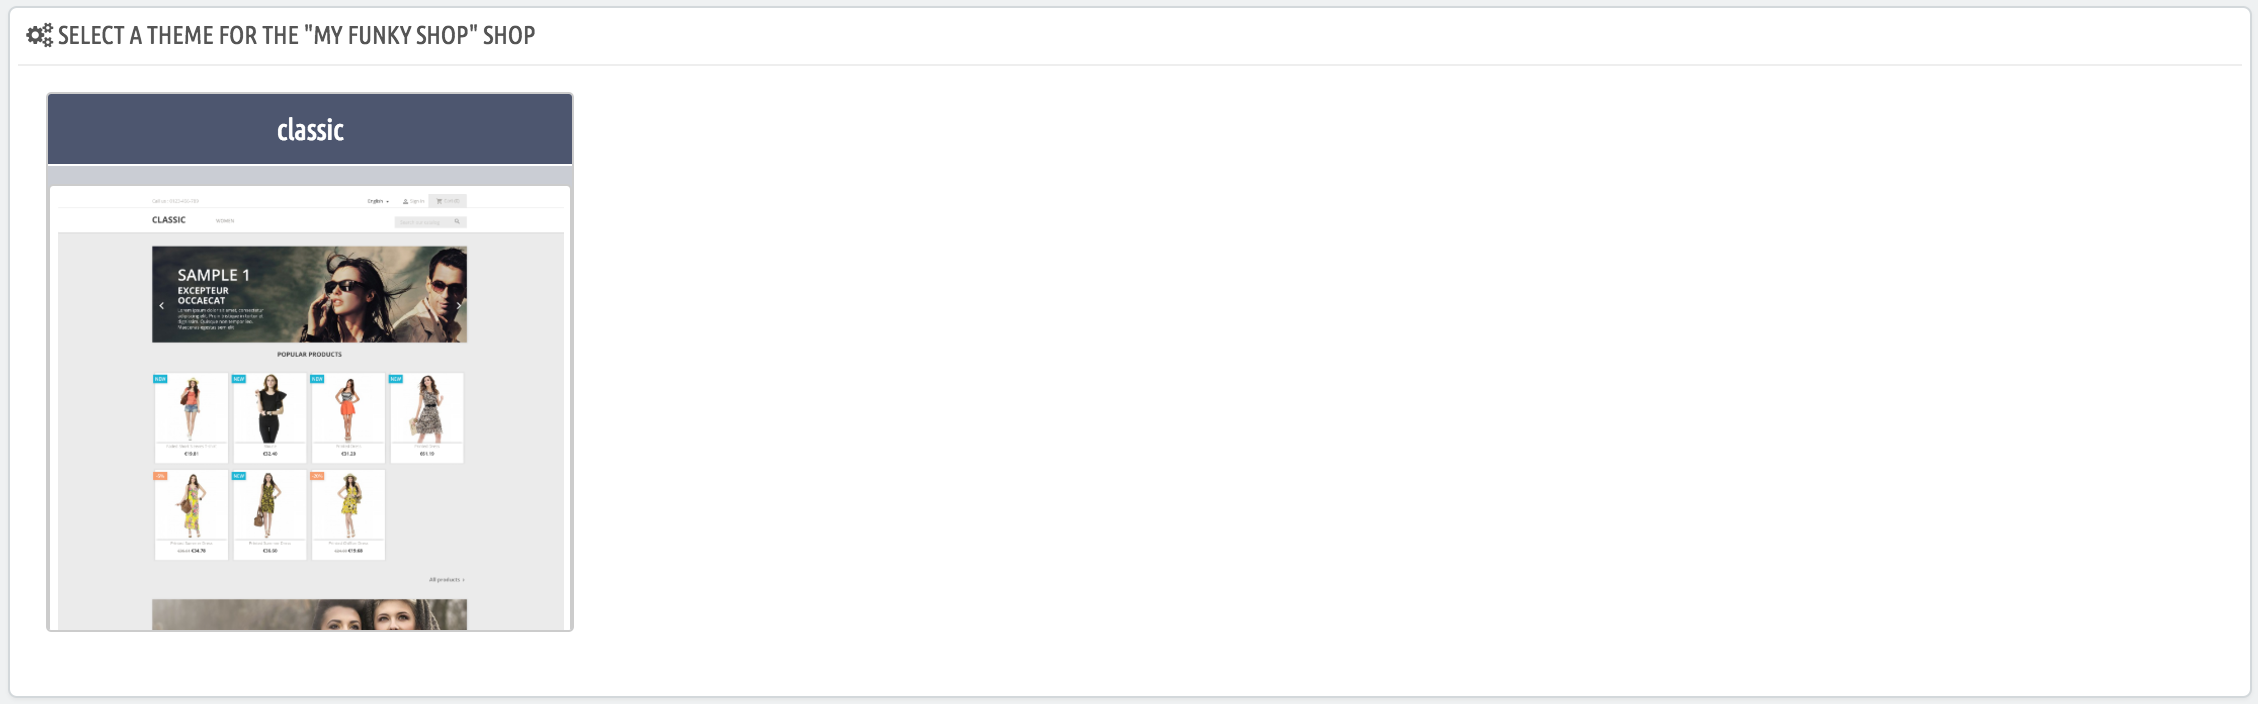
Move your mouse cursor over the thumbnail to display a menu with two options:
- Use this theme. This will replace your current theme with this theme.
- Delete this theme. This will delete this theme's files from your web server.
| Note |
|---|
In multistore mode, you cannot apply a theme to all your stores or a group of stores; you must select a single store in the multistore menu, then pick a theme. |
Adding a theme
You can import a theme and install it (and its attached modules) thanks to the "Add new theme" button. By clicking it, a new screen will open.
This screen presents you with 3 methods to install a new theme. A final button leads you to the theme creation form, presented in the next section.

Whatever the method, the process remains the same: indicate the location of the theme's Zip archive, then click "Save". The only thing that changes is the source of the Zip file:
- Import from your computer. Use the file explorer to find the archive.
- Import from the web. Indicate the direct public URL to the archive.
- Import from FTP. Using your FTP client, upload the archive in the following folder:
/themes/.
Click "Save" to validate your choice: the theme is now installed.
Click "Save" one last time. A final confirmation page presents you with all the changes applied to your PrestaShop installation. Click "Finish" to end the process.
Exporting a theme
This section is only available when there is at least one theme installed on your PrestaShop site.
Exporting a theme is very useful when you want either to back the theme up for safety and create an archive of the theme for a friend or in order to make it available on the the Addons marketplace (http://addons. prestashop.com/). Not only does it generate a complete Zip archive of your theme, but it also adds the custom modules that your theme requires, which is very useful both when uploading to Addons, and when importing to another PrestaShop site.
...
From there on, you can easily share this theme, and if it is your own creation, you can start selling it on PrestaShop's Addons marketplace at http://addons.prestashop.com/.
Live from PrestaShop Addons!
If you are looking for a new theme, PrestaShop Addons is where you should go! Thanks to this section, you can browse through most popular themes to get inspired. If you wish to see more themes, click "Discover all of the themes" to be directed to the full selection of PrestaShop themes, as available on our official marketplace, PrestaShop Addons.
...
You can also use the search bar at the bottom of the page to find the theme that best suits your store.
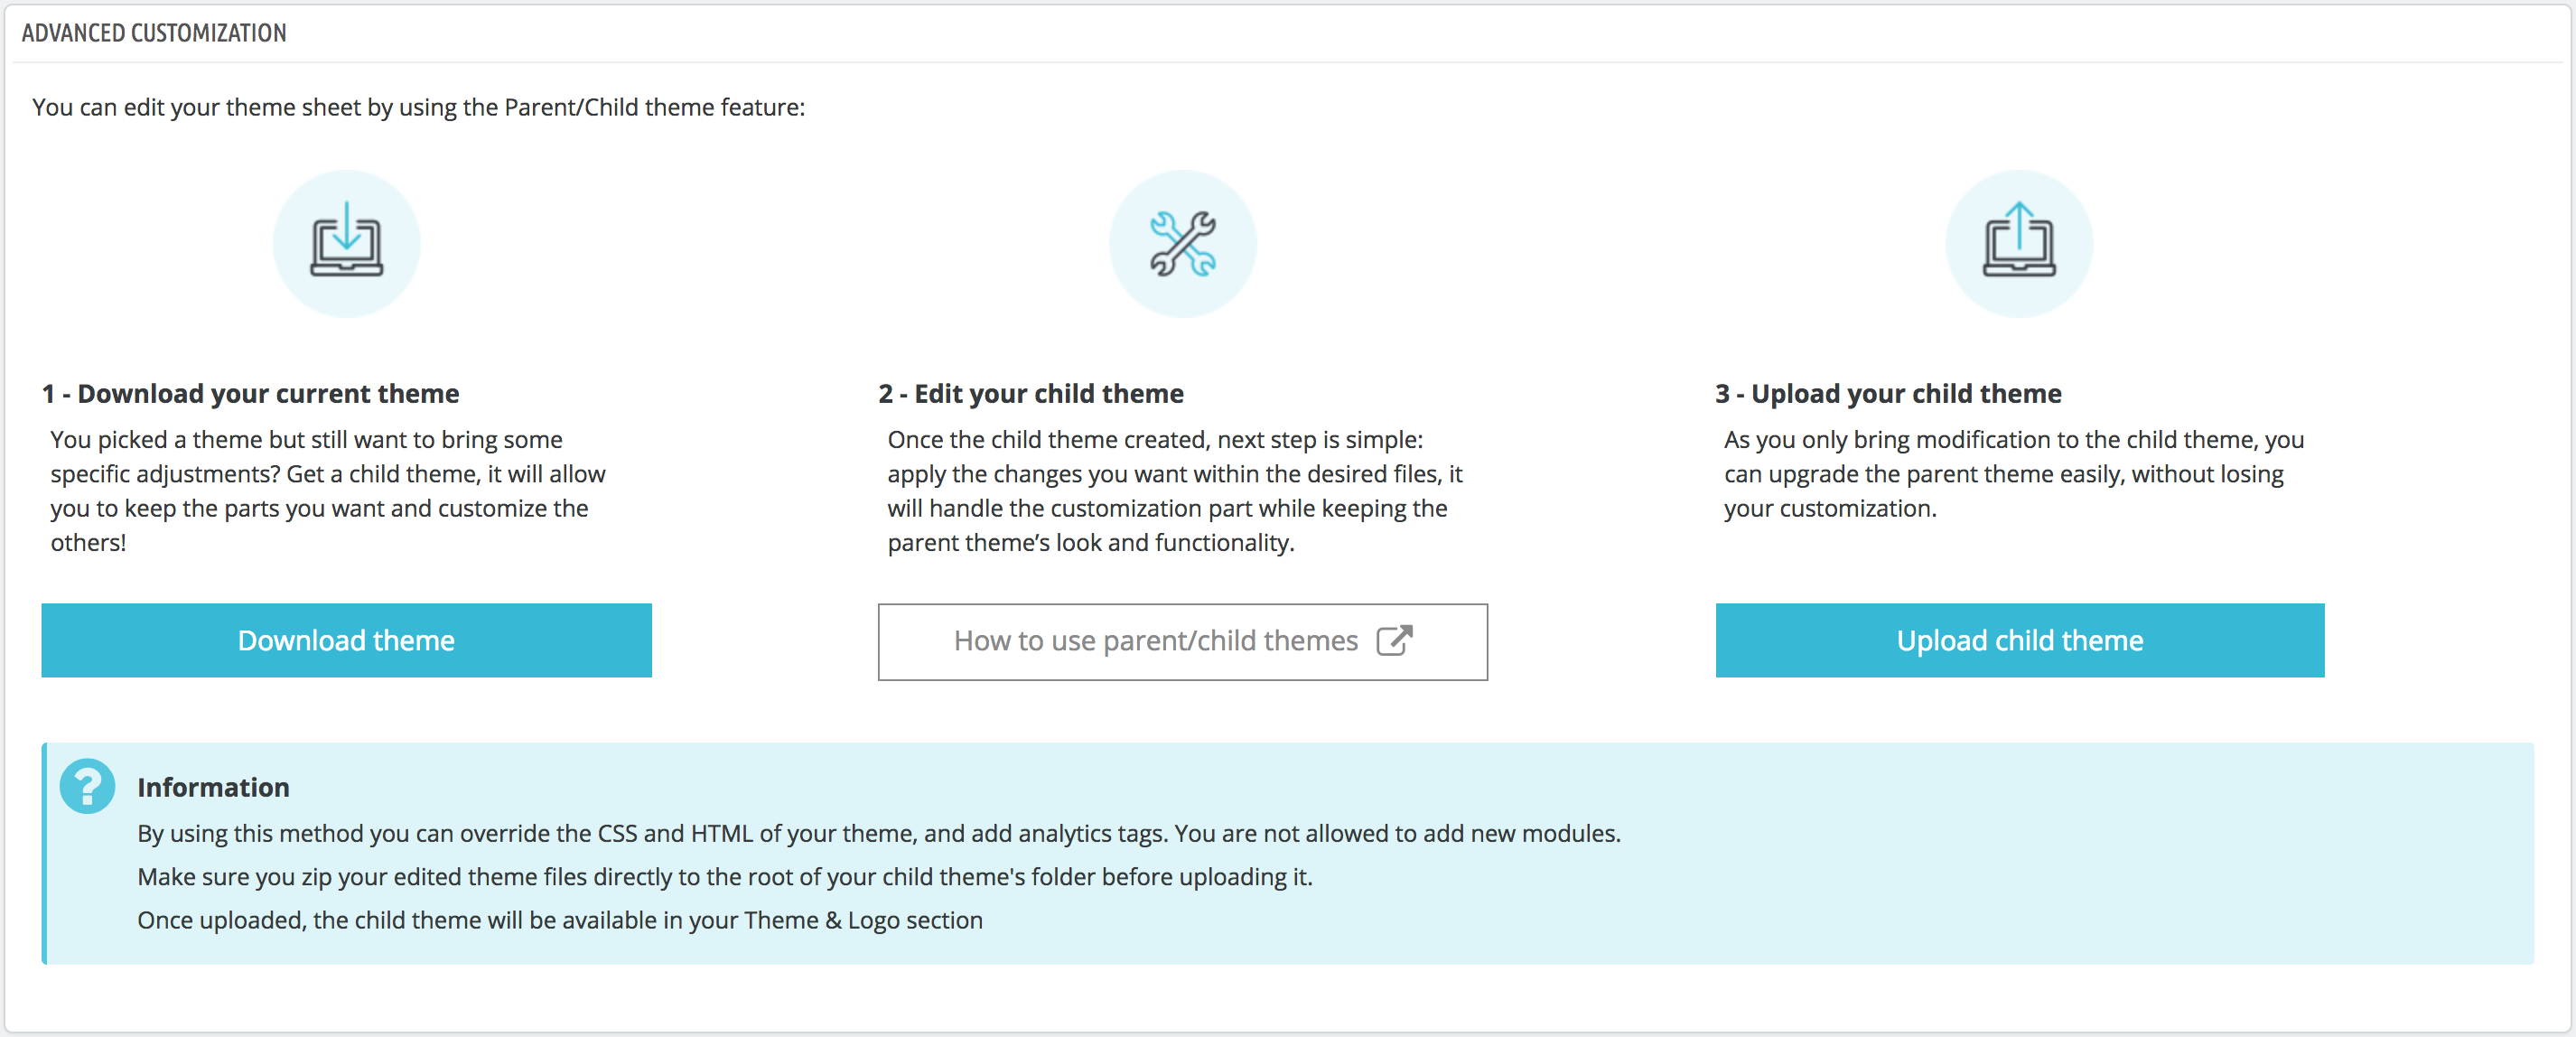
Parent / Child Theme
This is a feature introduced with PrestaShop 1.7 and it is only useful if you want to slightly modify a theme (to add a block for example), but still make sure you can update it easily. Indeed, if you modify a theme directly in its folder, the risk is that when the theme is updated, your changes could be incompatible with the update.
...
| Note |
|---|
Using a child theme can be a bit technical. To see how you can use a child theme in details, please refer the developer documentation: httphttps://developersdevdocs.prestashop.com/1.7/themes/smartyreference/template-inheritance/parent-child-feature.html/ |
Creating a child theme
First, you need to have the theme you want to use as a parent in your store /themes folder.
...
| Info |
|---|
Are you creating themes so good that other merchants could pay money for it? You can sell it on Addons, PrestaShop's official theme & module marketplace: http://addons.prestashop.com/. |
Homepage Configuration
Here is one of the feature we're really proud of: the homepage's cartography! As each part of the back office belongs to a dedicated module, every little modification brings back to the "Modules" page to find the right module and finally access its configuration page... not that intuitive, right? Now the cartography allows a double view for a quicker theme customization, and happier merchants!
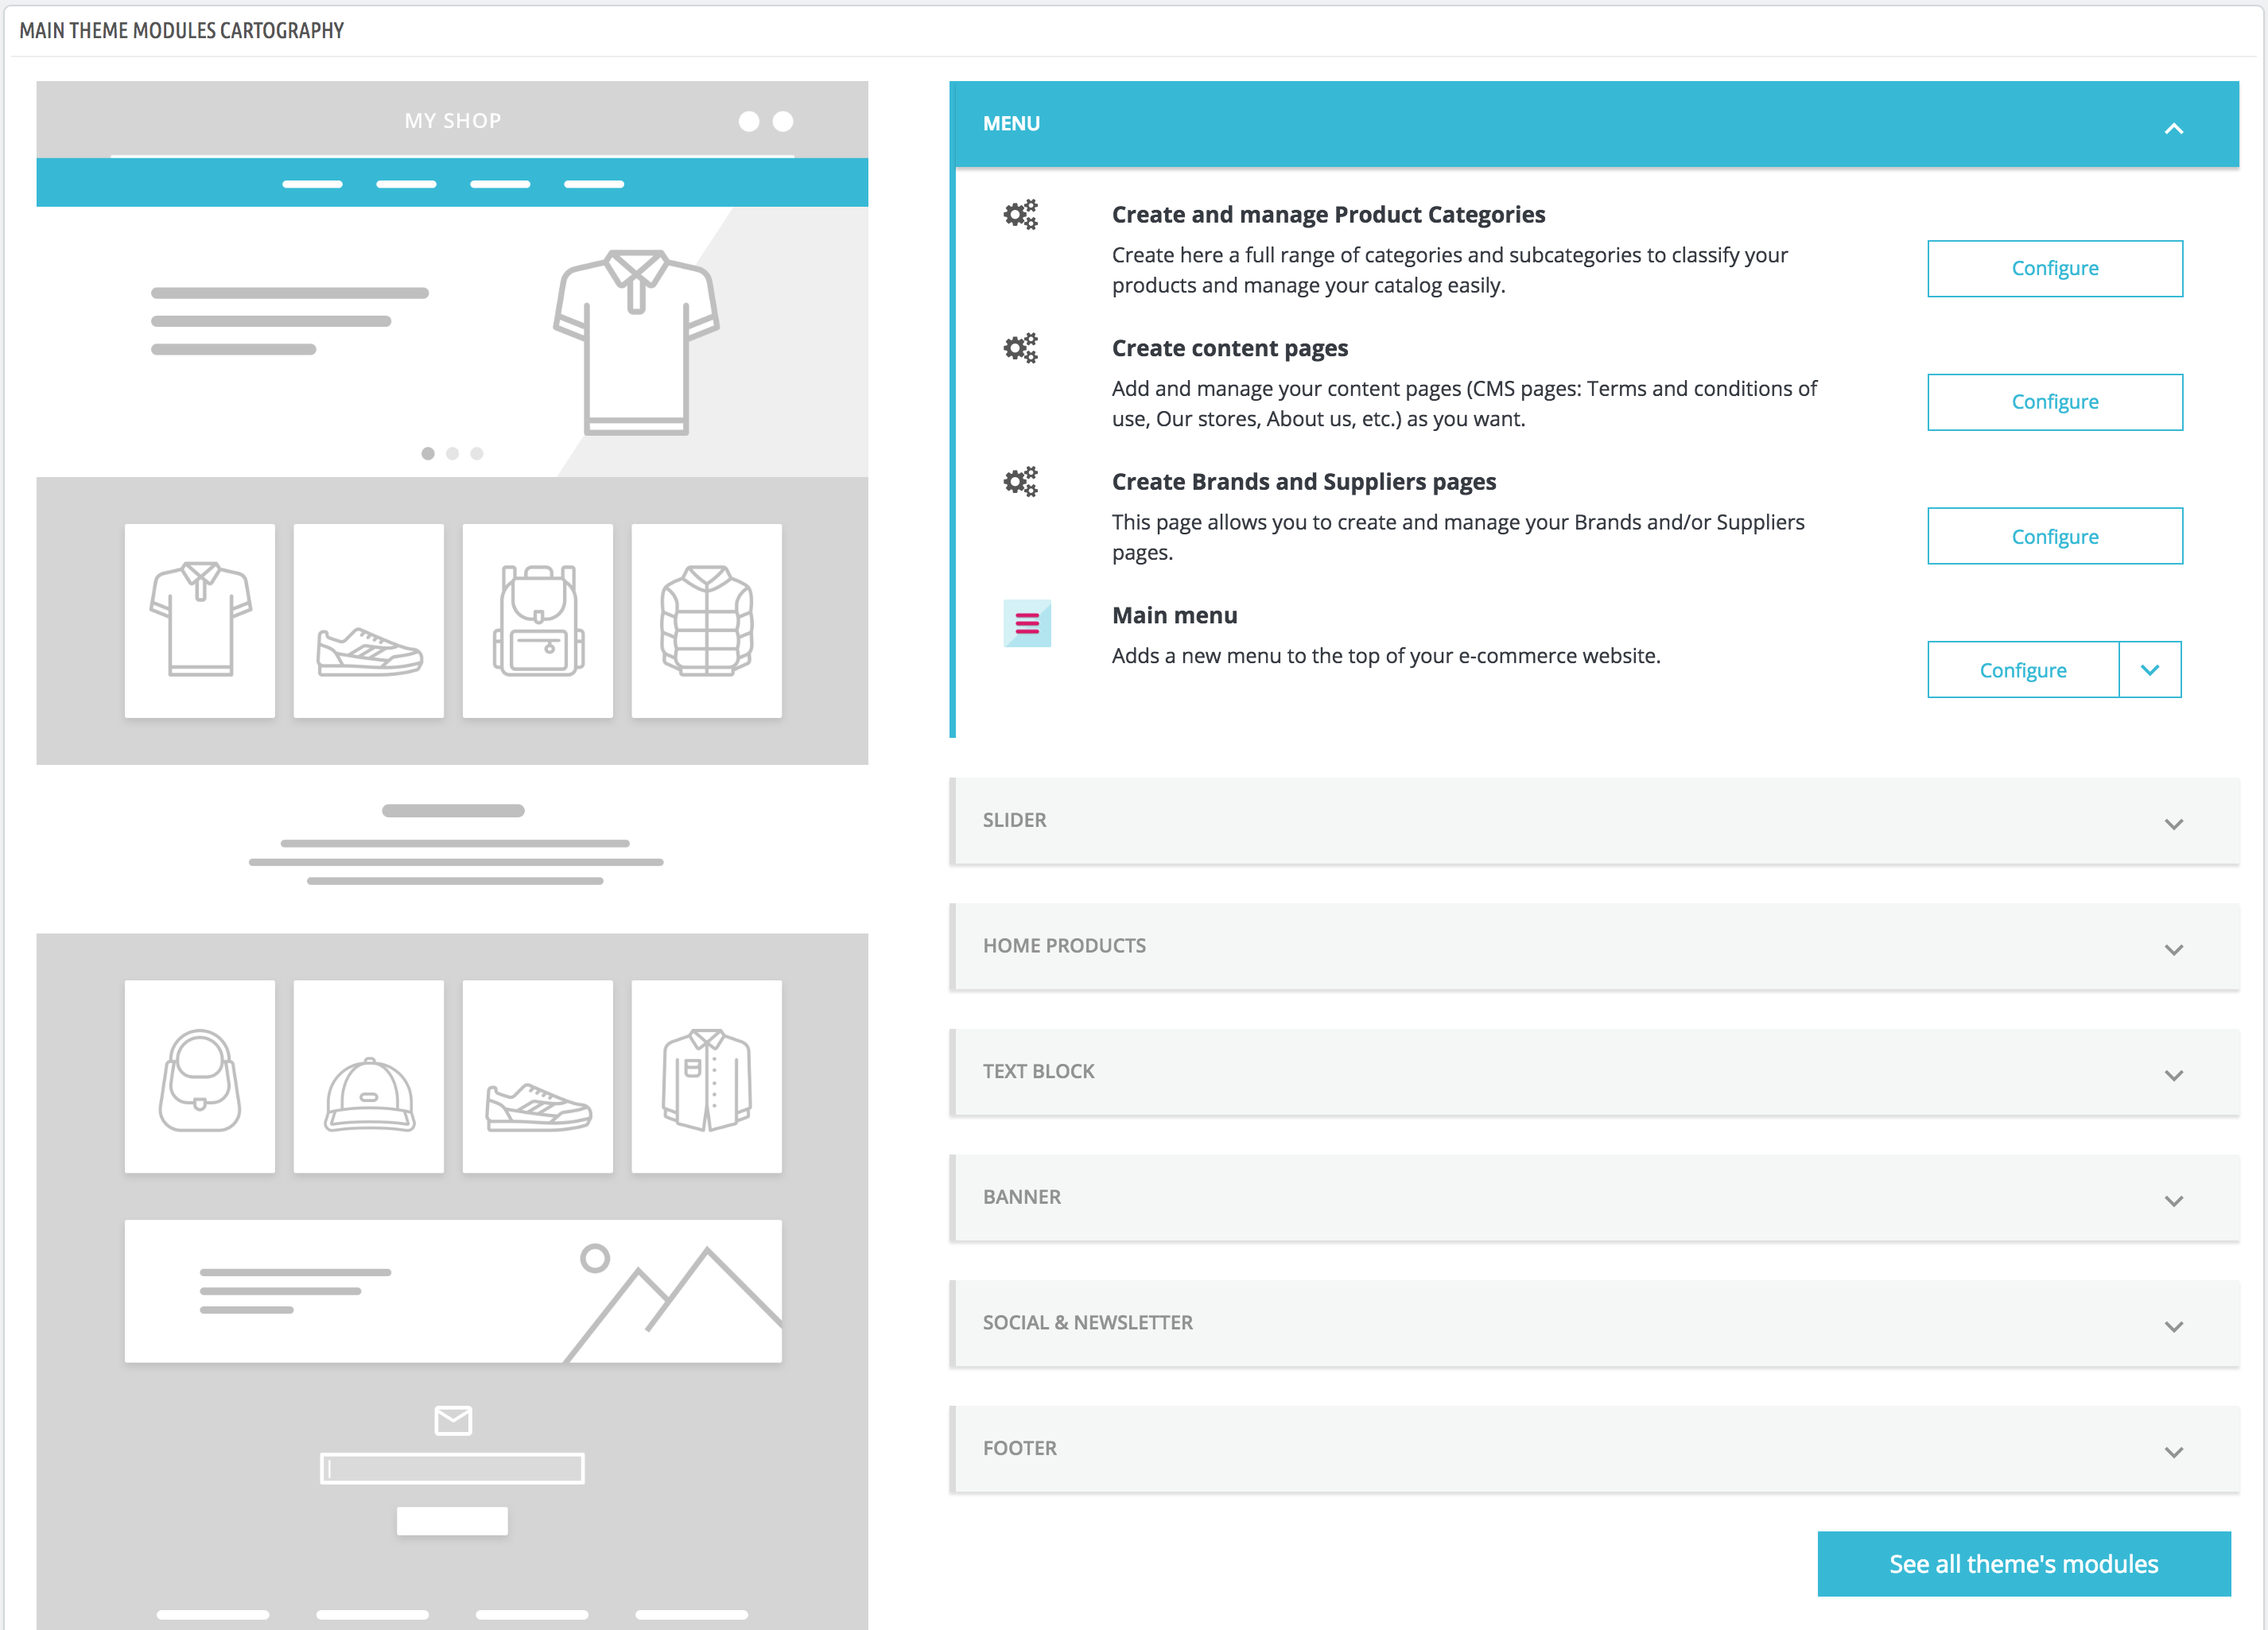
On the left side, an illustration of the homepage enables you to find the part you want to modify. It creates a simplified version of the PrestaShop front office with this interactive wireframe. On the right side, a mirrored view shows the module selection you need to configure for the modification.
...
By clicking on "Download theme", the merchant you will be able to get a zip of the current theme.
2- Edit the child theme
3- Upload the child themeNext step regards its edition, just bring specific adjustments within the desired files to customize it. Finally, upload it. Yep, it is already done!