...
| Info |
|---|
There are many more product-related options in the "Product settings" page from the "Shop parameters" menu:
You should really check that these global settings are set as you wish. |
Creating a product with combinations
Blabla
Creating a virtual product
...
Your shop may feature (partly or exclusively) virtual products – that is, products that are not shipped, but rather downloaded: entertainment tickets, e-books/PDF files, real-life services...
PrestaShop makes it easy for you to create a virtual product.
The process to do this is similar to the one for creating a simple product:
- Go to the "Products" page, under the "Catalog" menu.
- Click the "Add New" button.
- From the "Information" tab on the leftNext to the product name, change the product type to "Virtual Product".
The tabs on the left page organization will change:
- The "Quantities" tab becomes "Virtual Product" tab appears, to which you will be redirected as soon as you change the product type.
- The "Shipping product" tab disappears.
The new "Virtual Product" tab only features one option at first: it asks if the virtual product you are creating has a file attached (i.e., if your customer will pay to download something).
- If not, leave it at that: you are selling a service, and nothing needs to be downloaded.
- If yes, click the "Yes" option.
When you click "Yes", PrestaShop opens a new form within the tab, from which you can upload the file you intend to sell:
Filename. The name of the file. This field is automatically filled after the file has been uploaded. It is not recommended to change it to another value.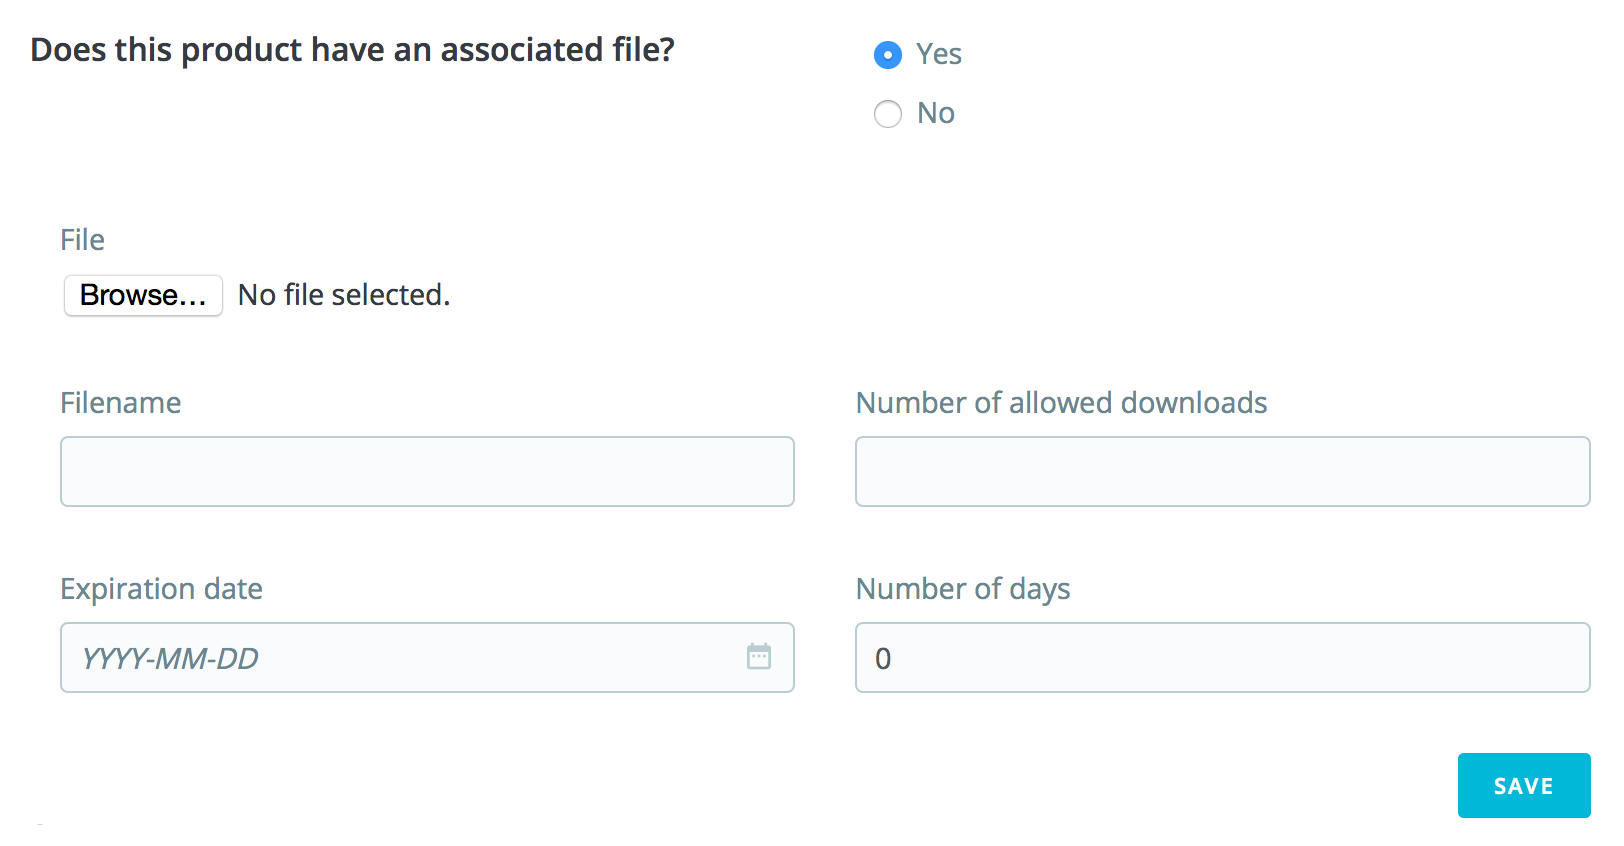
File. Click the "Browse" button to find the file on your hard drive. As soon as you have selected a file, the upload begins.
Info The maximum file-upload size setting depends on your server's settings, and cannot be increased from PrestaShop.
If you have access to your server's
php.inifile, these are the values you should change:upload_max_filesize = 20Mpost_max_size = 20M
If you do not have access to the
php.inifile, contact your web host about this.- Filename. The name of the file. This field is automatically filled after the file has been uploaded. It is not recommended to change it to another value.
Note You should compress your file in zip format, in order to avoid the browser misinterpreting
.exeor.jpgfile formats. Browsers automatically download zip files for the customer, no question asked.If you are selling a high resolution image, uploading it using this form does not prevent you from uploading its thumbnail in the "Images" tab on the left.
- Number of allowed downloads. You can set the number of time the file can be downloaded once the customer has bought it. You might prefer to limit this to 1, or 5. If you want to keep it unlimited, set the text field to 0.
- Expiration date. Virtual files can be of promotional nature, or lose their selling value after a certain date. If so, you can set the expiry date after which the product will not be available on your shop anymore. Leave it blank if there is no expiry date.
- Number of days. You can set the number of days after which the download link becomes non-functioning. If there is no limit, set the text field to 0.
Once you are done with the "Virtual Product" tab, you can edit all the other available tabs as if you would for a regular product.
...