...
At the top of the back office is a white bar containing a handful of information and links:
- The PrestaShop logo, following the followed by its version.
- Quick Access. This is the quick links menu, presenting the most useful links. You can customize it by clicking on "Manage quick accesses".
- Search field with dropdown list. Enables you to search within the content of your shop.
- Debug mode (optional). If you set your shop in Debug mode, an icon will be displayed to remind you it is enabled.
- View my shop. Opens a new browser tab with your shop's front-end.
- Bell icon and number. Indicates the number of new notifications, which by default will show you the last orders.
- Orders. Opens a panel presenting the new orders since you last clicked that icon. From there on, you can either display one of the new orders or go to the list of orders.
- Customers. Opens a panel presenting the last registered customers. From there on, you can either display one of the new customers or go to the list of customers.
- Messages. Opens a panel presenting the last customer service message. From there on, you can either display one of the new messages or go to the list of messages.
- Personal menu with your profile picture. A simple dropdown panel with a reminder of the administrative account with which you are currently logged-in. It contains the following links:
- "Your profile" link. Takes you to your account's preferences page, where you can set some personal options (for instance, the language of your back office or your password).
- "Sign out" link. Logs you out of the current user account.
...
- Orders. Once clients start adding products in their shopping carts, you will see orders on this menu, with the resulting invoices. This is also where you handle credit slips and abandoned carts, among other things.
- Catalog. This is the heart of your shop, where you will add products, create categories, set up carriers brands and suppliers, define discounts etc.
- Customers. Here you can access all the information about your clients, and edit their addresses.
- Customer service. Where you handle customer service and anything post-purchase: merchandise returns, per-order customer service, etc.
- Stats. This menu gives you access to all the numerous statistics and graphics that are gathered and generated by PrestaShop.
...
In order to choose a period of time, you can either click the first and last date of that period in the calendar (the clicking order does not matter), or you can type the dates in the YYYY-MM-DD format in the text boxes. Click "Apply" to see the Dashboard change according to your settings.
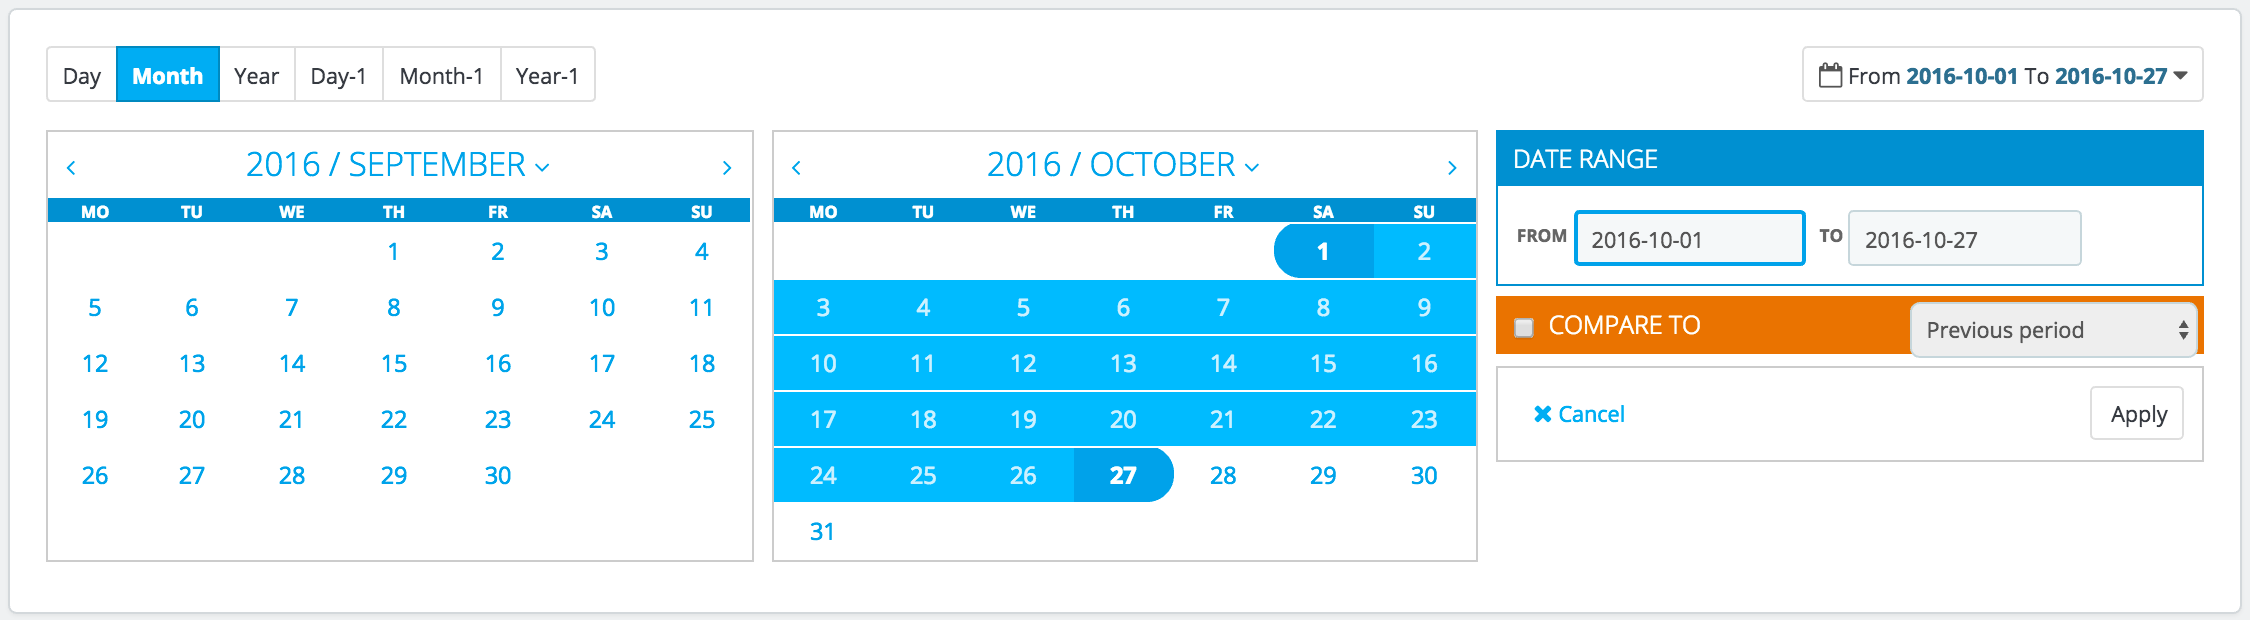
You can also compare two periods of time together by checking the "Compare To" box. Select the second period as would do for the first one (the two can even overlap), then click on the "Apply" button.
When comparing two periods, some of the content blocks will update to indicate the evolution of the data (see for instance the main "Dashboard" block, which presents data from the Dashboard Trends module).
...
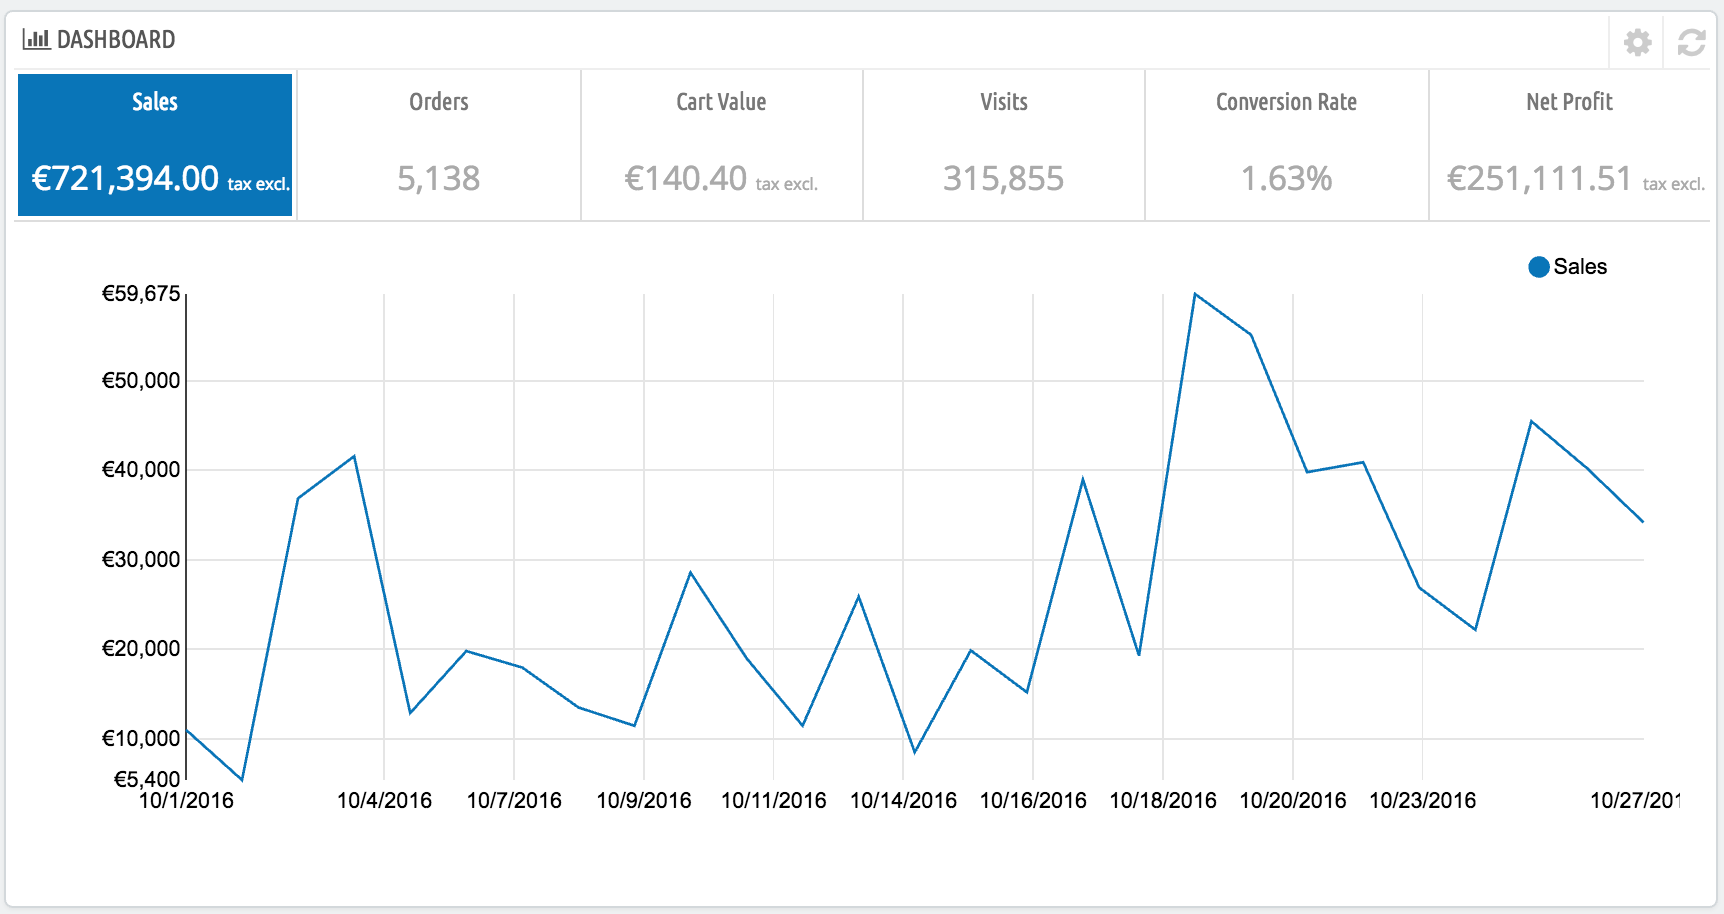
- Dashboard (Dashboard Trends module). This is the main block of information on the dashboard. With its various graphics, it really helps you see if your shop is headed in the right direction or not. Click on one of the graphic types to display it. Additionally, when comparing two time periods, it displays the evolution of each figure in percentages. Hover the graphic with your mouse to see the details.
Clicking on its configuration icon (top right) open a new page where you can set various expenses that your shop has (bank wire fee, average shipping fee, hosting expenses, etc.), in order to better indicate your trends. - Your Forecast (Dashboard Goals module). This block presents you with the goals you have for the coming months, and how your shop is doing as compared to them. Hover the graphic with your mouse to see the details.
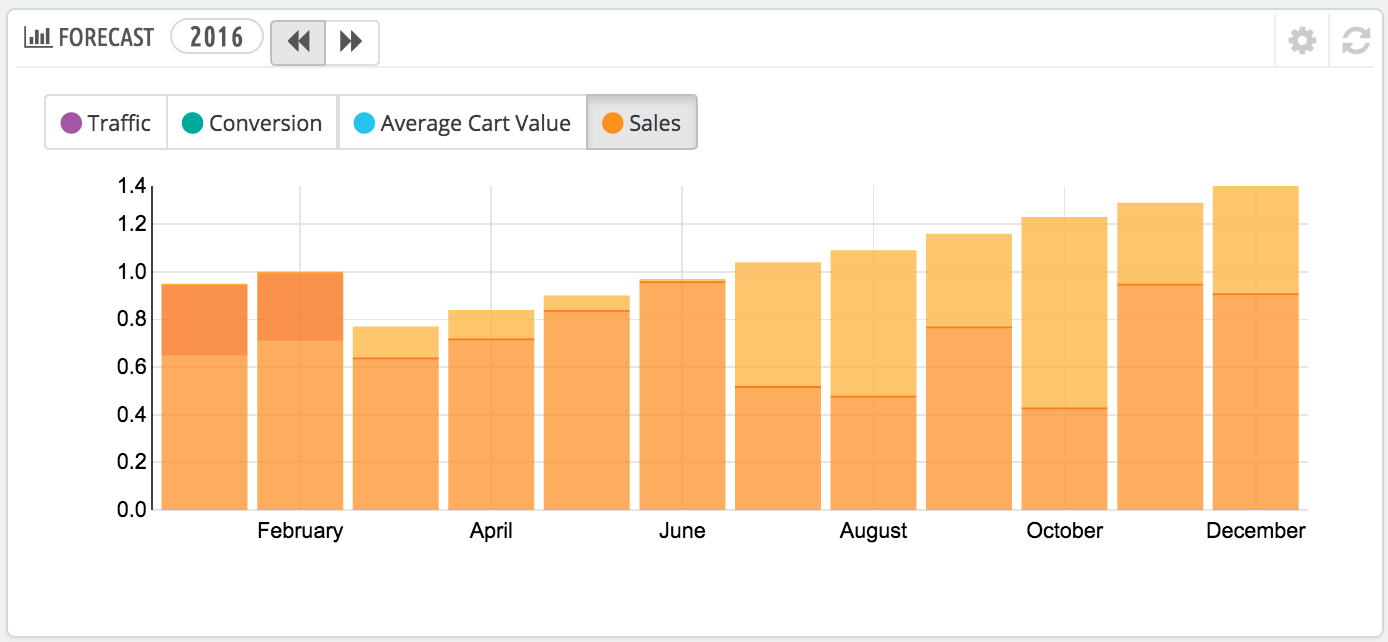
Depending on your monthly results, you should update your forthcoming goals. You can set your goals in the block's configuration form (top right of the block), and fill in your expectations month per month in terms of traffic, conversion rate, and average cart value. The "Sales" column will be updated according to the goals set in the other columns (for instance, for a 1000 visitors with a 2% conversion rate and a $10 average cart, you would get 1000*(2/100)*10 = $200). You can change the currency in the "Currencies" page under the "Localization" menu.
- Products and sales (Dashboard Products module). This block presents you with a table of your latest orders and a ranking of your products: best sellers, most viewed and top searches (as searched in your shop's search form, not from search engines).
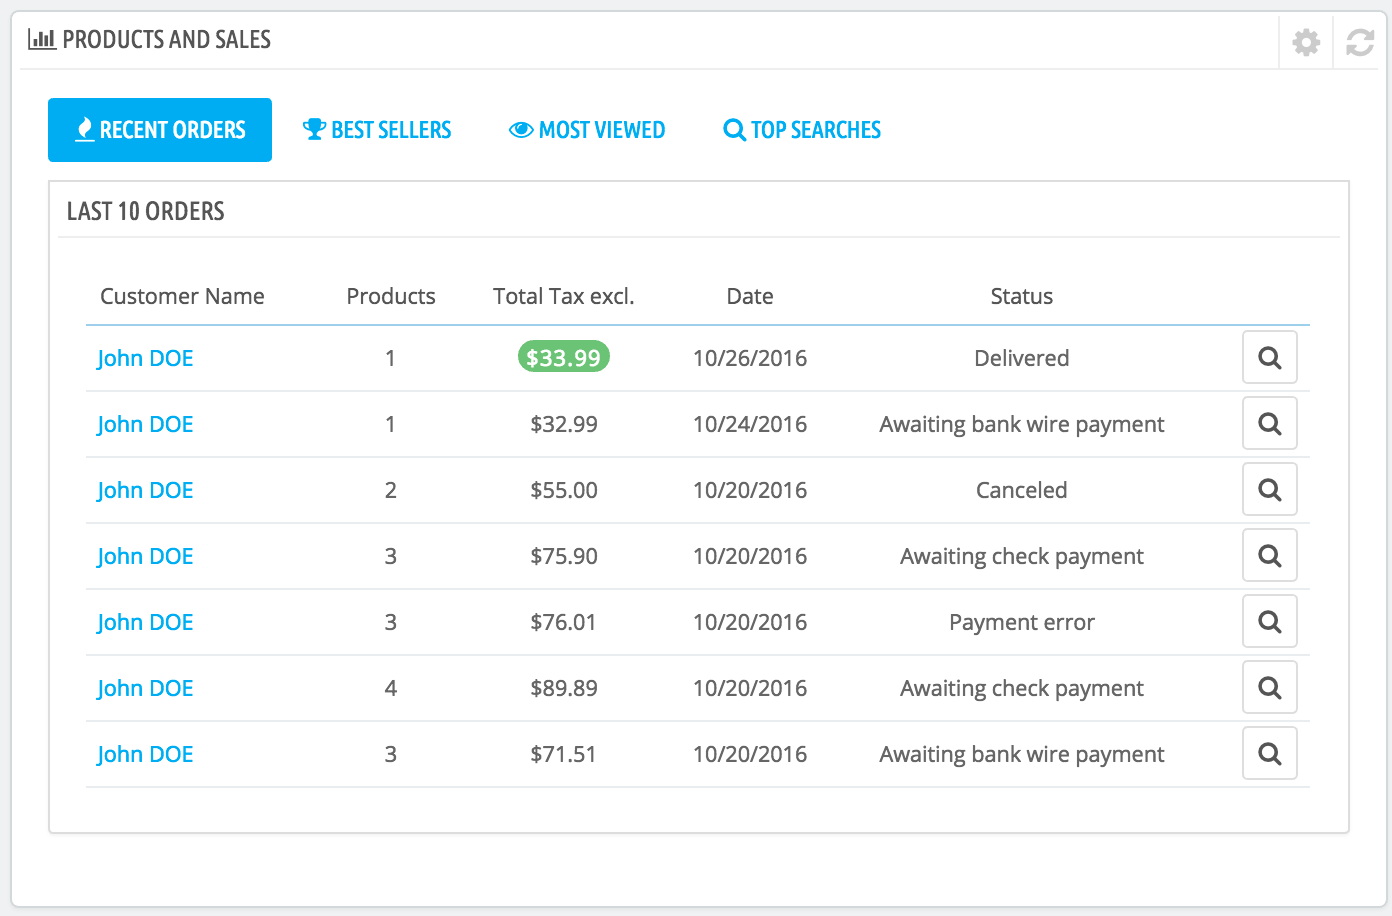
You can set the number of items to display in each by opening the block's configuration form
...