...
The "Carriers" page presents you with a list of all your current carriers. From there, you can directly change their status, indicate why of shipping is free or not, and change their position when presented to customers.

By default, you have two carriers in your database:
...
| Tip | ||
|---|---|---|
| ||
|

Recommended carrier modules
Adding a Carrier using a recommended Carrier Module
PrestaShop comes with a host of free modules, amongst which you can find a handful of carrier modules which you can install right away, for the major worldwide and domestic carriers.
| Info |
|---|
The available carriers depend on the initial settings of your shop: if you have set your shop as being located in France, you will not get the same modules as if you set your shop in the USA! |
In the "Carriers" page, you can choose between creating a carrier using the Carrier Wizard, or using one of our recommended carrier modules. It is highly recommended to register carriers by installing a carrier module: this will make the process much faster, and the settings will be much more accurate.
Depending on your shop's location different carrier modules are recommended.Alternativelythe module, you can also look for a carrier module on PrestaShop Addons, PrestaShop's official marketplace.either click on the "Install" button and let PrestaShop do the work, or click on the shopping cart button. In that second case, you will be taken to the Addons marketplace, where you can buy the module. Once you have bought the module, you can install it and configure it.
Adding a new carrier using the Carrier Wizard
...
This is where you describe the carrier, giving information that the customer will need in order to recognize and choose the carrier she/he prefers.
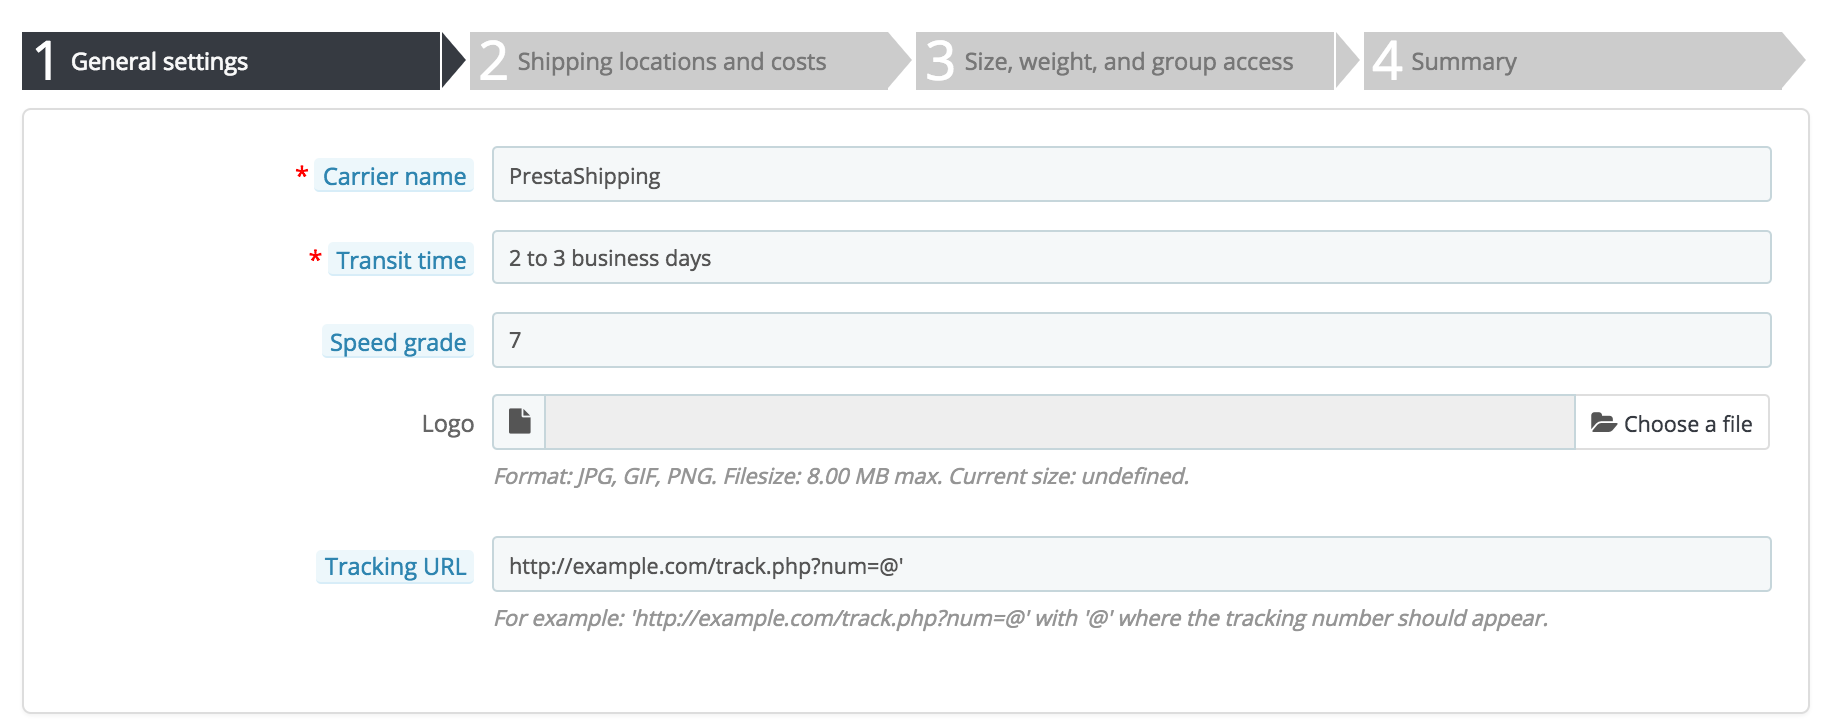
Let's examine all of the information you need to enter:
...
Panel 2: Shipping locations and costs
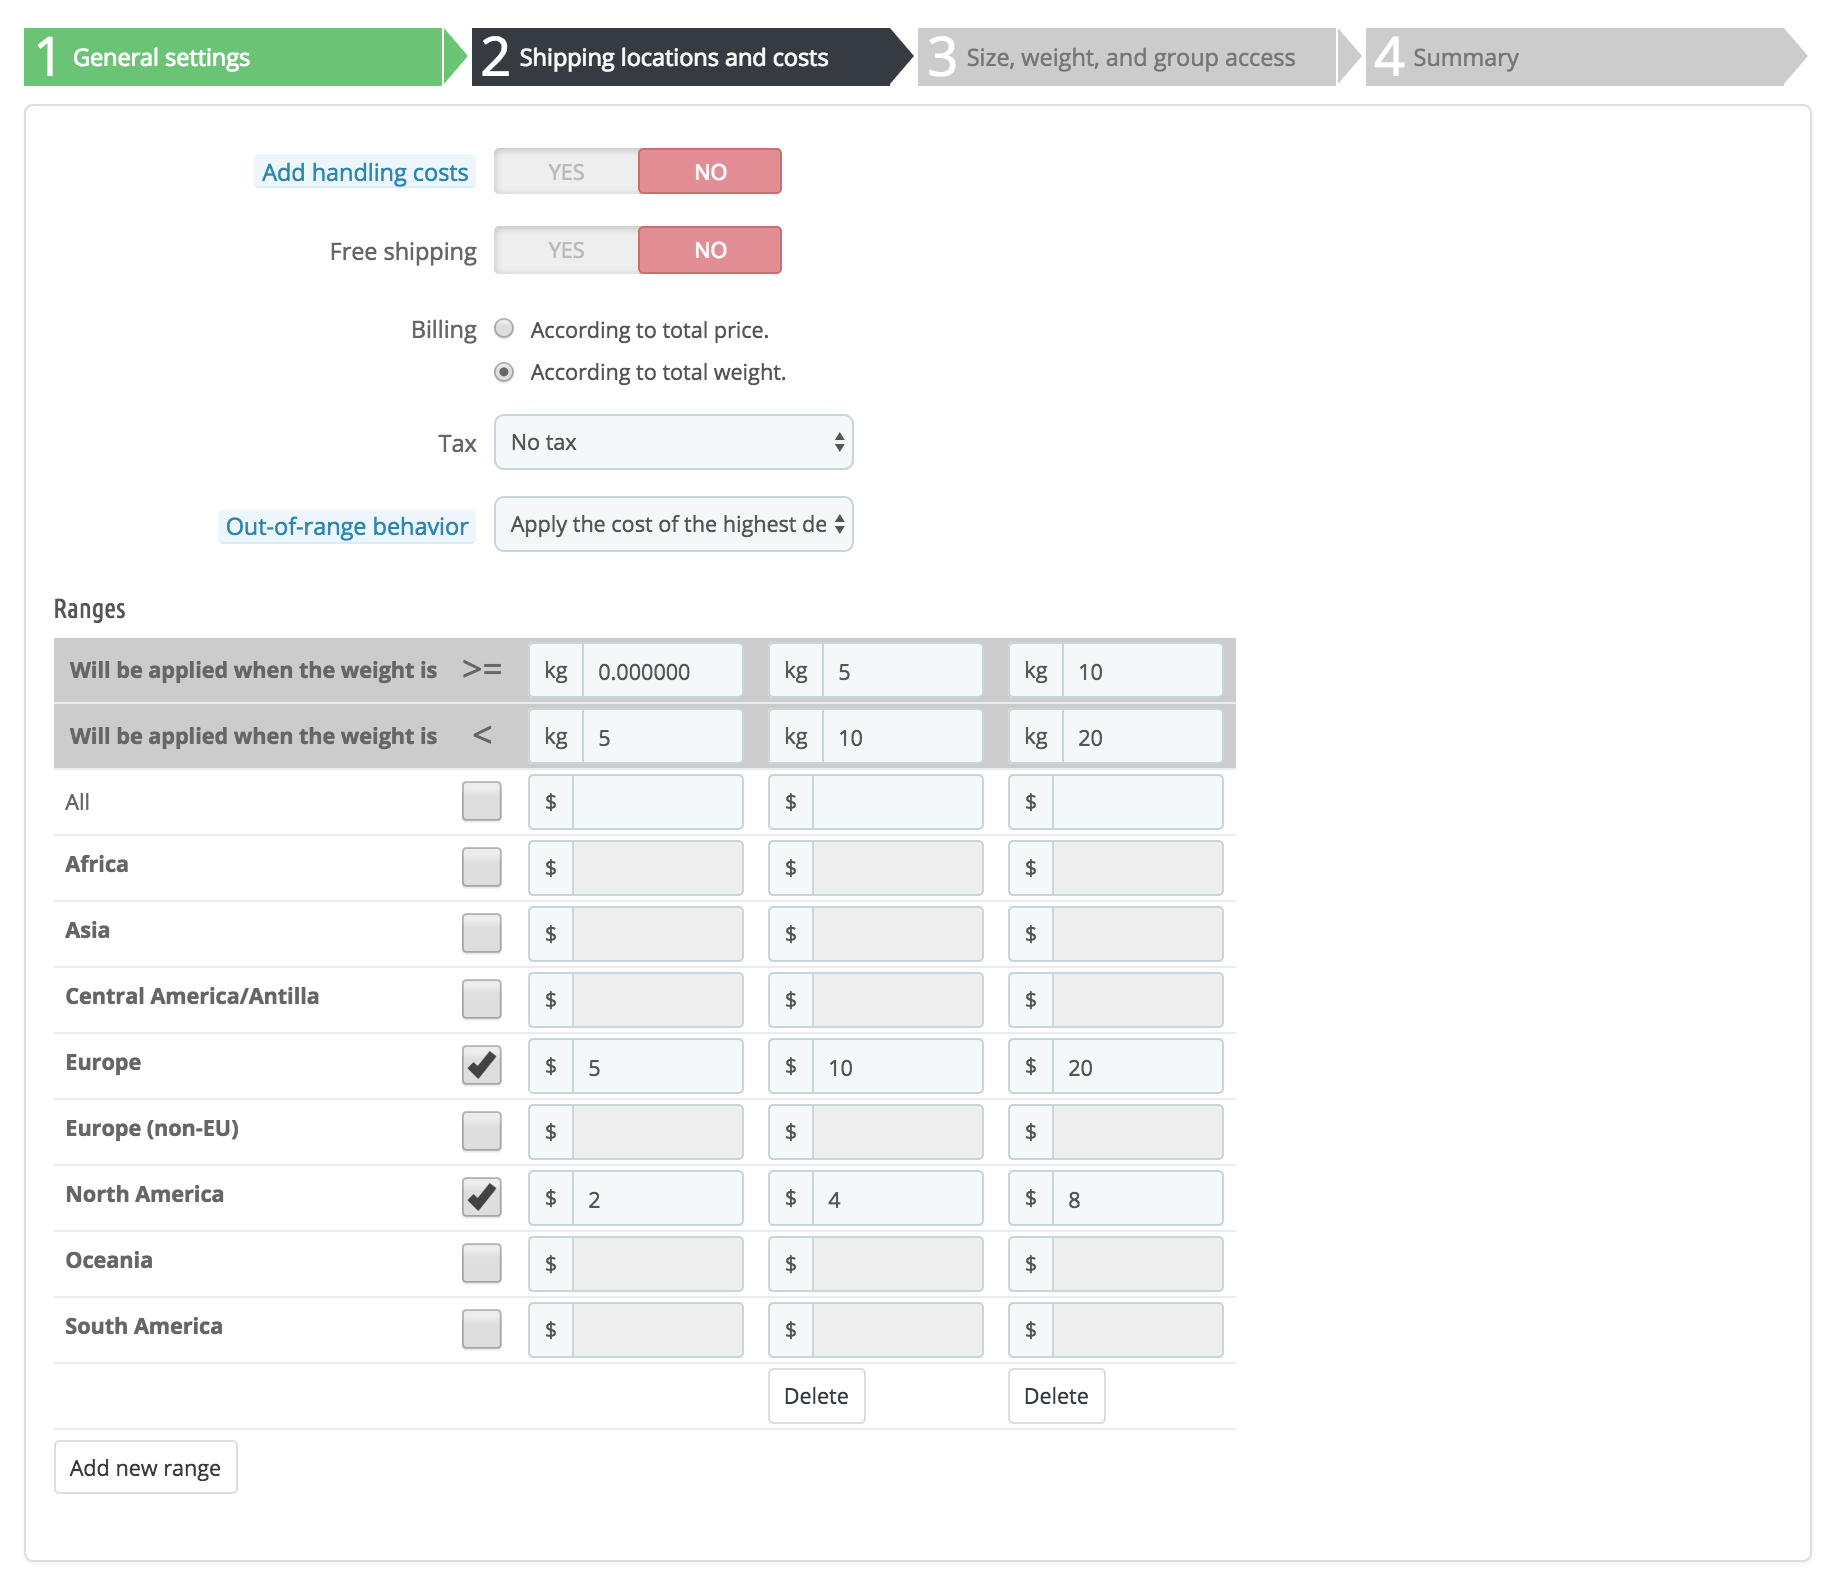
First, this panel presents a handful of settings:
...
Fix the lower and upper limits of the range you are creating. Depending on the "Billing" choice, it will display either "Will be applied when the price is" or "Will be applied when the weight is" for the lower limit, and either "Will be applied when the price is" or "Will be applied when the weight is" for the upper limit.
Note Note that the lower limit is inclusive (>=) whereas the upper limit is exclusive (<). This means that a range's upper limit cannot can have the same value as the next range's lower value, as the two will not overlap.
- Fill in the prices. As soon as both lower and upper limits are filled, PrestaShop makes the "All" field available to edit. This is a special field: any value you enter in it will be copied into the field for all the available geographical zones, without any action on your part. To edit it, tick the checkbox then enter your value. You can then edit the values of each zone field separately.
Check the checkbox for each zone the carrier delivers to at this range. If this carrier does not make deliveries in a given geographical zone for this current range, make sure to uncheck its checkbox. - Create the range. To create another range, click the "Add new range" button. PrestaShop will add a new column of zone fields. Start again by fixing the lower and upper limits of this range, then filling the prices per zone.
...
Panel 3: Size, weight and group access
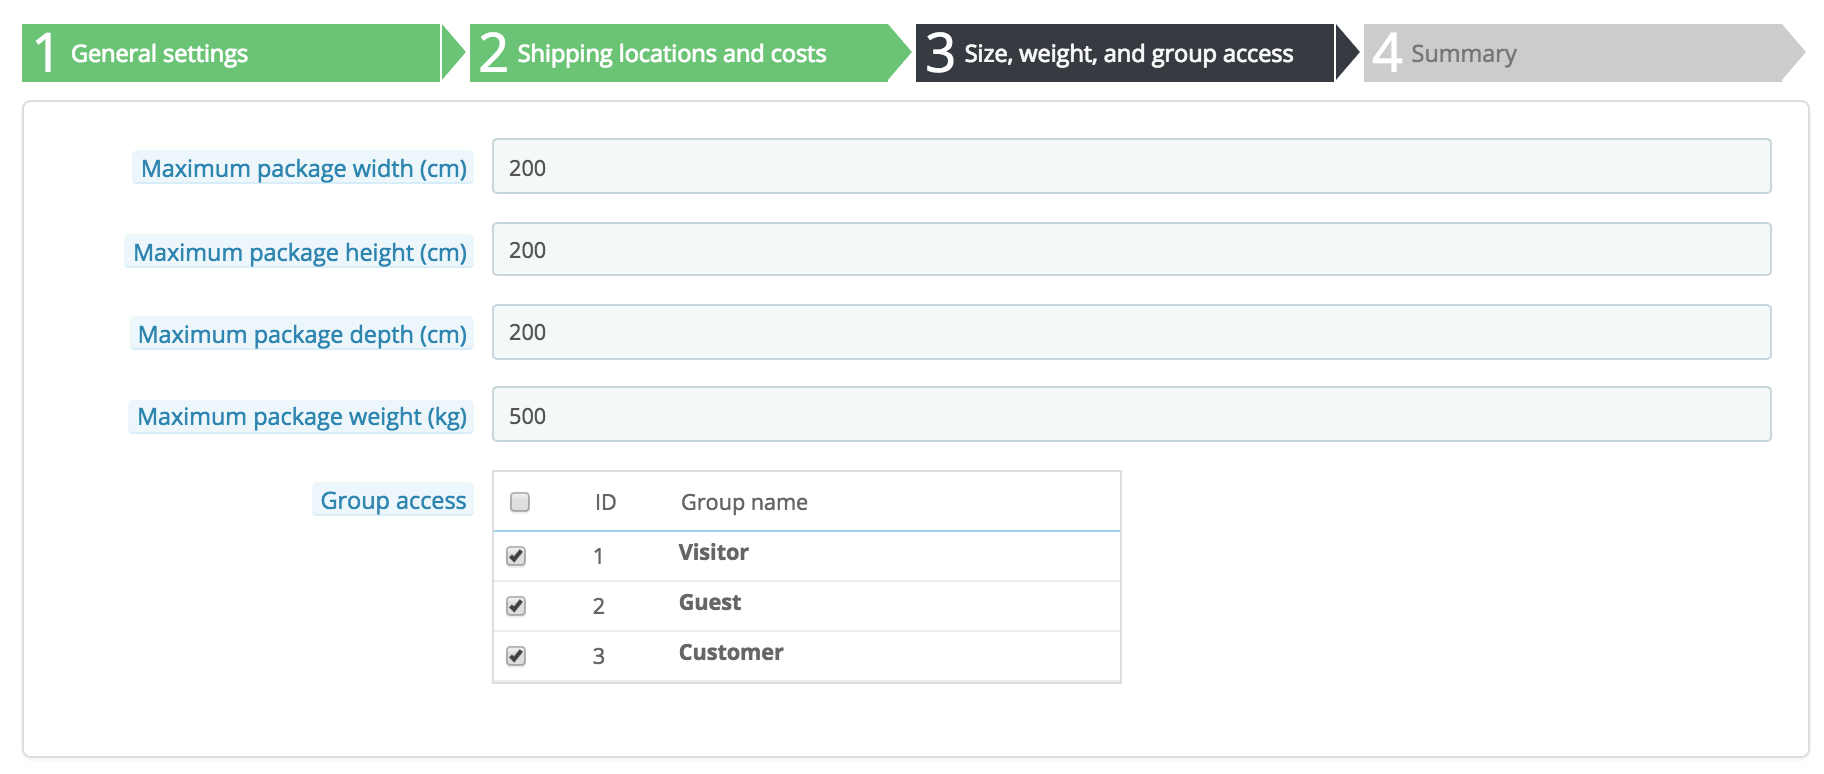
This panel presents two sets of options:
...
Click "Next" to reach the fourth and final panel.
Panel 4: Summary
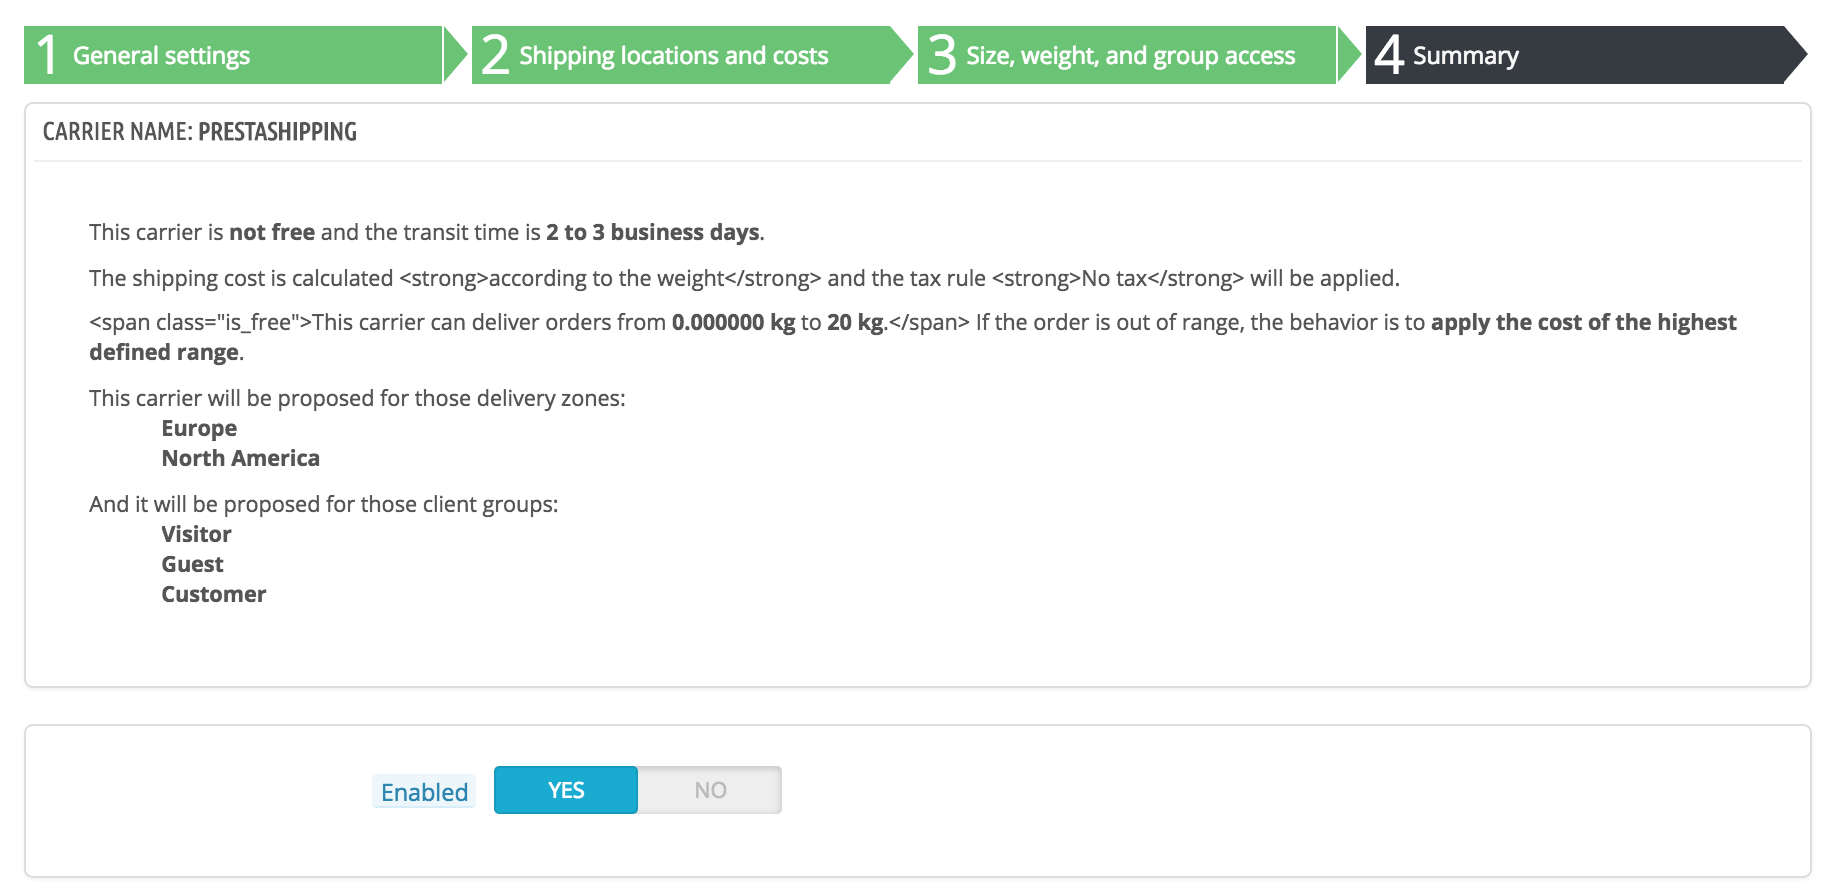
This last panel gives you an overview of your settings for this carrier.
...
| Info |
|---|
When using PrestaShop in multistore mode, another panel is available, and the panel order changes slightly:
All the panels are as described above. The new one, "MultiStore", makes it possible for you to limit this carrier to a selection of your stores. |
Adding a Carrier using a Carrier Module
PrestaShop comes with a host of free modules, amongst which you can find a handful of carrier modules which you can install right away, for the major worldwide and domestic carriers.
| Info |
|---|
The available carriers depend on the initial settings of your shop: if you have set your shop as being located in France, you will not get the same modules as if you set your shop in the USA! |
In the "Carriers" page, you can choose between creating a carrier using the Carrier Wizard, or using one of our recommended carrier modules. It is highly recommended to register carriers by installing a carrier module: this will make the process much faster, and the settings will be much more accurate.
Depending on the module, you can either click on the "Install" button and let PrestaShop do the work, or click on the shopping cart button. In that second case, you will be taken to the Addons marketplace, where you can buy the module. Once you have bought the module, you can install it and configure it.