...
Deactivating your shop means making sure that no one can access it while you are busy making changes, creating products, settings prices and taxes, installing payment modules and a new theme, setting carriers... This is called "putting your shop in maintenance mode".
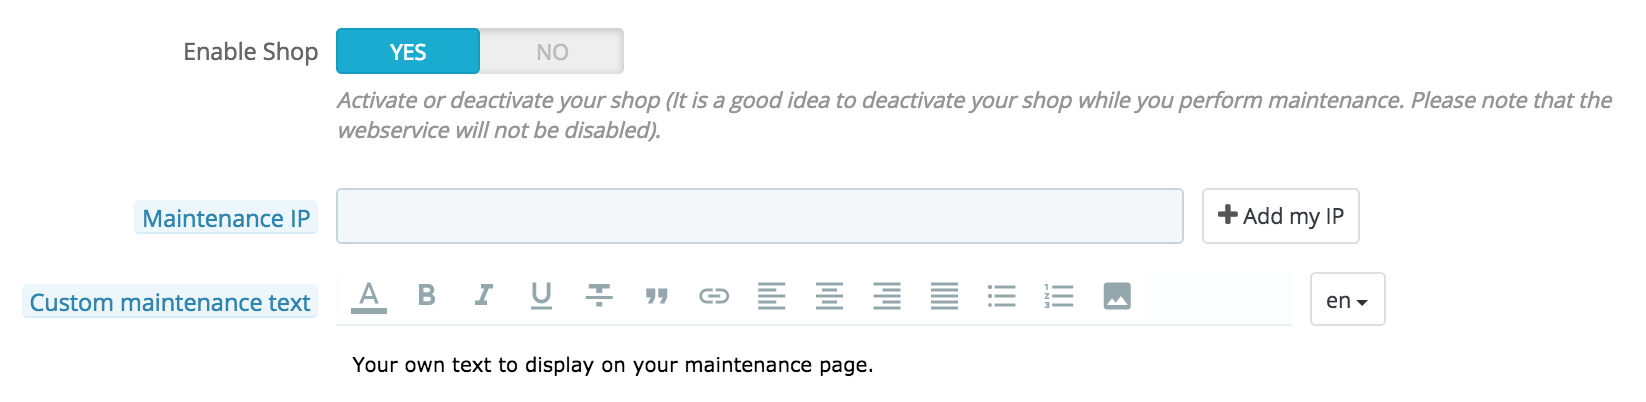
In your back office, go the "Preferences Shop Parameters / MaintenanceGeneral" page. This page Maintenance options are on the second tab and it features two simple settings:
- Enable Shop. Simply set it to "No", and your front-end will display the maintenance page to your visitors, which simply states that your shop will soon be back online.
- Maintenance IP. This is where you must put your own IP address, so that you can still get access to your front page, and browse your shop as if it was available to all. This is a must-do every time you put your shop in maintenance mode, as you will always need to browse your front-end so as to make sure everything is in place as intended.
Simply click on the "Add my IP" button. You can add more IP addresses by separating them with commas. - Custom maintenance text. New in 1.7. You can now display a message of your own on the maintenance page, to inform your visitors when the site will be back for instance.
| Tip |
|---|
If you have already decided what your theme and products are, you can simply put your shop in Catalog mode. This means that customers can browse your shop, but no price will be displayed, and they won't be able to add anything to their cart until you disable the Catalog mode. You can activate the Catalog mode by going to the "Preferences Shop Parameters / Products Settings" page, where it is the first option.
|

Delete the content of the default shop
The default installation features a handful of products – mainly women's clothing. Their only use is to help you explore the organization of a real store. After you've learned the intricacies of the ties between products, categories, orders and customers, you should delete all these items in order to start your shop with a clean slate.

You must therefore delete all the default data, which means:
- products and their...
- categories
- attributes
- features
- manufacturers
- suppliers
- image mappings
- tags
- orders
- order messages
- customers
- customers shopping carts
- carriers
- price ranges
- weight ranges
- contact & stores (delete or adapt to your business' needs)
- CMS pages Pages (delete or adapt to your business' needs)
This would mean browsing through the many various screens of the back office and deleting content one page after the other, but there is much easier way:
Go to the "Modules > Modules & Services" page.Find the "Database Cleaner" module and click its "Install" button.- You are directly taken to its configuration page (if not, click its "Configuration" button)
Click its "Configure" button. Read and accept the warning, then click the "Delete Catalog" button: it will delete all your products and their attributes, manufacturers, etc.Read and accept the warning, then click the "Delete Orders & Customers" button: it will delete all your customers and their orders, carts, etc.Click the "Check & fix" button to refine your database integrity constraints.Click the "Clean & optimize" button to reorganizes the physical storage of table data and associated index data, to reduce storage space and improve I/O efficiency when accessing the tables.
THERE IS NO WAY BACK. Be sure to only click these buttons if you do intend to wipe your database from its default content.
Configure your shop's information
...
| Tip |
|---|
Some of these settings require you to configure a module instead of changing one of PrestaShop's preferences. Configuring a module is easy:
For each module presented here, you should read their documentation for more information. |
Setting | Description | Where to find it | |||||
|---|---|---|---|---|---|---|---|
Shop name | Defines your brand, most notably on search engines (Google, Yahoo!, Bing...). | "PreferencesShop Parameters" menu, "Store ContactsContact" page, "Stores" tab, then in the "Contact details" section, edit the "Shop name" option. | |||||
Shop logo | Defines your brand visually. The default logo says "YourLogo" as an incentive to use yoursClassic", which is the name of the default theme. | "PreferencesDesign" menu, "ThemesTheme & Logo" page, "AppearanceYour current theme" section, then change the various default images to your logo. | |||||
Default shop currency | The currency in which you want to set the default price for your products. | "LocalizationInternational" menu, "Localization" page, "Configuration" section. | |||||
Customer service info | A block Shop information | Several blocks presenting the phone number for your customer serviceshop, and a button to send you an e-mail. | "Contact block" module. | Company info / | A block presenting your contact address, the phone number for your customer service, and a link to send you an e-mail. | "Block contact infoyour contact address and the email for your shop. These are displayed at various places in the front-offices. | The information comes from "Shop Parameters" menu, "Contact" page, "Stores" tab, then in the "Contact details" section. To disable it, refer to the "Contact information" module. |
|
|
| |||||
Image slider | The slider presents several images, scrolling one after the other. It is a strong visual signature for your store and products. | "Image slider for your homepage" module. | |||||
CMS pagesPages | The content of static pages, such as "About Us", "Delivery", "Legal Notice", "Terms and Conditions", and "Secure Payment". Some of them have default content, which you should adapt to your business; some others are empty, and you should paste your own text. | "PreferencesDesign" menu, "CMSpages" page, then edit and create pages at will. | |||||
| Social networks | A block presenting three links: several icons to follow your company 's Facebook page, your company's Twitter account, and the RSS feed for your company's blog (or "current events" site). on social media. It won't display by default, so make sure you enter your social media links on the module. | "Social media follow links" module. | |||||
| Social media sharing | On each product page, 4 buttons to share the page's URL on social media: Facebook, Twitter, Google + and Pinterest. | "Social media share buttons" module. | |||||
| Top menu | The top of the default theme uses a top menu to indicate categories that the visitor can go to, as well as links to other locations – for instance, the default installation has a "Blog" link which sends the use to the official PrestaShop blog."Top horizontal menu. | "Main menu" module. | |||||
| Reassurance | On the product page, a block allows you to display some reassurance details. Use it to give some details about your return policy ("Free returns!"), your security policy ("Secured payments"), etc., so that visitors will feel it's safe to order on your shop. | "Customer reassurance" module. | |||||
| Homepage content | The default theme contains a lot of demo content: texts, images, links, etc. If you intend on using that theme for your own store instead of buying your theme, you should make sure to remove all the default content first. |
These are the most visible default settings on your front-end – at least with the default theme.
The "Where to find it" column enables you to see where you can find the interface to change these aspects of your store. This user guide will provide you with more details for each interface.
...