...
The "Basic Settings" tab provides the main options required to create a basic product: in a few clicks you'll be able to create a new product. Fom there you can also browse the other tabs to add further details to your product.
Images
The image section is on the top-left part of the "Basic settings" tab. You should upload all the images for this product, including all of its combinations (color, size, shape, etc.).
...
When you create features and values (i.e. wool knit and micro-fiber materials), you assign them to the products when it is appropriate. This means that you do not have to fill out the features fields for each of your products but instead simply fill in the necessary values and apply them later.
| Info |
|---|
|
Be aware that contrary to the combinations, these values do not change, and are valid for the general product (meaning: all your combinations will share these same features).
...
You can associate a product with as many other products as you deem necessary. Click on the trash icon to delete the product association.
An association goes one way only: the associated product will not feature an association to the current product in its setting page.
| Tip |
|---|
Accessories addition/removal is not automatically saved! Do not forget to click on the "Save" button. |
Combinations
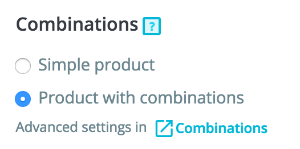
You will often sell the same product under different versions: they share the same overall name, but they might differ by their color, their capacity, their screen size, and other attributes. Most of the time, these attributes come together: you could have the red version of the product available with either 1 Gb capacity or 2 Gb, or with 12'' screen or a 15'' screen. This is why PrestaShop calls these versions "combinations": your stock of products can be made of several variations of a single product, which in effect are simply its attributes combined in specific ways.
...
If you feel you need to add a category, save the current state of your product before clicking the "Create new category" button. Category creation is explained in another section of this guide.
Click on "Create a category" : the category options will appear. Fill in the name of the category and select the parent category. By clicking on create, the new category will be created and it will automatically associated with your product.
...
Product quantities are managed in a single tab. PrestaShop will use this to determine when a product is soon out-of-stock or unavailable anymore.
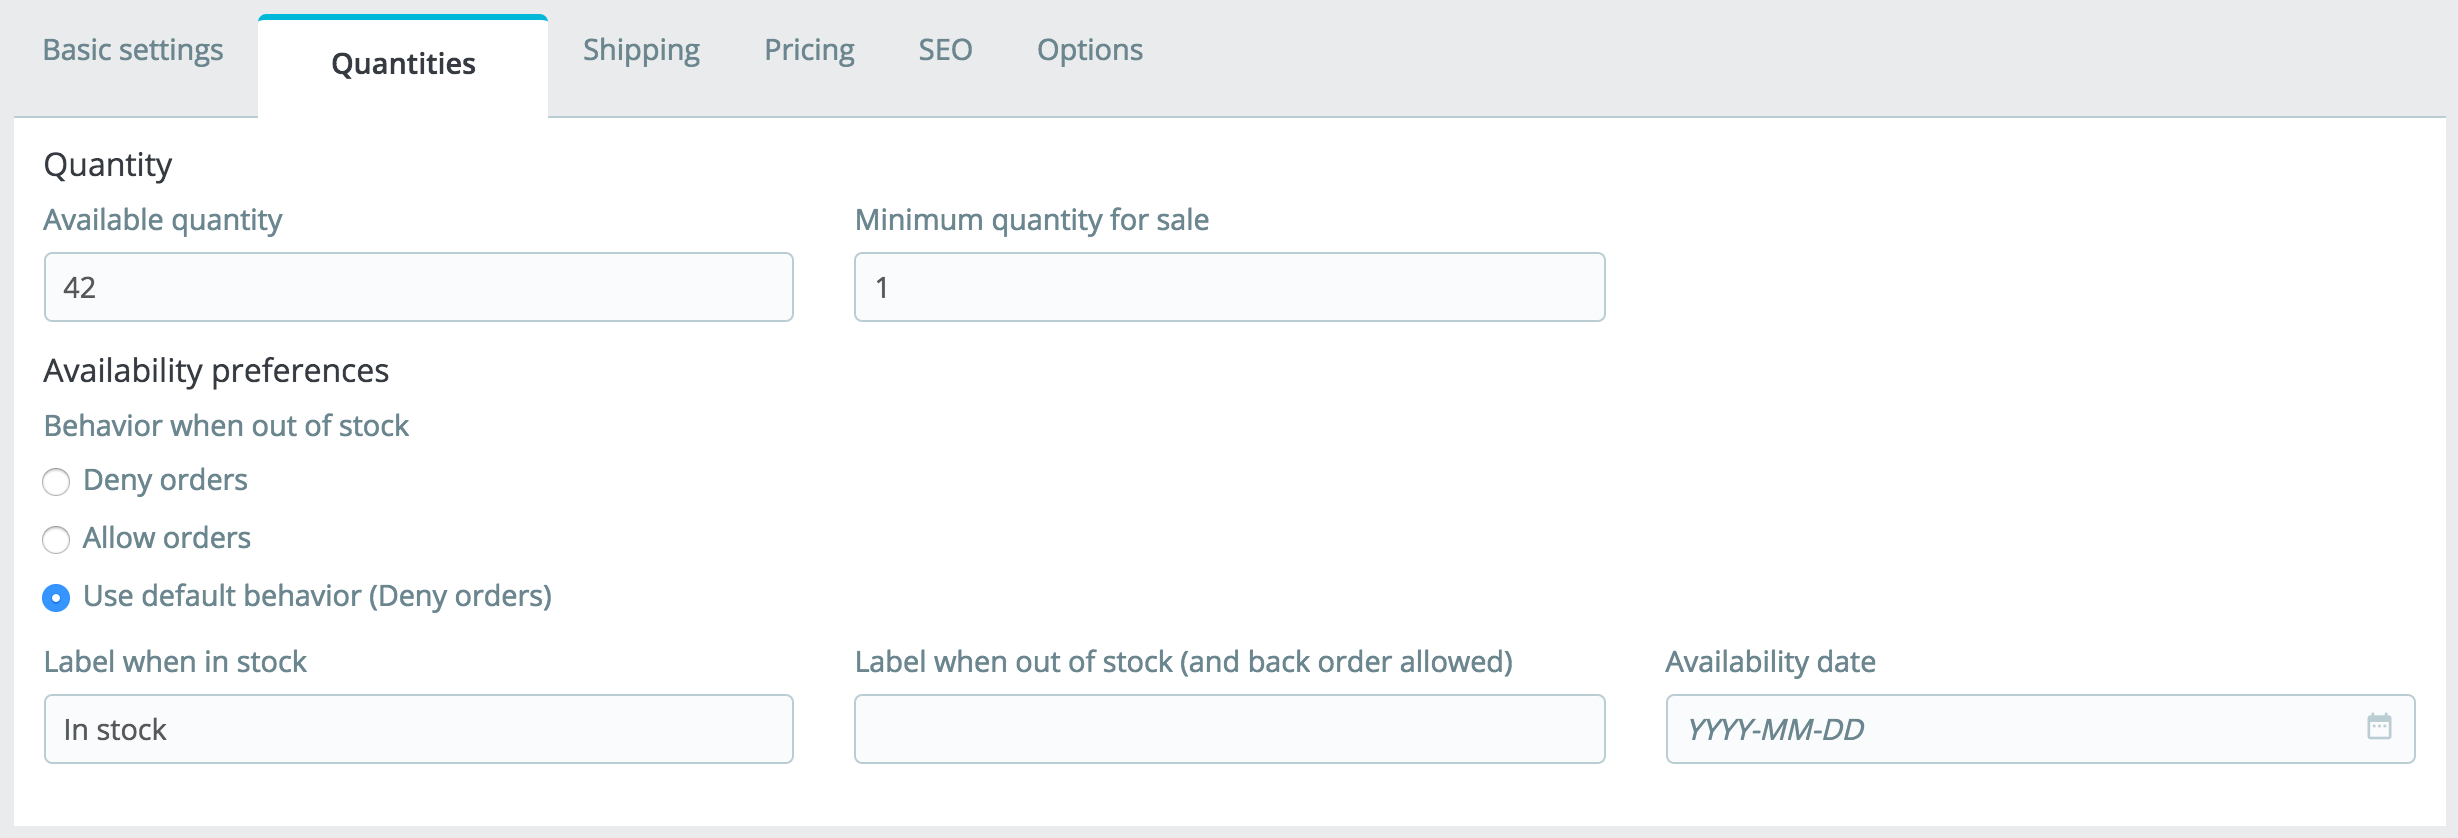
Standard Product
For a standard product you only have two fields:
...
To access the product's SEO information, go to the "SEO" tab.
Image
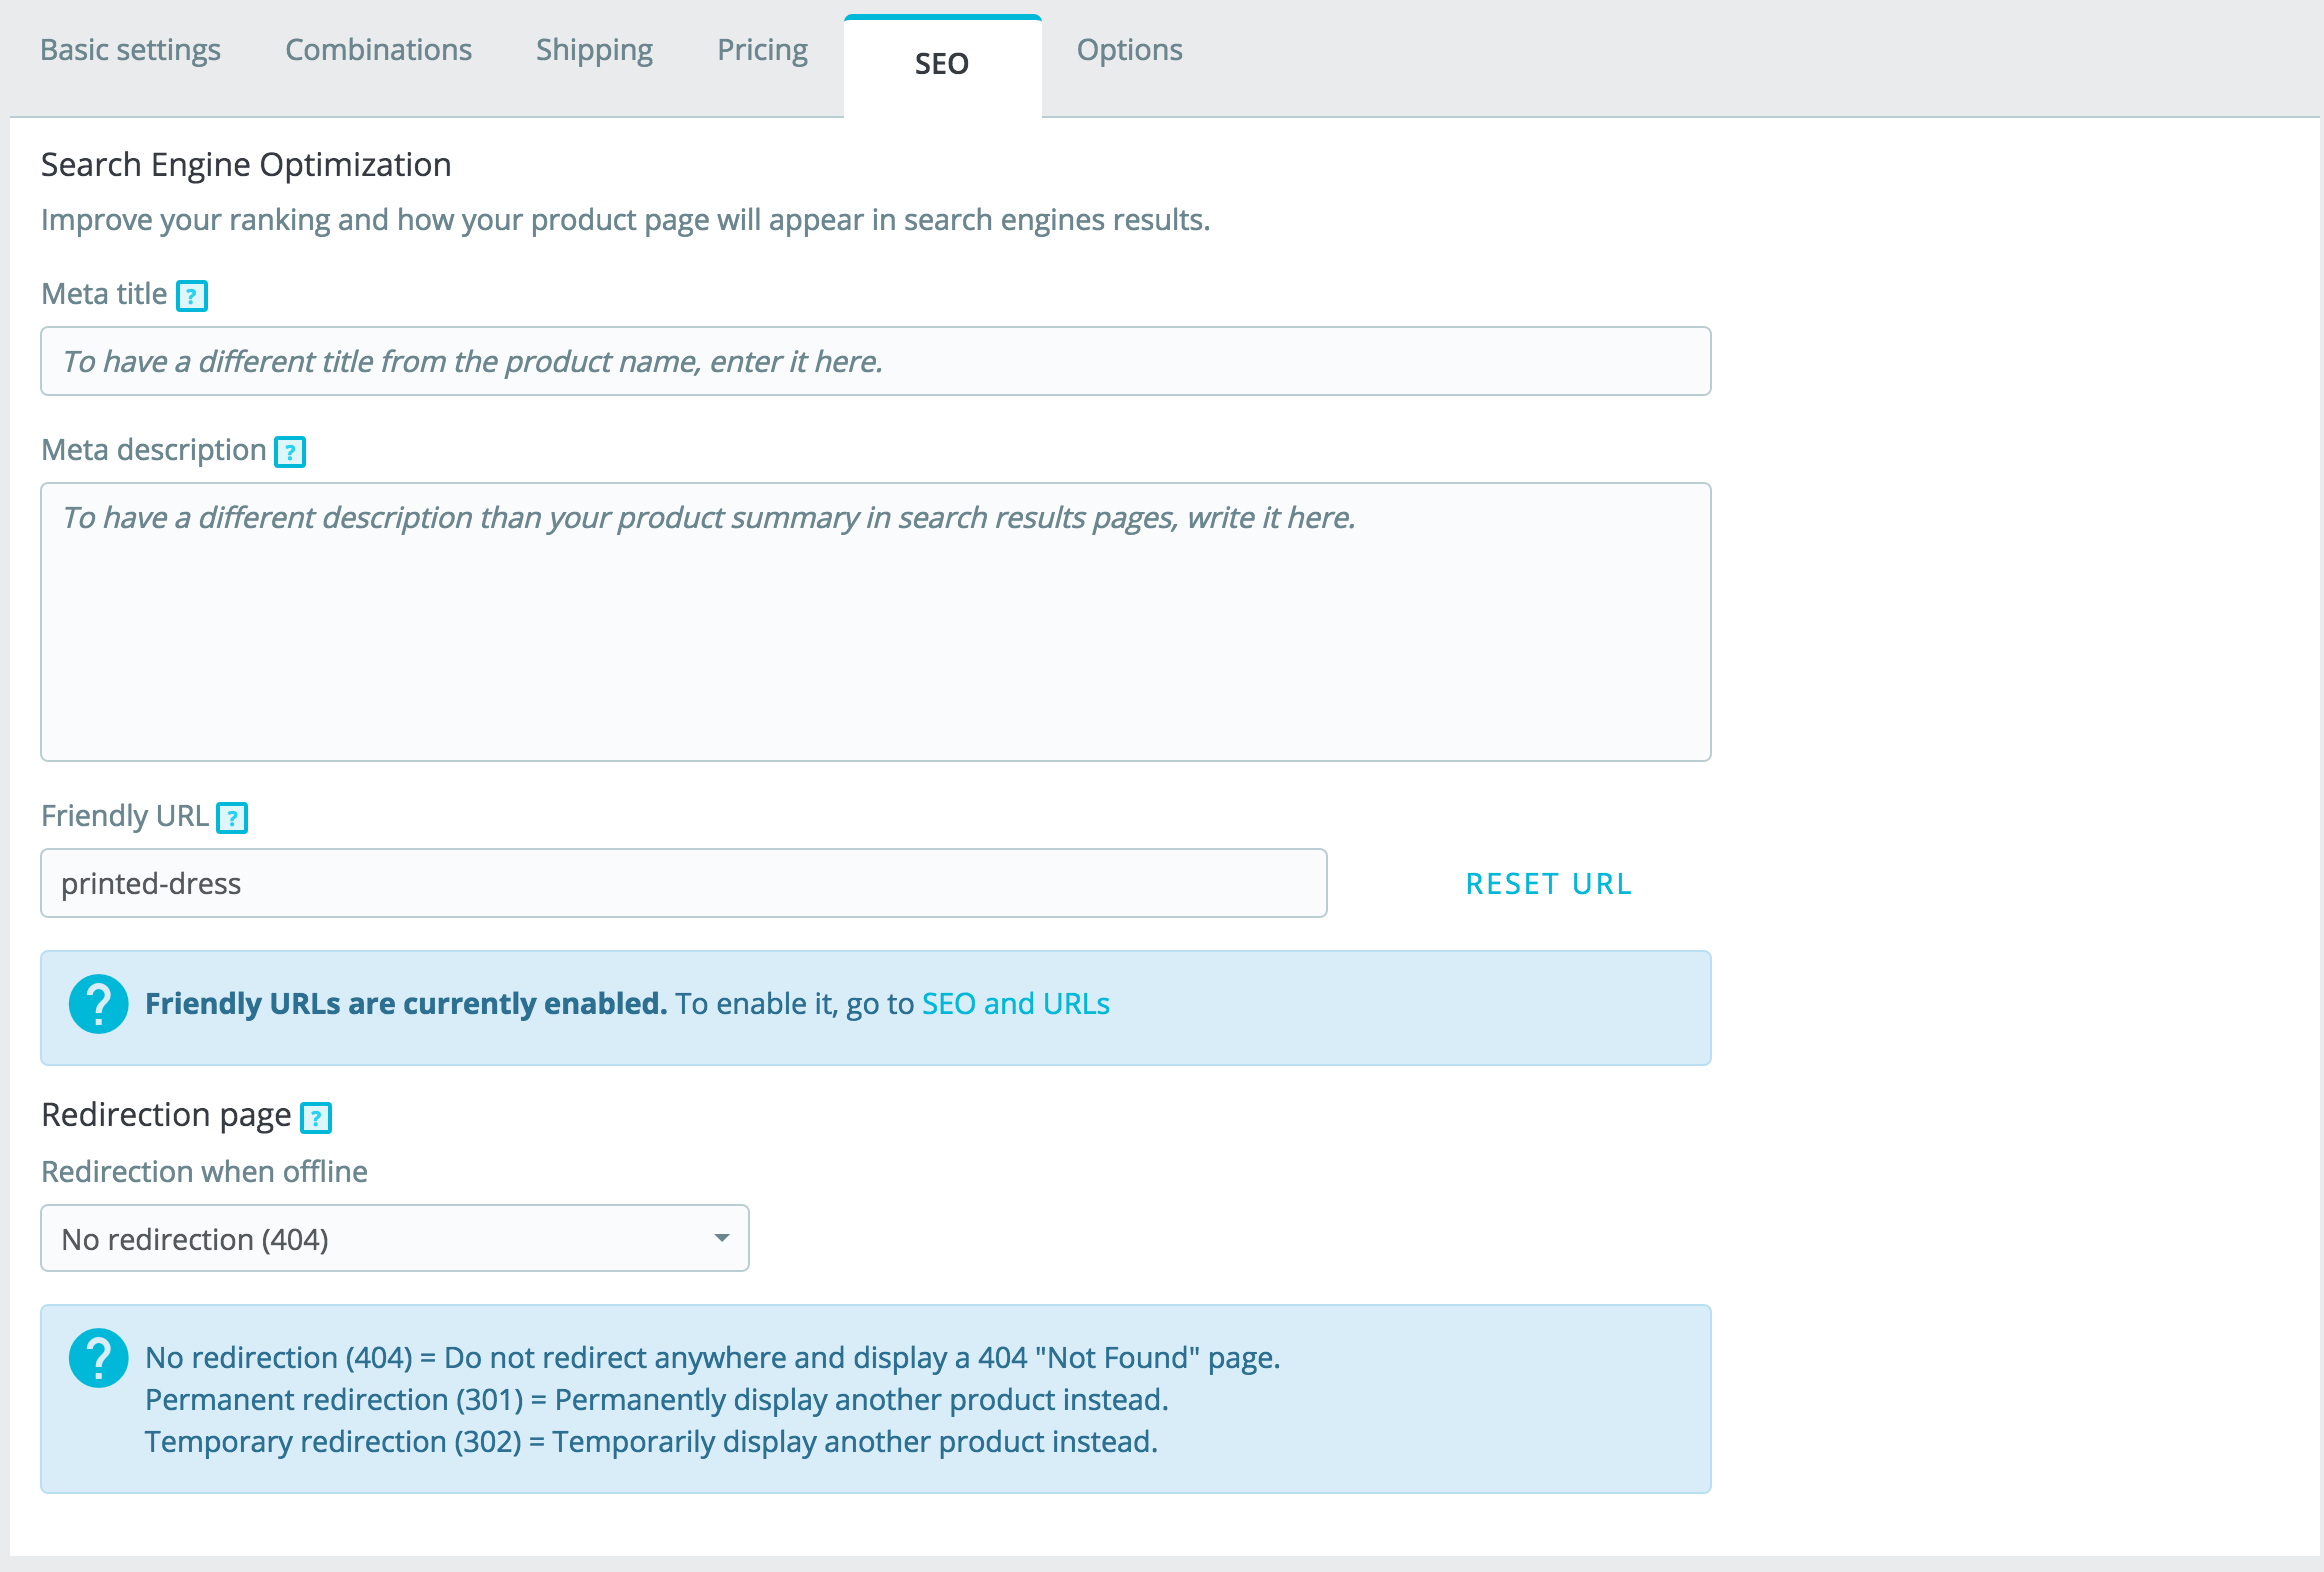
Search Engine Optimization
...
- No redirection (404). This will display a "404 error - Not found" page.
- Permanent redirection (301). This will permanently redirect the visitor to another product page. The current URL of your product page will no longer be indexed by search engines: it will be replaced by the URL of the product page of your choice. Choose which product page you would like to display instead. Remember, this is permanent, so make sure you don't need this URL anymore before activating the 301 redirection!
- Temporary redirection (302. This is a temporary redirection to another product page. Choose which product page you would like to display instead. Search engines will still index the product page URL, so you can reuse it later easily, should you reactivate the product, for example.
Options
The "Options" tab provides additional settings to manage product references, suppliers, product customization, visibility and files.
Visibility
You can choose to have the product available through different channels:
...
3. The combination will appear in a table below.
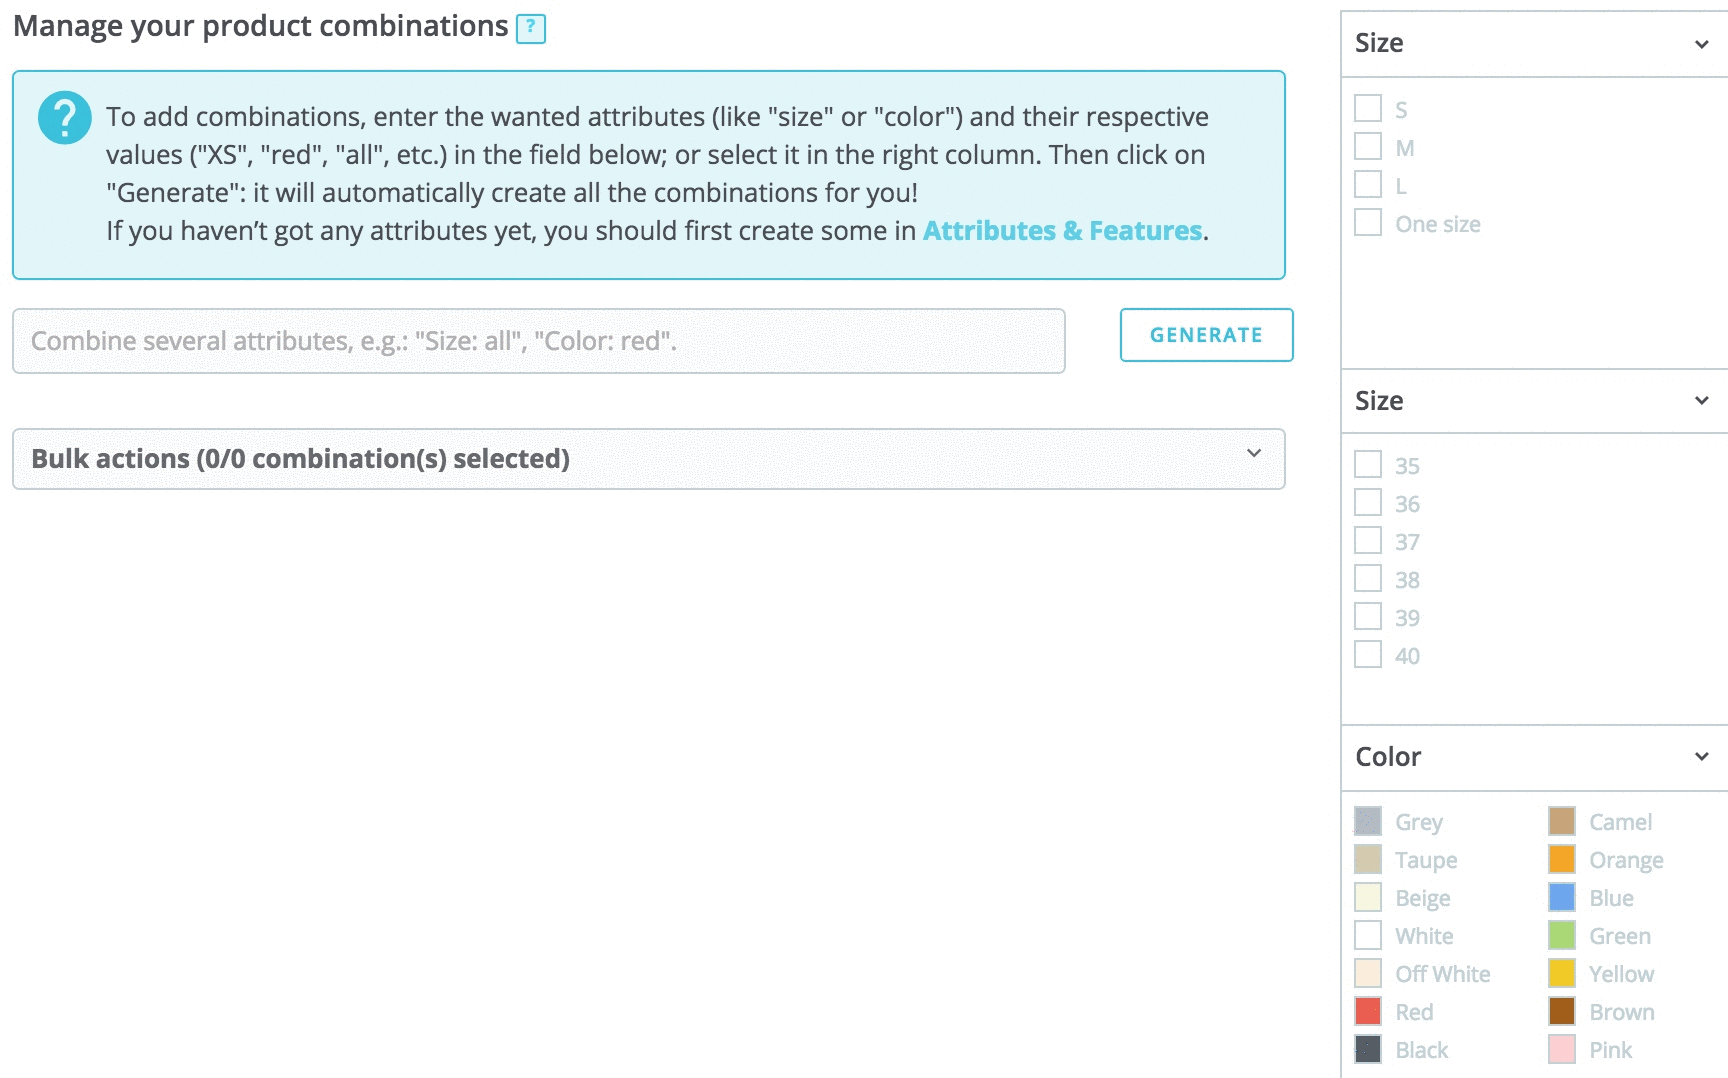
Automatic method
Faire screencast
If you have too many different products versions or varieties, you can use the "Product Combinations Generator." This tool allows you to automatically generate all of the combinations and possibilities.
...