
Table des matières
Gérer les modules
PrestaShop 1.4 est livré avec plus de 110 modules qui peuvent être installés/désinstallés et configurés à votre guise, afin de personnaliser et compléter votre boutique. L'onglet "Modules" vous donne accès à une liste de modules. Sur cette page vous pouvez installer, désinstaller et configurer chaque module.
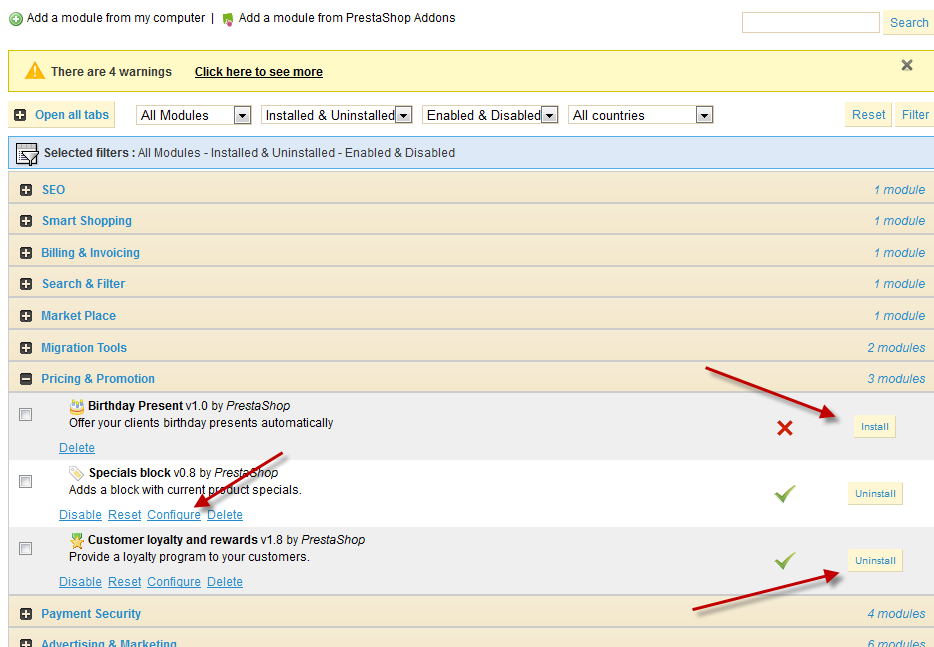
- Cliquez sur "Installer" : en un clic, le module est installé.
- Quand un module doit être configuré, cliquez sur "Configurer", vous serez dirigé vers un assistant de configuration.
- La désinstallation d'un module s'effectue également en un clic. Vous perdrez alors vos paramètres pour ce module.
- Si vous préférez conserver vos paramètres pour ce module, vous pouvez le désactiver en cliquant sur la virgule verte.

Les modules peuvent avoir 4 statuts différents, représentés par des icônes:
- Installé et activé
- Non installé
- Installé mais désactivé
- Installé et activé, mais avec un avertissement
Le plus souvent, l'avertissement indique que vous n'avez pas proprement configuré le module. Cliquez sur le lien "Configurer" et suivez les différentes étapes.
Nous allons présenter les modules qui existent déjà dans le cadre de PrestaShop, et voir comment les configurer. Cliquez sur le signe "+" dan chaque catégorie pour voir les modules que contient la catégorie.
Liste des modules disponibles
Référencement - SEO
Cette section ne contient qu'un module.
Google Sitemap
Afin d'optimiser votre SEO, il est essentiel d'avoir un sitemap (plan du site), qui est un fichier XML listant toutes les pages et tous les produits de votre boutique. Cela permettra aux moteurs de recherche d'indexer toutes les pages facilement et avec efficacité. Vos produits apparaîtront alors sur les moteurs de recherche. Vous pouvez créer un sitemap en utilisant PrestaShop et être indexé par Google (et d'autres moteurs de recherche qui supportent ce format de fichier) en utilisant des outils tel que "Webmaster Tools". Une fois installé, cliquez sur "Configurer" pour atteindre la page ci-dessous:
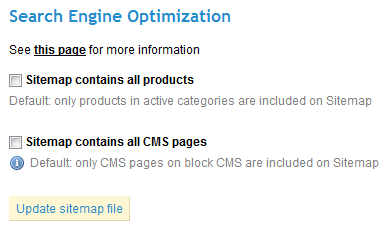
La première étape consiste à décider d'afficher ou non les produits que vous n'avez pas activé dans votre boutique. Si vous souhaitez afficher tous vos produits, cochez "Le Sitemap inclus également les produits des catégories inactives". Les produits inactifs seront alors indexés par Google de sorte à ce qu'ils deviennent visibles dès que vous les remettrez en ligne.
Une fois que vous avez terminé de configurer le module, cliquez sur "Mettre à jour le fichier Sitemap". L'adresse du sitemap vous sera donné (par exemple, myprestashop.com/sitemap.xml). Copiez cette adresse web pour l'enregistrer dans votre compte Google Webmaster Tools. Le module vous indiquera alors la taille du fichier et le nombre de pages indexées. Prenez soin de le mettre à jour régulièrement de sorte à ce que les moteurs de recherche indexent parfaitement votre contenu.
Smart Shopping
Cette section ne contient qu'un module.
Twenga
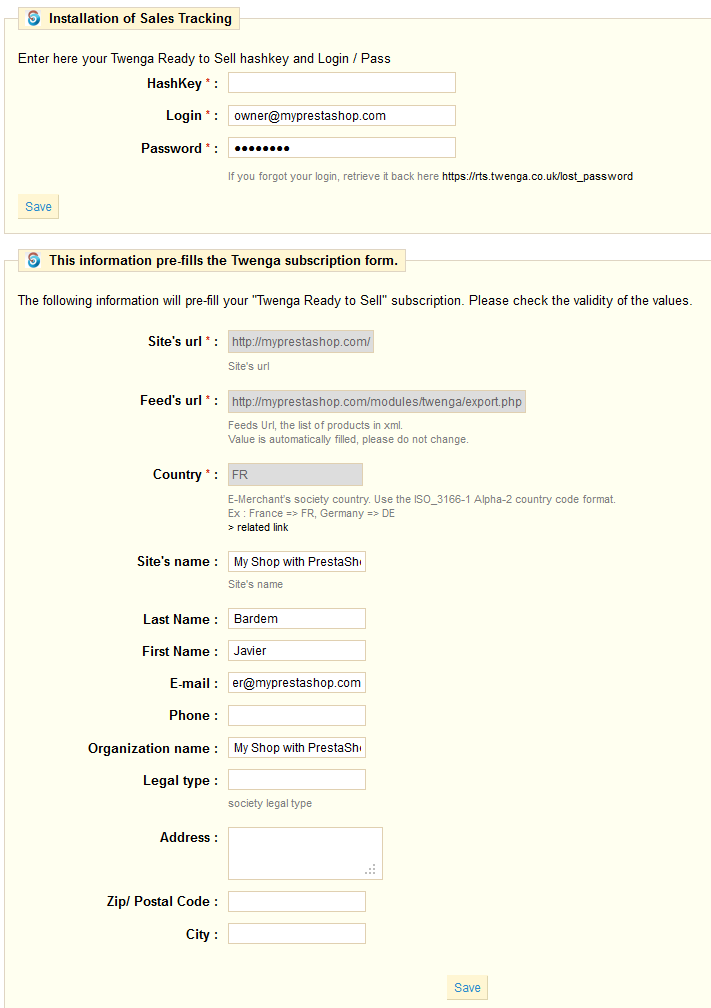
Twenga est une plateforme ouverte de shopping, qui vise à rassembler "tous les produits et boutiques en ligne dans un unique endroit". Ce module vous aide à placer votre produit sur la plateforme Twenga : il exporte votre liste de produits sur leur plateforme, et vous aide à suivre leurs performances.
Vous devez avoir un compte Twenga pour que ce module fonctionne.
Une fois installé, cliquez sur "Configurer" et suivez les instructions.
Facturation
Cette section ne contient qu'un module.
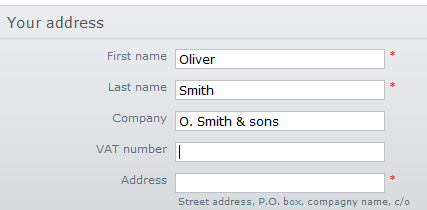
Numéro de TVA européen
Ce module permet à votre client d'indiquer leur numéro de TVA dans leurs détails. Le numéro peut être récupéré grâce à un service web, en fonction de votre pays.
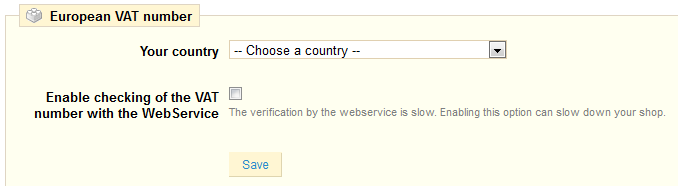
Le champ TVA n'apparaît que quand l'utilisateur indique le nom de sa société.
Bloc recherche rapide
Cette section ne contient qu'un module.
Bloc recherche rapide
Ce module installe un champ de recherche sur votre boutique. Il est installé et activé par défaut, et il est préférable de le garder activé pour faciliter la navigation des visiteurs. La barre de recherche affiche des résultats à partir du moment où les premières lettres sont tapées.
Il n'y a pas de page de configuration.
Place de marché
Cette section ne contient qu'un module.
eBay
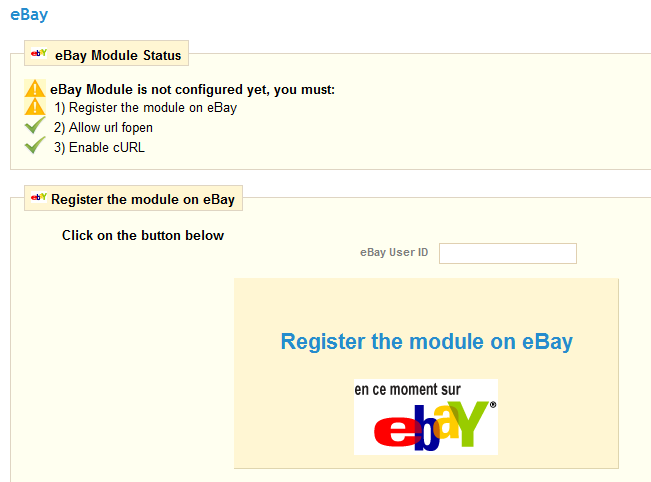
Ce module vous permet de placer facilement votre produit sur eBay. C'est une excellente manière d'élargir votre audience.
Installez le module, cliquez sur "Configurer", et suivez les instructions. Vous aurez d'abord à enregistrer votre module/boutique sur eBay afin que le module fonctionne.
Outils de migration
Cette section contient deux modules.
Import de boutique
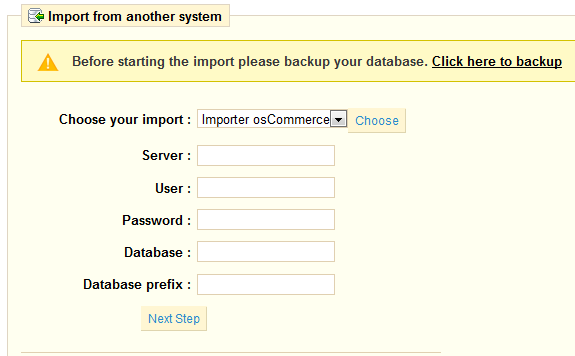
Il s'agit d'un module générique pour importer vos produits d'un autre système e-commerce vers votre boutique PrestaShop. Par défaut, le module n'importe rien, il nécessite pour fonctionner des modules spécifiques à chaque plateforme. Quand au moins l'un de ces modules est activé, la page de configuration du module conne accès à un menu-déroulant. Choisissez la plateforme du système source, et indiquez les détails d'authentification requis. Cliquez sur "suivant" et suivez les instructions.
Caution
Faites une sauvegarde des deux plateformes avant toute chose ! Il est primordial que vous soyez en mesure de restaurer vos informations en cas d'échec de l'importation.
Importer osCommerce
Il s'agit d'un module d'importation pour l'Import de Boutique. Installez le afin de l'utiliser avec le module d'Import de Boutique.
Prix & promotions
Cette section contient trois modules.
Cadeau d'anniversaire
Ce module est capable de créer et d'envoyer des bons de réduction à vos clients pour leur anniversaire. Installez le et cliquez sur "Configurer" pour inclure cette fonctionnalité dans votre boutique. Plusieurs options apparaîtront:
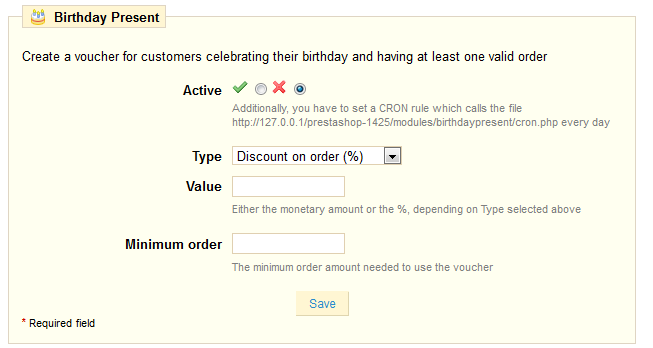
- Activez le module.
- Choisissez le type de réduction que vous souhaitez envoyer, par exemple une réduction sur un pourcentage de la commande, etc.
- Entrez le montant dans le champ "valeur" et spécifiez le montant minimum de commande que le client doit passer pour utiliser ce bon.
Pour que ce module fonctionne, vous devez configurer une tâche cron sur votre serveur qui sera parcouru tous les jours. L'adresse du fichier est :
http://www.myprestashop.com/modules/birthdaypresent/cron.php
Note
Une tâche cron exécute automatiquement et régulièrement une tâche. Vous pouvez la configurer depuis votre serveur. Si vous n'êtes pas à l'aise avec ce type d'opération, contactez votre administrateur.
Bloc promotions
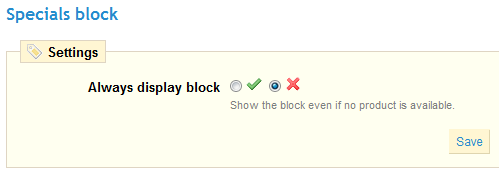
Ce module ajoute un bloc sur la page d'accueil de votre boutique, dans lequel le client pourra prendre connaissance des offres du moment (choisies par hasard).
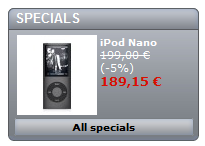
Installez le. La configuration de ce module est très simple :
Programme de fidélité
Le programme de fidélité de PrestaShop offre à vos clients des points de fidélité en fonction du montant qu'ils dépensent sur votre boutique. Installez le et cliquez sur "Configurer" pour accéder à ce formulaire :
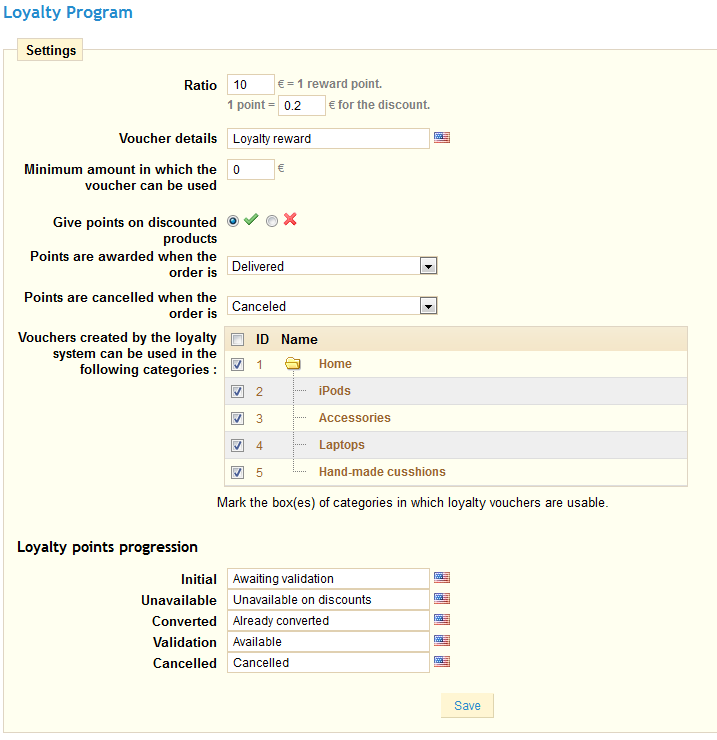
Remplissez les différents champs en fonction de vos besoins, et sauvegardez.
Sécurité des paiements
Cette section contient 4 modules.
FIA-NET - Système d'Analyse des Commandes
FIA-NET est un service tiers de labellisation contre les détournements bancaires: il protège à la fois les clients et les boutiques en ligne contre les fraudes à la carte de crédit et autres activités malveillantes. Vous devez déjà posséder un compte FIA-NET pour utiliser ce module. Demandez-en un ici. Une fois que vous avez un compte, configurez le module avec vos détails.
PrestaShop Security
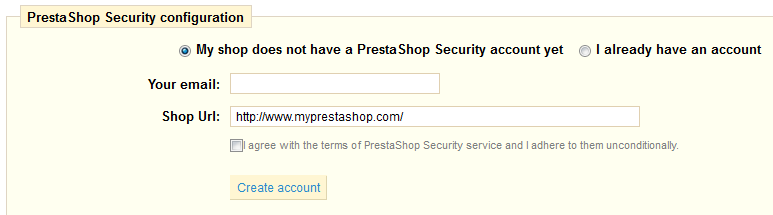
PrestaShop Security est un service fourni par PrestaShop afin de protéger votre boutique contre les paiements frauduleux.
Si vous n'avez pas de compte, vous pouvez en créer un directement depuis PrestaShop: remplissez le premier champ avec votre e-mail, puis vérifiez que le deuxième champ contient la bonne adresse WEB de votre boutique, puis cliquez sur "Créer un compte".
Si vous avez déjà un compte, cochez "J'ai déjà un compte", le formulaire suivant apparaîtra:
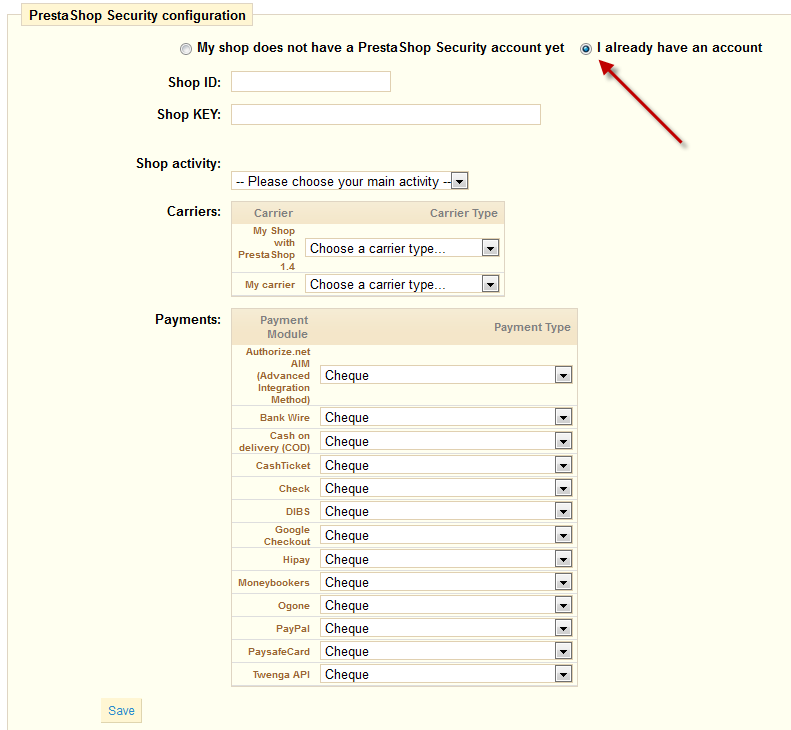
Indiquez vos identifiants et choisissez les transporteurs et les modes paiement.
Module Secuvad
Secuvad est une solution pour lutter contre la fraude en ligne.
Vous devez avoir un compte pour utilise ce module. Vous pouvez contacter Secuvad et remplir leur formulaire en ligne : http://www.secuvad.com/contact.php.
Une fois que vous avez un compte, remplissez ce formulaire avec vos détails, et cliquez sur "Enregistrer".
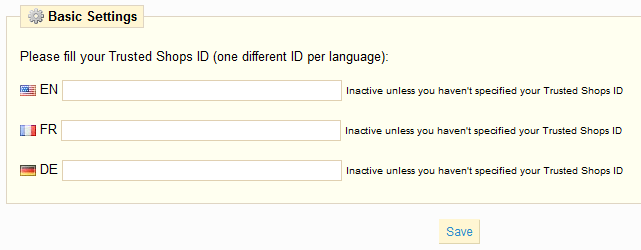
Solutions de confiance Trusted Shops
Trusted Shops est le label de confiance pour sites marchands le plus répandu en Europe.
Vous devez avoir un compte pour utiliser ce module. Vous pouvez en créer un avec ce lien partenaire|http://www.trustedshops.com/merchants/membership.html?partnerPackage=presta&shopsw=PrestaShop&website=http%25253A%25252F%25252F127.0.0.1%25252Fprestashop-1425%25252F&firstName=&lastName=&email=&language=EN&ratingProduct=RATING_PRO&et_cid=53&et_lid=3361].
Une fois que vous avez un compte, remplissez les champs avec vos informations. N'oubliez pas le second onglet du module.
Publicité & Marketing
Cette section contient 6 modules.
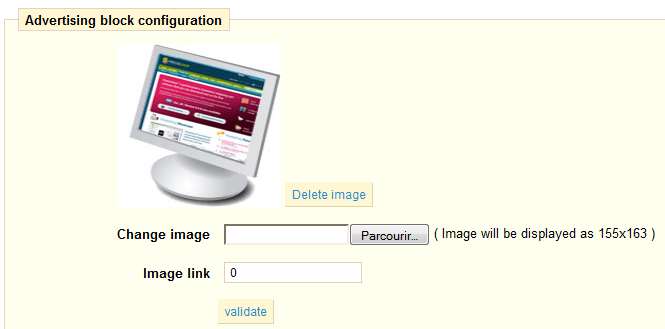
Bloc publicité
Ce module vous permettra d'afficher sur votre front office une image de votre choix. Cliquez sur "Configurer" pour uploader l'image de votre choix ou indiquer son adresse web. Validez, l'image apparaîtra comme ci-dessous:
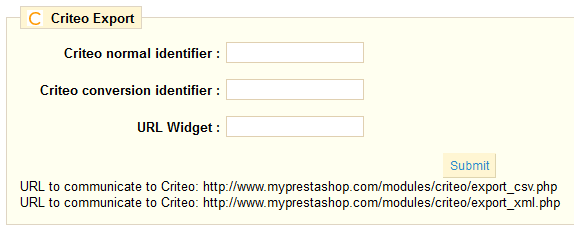
Criteo
"Criteo vous permet d'améliorer considérablement l’impact de vos campagnes SEM (Search Engine Marketing). En s’appuyant sur les recherches effectuées par les visiteurs de votre site, Criteo génère un nombre important de visites qualifiées et de conversions."
Vous devez avoir un compte Criteo pour utiliser ce produit. Vous pouvez les contacter en remplissant le formulaire situé sur leur page d'accueil.
Une fois que vous avez un compte, remplissez les champs avec vos informations.
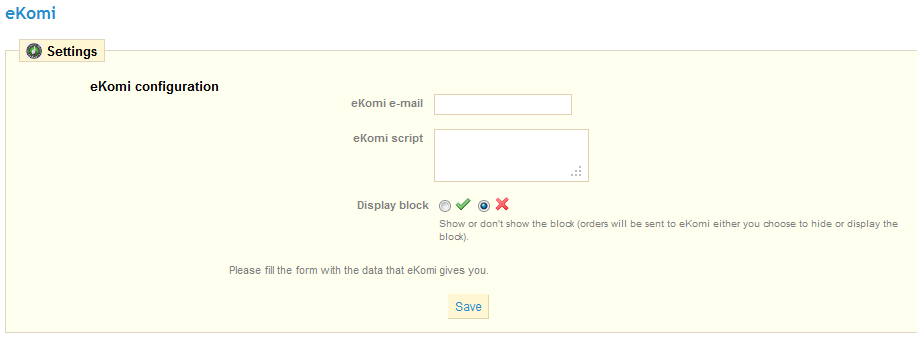
eKomi
"Générez dès aujourd’hui de précieux et authentiques commentaires client grâce au système d’évaluation intelligent eKomi, pour une confiance accrue de vos clients et une augmentation de votre chiffre d‘affaires. "
Vous devez avoir un compte eKomi pour utiliser ce module. Vous pouvez en créer un sur leur site internet.
Une fois que vous avez un compte, remplissez les champs avec vos informations.
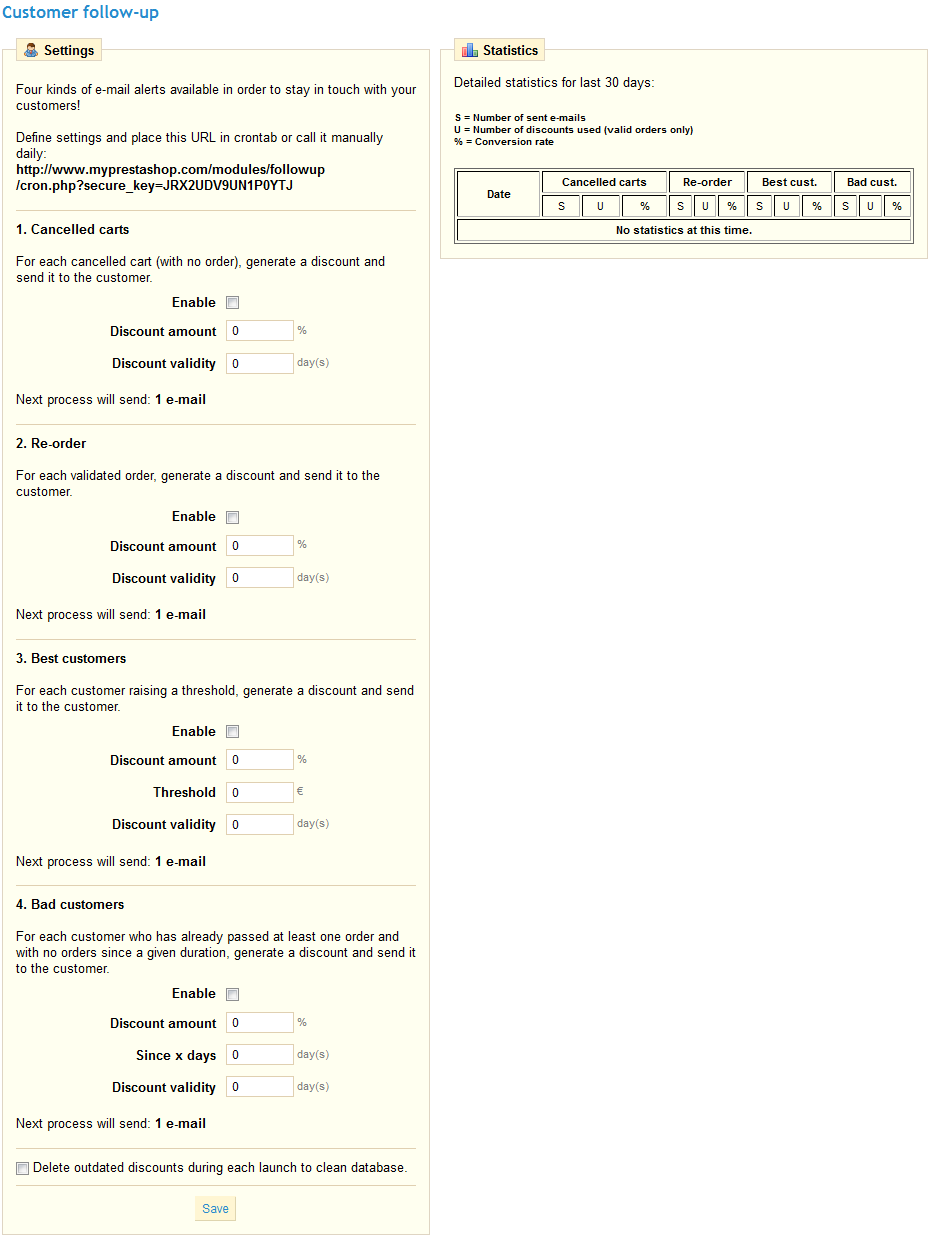
Relancez vos clients
Ce module vous permet de créer des alertes e-mail pour vos clients. Vous pourrez ainsi envoyer automatiquement des bons de réduction à certains de vos clients.
Vous pouvez par exemple envoyer des bons de réduction à ceux qui ont abandonné leur commande, ou à ceux que vous voulez remercier pour leur commande, ou à vos meilleurs clients pour les remercier de leur achat et leur confiance.
Activez le, puis cliquez sur "Configurer". Vous choisirez entre 4 sortes d'e-mails.
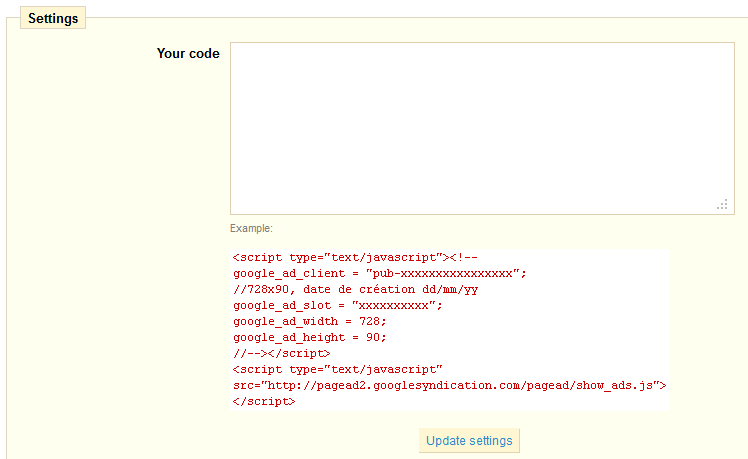
Google AdSense
"Google AdSense est un programme gratuit permettant aux éditeurs Internet de générer des revenus en diffusant des annonces ciblées sur une large gamme de supports Web".
Ce module vous permet de facilement intégrer des scripts Google AdSsense sur votre boutique. Vous devez avoir un compte Google AdSense pour utiliser ce module.
Une fois que vous en avez un, vous devez ajouter votre code script AdSense dans le champ de texte.
Programme de parrainage
Votre boutique peut se servir de vos clients actuels pour atteindre de nouveaux clients grâce à un système de parrainage. Installez ce module puis cliquez sur "Configurer".
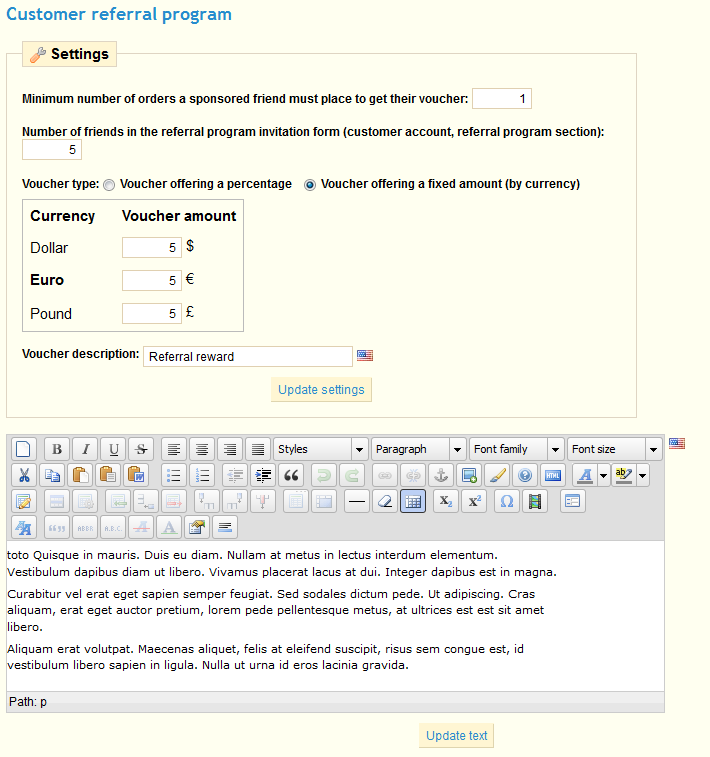
Voici une description de chaque champ :
- Nombre minimum de commandes qu'un filleul doit passer afin de recevoir son bon de réduction. Remplissez ce champ avec la valeur de votre choix. Jusqu'à que ce nombre soit atteint, votre client ne peut pas bénéficier de la remise.
- Nombre de filleuls dans le formulaire d'invitation pour parrainage (compte client, section parrainage). Indiquez la valeur de votre choix.
- Type de bon. Vous pouvez offrir deux types de réduction, soit en pourcentage, soit en montant. Choisissez le type que vous préférez, puis indiquez la valeur de la réduction que vous souhaitez appliquer selon les différentes devises reconnues par votre boutique.
- Description du bon. Donnez un nom au bon.
Après avoir rempli ces champs, cliquez sur "Mettre à jour les paramètres".
Pour expliquer en profondeur comment le programme de parrainage fonctionne, vous pouvez écrire une description dans le champ destiné aux "Règles de fonctionnement du programme de parrainage". Cliquez ensuite sur "Mettre à jour le texte".
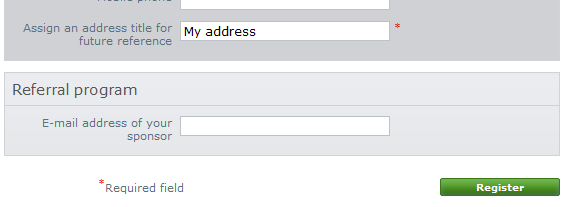
Lorsque vos clients s'inscrivent et veulent savoir les bénéfices qu'ils peuvent tirer de ce programme, ils doivent aller dans la section "Parrainage" de leur compte. Ils verront apparaître la capture d'écran ci-dessous:
Votre client peut entrer le nom et l'adresse e-mail de la personne qu'il souhaite parrainer. Après avoir cliquer sur "Valider", la personne en question recevra un e-mail.
Dans "Filleuls en attente", le programme indique au client lesquels de ses filleuls n'ont pas effectué d'achat après avoir reçu l'e-mail. Ils peuvent choisir de renvoyer un e-mail en sélectionnant le nom et en cliquant sur "Relancer mes amis". Ses filleuls recevront un e-mail les invitant à s'inscrire et à passer une commande.
Le dernier onglet "Mes filleuls" permet aux clients de voir lesquels de leurs filleuls ont accepté l'invitation et passé une commande sur la boutique.
Lorsqu'ils s'inscrivent, les filleuls doivent indiquer l'adresse e-mail de la personne qui les a parrainé, de sorte à ce qu'ils bénéficient eux aussi de la réduction :
Administration
Cette section contient 10 modules.
Artichow
Ce module est est une librairie qui permet d'afficher des graphiques simples basés sur des images utilisant PHP et GD.
Google Chart
Ce module permet de générer dynamiquement des graphiques.
Visifire
Ce module est un pack de composants permettant de visualiser graphiquement des données.
XML/SWF Charts
Ce module est un outil simple mais puissant utilisant Adobe Flash pour créer des graphiques à partir de données dynamiques.
Alertes email
PrestaShop vous permet d'alerter vos clients par e-mail dans certaines situations, par exemple, lorsqu'une nouvelle commande est placée, ou lorsqu'un produit est presque en rupture de stock. Les clients peuvent entrer une adresse e-mail sur laquelle ils seront contactés quand le produit sera de nouveau disponible. Cliquez sur "Installer" puis "Configurer" pour configurer le module.
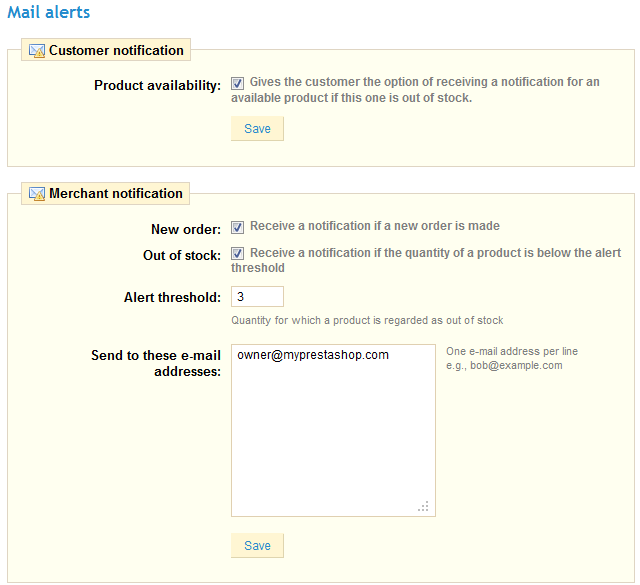
Lorsque vous cochez la case "Disponibilité du produit", un champ apparaît sur la page du produit dans votre boutique quand il est en rupture de stock. Ce champ demande aux clients de laisser des informations de sorte à ce qu'ils soient contactés quand le produit sera de nouveau disponible.
Dans la section "Alertes e-mail", vous pouvez spécifier si vous souhaiter être alerté à chaque nouvelle commande. Pour celle, cochez la case "Nouvelle Commande". Si vous souhaitez être alerté lorsqu'un produit atteint un certain niveau de stock que vous aurez préalablement défini, cochez la case "Hors Stock" et indiquez le niveau de stock en question.
Les alertes e-mail peuvent être envoyées sur plusieurs adresses en même temps. Pour cela, listez chaque adresse e-mail qui doivent recevoir l'alerte (une adresse par ligne. Pour passer à la ligne, appuyer sur la touche Entrée de votre clavier). Une fois les paramètres configurés, cliquez sur "Enregistrer".
Newsletter
Your customers can give you their e-mail address either by entering it in the Newsletter block located on the homepage or by checking the "Yes" box to subscribe to the newsletter when they register. You need these e-mail addresses in order to do some marketing. Install it and click "Configure" in order to see this page:
Upon registration, your customers have two choices related to the newsletter: The first asks users to subscribe to the newsletter, the second to receive offers from partners (Opt-In).
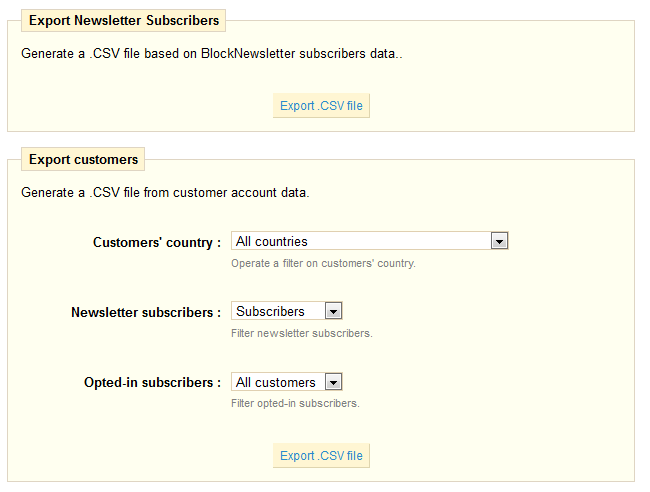
The first section allows you to collect all the email addresses recorded by the newsletter block on your homepage, by clicking the button "Export .CSV file". A notification will appear, asking you to click on a link to download the file containing the addresses.
Four pieces of information will be present in this file. The customer id, e-mail address, the day of registration, and the IP address. If you use this data with software such as Microsoft Excel, you can sort the information as you wish.
The second item, named "Export clients", enables you to filter your customers' e-mail addresses. You can then filter the clients by country of origin by selecting "Customer Country" from the drop-down menu, and then selecting the country you want. Filtering by country is particularly useful for sending newsletters in the right language and for adapting your offers.
You can then take more information into account, when exporting the e-mail addresses. Select the field "Newsletter's subscribers", and select from the drop-down menu one of the following three items:
- The first "All customers" allows you to select all the e-mail addresses of your customers who open an account on your store. That is to say, those who do want to receive information from your part, as well as those who don't. Be careful what you did with it, then.
- The second, "Subscribers", allows you to select only those customers who do want to receive a newsletter from you.
- The third "Non-subscribers" allows you to select only those customers who do not want receive a newsletter from you.
Next is the "Opted-in Subscribers" field, where you can filter the contacts based on their desire to register for messages from advertising partners. Similarly, three choices are available:
- The first "All customers" allows you to select all the e-mail addresses of your customers who open an account on your store. That is to say, those who want and do not wish to receive information from your part.
- The second, "Subscribers", allows you to select only those customers who do want to receive a newsletter from your partners.
- The third "Non-subscribers" allows you to select only those customers who do not want receive a newsletter from your partners.
Once you have filtered the e-mail addresses to export, click "Export .CSV File" to retrieve all addresses. As before, a notification on a green background appears asking you to click and download the file. This document contains six types of information: The customer ID, Last Name, First Name, email address, IP address, and date of registration. You can then use this information to send your marketing campaigns.
Import/export a theme
This is a special module that enables you to import a theme and install it (and its attached modules), or to export a theme and its modules from your shop in order to share it with the world.
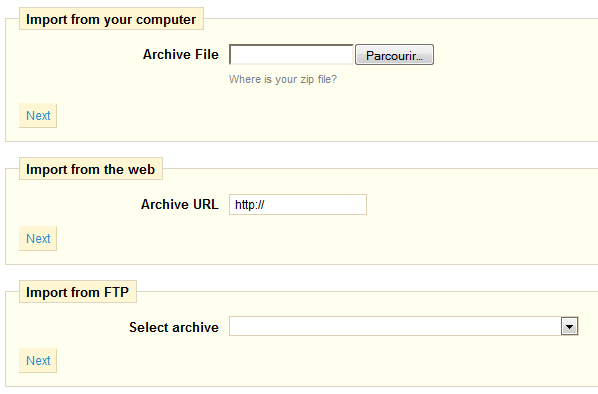
The module presents you with 3 methods to install a new module: from your computer, from a public website, or from your own FTP server.
Importing a theme
Whatever the method, the process remains the same: indicate the location of the theme's Zip archive, then click "Next".
Import from your computer: using the the file explorer to find the archive.
Import from the web: indicate the direct public URL to the archive.
Import from FTP: using your FTP client, upload the archive in the following folder: prestashop/modules/themeinstallator/import/ .
A quick summary is displayed in the next page.
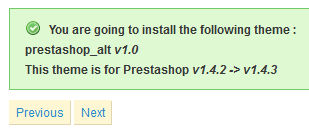
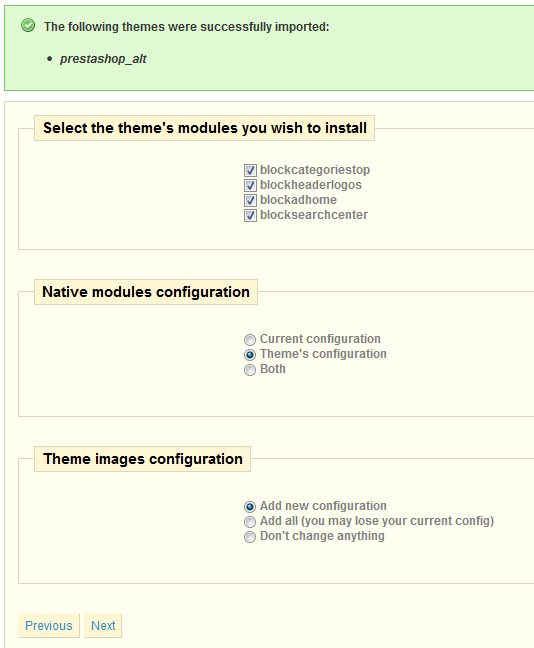
Click "Next" again to validate your choice. The theme is now installed, and PrestaShop asks you if you wish to install modules that were imported along with the theme, what you'd rather do with the current modules configuration, and how you'd like the images configuration to be taken into account.
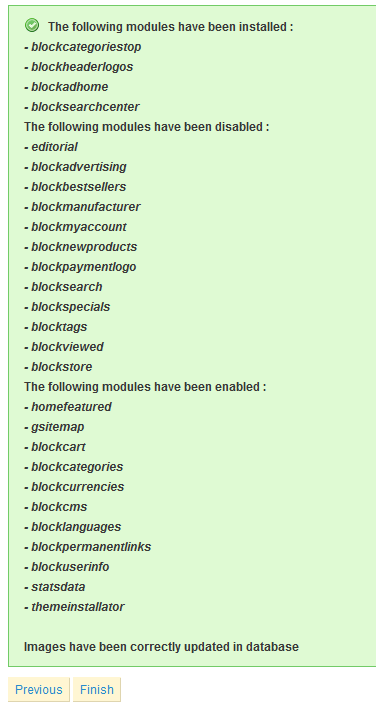
Click "Next" one last time. A final confirmation page presents you with all the changes applied to your PrestaShop install. Click "Finish" to end the process.
Exporting a theme
Once at least one theme has been important into your PrestaShop install, a new section appears in the "Import/Export a theme" module configuration page.

Select a theme and click on "Export this theme". A configuration form appears, where you can set the exported themes parameters: author, modules, theme name, compatibility version, etc.
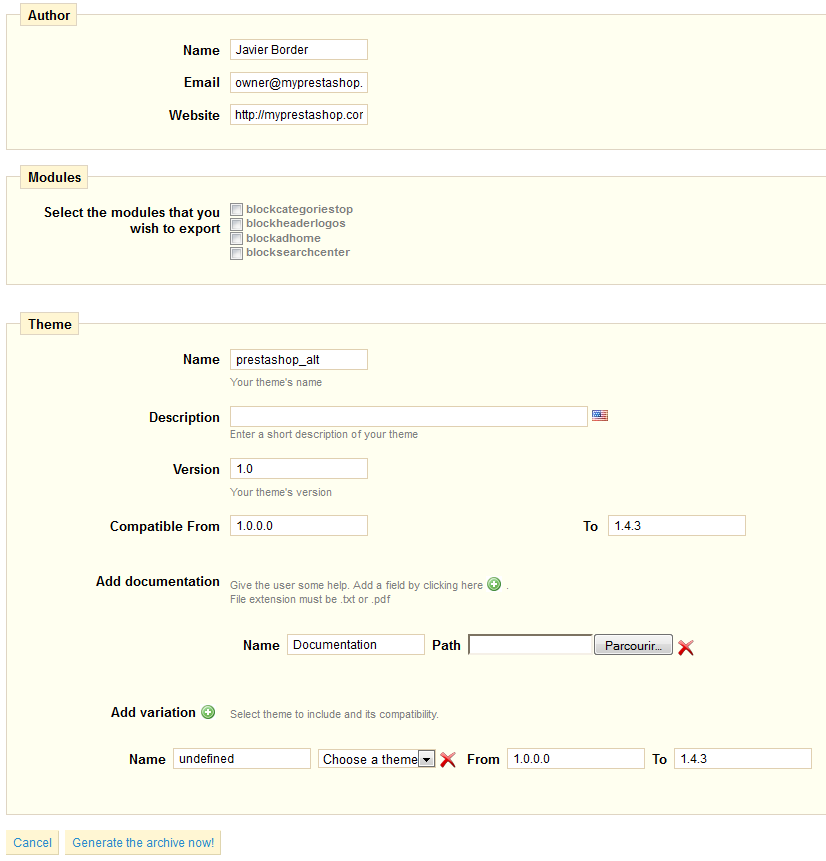
Once all the parameters are correctly set, click on "Generate the archive now". You will quickly get a file to download from your browser. Save it on your hard-drive, then give the save file a proper name. From there on, you can easily share this theme, and if it's your own creation, you can start selling it on PrestaShop's Addons website!
SMS Tm4b
Tm4b (Text-Messaging for Business) is "an SMS Gateway that provides text-messaging solutions for the business community".
PrestaShop enables you to receive texts with important information concerning your store, such as a new order, a change of stock, or a daily activity report. Install it then click "Configure", and configuration page appears.
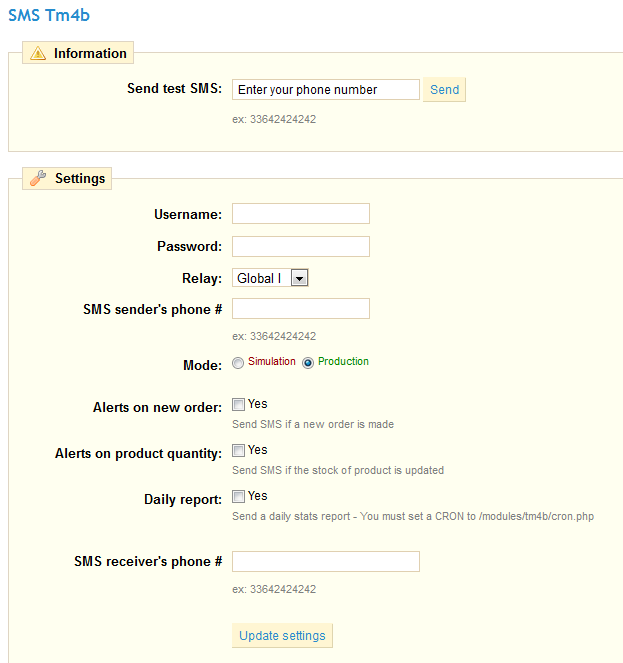
All information that you must enter into the various fields will be provided when you register on the Tm4b site.
Choose what information you want to receive by text/SMS. In order to receive the report, set a CRON job in your shop by adding your URL, such as www.myprestashop.com/modules/tm4b/cron.php, in your server's crontab.
Watermark
This module enables you to add a watermark to images from your store. This limits their diffusion on the Internet.
Note: if you intend to export your products on Google Shopping, know that on this service, the usage of promotional text / logos and watermarks in the images is not allowed. You may only upload images which are free of any further watermarks / logos
Install it, then click on "Configure".
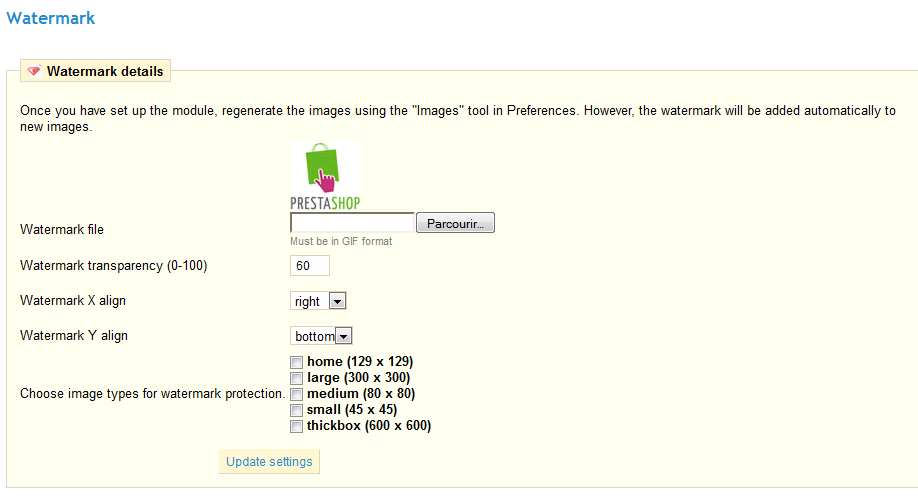
First select the image (the ‘watermark') that you want to apply to images (the image must be in GIF format). Then select the watermark transparency value (100 amounts to a non-transparent image). Select where your watermark should appear on each of your images. The X alignment corresponds to the horizontal axis. The drop-down menu proposes three options:
- Left
- Medium
- Right
Then select the Y alignment (vertical alignment) and choose from the these options :
- Top
- Middle
- Bottom
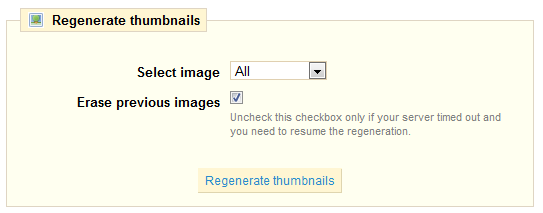
Combine the two axis to choose where to place your watermark. Then select what type of image it is being applied to. Once you have configured the module to your convenience, click on "Save." At this stage the configuration is completed but the watermarks are not yet implemented. Go to the "Preferences" tab, then under the "Images". Click "regenerate thumbnails".
After this process, your watermark image will appear on the images that you selected.
Shipping & Logistics
This section contains 10 modules.
Shipping Estimation
This module enables the customer to compare carrier possibilities before going under the checkout process. Just install it to display this on your frontoffice.
Note that all your carriers must have their fees properly set. This is done at the bottom "Shipping" page, in the "Fees by carrier, geographical zone, and ranges".
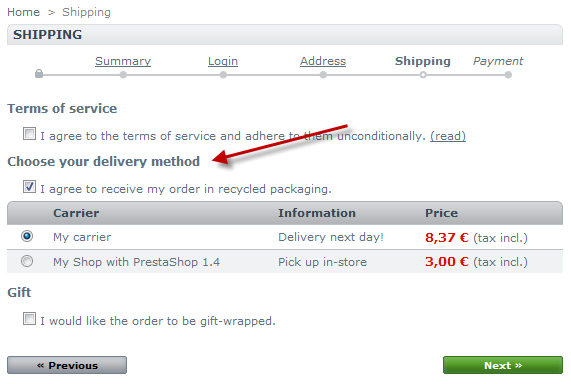
Date of delivery
This module displays an approximate date of delivery during the checkout process.
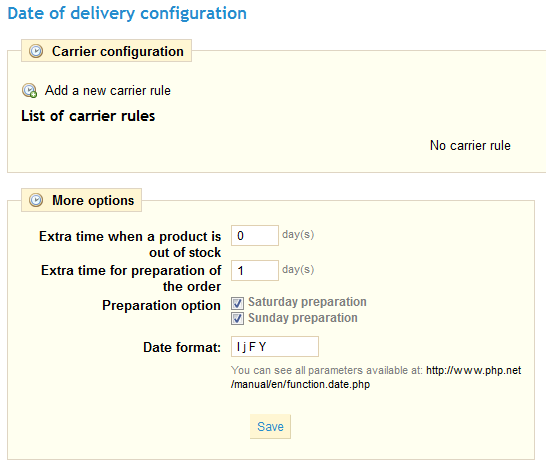
You need to set delivery rules for each carrier. Click "Add Now" to find that form.
!_Images^173-modules-deliveryDateAddNew.png |border=1!
You should create as many delivery rules as necessary.
Set the remaining module options, and finally click "Save".
Dejala.com : Courier delivery
Once you sign up with Dejala, the module allows you to add supplementary delivery services. When your clients purchase a product, they will see the shipping options available with a detailed time slots. They will order the product and ask for it to be delivered during the time slot that works best for them.
You must have a Dejala account in order to use it. you can create one right from the module's configuration page. Once you have your account, sign in using the second form in the module's configuration page, and follow the instructions.
This service is only available in certain towns. Please see the site http://www.dejala.fr for more information. As of this writing, they have staff in France's Ile-de-France region, and in Madrid, Spain.
Envoimoinscher
This module allows you to compare carrier offers and online ordering services' negotiated delivery rates.
You need an Envoimoinscher account in order to use this module. You can create one on their website.
!_Images^174-modules-envoimoinscher.png|border=1]
Once you have an account, fill in the module's various form fields, and click "Save".
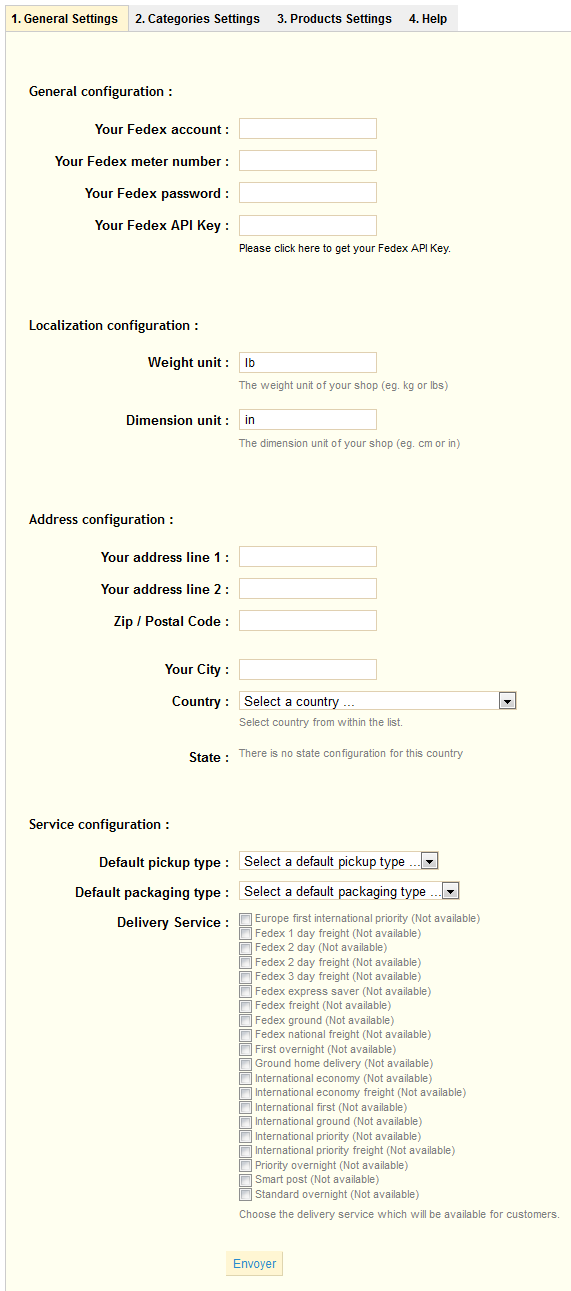
FedEx
FedEx is "the fastest courier services around the world daily. FedEx Express is your 24 hours solution for the best courier service".
With this modules, you can add FedEx as a carrier, and offer your customers different delivery methods through their service.
You must have a FedEx account in order to use this module. You can register on their website.
Once you have your account set up, fill in the various fields from the module's configuration form, and validate. Once your PrestaShop is tied to the FedEx webservice, you can use the two other tabs, named "Categories Settings" and "Products Settings". The last tab gives you some help.
Mondial Relay
This module enables you to display rates for delivering in Mondial Relay points. This service is available in France, Luxembourg, Spain and Belgium.
You must have a Mondial Relay account in order to use this service. You can create one on their website.
Once you have your authentication details, use them to fill the first form in the module, and click "Update Settings" in order to connect your shop to the Mondial Relay webservice.
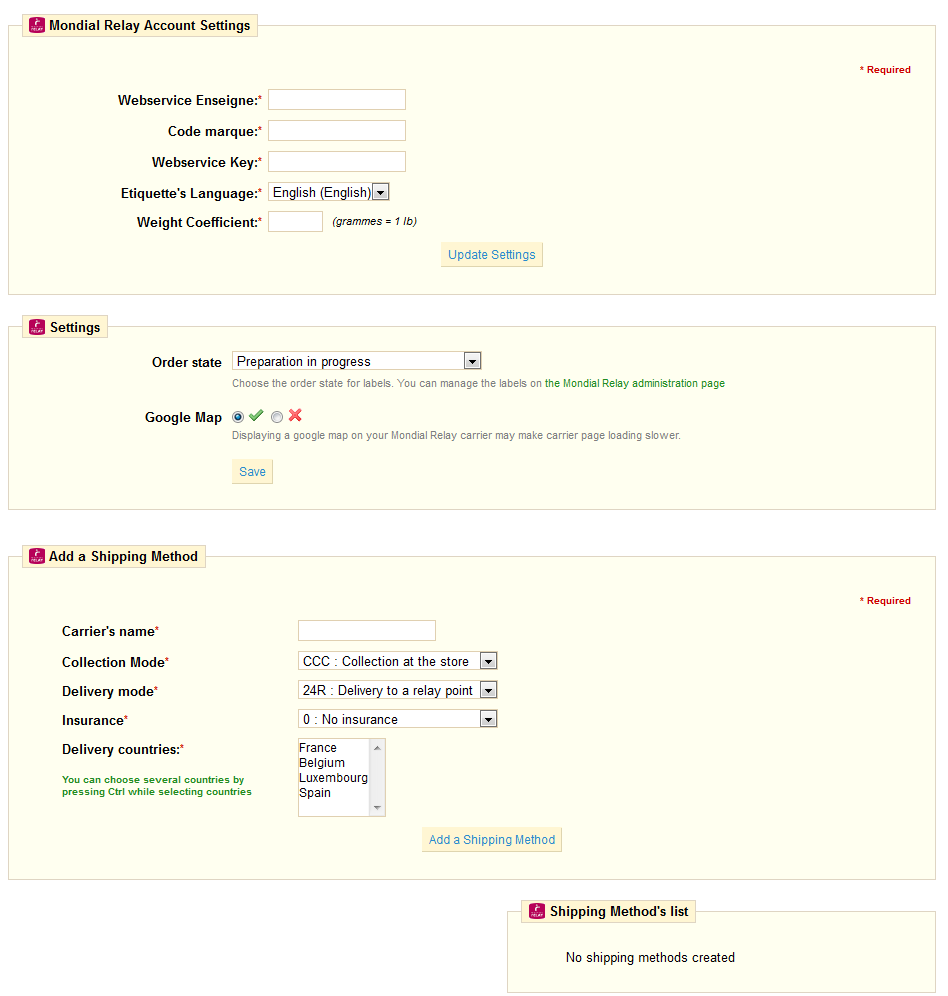
From there on, follow the module's instructions.
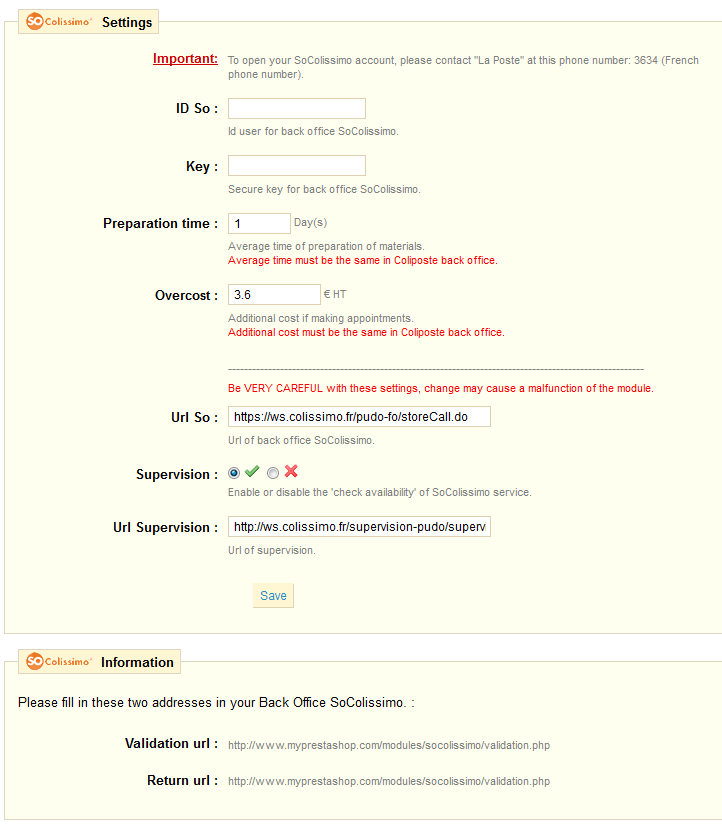
So Colissimo
SoColissimo is a service offered by La Poste, which allows you to offer your customers various modes of delivery.
You must have a So Colissimo account in order to use this service. You can create by calling a phone number in France: (+33) 36 34.
Once you have your authentication details, use them for fill the module's form, then click "Save".
Tracking - Front office
Enable your affiliates to access their own statistics.
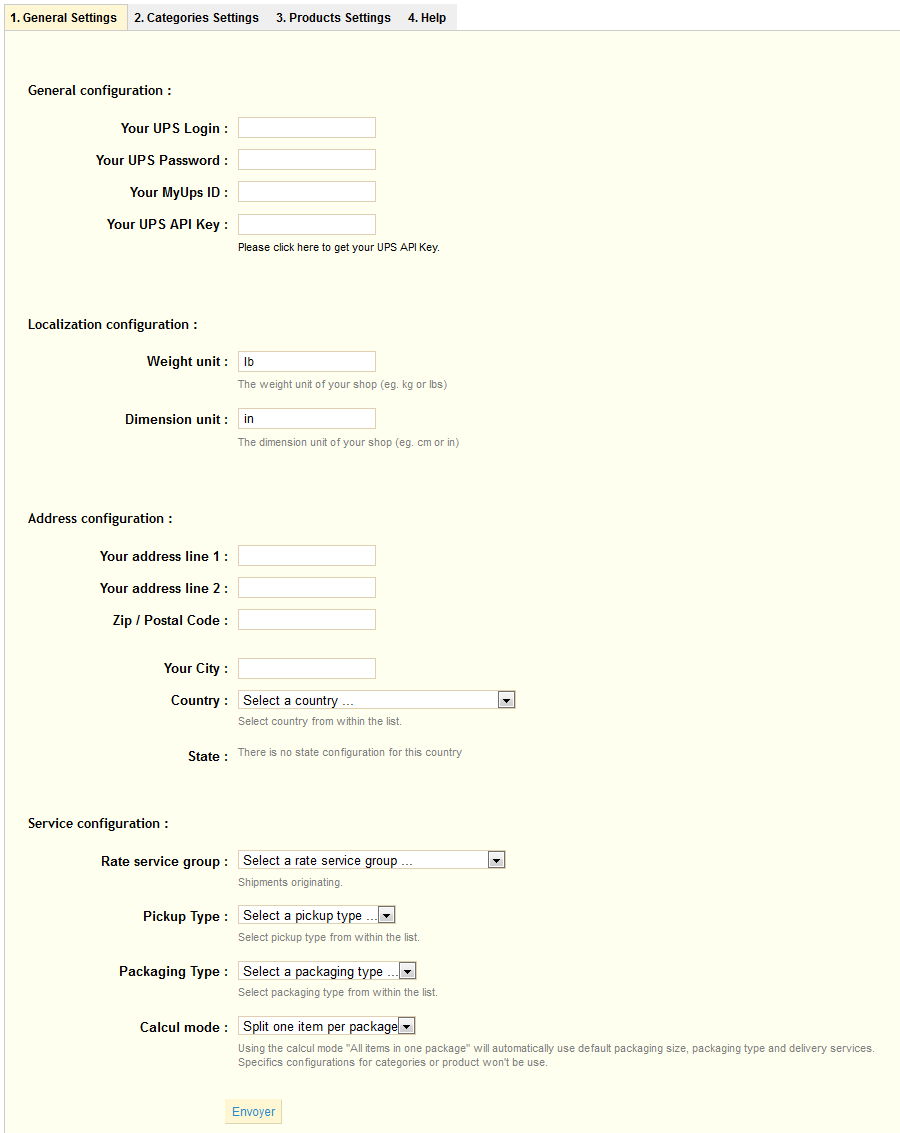
UPS Carrier
UPS is a well-know worldwide parcel carrier
With this modules, you can add UPS to your list of carriers, and offer your customers different delivery methods through their service.
You must have an UPS account in order to use this module. You can register on their website.
Once you have your account set up, fill in the various fields from the module's configuration form, and validate. Once your PrestaShop is tied to the FedEx webservice, you can use the two other tabs, named "Categories Settings" and "Products Settings". The last tab gives you some help.
USPS Carrier
This modules enables you to add the United States Postal Service to your list of carriers.
You must have an UPS account in order to use this module. You can register on their website.
Once you have your account set up, fill in the various fields from the module's configuration form, and validate. Once your PrestaShop is tied to the UPS webservice, you can use the two other tabs, named "Categories Settings" and "Products Settings". The last tab gives you some help.

Payments & Gateways
This section contains 12 modules
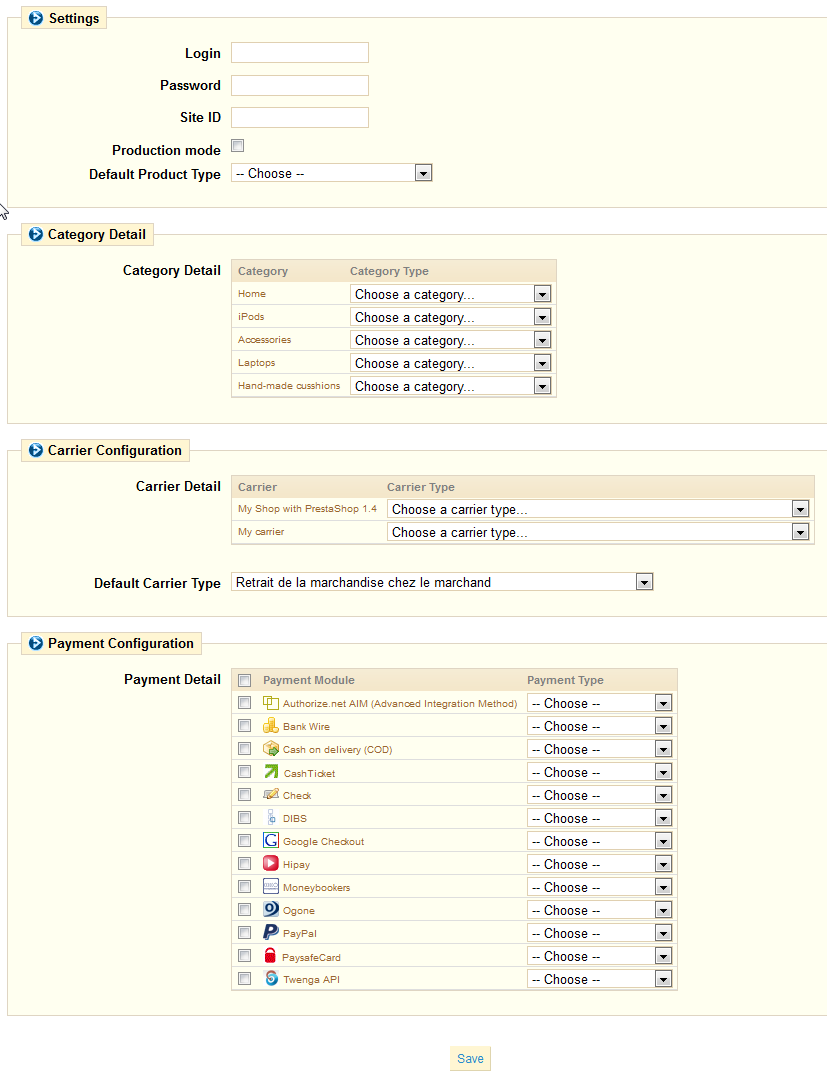
They are all explained in detail in the "Managing Payments Methods" section of this user-guide, in the "Setting up a payment module" section.
Analytics & Stats
This section contains 23 modules. Most of them create a new section in the "Stats" tab of your PrestaShop install. Many are installed by default. Therefore, if some of PrestaShop's functionalities are not useful to you, you can disable them here.
Many are described in detail in the "Understanding Statistics" of this user-guide. In this section, we will only describe the ones that are not enabled by default.
Google Analytics
This module makes it easy for you to install a Google Analytics script on your shop. You will then be able to enjoy the stats tools offered by Google.
You must have a Google Analytics account to make this widget work. Once you have one, follow the Analytics instructions to create a profile for your shop. you will receive a unique identifier. Use it in the module's "username" field and save it. Google Analytics will start gathering stats about your visitors.
Do read all the instructions provided by the module.
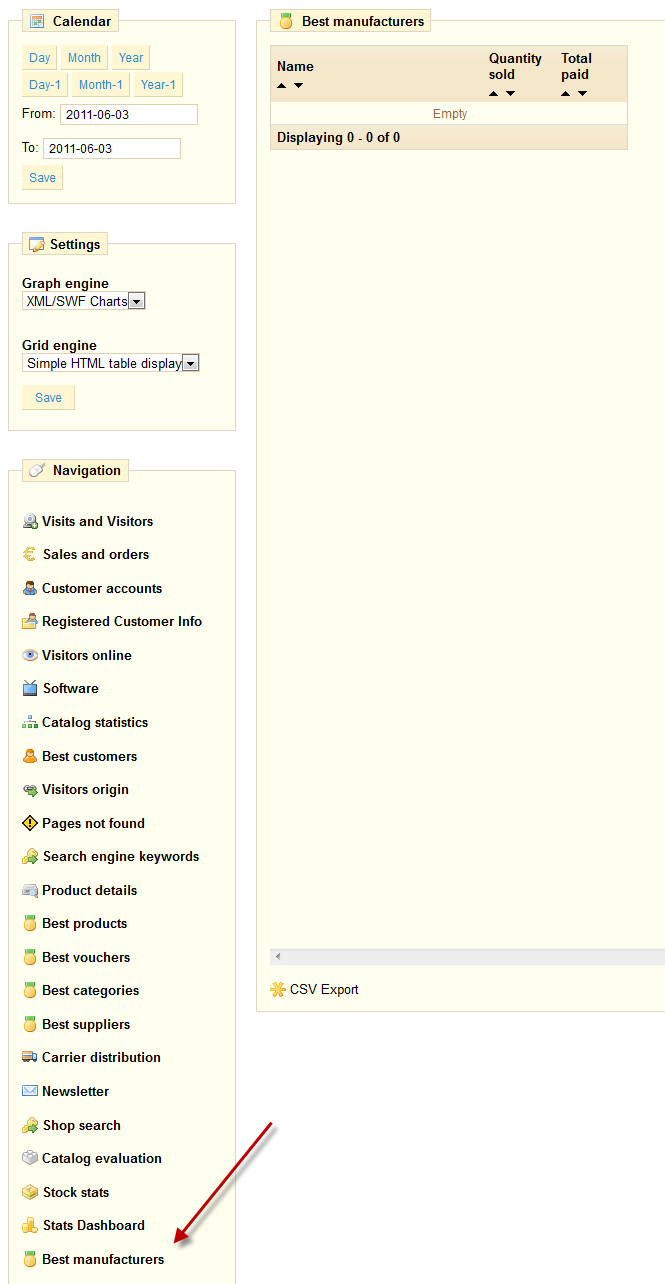
Best manufacturers
This module adds a "Best Manufacturers" link to the list of possible stats.
Geolocation
This module adds a "Geolocation" link to the list of possible stats.
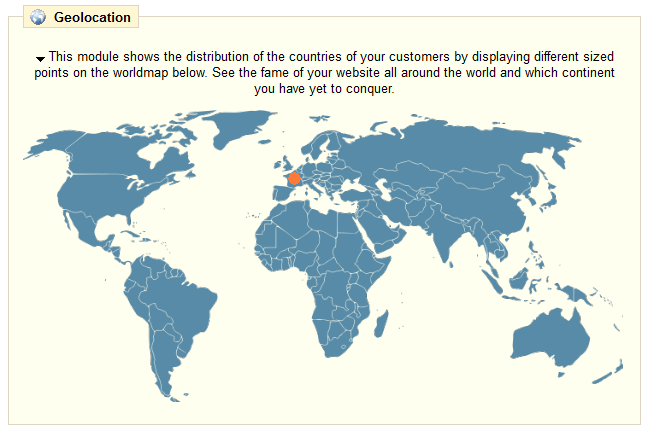
At first launch, you will have to update the location of many of the missing countries (mostly the lesser know ones). This will help the module locate your visitors. Simply click on the country's name, and indicate where it is on the map.
Front Office Features
This section contains 34 modules.
Many of these are installed by default. Therefore, if some of PrestaShop's functionalities are not useful to you, you can disable them here.
Top seller block
Add a block displaying the shop's top sellers.
Cart block
Displays the products that your customers added to their basket. They can then see their basket to change the amount of product they're ordering or delete or add a coupon. The block is presented as follows. By clicking on "Shopping Cart", they see the "Summary Order" of all products added to their basket and their quantity.
Categories block
This feature allows you to display a list of your product categories on your site. To create the categories, consult the section Managing Categories on page 17.
CMS Block
Adds a block with several CMS links.
Currency block
This feature allows your customers to choose which currency will appear in price displays, as well as how the customers will pay for their orders. The block appears in standard currency in the header (top part) of your store (see picture adjoined). To add or configure the currencies go to the "payment / currency" section.
Language block
Choose the languages that you want your store to appear in with the "Language Block" model The languages will appear on your store in the following manner: If you don't want them to appear then uninstall this block.
Layered navigation block
Displays a block with layered navigation filters.
Before using this module for the first time, you have to initialize the cache. Use the module's tool.
Link block
With this module you can add links to the sites you want, or to pages of your store. Click "Install" then "configure" to add links to this block. The page below, divided into three sections, will appear.
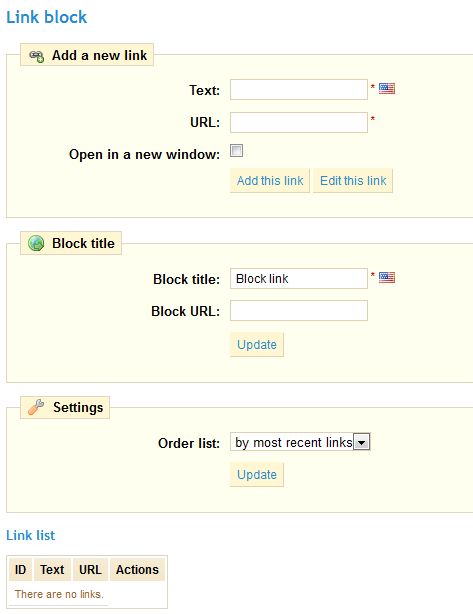
The first section "Add a new link," allows you to specify the link name and URL Enter a link following the form http://www.myprestashop.com
Click "Add this link"
The second section "Block title," is where you add a site name as well as a URL to which visitors will be redirected.
Manufacturers block
Displays a block of manufacturers/brands.
My Account block
Each client must be able to view all of their account data. Here they will find a summary of previously made orders, package tracking, product returns, their addresses (if more than one), coupons etc. Once the client is connected he will see a panel shown in the manner displayed in the adjoining screenshot.
New products block
This block presents recently added products and quickly make them visible. With this option you can create traffic for your new products. You can set the number of visible links by configuring this module.
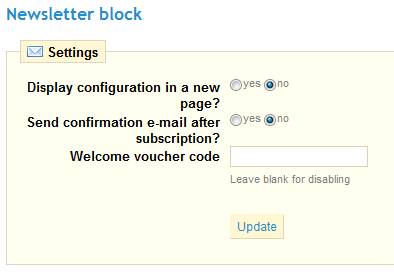
Newsletter block
This block invites your store's visitors to enter their email address to be included in the newsletter.
You can in the configuration set several options For example ‘Send a confirmation email after registration' or ‘send a discount code for each entry'
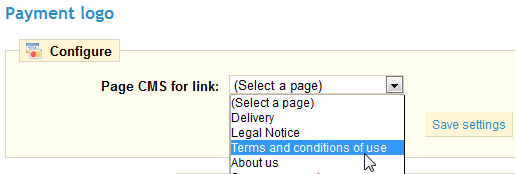
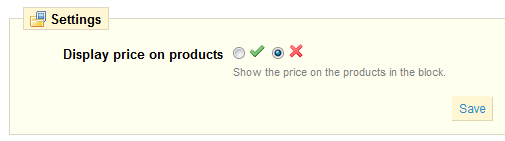
Block payment logo
Adds a block to display all payment logos.
The module's configuration page let's you choose where to display these logos.
Permanent links block
Adds a block that displays permanent links such as sitemap, contact, etc.
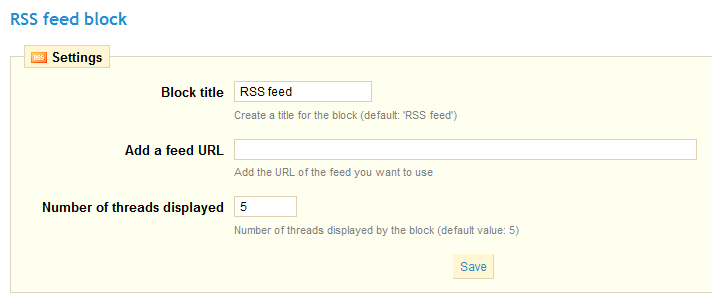
RSS feed block
The RSS feed allows your visitors to stay informed about news from a site that you specify in the field provided in the module configuration. Please do not put your website address in this field- it could create an error. The RSS feed will then appear on the front of your shop in a block. Visitors can sign up for the RSS feed in this block.
Stores block
Displays a block with a link to the store location.
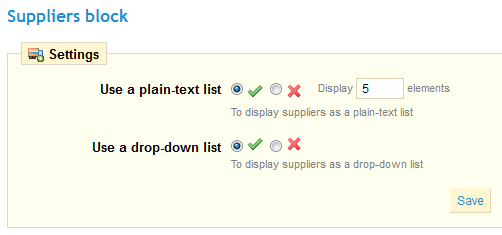
Suppliers block
Adds a block displaying suppliers.
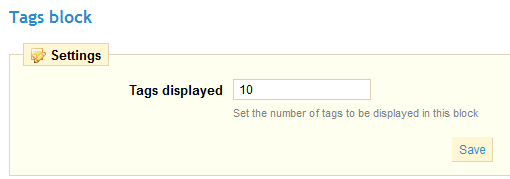
Tags block
This block can slightly improve your store's SEO and make visible the most important words of your shop. Indicate in the module's configuration how many keywords should appear. They will then show up in a block.
User info block
Adds a block that displays information about the customer.
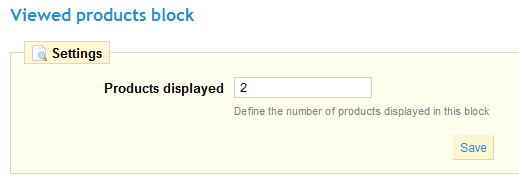
Viewed products block
This block displays the latest products that each customer has consulted. You can set the number of products shown by completing the "products displayed" field.
Wishlist block
With this module your customers can save a wish list that can be sent to many people. Once the module is enabled, the product page will have a new button, "Add to my list." By clicking the button and logging in, you client can add the products to his list. He can always review its contents by going directly into the "My Wishlist" section of his account.
The module's configuration page enables you to view your customers' lists.
Cross Selling
This module displays a "Customers who bought this product also bought..." block.

Home text editor
To adjust your online store's home page click "configure". You will then discover all the fields that you can configure. You can edit each of them in all the languages installed on your shop. To do this, select the language by clicking on the flag next to the field.
The home page image itself may also be modified. To do this click on "Browse" to find the image you want on your computer.
Once you are done, click "Update."
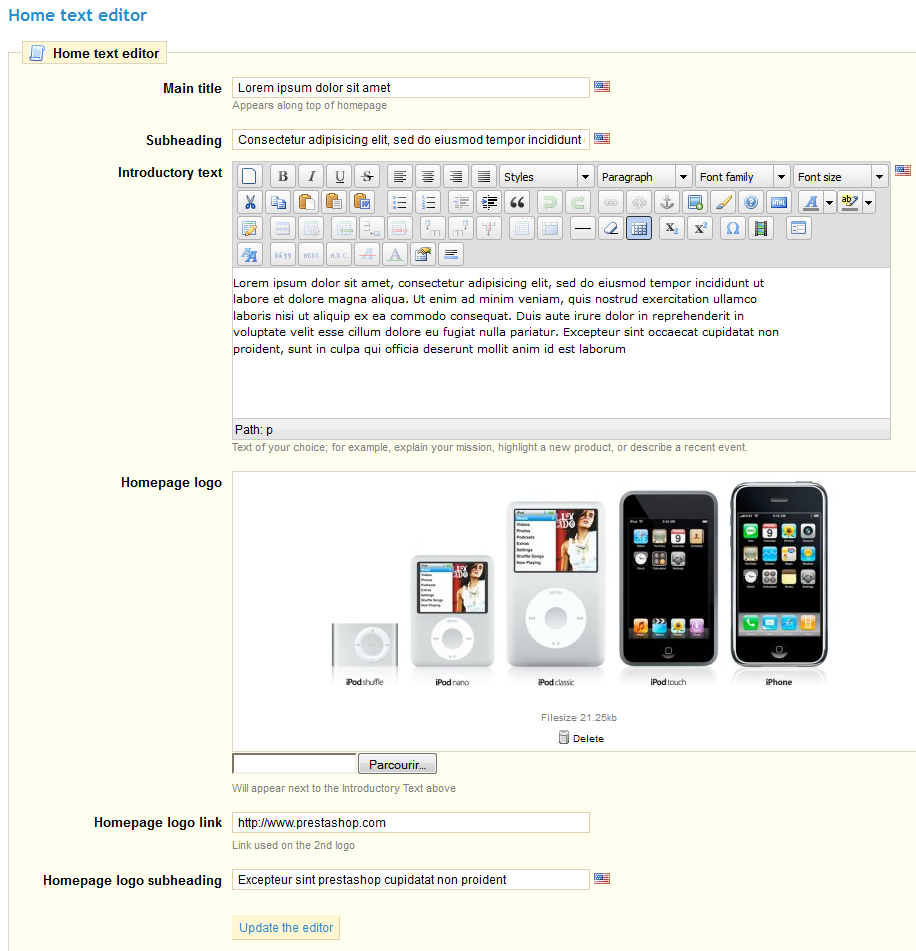
You can now see the new look of your store by going to your homepage.
Note: The homepage is the first image that your visitors experience when they access your store. Remember to make it pleasant and efficient and to update it regularly.

RSS products feed
Permits you to generate an RSS Product Feed on your store, showing the latest products that you have put on line. Regular visitors as well as search engines are very fond of this module.
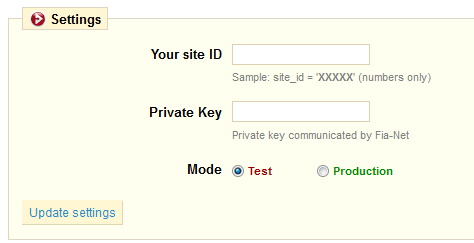
FIA-NET Seal of Confidence
Turn your visitors into buyers by creating confidence in your site.
FIA-NET is a French third-party e-commerce trust partner: it protects both customers and online shops against against credit card frauds and other malevolent activities.
You have to already have a FIA-NET account in order to use the module. Ask for one here. Once you have an account, configure the module with your details.
Featured Products on the homepage
With this module you can choose which products to highlight by placing them on your homepage.
To activate this feature, install the module located in your Back Office and click on "Configure". A page will appear asking how many products you want to show. Enter the value of your choice and click "Save." Now go into the configuration page of a product of your choice by going to the "Catalog" tab. Select "Home" as the category into which the product appears. Validate by clicking on "Save" and you product will appear on your store's home page
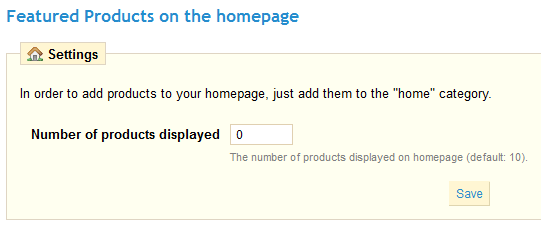
Repeat for all of the products that you want to place on the home page by checking the box marked "Home".
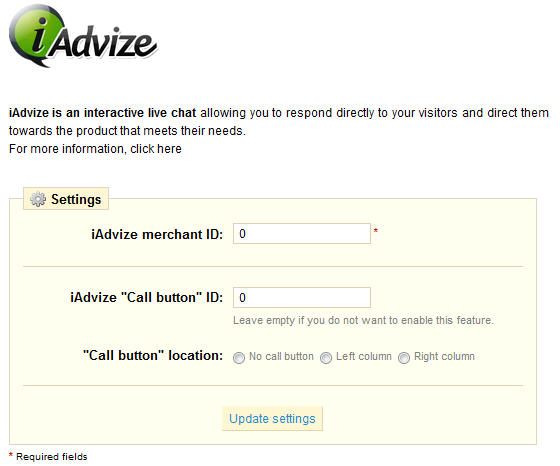
iAdvize
Offer an interactive live chat to your customers.
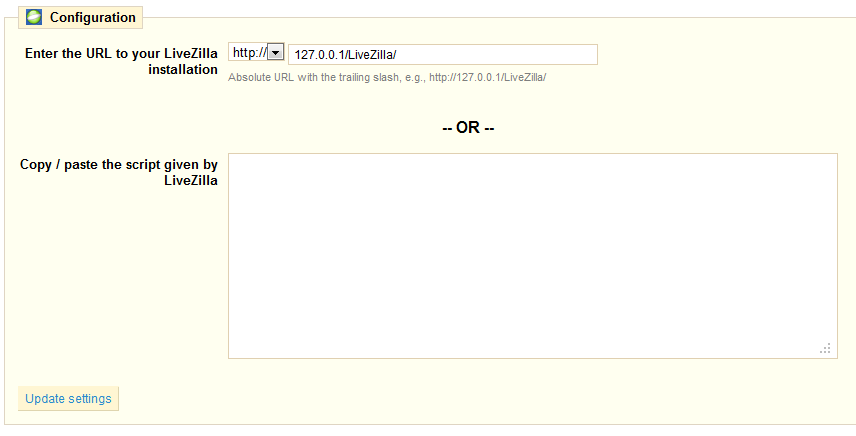
LiveZilla
Live support chat.
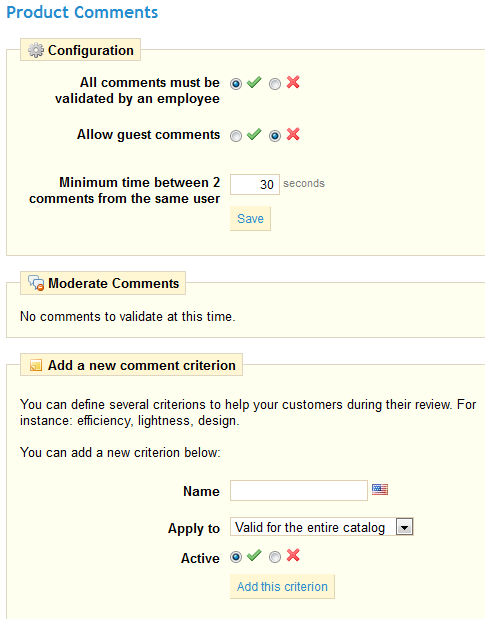
Product Comments
This module gives visitors the possible to leave a message on your product page. They can write it by using a new tab that will add itself to your product page.
Click on "Configure" from your Back Office and you will have the option of validating or rejecting the comments submitted. To validate click on the corresponding green icon; to delete the comment then click on the red icon. If you want your comments to be validated automatically, check the red cross icon in "Validation Required."
Products Category
The "Products Category" module enables you to display on each product page suggestions of other products that are in the same category. This model is particularly useful for discovering what your store has to offer. See the example below.
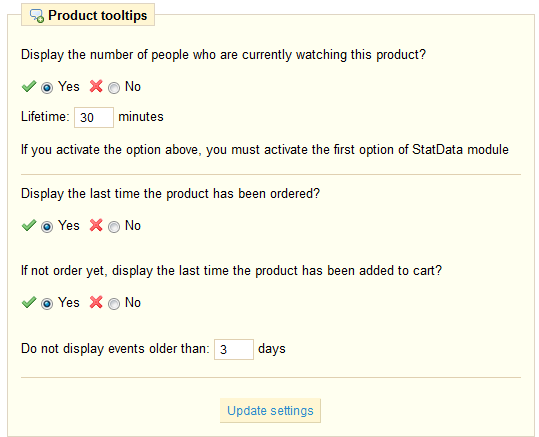
Product tooltips
This model shows information on the behavior of the visitors on the page that you're currently looking at Click on "install" to install this module then on "configure" to set up all of the different possibilities offered. The screenshot below will then appear.
Validate the choices corresponding to the information that you would like to show to your clients. Once you are done click on "Update Settings" to save This information will then be posted in the top right section of your browser.
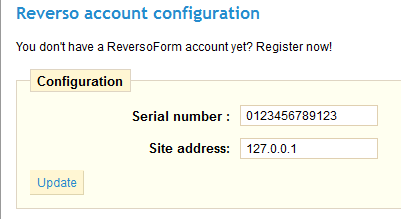
ReversoForm
This module allows your customers to quickly and easily fill in their contact information. Your customers only need to fill in their phone numbers, and then their name, address, zip code, and city will be filled in automatically. This saves your customers time, thus removing the reluctance they may have to create an account. To enable this module just click on "Install" then "Configure". You are asked for your ReversoForm account number (you can get it from the site: http://www.reversoform.com/ and the address of your shop. Once completed click on "Update" to save the settings. Your customers will see a field appear asking for their phone number.
Send to a Friend module
You want to give your customers the opportunity to share your product knowledge. In order to do this install the "send to a friend module t the bottom of your product pages a link will appear with which you can share the product.
By clicking on the link, you are then redirected to a form where you can enter the name and email address of the person with whom you want to share your product. He will then receive the link of the product in question, inviting him to see it.
Treepodia
Cover your entire catalog with product videos in 24 hours.
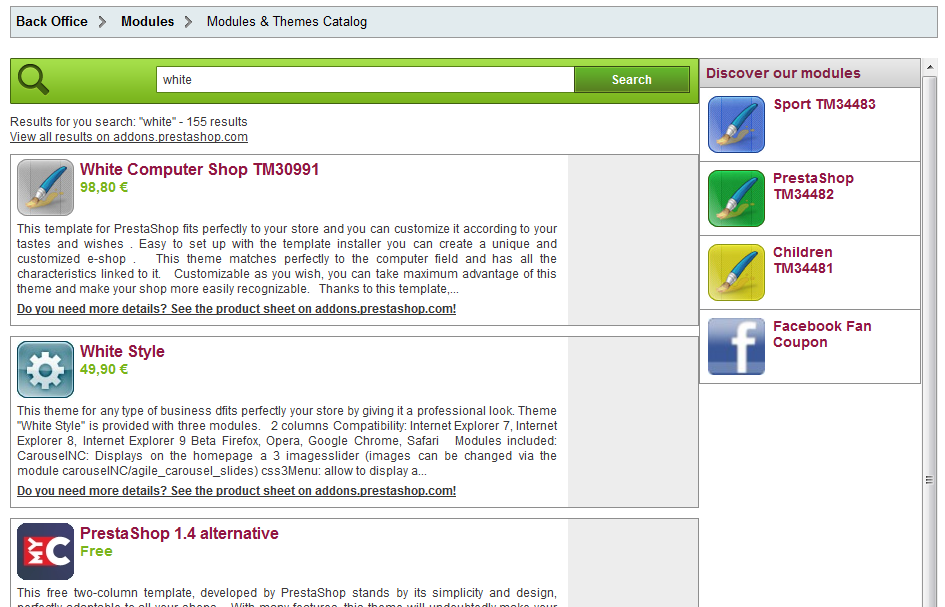
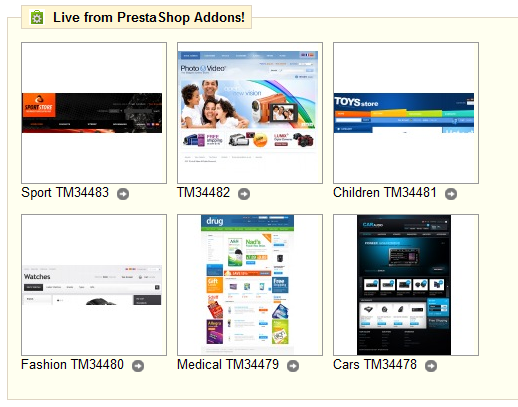
Modules & Themes Catalog
PrestaShop comes bundled with a host of modules, but even that number might seem limiting, or you could want to explore other directions.
There are many more modules available on the PrestaShop Addons website. Some are free, other are for-pay, and you're sure to find something that suits your needs! Once you are a seasoned module developer/theme designer, you can even submit your own creations, and sell them on Addons!
The "Modules & Themes Catalog" gives you a quick and easy access to the Addons database of modules and themes. A search query will return the 5 first results from Addons, with more available if you click on the "View all results on addons.prestashop.com" link.
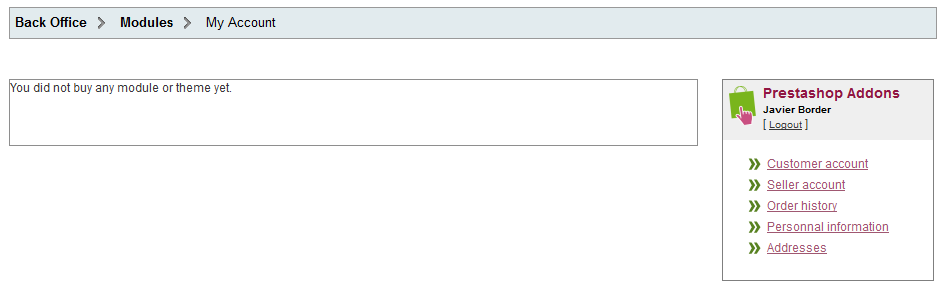
My Account
PrestaShop also enables you to access your Addons account right from the back-office.
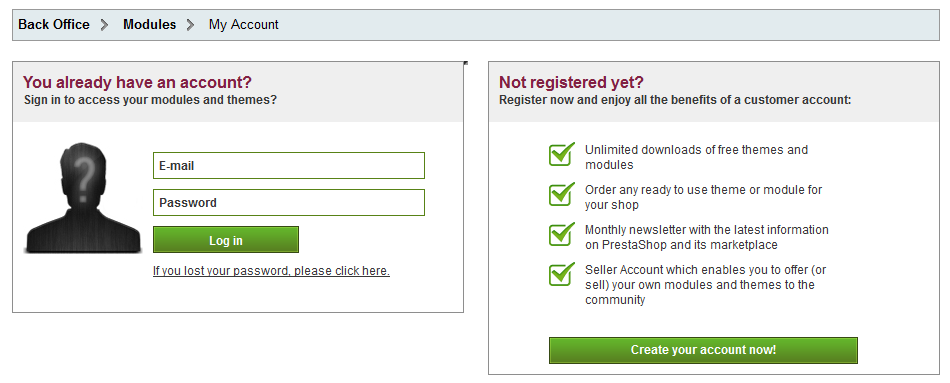
Log-in using the form on the "My Account" sub-tab, and get access to all your Addons details.
Themes
The "Themes" sub-tab enables you to quickly customize the current theme: header logo, mail logo, invoice logo, favicon, store icon and even the navigation pipe can be easily modified from there.
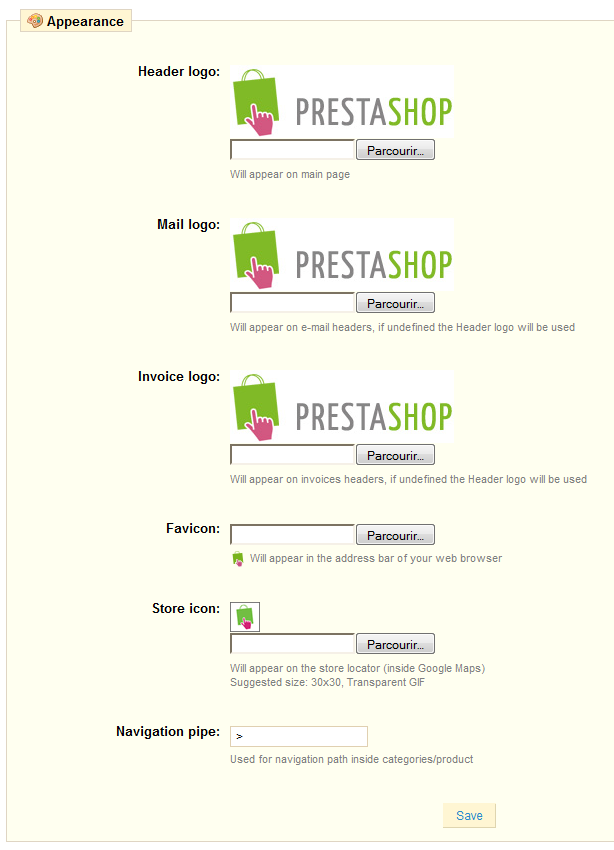
From this sub-tab, you can also choose to use another theme (if you have more than one installed already).
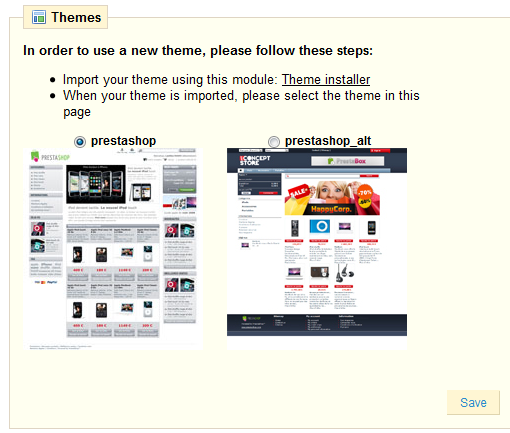
Finally, a section lists the latest themes from the Addons site, and you can click on any of them to reach their page, and possibly download them.
Positions
The order in which modules' front-office interface are displayed can be customized – because you might want one module to be place much higher (or lower) in the page that others. In PrestaShop's jargon, this is called "transplanting", and is done using the tool available under the "Positions" sub-tab for the "Modules" tab. In effect, this enables you to attach a module to one of the many available hooks in the current theme, without writing any code.
The "Positions" home-page displays all the available hooks, and their attached modules.
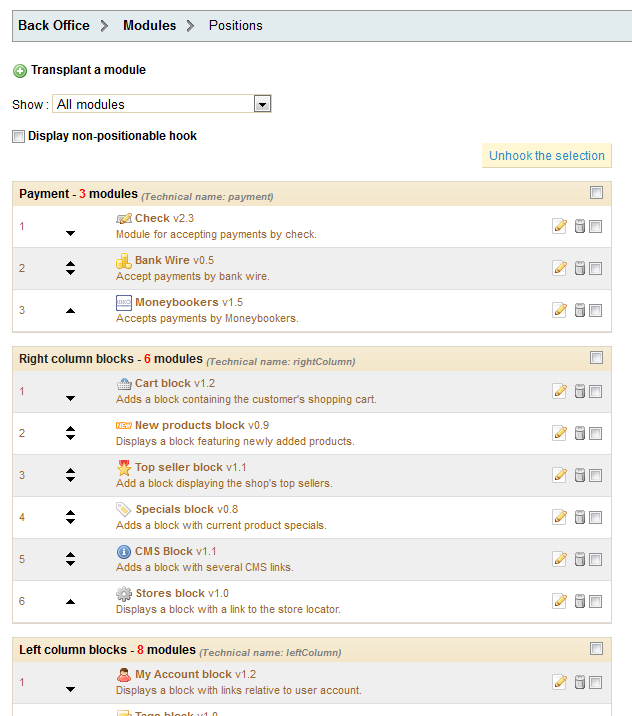
Each hook's table displays the hook's name, its technical name, its number of attached modules, and finally lists the attached modules themselves
For each module, you have access to its position relative to this hook.
Moving a module
You have two ways of moving a module within a hook:
- Click the up or down arrow. The page will reload and display the new order.
- Drag and drop the module's row itself:
- Place the mouse cursor between the moving arrows and the module's name to have it change into a "move item" cursor.
- Click and hold: the row turns orange
- Move the cursor over the row/position where you want the module to be: the module's row changes position accordingly.
- Release the mouse button: the now position for the module is saved.
For most modules, transplantation can easily be done directly via the Back Office. Certain modules require altering the code in order to transplant the module.
Transplanting a module via the back-office
![]()
- Go to the "Modules" tab, and its "Positions" sub-tab.
- Click the "Transplant a module" link.
- In the "Module" drop-down menu, select the module you want to transplant.
- In the "Hook Into" drop-down menu, select where you want to transplant the module to.
- In the "Exceptions" field, type the name of the file(s) of the pages in which you do not want the module to appear.
- Click the "Save" button.
The "Hook Into" drop-down menu gives you a good idea where module can be placed.
Transplanting a module by modifying its code
Some modules cannot be transplanted into other page sections because they lack the necessary code. For example, the Quick Search block contains templates for both column display and header display, while the Currencies block only has one template file which only pertains to the header section. Likewise, the default Featured Products block can only be placed in the center content section of the main page. If you want to move it to a column, you'll have to do the customization yourself.
If you want to display simpler modules such as the Currencies block or the Featured block in a position for which it wasn't built, you'll have to edit its template files.
To customize the transplantation of a module on a hook, you must give it the PHP function for the hook. For example, the Currency block has this function exists:
function hookTop($params)
  {
  ...
  }
In order for instance to transplant the Currency block into the right column, you need to create:
function hookRightColumn($params)
  {
  ...
  }
...and edit its PHP, HTML and CSS code accordingly.
Live Edit
Another way to move modules around on the shop's homepage is the Live Edit mode, which embeds said homepage into a tool that let's you graphically decide where to place your modules. You can access it from the "Position" sub-tab, by clicking the "Run LiveEdit" button.

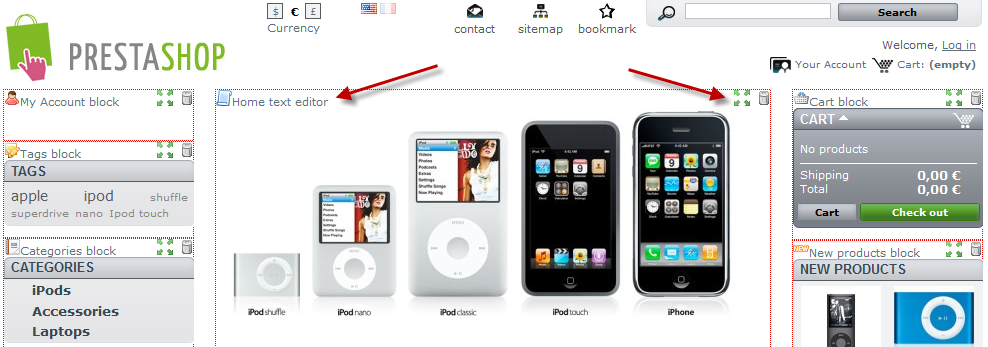
Once clicked, PrestaShop opens the homepage in a new browser windows/tab, with the Live Edit script on top:
- All blocks have a dotted red border, enabling you to see which blocks you can move.
- At their top left side, a block-specific icon appears, along with the block's name, enabling you to always find your way among blocks.
- At their top right side, they have two icons:
- A "move" icon: click on it to start moving the module around.
- A "trash" icon: click it to remove the block from the home.
At the bottom of the Live Edit mode, a row presents you with two buttons: "Save" and "Close Live Edit".

The first one is explicit, the second one cancels all changes you might have made to your modules during this live-editing session. Note that once you have clicked after having removed a module, you'll have to go to the "Positions" sub-tab and use the "Transplant a module" form in order to bring it back.
Where to move modules
Modules cannot be moved just about anywhere: it depends on both the theme's hooks, and each module's hook support (as seen in the above section). Therefore, you mostly can only move modules within their understood context : column modules can be moved within a column as well as from one column to the other (right to left, for instance), while regular homepage modules (the ones at the center) can only be moved within their specific column.
In order to give you a visual hint about where a given module can be moved, it will display an empty green block if the location is correct, and an empty red block if not.