
Reglas de carrito
La página "Reglas de compra (Reglas de carrito)" le da acceso a una herramienta avanzada que sustituye y mejora el sistema de cupones utilizado en PrestaShop 1.4. Los usuarios más experimentados de PrestaShop no se sorprenderán con las funcionalidades que se han añadido, pero tendrán que adaptarse al nuevo nombre: cuando esta guía menciona cupones o vales de descuento, en realidad nos estamos refiriendo a las reglas de compra (reglas de carrito) – que, en sí mismas, son bastante diferentes a los cupones o vales de descuento.
Diferencias entre una nota de crédito, un cupón de descuento y una regla de catálogo
Una nota de crédito es ante todo una prueba por escrito de que un producto ha sido devuelto. La mayoría de las veces, el cliente puede utilizar a ésta como un cupón.
Un cupón es un código de descuento, que no tiene que estar relacionado con una devolución de mercancía o reembolso, y que puede tomar más formas que un simple vale de descuento:
- Un descuento en un pedido (porcentaje).
- Un descuento en un pedido (cantidad).
- Envío gratuito.
Puede aplicar un cupón a todos los clientes, a un grupo de clientes, o a un cliente único; también puede establecer su fecha de caducidad.
Una regla de catálogo es básicamente una versión avanzada de un cupón: en adición a lo que un cupón podía hacer en PrestaShop 1.4, el sistema de reglas de catálogo introducido en PrestaShop 1.5 le permite:
- Darle un nombre al descuento.
- Permitir al cliente utilizar solamente una parte del descuento.
- Asignar prioridades entre las reglas de catálogo.
- Establecer la compatibilidad entre las reglas de catálogo.
- Hacer que el descuento sólo funcione con algunos transportistas.
- Hacer que el descuento sólo funcionen con una selección de productos y/o categorías y/o fabricantes y/o proveedores y/o atributos... ¡o todos al mismo tiempo si es necesario!.
- Hacer que el descuento sea aplicable para envíos gratuitos y/o un descuento en un pedido y/o un regalo... ¡o todos al mismo tiempo si es necesario!.
En esta guía del usuario, una "regla de compra" y un "cupón" son sinónimos e intercambiables.
La página "Reglas de compra" muestra un listado de las reglas de compra existentes en la actualidad, que puede activar o desactivar haciendo clic en el icono disponible en la columna "Estado".

Crear una nueva regla de compra (regla de carrito)
Un cupón puede ser creado de manera automática tras la devolución de un producto, pero también puede crearlo en cualquier momento de forma manual, y especificar con detalle sus propiedades.
El formulario de creación muestra tres pestañas, que le permite, precisamente, construir nuevas reglas y cupones.
Pestaña Información
La primera pestaña, "Información", contiene los identificadores de la regla y sus principales ajustes.
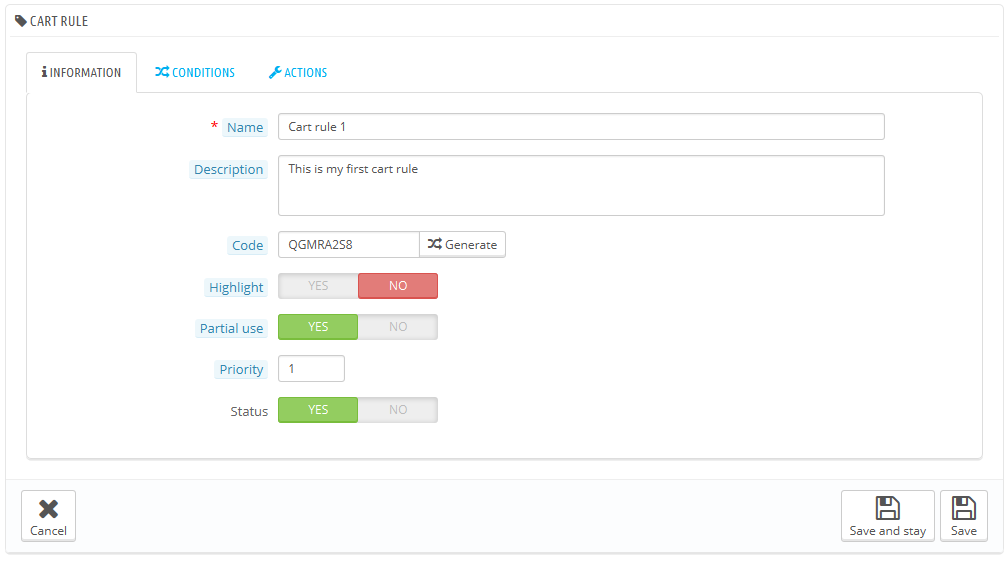
- Nombre. El nombre es público, por lo que debe ser entendible por el cliente.
- Descripción. La descripción no es pública. Esta es de ayuda a los empleados de su tienda para entender por qué se creó la regla.
- Código. Especifíque a su regla un código único. Puede crear uno manualmente (y por lo tanto usar palabras legibles, como 1CUPONPARAJOE), o hacer que PrestaShop genere una cadena única haciendo clic en el botón "Clic para generar un código aleatorio". Por supuesto, también puede utilizar cualquier otro generador de cadenas (como por ejemplo http://www.random.org/strings/).
Tenga en cuenta que si no se establece un código, la regla se aplicará a cualquier cliente que encaje dentro de las otras condiciones:- Si hay un código, entonces el cliente tiene que introducirlo durante el proceso de pedido.
- Si no hay ningún código, entonces l a regla se aplica automáticamente, beneficiando a todos los clientes.
- Highlight. If enabled, PrestaShop will let the user know that a voucher corresponding to the items in the cart is available and can be added.
- Partial use. If disabled, the rule/voucher can only be used once, even if it is not completely used. If enabled, a new voucher is created when the current one is not completely used.
- Priority. If a customer (or group of customers) is eligible for more than one voucher, or if more than one voucher can be applied to an order, then PrestaShop applies said voucher one by one in the alphanumerical order. You can change that order by placing a lower priority to you voucher. By default, they all have a priority of 1. If you set it to a higher number, the voucher will be applied after vouchers with a lower number.
- Status. You can disable and enable a rule whenever you feel is necessary.
Conditions Tab
The second tab, "Conditions", contains a large set of possibilities, enabling you to precisely target who should be able to benefit from this rule.
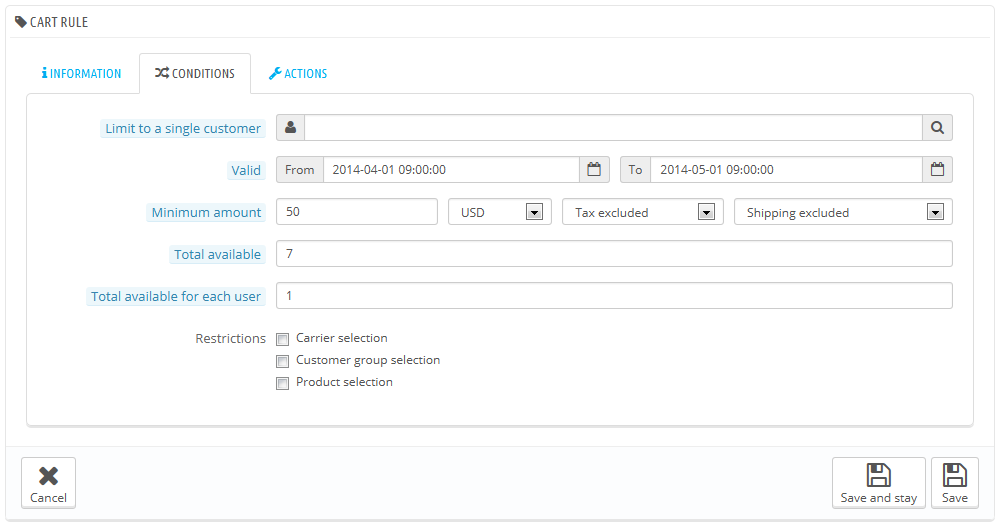
- Limit to a single customer. This is where you indicate that the voucher you are creating is for one customer only. For instance, if you had a delivery delay and you want to make a gesture of goodwill, you can create a voucher for this customer that only he or she can access. To quickly find the customer, type in the first few letters of their first name, last name or e-mail in the text field.
If empty, PrestaShop will understand than any customer can use it... unless you have added a customer group as a further condition (see "Customer group selection" check-box below). - Validity. The default validity is one month, but you can reduce that to one week or even one day.
- Minimum amount. The minimum order amount from which the voucher is applicable. Your voucher will only be applicable if the customer's order is above the given amount. You can choose if that amount should include taxes and/or shipping costs.
- Total available. Set a quantity of available vouchers: either "1" if it is intended for a single customer, or any number if the voucher is for whoever uses one first.
- Total available for each user. You can set the number of times a voucher can be used for each user. That number must be at least equal to the quantity of available vouchers above ("Total available" field).
- If that number is inferior to the total quantity of available vouchers, then one single customer will not be able to use all of them.
- Keeping it to "1" makes sure that each of your customers can only use the voucher once. In that case, make sure the voucher applies to a group rather than a customer...
The check-boxes at the bottom of the section are very important, as they help you further filter to what or to whom the rule is to be applied.
- Carrier selection. You can make it so that the customer will have a discount if he or she chooses a specific carrier for the package delivery.
- Customer group selection. This is very useful. Thanks to PrestaShop's group creation tool, you can create discount that apply to a range of users, and build other conditions on top of that discount thanks to the cart rule creation tool.
- Compatibility with other cart rules. By default, an order can benefit from any number of cart rules. With this option, you can tell PrestaShop that this rule cannot be combined with a selection of other rules. This option only appears if you have more than one cart rule.
- Product selection. Another very useful tool, which enables to create automatic vouchers for cart which contain specific products. The tool is explained in more detail below.
- Shop selection. By default, a cart rule applies to all your stores. With this option, you can make it so that rule only applies to a selection of your stores.
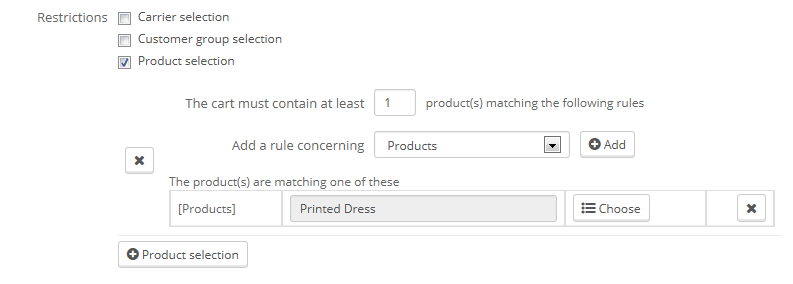
The "Product selection" option brings a whole new form, and enables you to create not only per-product vouchers, by also per-categories, per-manufacturers, per-suppliers and even per-attribute. As a bonus, you can combine all these in order to specify your customer target as much as possible.
For instance, you can create automatic vouchers for your customer in the form "Buy at least 3 Apple product, get free shipping!"
This is really a tool within the cart rule too, and its configuration is quite specific. You can add as many product selections as needed, following this path:
- Click the "Product selection" link to add a new section.
- Indicate the number of products needed for the discount to activate.
- Add at least one rule, of the type you want: products, attributes, categories, manufacturers, suppliers. You can add as many rules per product selection as you want, even one for each type if necessary.
- Clicking the "OK" adds a new line in the selection. For each type, you must give details on the content the rule applies to. Click the "Choose" link and a window opens, listing the content available for this type (products, categories...). Move the content from the left panel to the right one by clicking on the "Add" button, and close the window by clicking on the "X" at the top right. If only one content is selected, the content field will give its name; otherwise, it will indicate the number of selected content.
You can add as many rules within a selection as necessary. These rules are cumulative: either they all apply, or the discount is not granted.
Product selections are independent: you can add as many as needed, and they will not influence each other. This enables you to create a whole range of products to which the cart rule will apply.
Actions Tab
The third and last tab, "Actions", is where you choose what the discount actually consists of.
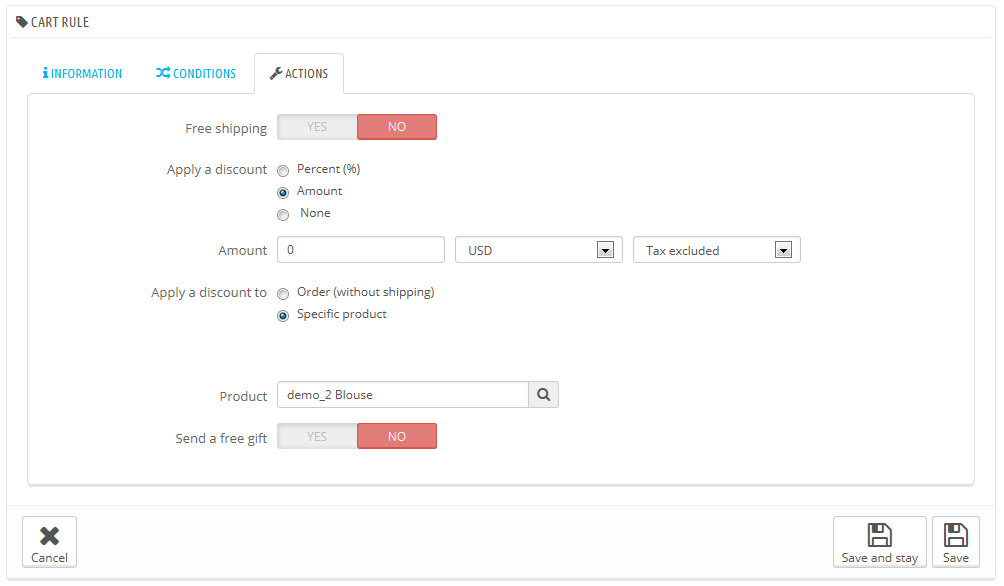
- Free shipping. The rule treats benefiting customers to free shipping.
- Apply a discount.
- Percent (%). The rule applies to a percentage of the order total. For instance, let's say the order is valued at $200 before taxes. The rule has a value of 15%. Customer who benefit from this rule will only have to pay $170 (before taxes and shipping costs).
- Amount. The rule applies a monetary discount on the order total. For instance, let's say the order is valued at $200 before taxes. The discount offers $20 off the purchase. Customer who benefit from this rule will only pay $80 before (before shipping costs). You can choose whether taxes are applied to the discount or not.
- None. The rule does not offer any discount on the order. Choosing this option makes the next section, "Apply discount to", disappear.
- Apply discount to.
- Order (without shipping). The discount applies to the whole order.
- Specific product. You can choose to which product the discount should apply: type the first letters of the product, and choose in the list of matching names.
- Cheapest product. Only available for the "Percent (%)" option.
- Selected product(s). The customer can choose on which products the discount should be applied. Only available for the "Percent (%)" option.
- Send a free gift. You can choose to offer a gift for some conditions (and skip the discount altogether). A field appears: type the first letters of the product, and choose in the list of matching names.
Once everything has been saved, you can send your voucher code to your customers, or let the system handle the cart rules automatically, depending on your settings.
Your voucher will appear in the "Cart Rules" page, under the "Price rules" menu. You can delete or edit it at any time. If the voucher was set to a specific group or customer, then it will appear in the Front-Office, in the customer's "Vouchers" section of his account as well as in the cart (if you chose to), where they can choose which one to apply to their order.
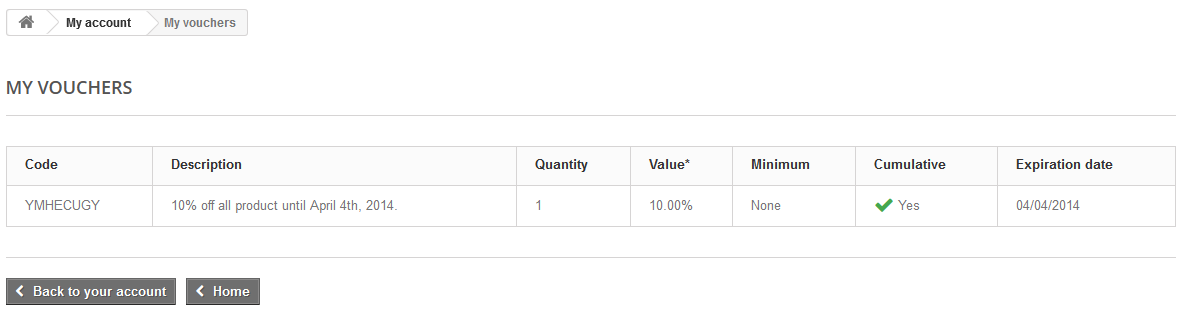
Cart rules that are set to apply to all customers do not appear in the customer's "My vouchers" page: he or she has to know about them in order to use them. It is up to you to let them know about these public discounts.
In order to apply the cart rule, the customer needs to visit his cart and enter the voucher in the "Vouchers" field and click "Add". The customer will not be able to apply the voucher if the check-out is already validated.

Once applied, the cart summary displays the voucher's impact on the order's amount.
