PrestaShop le proporciona una completa herramienta de traducción para su tienda. Esta le permite añadir y editar las traducciones de sus páginas. De esta manera, usted es realmente el dueño de su tienda, y puede gestionar las cadenas de traducción sin tener que esperar a que los traductores oficiales publiquen correcciones.
Incluso si no desea corregir el trabajo de los traductores, es posible que quiera cambiar el estilo que ellos utilizaron (menos formal, menos prolijo, etc.), y personalizar los diferentes textos disponibles, adaptando así su sitio web a sus clientes; por ejemplo, una tienda de ropa hip-hop podría utilizar expresiones diferentes de la de una tienda de relojes de lujo.
El proceso de adaptar un programa a una lengua extranjeras es llamado internacionalización y localización, o por sus siglas i18n y L10n. El equipo de PrestaShop ha optado por utilizar su propia herramienta integrada de traducción, de manera que cualquier persona puede personalizar su tienda conforme a sus necesidades. |
La herramienta más importante de la página "Traducciones" se encuentra en la sección "Modificar traducciones". Aquí es donde puede editar una traducción, y personalizar completamente todas y cada una de las cadenas de texto, si así lo desea.

Seleccione la sección de la traducción que desea editar:
Si está buscando una expresión específica en las secciones "Panel de Administración", "Tema" o "Plantillas de los correos electrónicos", pero no puede encontrarla, podría encontrarse en la sección "Otras traducciones". |
Algunas categorías tienen una segunda lista desplegable, la cual lista los temas disponibles. Los temas PrestaShop tienen sus propias cadenas, así como también pueden tener sus propios módulos, plantillas PDF y plantillas de correo electrónico. Esta lista desplegable le permite elegir el tema que desea editar.
Una vez realizada su selección, haga clic en la bandera del idioma para el que desea cambiar la traducción.
Una larga página se mostrará en pantalla. Ésta contiene los cientos de cadenas disponibles para esa categoría, a veces dividido en decenas de un grupo de campos.
En la parte superior de la página, hay una barra de búsqueda que le ayudará a encontrar una palabra, frase o expresión específica que podría querer modificar o traducir. A la derecha, se indica el número de expresiones disponibles en esta sección, y cuántas de estas cadenas de texto aún no han sido traducidas, en el idioma seleccionado.

Introduzca la expresión buscada y haga clic en "Buscar" para encontrarla.
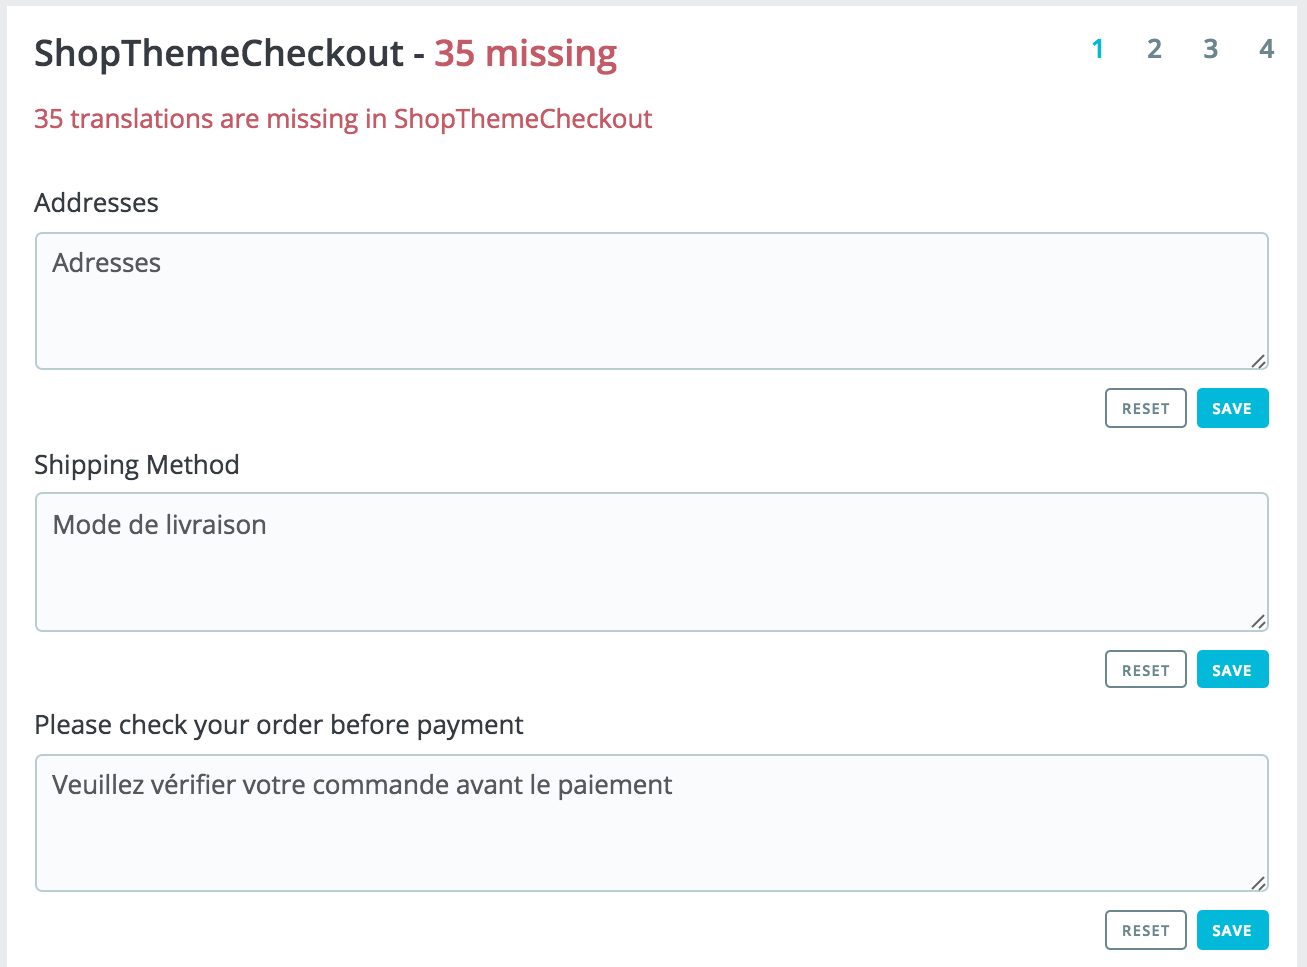
A continuación se muestran las expresiones que coinciden con su búsqueda. Puede modificarlas o traducirlas y hacer clic en "Guardar" para guardar los cambios. Al hacer clic en "Reinicializar" se reemplazará la traducción personalizada por las traducciones oficiales de PrestaShop: restaure la traducción inicial si hay una traducción disponible, o deje vacío el campo si no hay traducción disponible.

La columna de la izquierda está disponible para ayudarle a navegar a través de las diferentes cadenas disponibles en la categoría que quiera traducir o modificar. Ésta se basa en lo que llamamos dominios de traducción: cada expresión dentro de PrestaShop es asignada a un dominio, proporcionando a los traductores un mayor contexto, lo que hace posible saber dónde se muestra esta expresión en PrestaShop, y para qué se utiliza.
Para la sección de back office y front office, verá dos dominios principales, siendo el segundo el de módulos. Este segundo dominio destinado a los módulos está disponible de manera independiente del primero, debido a que los módulos tienen contenido que pueden ser mostrados tanto en en el panel de administración como en el front office, por lo que estas expresiones permiten traducir las cadenas que se muestran tanto en el panel de administración como en el front office.
Al lado de cada dominio, se muestra el número de expresiones que faltan. Esta información, le ayuda a saber dónde debe centrarse si desea traducir completamente PrestaShop.
Para ver las expresiones de un dominio, haga clic en su nombre: verá todas las expresiones a la derecha.
Aunque al principio puede parecer complicado navegar por los dominios de las traducciones, comprenderá en poco tiempo cómo funciona, y hallará la manera de encontrar lo que busca a través del árbol del dominio. Each section (back office or theme) is further divided into functional domains, matching each sections of the back office (or theme).
For example, for the back office, the following domains correspond to their matching pages in the interface:
These domains can have several sublevels: Feature, Notification, and Help. It means the following:
On the other side, some domains are more generic:
The same logic can be applied to the theme translations:
|
When you open a domain to see all its strings, you can then modify existing translations, or fill out missing ones.
Clicking "Save" will logically save your changes.
Clicking "Reset" will replace your custom translation by the official PrestaShop translations: it either restores the initial translation if a translation was available or empties the field if no translation was available.

Some strings use a special syntax with placeholders, such as When you find a string with such placeholder, it means that PrestaShop will replace it with an actual dynamic value before displaying the translated string. Technically, having placeholders prevents strings from being split in parts. |
In case of a string with a placeholder, you should make sure that the content of that placeholder will be placed in the correct flow of the sentence, and avoid literal translation.
Numbered placeholders (%1$s, %2$d, etc.) enable translators to rearrange the order of the placeholders in the string while maintaining the information each is replaced with. This way, a French translator could choose to translate "Order #%1$d from %2$s" into "Commande n°%1$s du %2$s" or "Le %2$s, commande n°%1$s".

When you wish to translate a specific module, choose "Installed modules translations", then select the one module you want to edit. It will open a new page with the content from this module, and all its available strings.
| Depending on the module you are looking at, the interface could be different. Some modules are using a translation system specific to 1.7, while others are still using the former system from 1.6 version. In the end it doesn't change anything for you, as you will be able to translate your modules just the same. |
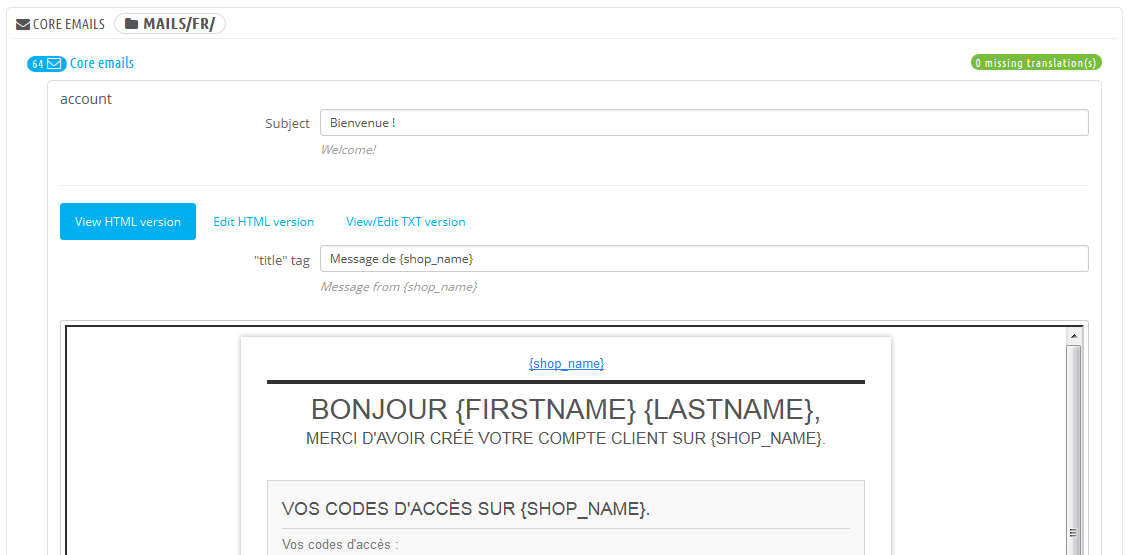
The way email templates translations are handled is a bit different from the other translations.
Strings are split into fieldsets, but they are not simple text fields anymore. Each e-mail has two templates: a HTML one, which is styled and colored, and a text one, when is plain and simple. While the plain text one can be edited directly in the textfield, the HTML one can only be edited by clicking on the "Edit this e-mail template" button at the bottom of the preview. That click turns the preview into a WYSIWYG textfield (what you see is what you get), with a complete editor at the top (based on TinyMCE: http://www.tinymce.com/). In addition to editing the text, you can change the design as you see fit, for instance you can change the colors in order to adhere to your shop's design.
Note that the e-mail templates feature placeholders, such as {lastname} or {shop_name}, which PrestaShop replaces with the actual values when sending the e-mail. Make sure to keep them in both your translation.

PrestaShop translations are available in packs, which combine all the different translation categories into a zip file. Many language packs are available freely for you to download and install, directly from the PrestaShop servers. PrestaShop will take care of downloading the language pack, unpacking it and creating the correct sub-folder in your installation's /translation folder.

You can then manage the new language in the "Languages" page of the "Localization" menu.
In the case where you do not want to use an official PrestaShop translation pack, but rather a custom one (either provided by someone you know, or one that you exported from another PrestaShop installation), then this tool is for you.

Select the Zip file, select the theme to which you want that pack to be applied to, then click the "Import" button, and it will install the pack in the /translation folder.
If there is already a language folder with the same ISO 639-1 code, it will be replaced by the files from the pack you are importing. |
You can create your own language pack using this tool, either as a way of making a backup of your customizations, or in order to share your translations with other PrestaShop installation – your own or someone else's.

Simply choose the language and the theme of the translation you wish to export, and click the "Export" button.
Note that the pack will contain the theme that your translation is supposed to support.
You can copy the content of one language to another. This is especially useful when you wish to replace a theme's language with the same language from another theme.

Choose the source language and theme, then the destination language and theme, then click the "Copy" button. In most case, the language should remain the same in both drop-down lists.
If there is already a language folder for this language in the destination theme, it will be replaced by the files from the language and theme you are copying. You might prefer to first create a new language for the destination theme before copying the source language to it. |