
Inhoudsopgave
Automatisch bijwerken
PrestaShop's automatische update-tool maakt het mogelijk voor webwinkeleigenaren zonder technische kennis om hun eigen site bij te werken in slechts een paar klikken.
De 1-Click Upgrade module zou standaard beschikbaar moeten zijn op de "Module"-pagina (onder de categorie: "Administratie"): klik op de "Installeer"-knop en PrestaShop wordt bijgewerkt.
Werk uw winkel nooit zomaar bij. De automatische tool waarmee PrestaShop bijgewerkt kan worden kan in sommige situaties falen en mogelijk kunt u dan ook nog eens niet meer herstellen naar een vorige versie.
Het veiligst is om een exacte kopie van u winkel beschikbaar te hebben. Dat kan lokaal op uw eigen computer zijn of ergens op de webserver. Het moet al uw producten, categoriën, thema's, modules, vertalingen, instellingen, etc. bevatten.
Probeer een proefupgrade uit te voeren op die kopie. Als het lukt om te upgraden, controleer dan uw front en back office om te kijken of alles nog werkt zoals verwacht. Als dat niet het geval is, dan heeft de upgradetool problemen met uw configuratie en heeft u de handmatige methode nodig, welke helaas niet meer ondersteund wordt en langer duurt, maar kan in uw situatie toch van pas komen.
Downloaden en installeren van de 1-Click Upgrade module
Als de 1-Click Upgrade module niet beschikbaar is in uw installatie van PrestaShop 1.4, 1.5 of 1.6, dan kunt u deze gratis downloaden vanaf the Addons website.
Zelfs als u al de "1-Click upgrade" module hebt geïnstalleerd, zorg er dan alsnog voor dat u beschikt over de meest recente versie:
- PrestaShop 1.4: Controleer het versienummer in het "Modules"-tabblad, vergelijk deze met het versienummer op de Addons site. Als de versienummers verschillen, download dan de versie vanaf Addons en werk de module bij.
- De module bijwerken gaat als volgt: deïnstalleer de oude versie en verwijder deze daarna, kopieer daarna de "/autoupgrade" map uit het zip-bestand van de module (deze wordt geleverd door de Addons website), kopieerd deze map naar de "/modules" map van uw PrestaShop-installatie. Als laatste installeert u de module weer in uw administratiepaneel.
- PrestaShop 1.5: PrestaShop controleert automatisch via de Addons website of u over de meest recente versie beschikt. Als er een nieuwe versie beschikbaar is, dan verschijnt de tekst "Bijwerken" naast de knop "Installeren/Deïnstalleren" van de module. Als u op de bijwerkknop klikt, dan download PrestaShop zelf de meest recente versie en werkt het de module bij.
- PrestaShop 1.6 en nieuwer: PrestaShop controleert automatisch via de Addons website of u over de meest recente versie beschikt. Als er een nieuwe versie beschikbaar is, dan verschijnt de tekst "Bijwerken" op de configuratieknop van de module. Als u op de bijwerkknop klikt, dan download PrestaShop zelf de meest recente versie en werkt het de module bij.
Volg simpelweg de normale manier om een module te installeren in PrestaShop:
- Download de 1-Click Upgrade module vanaf PrestaShop Addons: http://addons.prestashop.com/nl/administration-tools/5496-autoupgrade.html. Bewaar het zip-bestand op uw bureaublad of andere locatie naar keuze.
- Ga naar de "Modules" pagina in uw back office.
Klik op "Nieuwe module toevoegen", deze knop is boven de modulelijst te vinden.
Wanneer u update vanaf versie 1.4, klik dan op de link "Module toevoegen vanaf mijn computer", deze link is linksboven te vinden.
- Klik op de knop "Kies een bestand" in het formulier dat nu opent ga zoek het zip-bestand van de module die zojuist hebt gedownload.
- Klik op de knop "Upload deze module". PrestaShop pakt de module automatisch en voegt deze toe aan de
/modulesmap.
De module is nu beschikbaar in uw modulelijst, maar u moet het nog wel installeren:
- Type "autoupgrade" in de zoekbox van de modulelijst (niet de globale zoekfunctie linksboven).
- De module zou nu in de modulelijst moeten verschijnen.
- Klik op de knop "Installeren" van de module.
De module is nu gereed om te configureren en te gebruiken.
Het configuratiescherm van de module
Het configuratiescherm van de module is nu bereikbaar vanaf de modulelijst, door op de knop "Configureren" te klikken.
Het configuratiescherm is ook beschikbaar vanaf:
- PrestaShop 1.4: onder de tab "Gereedschap", onder de "1-Click Upgrade" tab.
- PrestaShop 1.5, 1.6 en nieuwer: onder "Geavanceerder instellingen/Geavanceerde parameters" en dan "1-Click Upgrade".
Het configuratiescherm toont een aantal onderdelen met informatie, tools en instelligen.
Welkom
Deze kleine sectie bevat een reminder om aan te geven dat een upgrade nooit 100% veilig kan zijn en dat het daarom verstandig is dat u een complete backup maakt van uw bestanden en data. Op deze manier, mocht de upgrade mislukken, kunt u alsnog de winkel herstellen - alhoewel er wel enig werk bij komt kijken.
Dit proces wordt in detail omschreven in hoofdstuk Backups aanmaken en terugzetten.
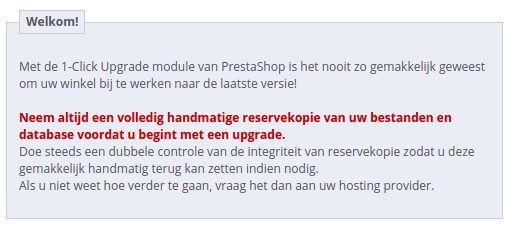
Noot: de 1-Click upgrade module maakt zelf ook een backup om ervoor te zorgen dat de gehele upgrade ongedaan gemaakt kan worden. Toch kunt u beter vertrouwen op uw eigen backups.
De checklist voor het bijwerken
De sectie "checklist voor het bijwerken" geeft u nuttige informatie over uw huidige PrestaShop-installatie en of het upgradeproces kan worden uitgevoerd.
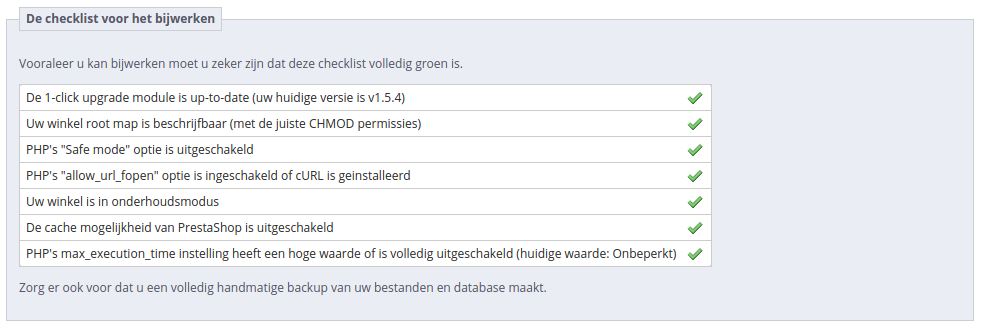
U moet er zeker van zijn dat aan alle eisen op de lijst is voldaan voordat u verder kunt gaan met de upgrade.
- De 1-click upgrade module is up-to-date (uw huidige versie is x.x). Dit geeft aan of u de module zelf nog moet bijwerken. Als u zojuist de upgrade-module hebt geïnstalleerd dan is de kans klein dat deze nog moet worden bijgewerkt.
PrestaShop 1.4 - Als u niet de meest recente versie van de module hebt, dan verschijnt een knop onder dit veld, met de tekst "Installeer de laatste versie door te klikken op 'Toevoegen vanaf mijn pc'". Als u hierop klikt wordt u naar de "Modules"-pagina geleid. Vanaf hier kunt u op de knop "Nieuwe module toevoegen" klikken om het vooraf ingevulde formulier te openen. Klik op "Deze module downloaden" om de module bij te werken. Ga hierna weer terug naar de configuratiepagina van de module om te controleren of aan dit item op de checklist is voldaan.
PrestaShop 1.5/1.6 - Als u niet de meest recente versie van de module hebt, dan verschijnen er twee links naast dit veld, met de tekst "Bijwerken" en "Downloaden". Als u kiest voor bijwerken, dan wordt deze module automatisch bijgewerkt. Kiest u voor "Downloaden" dan volgt u het stappenplan onder "Downloaden en installeren van de 1-Click Upgrade module". Ga hierna weer terug naar de configuratiepagina van de module om te controleren of aan dit item op de checklist is voldaan. - Uw winkel root map is beschrijfbaar (met de juiste CHMOD permissies). Dit geeft aan of de toegangsrechten juist zijn ingesteld. Is dit niet het geval, dan moet u dit corrigeren met uw FTP-client.
Bekijk de sectie Stap 3 & 4: Systeemcompatibiliteit & winkelinformatie uit het hoofdstuk PrestaShop installeren. - PHP's "Safe mode" optie is uitgeschakeld.
- PHP's "allow_url_fopen" optie is ingeschakeld of cURL is geïnstalleerd.
- Uw winkel is in onderhoudsmodus. Dit geeft aan of uw winkel nog actief is of in onderhoudsmodus staat. U moet uw winkel in onderhoudsmodus zetten gedurende het gehele updateproces (reservekopie maken van bestanden, reservekopie van database, automatisch bijwerken, verificatie). Dit is om te voorkomen dat u gedurende het proces geen bestellingen verliest (en uiteindelijk klanten). De module kan voor u de winkel in onderhoudsmodus zetten. Klik op de knop met de tekst "Klik hier om uw winkel in onderhoudsmodus te plaatsen". U kunt zelf ook de winkel in onderhoudsmodus zetten via de gebruikelijke configuratiepagina.
- PrestaShop 1.4: in-/uitschakelen van de winkel op de pagina "Instellingen".
- PrestaShop 1.5/1.6 en nieuwer: in-/uitschakelen van de winkel op de pagina "Onderhoud" onder het "Instellingen"-menu.
- De cache mogelijkheid van PrestaShop is uitgeschakeld. Dit geeft aan het of cachingmechanisme van PrestaShop is uitgeschakeld. U moet caching uitgeschakeld houden gedurende het upgradeproces. De module kan caching voor u niet uitschakelen.
- PrestaShop 1.4: in-/uitschakelen van de cache kan op de pagina "Prestaties" onder het "Instellingen"-menu.
- PrestaShop 1.5/1.6 en nieuwer: in-/uitschakelen van de cache kan op de pagina "Instellingen" onder het menu "Geavanceerde parameters/Geavanceerde instellingen".
- PHP's max_execution_time instelling heft een hoge waarde of is volledig uitgeschakeld (huidige waarde: xxx). Het automatisch bijwerken van PrestaShop is een langdurig proces, omdat de module het archief moet downloaden van prestashop.com, deze moet uitpakken en daarna de update zelf moet uitvoeren. Als deze waarde te laag is, dan kan het proces worden onderbroken en blijft u over met een beschadigde winkel. In het beste geval ziet u "Onbeperkt" staan.
Al deze indicatoren moeten groen zijn, anders verschijnt de knop "Werk PrestaShopo nu bij!" niet.
Wanneer de winkel is gehost op uw eigen lokale server (http://localhost of http://127.0.0.1), dan begrijpt de auto-upgrade module dat onderhoudsmodus niet is vereist, omdat niemand anders, behalve u, de site kan bereiken. Daarom, zelfs als de winkel zich niet in onderhoudsmodus bevindt, kan het zijn dat dit item alsnog wordt goedgekeurd.
De upgrade starten
Dit gedeelte vergelijkt uw huidige versie van PrestaShop met de meeste recente stabiele versie. U kunt in een ogenblik zien of u moet updaten of niet. Als u weet dat er een nieuwere versie is dan hetgeen wordt getoond, dan kunt u een versiecontrole laten uitvoeren door te klikken op "Kijk na of er een nieuwe versie is".
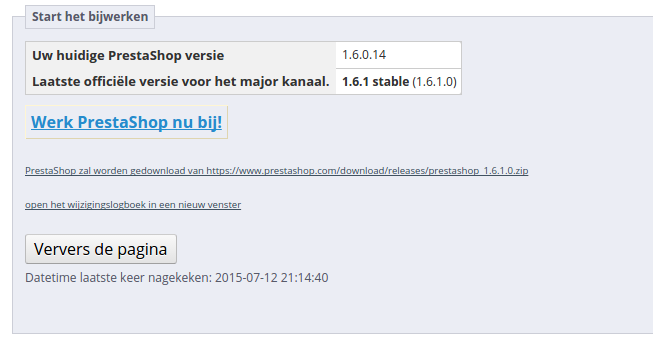
Standaard is de updatetool ingesteld om uw winkel bij te werken naar de volgende kleine release. Dit betekend dat als u een versie van de 1.4.x branch gebruikt, het niet meteen de meest recente 1.6.x. versie zal tonen, maar eerder de laatste versie van 1.4.x. Als u wilt upgraden naar de meest recente versie van 1.6.x. vanuit 1.4.x. dan moet u klikken op de knop "Meer opties (Expert mode)", waar u het kanaal kunt aanpassen.
Dit is ook erg handig als u wilt controleren op een andere versie dan de stabiele (bijvoorbeeld beta, RC of een andere onstabiele versie).
Voordat u de upgrade start, moet u zeker zijn dat u begrijpt wat er is ingesteld. De secties "Reservekopie opties" en "Upgrade opties" zijn beschikbaar aan de onderkant van de pagina (en worden verder in dit hoofdstuk omschreven). Zorg ervoor dat u ze allemaal begrijpt.
Expert mode
Deze sectie zorgt ervoor dat u precies kunt aangeven naar welke versie u PrestaShop wilt bijwerken.
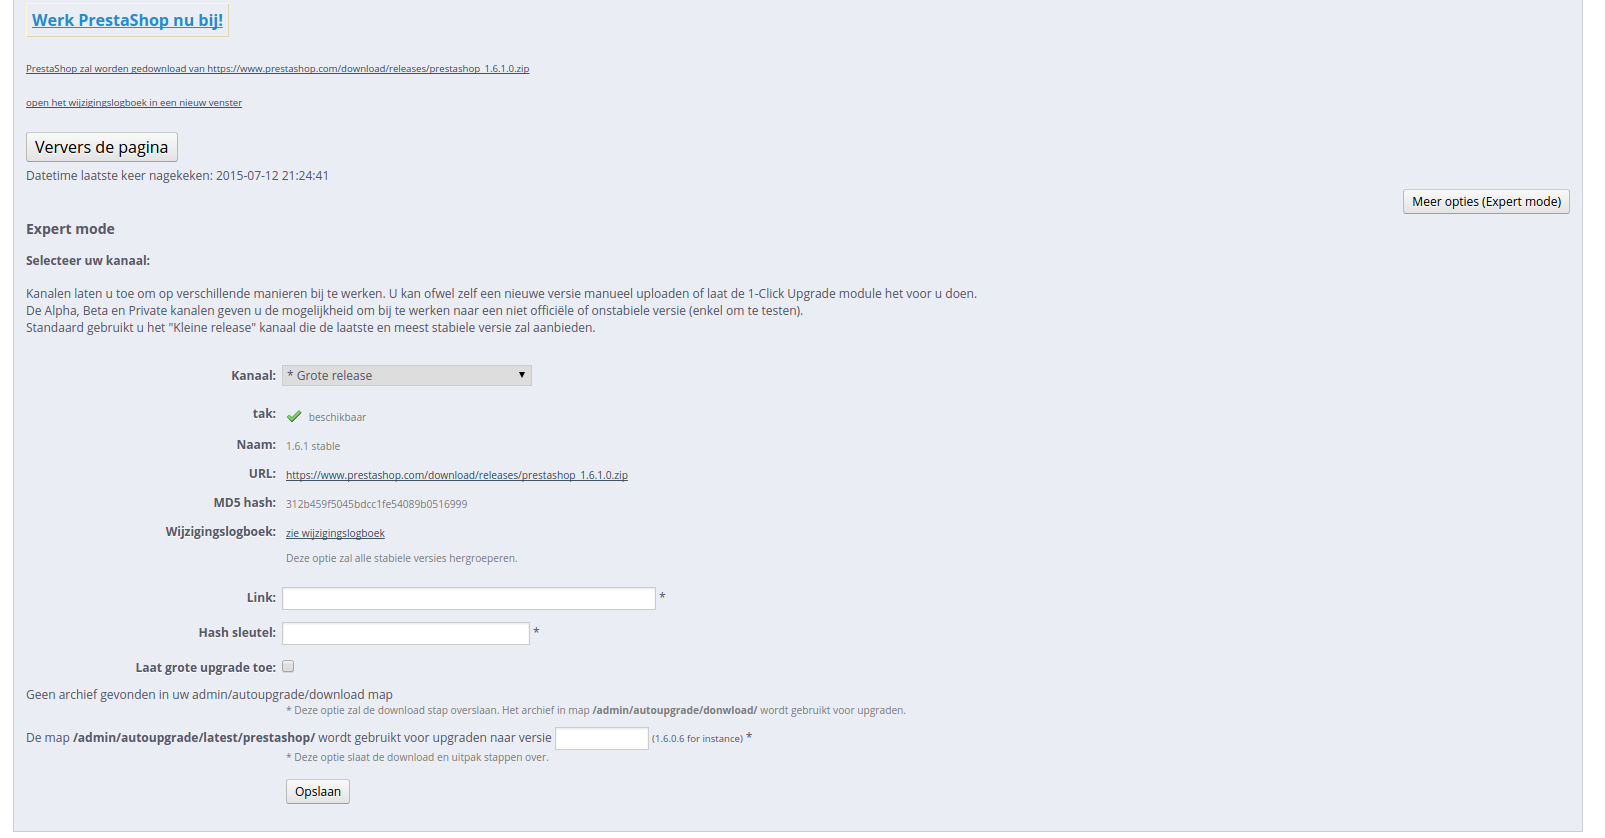
De opties zijn:
- Kanaal. Kies het distributiekanaal dat u wilt gebruiken. De aangeraden optie is "Kleine release". Dat betekent elke stabiele versie binnen de huidige branch. De andere opties zijn:
- Grote release. De volgende stabiele versie van de huidige of een nieuwere branch: omdat de huidige branch 1.6.x. is, gebruikt de update-tool de meest recente 1.6 versie (op het moment van schrijven: v1.6.1).
- Kleine release. Dit is de standaardinstelling. Deze gebruikt alleen de stabiele releases binnen de huidige branch: als u PrestaShop 1.4.2 hebt, werkt het uw winkel bij naar 1.4.9, zelfs als 1.6.2 uitgebracht is.
- Release kandidaten. RC-versies worden over het algemeen stabiel genoeg geacht voor de meeste gebruikers, maar nog niet goed genoeg voor een productieomgeving. Gebruik deze op eigen risico.
- Beta releases, alpha releases. Dit zijn development-versies. Gebruik deze op eigen risico.
- Private releases (link en md5 hash nodig. Soms uploaden PrestaShop-ontwikkelaars privéversies. Als u de juistie URL en hash hebt kunt u gemakkelijk naar een dergelijke versie upgraden.
- Lokaal archief. Deze kan gebruikt worden als u de versie van PrestaShop waartoe u wilt upgraden hebt geüpload naar de juiste map:
/admin/autoupgrade/download. Zodra u het archief hebt geselecteerd in het dropdownmenu geeft u het versienummer aan in het tekstveld (deze moet precies kloppen). - Lokale map. Deze kan gebruikt worden om gedownloadde en uitgepakte versies van PrestaShop te installeren. De map moet geplaatst worden in
/admin/autoupgrade/latest/prestashop.
- tak / branch. Geeft aan of er iets beschikbaar is binnen het huidige kanaal.
- naam. De naam van de meest recente versie binnen het huidige kanaal.
- URL. De URL naar de meest recente versie binnen het huidige kanaal.
- MD5 hash. De controlesom voor de meest recente versie.
Versievergelijking
Voor de nieuwsgierige gebruiker: het aantal verschillen tussen de huidige en meest recente versie worden hier aangegeven.
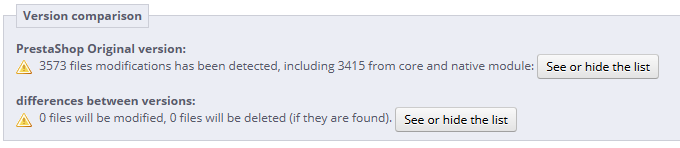
Als u direct wijzigingen hebt aangebracht aan de hoofdbestanden in plaats van de override-mogelijkheden toe te passen binnen PrestaShop, dan kunt u met deze lijst erachter komen of uw wijzigingen veilig zijn of niet.
U kunt hoe dan ook de levensduur van uw wijzigingen verlengen door de veranderde bestanden om te zetten in override-bestanden. Bekijk de ontwikkelaarshandleiding hoe u dit kunt doen.
Terugzetten van reservekopie
Deze sectie verschijnt alleen wanneer er op zijn minst één upgrade is uitgevoerd.
Kijk hieronder voor meer informatie.
Reservekopie opties
Deze opties geven u meer controle over het reservekopieproces:
- Neem een reservekopie van mijn bestanden en database. U moet een reservekopie hebben van uw bestanden en de module kan daarvoor zorgen. U zou deze instellingen nooit uit moeten schakelen, tenzij daar expliciet om gevraagd wordt.
- Neem een reservekopie van mijn afbeeldingen. U zou de module ook een reservekopie laten maken van uw afbeeldingen, om ervoor te zorgen dat u met gemak een kopie kunt terugzetten.

Upgrade opties
Deze opties zorgen ervoor dat u meer controle hebt over het upgradeproces:
- Server performantie. Sommige gedeelde webhosts bieden slechte performance. Dit kan het updateproces hinderen of er zelfs voor zorgen dat het hierom faalt. "Laag" wordt standaard geselecteerd, maar als u weet dat u een krachtige server hebt, dan kunt u "Gemiddeld" (aangeraden voor krachtige VPS) of zelf "Hoog" kiezen (aangeraden voor krachtige dedicated server).
-----------------------To be translated --------------------------------------
- Schakel niet-native modules uit. It is recommended to choose "Yes" for this option, as some module might prove a hindrance when upgrading PrestaShop.
- Upgrade the "default" theme. The upgrade process overwrites the default theme with its latest incarnation. If you have made changes to the theme directly, you can protect these changes by choosing "No". As a reminder, it is NOT recommended to edit the default theme! You should make a copy of the theme, and make changes to that copy.
- Upgrade the default e-mails. An update might bring new default e-mail templates. By default, the upgrade will replace the existing ones with the ones from the newer archive, and add the new templates. If you have customized your templates, it is recommended you keep them. You would then have to customize the new templates in order to fit the general style of your shop.
- Step-by-step mode. Dev mode only. If enabled, the module will stop at each step to ask you for confirmation.
- Display PHP errors. Dev mode only. If enabled, the module will displays PHP errors, which could help you discover server issues that would otherwise stay hidden from view.

The Upgrade process
Once all the indicators in the "pre-Upgrade checklist" section are green, the update button appears in the "Start your Upgrade" section, along with the URL from which the new version will be downloaded.
Clicking the "Upgrade PrestaShop now !" button triggers the whole process.
Once the upgrade process is launched, the whole configuration page is replaced by two sections: "Activity Log" and "Rollback".
The activity log gives you a detailed journal of what the updater is doing, in a screen you can scroll through:
- Removed files: only the sample files are removed, such as empty override classes and controllers.
- Name of the backup archive: the name follows the
auto-backupfiles_V1.6.0.2_20140127-120310-798d3a69.zipform. - Files added to the backup archive: all the remaining files of your current installation are put into the Zip archive.
- Database tables added to the backup archive: your files are important, but your whole catalog is stored in your database, and is therefore saved in the same archive.
- Removed files: mostly modules, controllers, classes, CSS and JavaScript files. Now that all the files have been saved in the backup archive, they can be safely removed.
- Files copied from the new archive: all the existing files are replaced by their new version.
- Merged translation files.
- Created, deleted, altered and updated database tables.
- Emptied temporary folders: if possible, the upgrader will try and delete the content of the cache folders.
A lot of files are mentioned during the whole process. You do not need to read all the notifications, it's only there for you to peruse in case of error.
You'll know the upgrade is over when the following message "upgrade complete. Please check your front office theme is functional (try to make an order, check theme)" appears in green, along with the following final log entry: "End of process".
The upgrader also indicates that you should re-enable your shop, but before you do that, you should first check that everything is working in your back office: no errors, all products and categories are in place with their images and attached files, etc. Until you have checked that everything is okay in your shop, it is better to keep it from the public eye.
On first load, pages might look wonky: because your web browser caches files, it is probably using the old CSS files instead of the new ones. Do not hesitate to reload the page several times, or even empty your browser's cache, in order to get the correct interface.
When you upgrade from version 1.4 to version 1.6, your menus will not be arranged the way they would be if you made a fresh installation of version 1.6.
That is because PrestaShop 1.4 tabs got reorganized into 1.6 menus, and a lot of pages were moved around in order to create consistent menus. Additionally, the upgrader assumes that your 1.4 tabs may have been customized or moved around, either by a module or by your own action. Therefore, rather than breaking the existing settings, the upgrader takes the tabs as-is, and does not re-arrange them into the default 1.6 menu order.
If you want to change the position of pages within a menu once you have updated to version 1.6, go the to "Menus" page under the "Administration" menu, and start fiddling with positions.
Once you have made sure your PrestaShop installation is up and running, you can re-enable your shop using the option in the "Maintenance" page of the "Preferences" menu, then make tests on your front office: browse products, sort them, try to order one, etc. In short, go through the entire buying process in order to make sure that you won't miss a sale.
Is everything working fine? Congratulations, you know have successfully upgraded your PrestaShop installation!
JavaScript error
In some server configurations, an error message might be displayed, saying "Javascript error (parseJSON) detected for action "upgradeNow". Starting restoration...".
Follow these steps to solve the error, :
- Open your
php.inifile and enable (uncomment) the MySQLi and MySQL PDO extensions. If you cannot access thephp.inifile, contact your web host about this. Open the
/modules/autoupgrade/db/Db.phpand find these lines (around line 210):public static function getClass() { $class = 'MySQL'; /*if (PHP_VERSION_ID >= 50200 && extension_loaded('pdo_mysql')) $class = 'DbPDO'; else if (extension_loaded('mysqli')) $class = 'DbMySQLi';*/ return $class; }Simply uncomment these lines (remove
/*and*/). They should now look like this:public static function getClass() { $class = 'MySQL'; if (PHP_VERSION_ID >= 50200 && extension_loaded('pdo_mysql')) $class = 'DbPDO'; else if (extension_loaded('mysqli')) $class = 'DbMySQLi'; return $class; }
After you have done all this, start the autoupgrade process again.
Going back to the previous version: rollbacks
Sadly, not all upgrades are successful – which is the very reason why you should always back-up all your files and data, and why PrestaShop performs an additional backup of said files and data by itself, which you should not always count on. Make your own backup first. See the "Making and restoring your own backup" chapter of this guide for more information.
PrestaShop's own backup files are saved on your server, and if it turns out your update has gone badly, you can find them in the "Rollback" section of the configuration page for the 1-Click Upgrade module.
Backup files are created as soon as the upgrade process is started, and are available immediately in the "Choose your backup" drop-down list.
Choose the most recent one. The date and hour of the creation of the backup file are right within the name: Vversion-date-hour-random, for instance "V1.4.9.0_20120907-114024-f85f41a" for a backup of a previous PrestaShop 1.4.9 installation, made September 7th 2012, at 11:40:24 AM.
The "Rollback" button triggers two actions:
- Takes the files from the latest backup, and re-installs them in place of those from the current installed version.
- Takes the data from the latest backup, and re-installs it in place of that from the current database.
Select the backup archive to which you want to roll back to, and click the "Rollback" button. As with the upgrade process, the whole interface disappears to only leave the "Activity Log" section and the "Rollback" section. You can follow the rollback process in the scrolling journal, and once it is finished, reload the page in order to check that everything is indeed back in place.
Going back to the previous version: restoring your own backup
This is explained in details in the "Making and restoring your own backup" of this guide: http://doc.prestashop.com/display/PS16/Making+and+restoring+your+own+backup.