Connecting to the PrestaShop back-office
At the install process, the PrestaShop installer asked you to change the name of your administration folder, from /admin to something unique to your shop, for security reasons (for instance, /admin789). Use that folder name to access your shop, for instance http://myprestashop.com/admin789).
You will see the login page for your store's control panel.
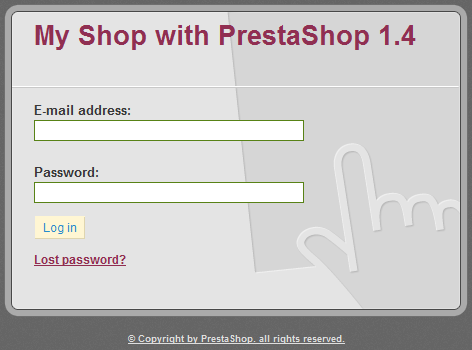
Enter the e-mail address and password that your registered with when you installed PrestaShop. Click "Log In", and you will be taken to the back-office welcome page, or your store's control panel.
From this step onward, you can begin to configure your store and offer products to your customers.
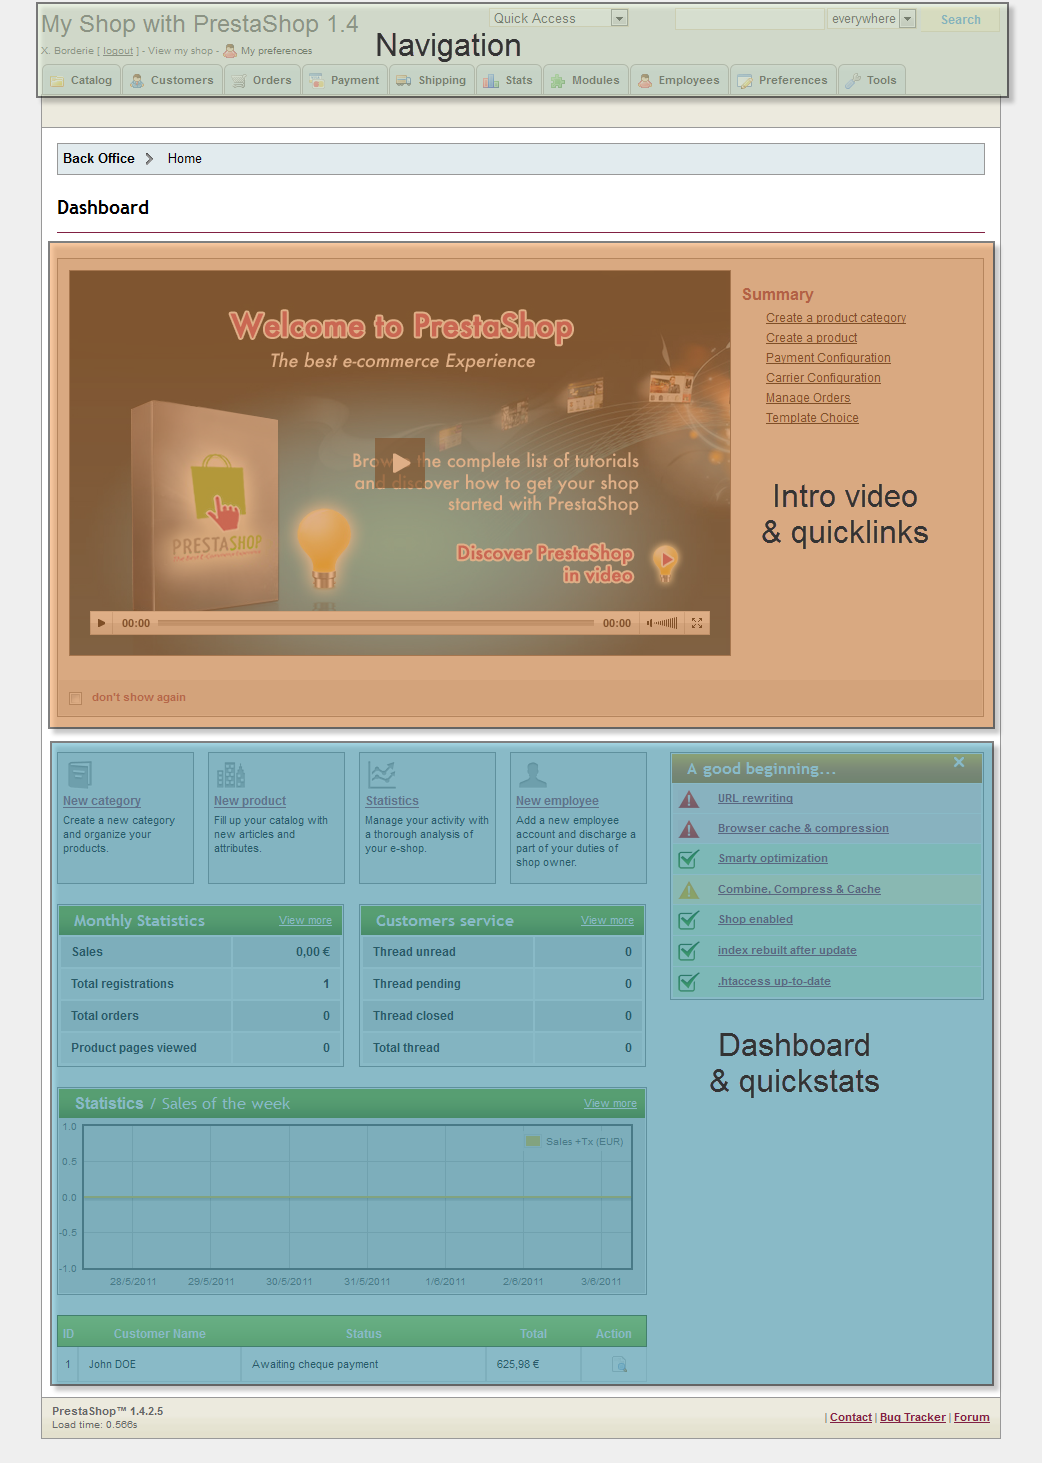
Discovering and Configuring the PrestaShop Back Office
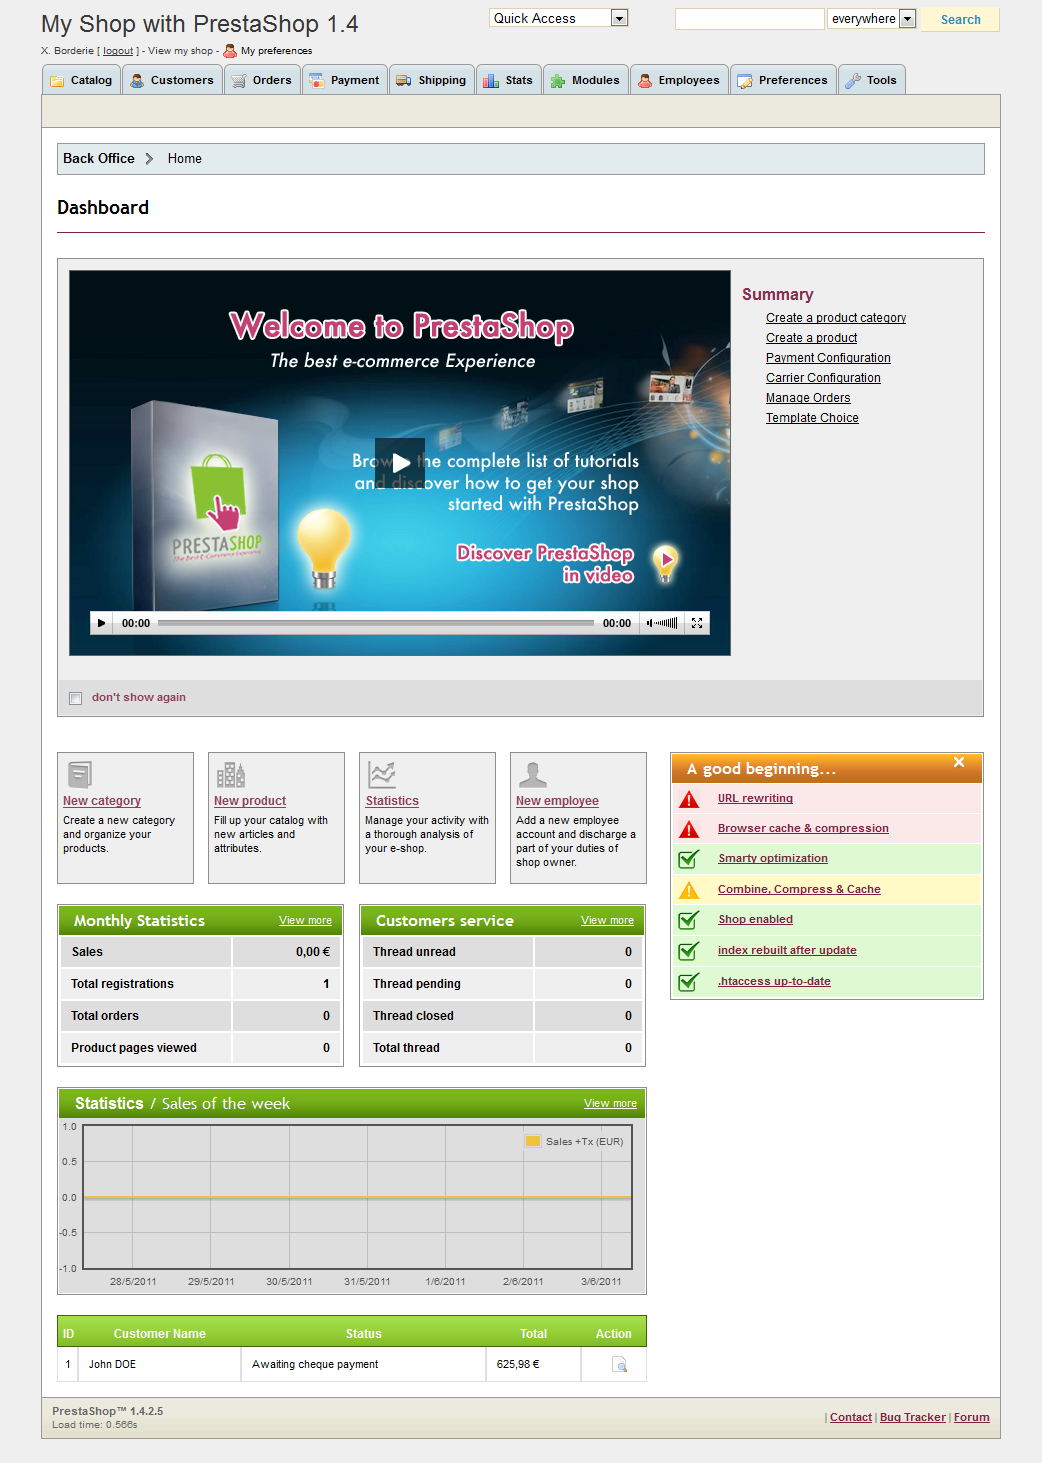
The PrestaShop Back Office welcome page is made up of three different areas.
- Navigation: Groups together all of the tabs indicating the different sections of your store.
- The Dashboard: Displays all of your store’s important information such as the number of orders sales completed, etc.
- PrestaShop Live Feed: Information PrestaShop software updates or other news. We advise you to check this section regularly in order to keep your store up-to-date with PrestaShop’s new features Back Office Welcome Page
Now take your first look at your Back Office, or the "Control Panel." Tabs situated at the top of the window help you navigate within the Back Office.