Table contents
Understanding the Preferences
The Preferences tab lets you configure and fine-tune some of your store's details. These include a lot of different aspects of the shop, from technical settings to the customer's shopping experience. Therefore, all of the Preference options should be carefully examined, and you should consider each option, as enabling or disabling any of them can have a real impact on your shop, and ultimately, your sales.
The Preferences tab lets you configure and fine-tune some of your store's details. We will now look over all of the functions in this section.
General
Clicking on the "Preferences" tab will take you directly to your store's general settings.

- Enable Shop. Choose to make your shop active after you have made changes. You can use it to deactivate your site when you need to perform maintenance on your shop. The webservice will still be active, so your data will still be available.
- Maintenance IP. The maintenance IP allows people to access the store even if it is disabled. If you want to add more IP addresses, separate them with commas "," or click "Add my IP address". To find out your IP address, go to http://www.whatismyip.com/
- Enable SSL. Providing an SSL connection to your shop is a great way to reassure your customers about the safety of their data (authentication, credit card, etc.) on your shop. If your hosting provider does support SSL, make sure to activate PrestaShop's SSL support, by clicking on the link. This will reveal a selector. Choose "Yes".
- Check IP on the cookie. An added security measure, you can tell PrestaShop to check that the user comes from the IP stored in his cookie.
- Increase Front Office security. This adds security tokens to your shop in order to improve its security.
- Back Office help boxes. Some of the back-office fields have a helpful legend that pops under them, in order for you to better understand their usage. You can disable them if you feel they are unnecessary.
- Order process type. By default, the customer has to complete 5 steps in order to complete checkout process. You can also choose to have it all done in a single page. The page will be longer, but many customers prefer this approach.
- Enable guest checkout. Allow orders to be placed by non-registered users.
- Terms of service. With this option, your customers have to accept your terms of service to complete an order.
- Conditions of use CMS page. Your shop's conditions of use are to be stored in a static page (called "CMS page"). Select which page to use so that PrestaShop can point to it correctly.
- Offer gift-wrapping. Suggest gift-wrapping to customer and possibility of leaving a message. Always a nice idea for people who want to buy gifts.
- Gift-wrapping price. Set the price of your gift-wrapping service.
- Gift-wrapping tax. If needed, indicate to which tax the gift-wrapping is tied.
- Attachment maximum size. Protects you from overloading your server with large files.
- Offer recycled packaging. If you can offer, some customers may appreciate it.
- Cart re-display at login. If the customer had a cart that wasn't checked-out, display it once he logs back in.
- Round mode. Choose the rounding method: always superior (round up), always inferior (round down), or classic rounding.
- Automatically check for module updates. Display new and ready-to-be-updated modules at the top of the "Modules" tab.
- Hide optimization tips. The back-office homepage gives you a handful of optimization tips. If you would prefer not to see them, you can use this option to hide them.
- Display suppliers and manufacturers. Display manufacturers and suppliers list even if corresponding blocks are disabled.
- Use Smarty 2 instead of 3. Change this ONLY if you know what you are doing. This checkbox is reserved for shops using a theme that has not yet been updated to Smarty 3. If it includes yours, you should update it, since PrestaShop will soon no longer support Smarty 2 templates.
- Timezone. Set your shop's timezone.
Contact information
This preference page gives you access to your shop's identification details.
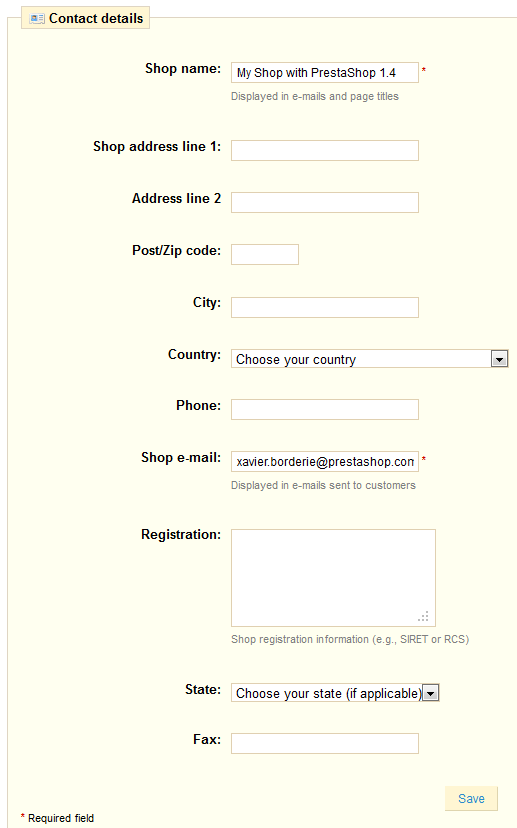
- Shop name.
- Shop address line 1.
- Address line 2.
- Post/Zip code.
- City.
- Country.
- Phone. Use your shop's contact phone. If you'd rather customers not call you, do not put anything in there.
- Shop e-mail. Use the general contact e-mail address that the customers should see when they receive an e-mail from your shop.
- Registration. Indication your shop's legal registrations numbers. This proves that you are a fully registered business, and gives it a better image.
- State.
- Fax.
Appearance
You can personalize your shop's appearance with the “Appearance” tab. Note that it is actually a redirect to the "Themes" sub-tab of the "Modules" tab.
The first section enables you to customize the theme's various logos and icons, and the breadcrumb separator (or "navigation pipe")
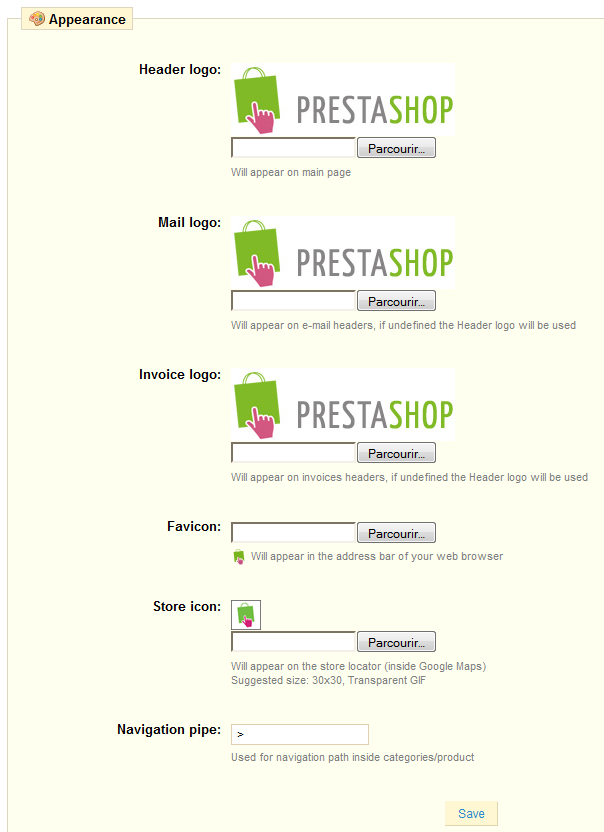
Click “Browse” to load an image from your computer.
A favicon is a small image that appears in the address bar of your browser and helps your customers find your store more easily amongst their list of favorites.
The navigation pipe is what PrestaShop uses to separate breadcrumb items, for instance "Music players > iPods > iPod Nano".
The second section displays all the themes available on your server.
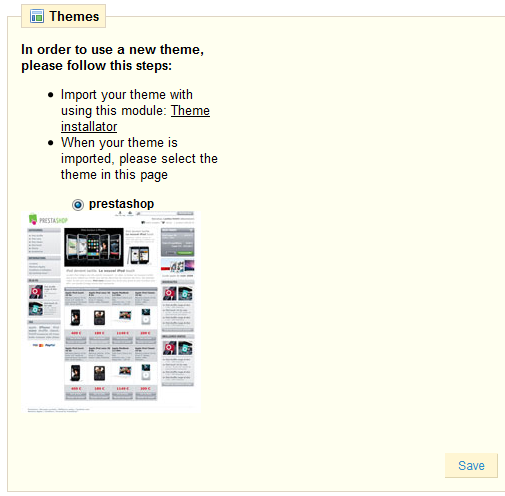
Select the theme that will be active on your shop by clicking the radio button, then confirm by clicking "Save."
The third and final section gives you a quick overview of the latest themes submitted to the PrestaShop Addons theme repository
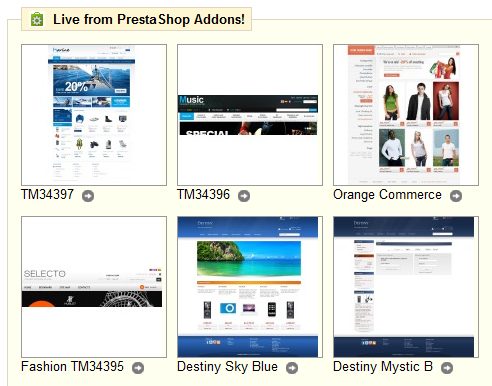
You can easily customize your shop with the various available themes. You can find them directly at: http://addons.prestashop.com/en/3-themes-prestashop
SEO & URLs
SEO means Search Engine Optimization. It represents a set of techniques aimed at improving the visibility of a website on search engines. This section helps you improve the presence of your PrestaShop store on web searches, and therefore reach more potential customers.
URLs are Uniform Resource Locators, or simply put, the online address of a web page. By default, they are rather uninformative to both the customer and search engines: an URL such as http://www.myprestashop.com/product.php?id_product=2 doesn't help you know what product is on that page. Friendly URLs are the way to achieve that, and get for instance http://www.myprestashop.com/2-music-players/27-ipod-nano-green.
A product's friendly URL is set on its own configuration, as explained on the "Adding Products and Product Categories" chapter, in the "Listing Your Product" section. The "Create a Category" section also mentions how to create friendly URLs for product categories.
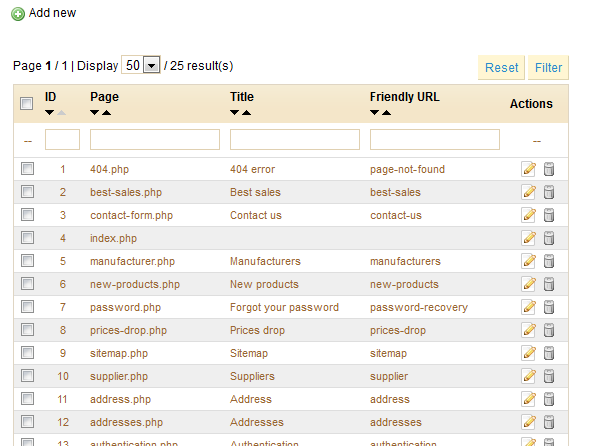
There are some individual "static" pages (or "CMS pages") in your PrestaShop install that would certainly benefit from friendly URLs. This tab presents you with a list of these CMS pages, and enables you to edit their friendly URLs.
WARNING: Friendly URLs only work with a server setup that supports URL rewriting. Make sure to check that yours does (ask your hosting provider!), as it can make your shop completely unavailable to customers if you enable friendly URLs and the server does not support it!
Adding a New Friendly URL
Click the "Add New" link to reach this form:
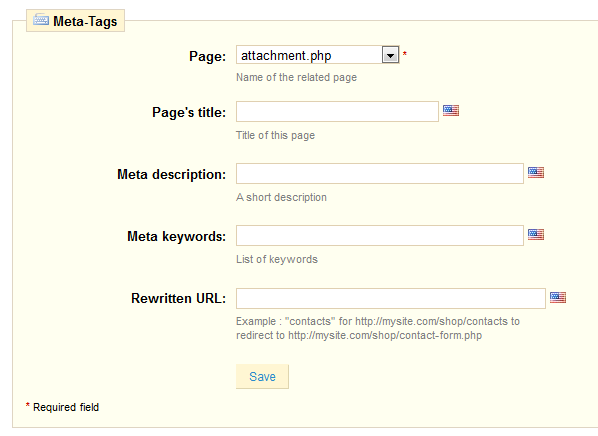
This form presents you with a handful of fields:
- Page. Presents you the pages that do not yet have a friendly URL set.
- Page's title. The title that will appear on the search engines when a request is made by a customer
- Meta description. A presentation of the product in just a few words, intended to capture a customer's interest. It will appear in search results.
- Meta Keywords. Keywords that you must define in order to have your site referenced by search engines. You can enter several of them, separated by commas, as well as expressions, which must be indicated in quotation marks.
- Rewritten URL. This is where you set the friendly URL. Make it short and descriptive, and replace spaces (" ") by hyphens ("-").
URLs Setup
At the bottom of the "SEO & URLs" tab is the following form.
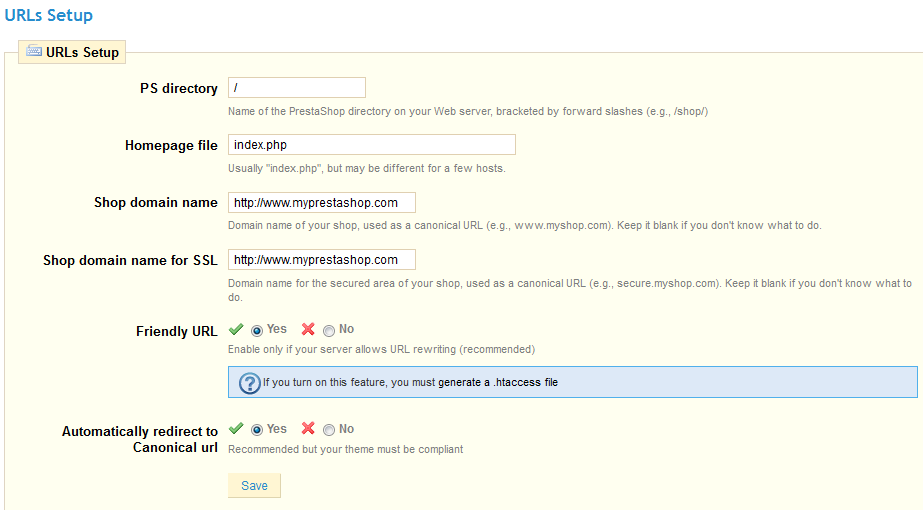
Here you can view and edit some of the default server settings. Most of the time, you shouldn't touch the first four fields (PS directory, Homepage file, Homepage file, Shop domain name for SSL) with knowing exactly what you are doing. One mistake could break your shop.
Change the "Friendly URL" radio buttons settings if you know that your server can support URL rewriting. If not, leave it at "No". Likewise, only change the "Automatically redirect to Canonical url" radio buttons settings if you know what you are doing. Canonical URLs are excellent ways to improve SEO, as they help avoid duplicate content on your shop (more than one URL for the same actual content).*
After you have enabled Friendly URLs, you MUST generate a new .htaccess file: go to the "Tools" tab, "Generators" sub-tab, check the "Friendly URL" box, and then click the "Generate .htaccess file" button. This will create a new .htaccess file at the root of the PrestaShop folder.
If you already have a .htaccess file with your own settings, do not forget to copy/paste them in the generator's "Specific configuration" field.
Products
This sub-tab contains a slew of preferences pertaining to how your products are to be handled and displayed by PrestaShop.

- Catalog mode. Enabling catalog mode turns your shop into a simple gallery of products, with no way to buy the items whatsoever.
- Allow ordering out-of-stock product. Displays the "Add to Cart" button even if the product is not currently available.
- Enable stock management. By default you should leave this feature enabled. This affects the entire inventory management of your store, such as the management according to status, etc.
- Display available quantities on product page. By enabling this feature, your visitors can see the quantities of each object available in stock. Displaying this information can be used to stimulate sales in the case where the quantity in stock is low. The quantities displayed are the selected attributes and combination.
- Enable JqZoom instead of Thickbox on product page. Once you activate this feature, a zoom will appears whenever a mouse is scrolled over a product's image on your store. You can configure the zoom size by modifying the image value in the "Image" sub-tab of the "Preferences" tab.
- Display unavailable product attributes on product page. Your product can be composed of many different combinations or attributes.
Go to the "Configure Attributes" section from the "Adding Products and Product Categories" chapter to understand attributes and combinations. When one or several of them are not available anymore, you have two possibilities:- First possibility. Leave this preference active. Example: The product "iPod Shuffle" is no longer available in "Blue" in our store. By activating the feature, the product's variety will remain visible in the shop. A message will indicate that the product is no longer available in the chosen option and invites customers to choose another variation.
- Second possibility. Disabling this preference. If the blue variety of the “iPod Shuffle” product is no longer available, the product is not displayed the front office and the customer cannot select it. This feature helps to clearly display the availability of your products
- Display "add to cart" button when product has attributes.
- Max items in the comparator.
- Minimum purchase total required in order to validate order. Indicates the minimum amount that must be in the shopping cart to submit an order. If the amount in this field is not reached, your customer cannot complete their purchase. If you do not want to activate this feature, enter "0" in the field.
- Display last quantities when qty is lower than. You can display an alert when a stock of your products gets low. This option is particularly useful for promoting purchases. To configure this feature, enter the field value at which an alert message should appear on your store.
- Number of days during which the product is considered 'new'. When you add a product in your store, it is considered new and it is reported back through the "New products" block and the "New products" page. The field allows you to specify how many days the product will remain visible on the block and page. With this feature, you choose how to display and updated your store's news. This page is usually most accessed by your regular customers.
- Re-direction after adding product to cart. When a product is added to the shopping cart and the AJAX version of the cart mode is disabled, the client can be directed to the shopping cart summary or stay on the current page.
- Products per page. Indicate how many products are displayed on the pages of your categories.
- Default order by. Indicate the order of products in your store's categories. 6 choices are available:
- Product name. Displays a list of your products based on the first letter of the product.
- Product Price. Displays your products according to their price.
- Product Added Date. Displays your products according to the date added to your shop.
- Position inside category. Displays your products as they are positioned in the categories in your catalog. The position of the products can be modified directly in the catalog of your store using the position arrows. This way you have your product in the most attractive fashion for your customers.
- Manufacturer. Displays your products in order of the first letter of the Manufacturer.
- Project Modified Date. When you edit your products the modification date is changed. They will appear in the order of modification date.
- Default order way. The above options can be sorted by ascending or descending order.
- Image generated by. This feature allows you to position the product image in its pre-established space. Choose ‘height' in order to fill the frame height (the width is then recalculated to maintain the same height/width ratio as in the file of origin). You could also choose ‘width' so the image fills the width of the frame (the height is then recalculated to maintain the same proportion), or finally, choose "auto", where the width and height are calculated to maximize the space it can occupy in the frame.
- Maximum size of product pictures. The maximum size of pictures that customers can upload (in bytes).
- Product pictures width. The maximum width of pictures that customers can upload (in pixels).
- Product pictures height. The maximum height of pictures that customers can upload (in pixels).
- Use the legacy image filesystem. Only change this setting if you have moved the images folder from its default location.
At the end of the checkout process, a client can leave a message. He can choose to whom to send it by selecting from the drop-down menu.
Under the "Email" sub-tab of the "Preferences" tab, you can configure PrestaShop to send emails to your customers. However, we advise that you consult your web host to determine which settings to use for this feature.
Your shop sends many messages throughout all the steps of registration and placing an order. Here, you can configure how these messages will be sent. By default, it is advisable to use the first option of sending information to "Use the PHP mail() function”.
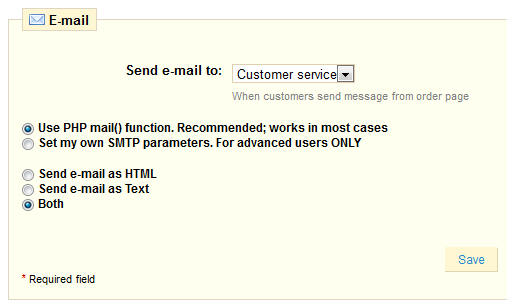
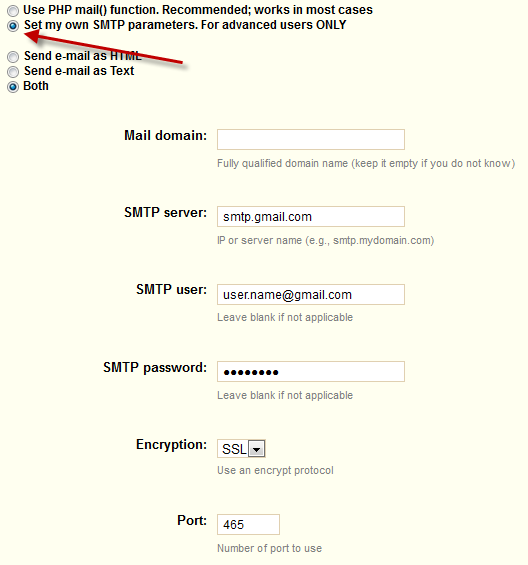
In the event that this does not work, then use the second option. In this case, additional fields appear.
Once you have configured emails using one of the two methods, enter your email address in the field labeled "Test your email configuration" then click "Send an email test".
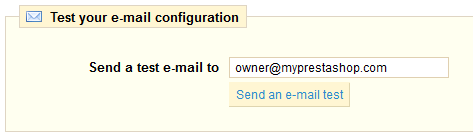
Now check the inbox of the address provided to verify that you received the test mail. If you have not received it, please modify your configuration. The configuration information can be provided to you either by:
- Your system administrator
- Your host
- Your ISP
- Your e-mail provider.
Your web host can tell you whether or not your username is mandatory, as well as the password information, and the encryption to use.
For example, in the case of Gmail (the e-mail service offered by Google), enter the following information:
- SMTP server: smtp.gmail.com
- User: [email protected] (example)
- Password: RT22UE87 (example)
- Encryption: SSL
- Port: 465
Aliases
When customers make a request using your shop's internal search engine, they may make mistakes in spelling. If PrestaShop does not display the right results, the "Alias" feature can address them. You'll be able to take words containing spelling errors, and point them to the real products sought by customers.
First, to find spelling errors often typed by your users, go to the "Shop search" section under the "Stats" tab. You can see the words typed by your customers as well as the most frequent errors. Take the most frequent ones, and add them to your list of aliases, in order to point user to the correct product.
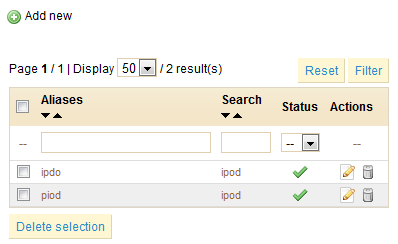
To create a new alias, click on “Add New”. A form will appear.
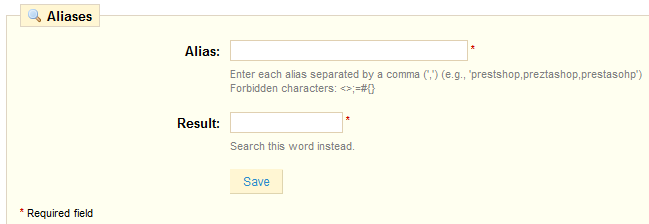
For instance, let's say your visitor frequently "player" as "palyer" and "plaier". You can create an alias for each of these typos, which will match the word "Player". Once all of your aliases are configured, click "Save" to confirm.
We also invite you to consult the section on meta tags, to better understand how to display products based on words typed by your customers. See the "Adding Products and Product Categories" and "A Look inside the Catalog" chapters.
Image
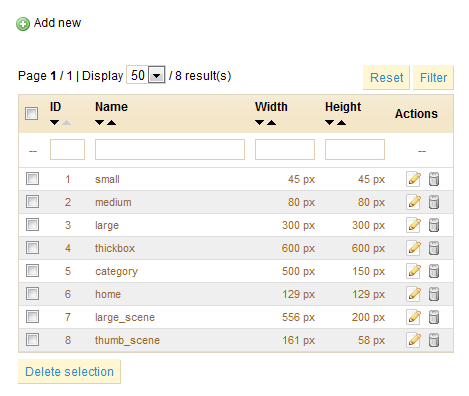
In the "Products" sub-tab of the "Preferences" tab, you can choose to have a zoom appear when the cursor hovers over a product's image. The "Image" sub-tab enables you to configure the various sizes.
Add a New Images Size
You can easily add a new image size, and even set to which categories it applies.
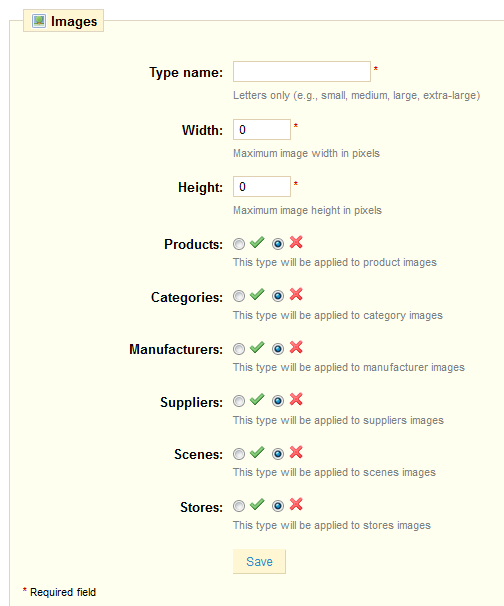
- Type in its name, width and height.
- Choose which categories it applies to.
- Validate.
Regenerate Images
You may be dissatisfied with your shop's current thumbnails size. You can regenerate them using the "Regenerate" section at the bottom of the "Image" sub-tab page.
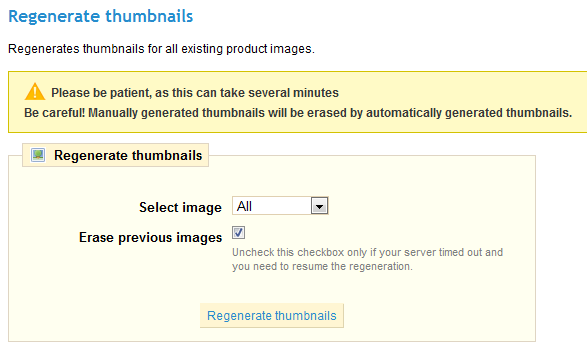
Select which category's images should be regenerated, indicate whether the previous thumbnails should be kept or not, then click "Regenerate Images".
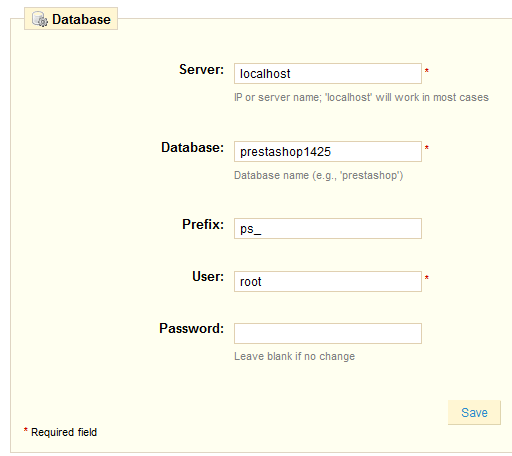
Database
You can change your store's database settings if you need to change your database server, or if you change the configuration access to your database. However, before making any changes, be careful and do all the necessary checks, or ask your host. These changes are required only if you changed your database settings at your server level.
At the bottom of the page is the "MySQL Engine" section, which is a long list of all of PrestaShop's table, and their MySQL engine.
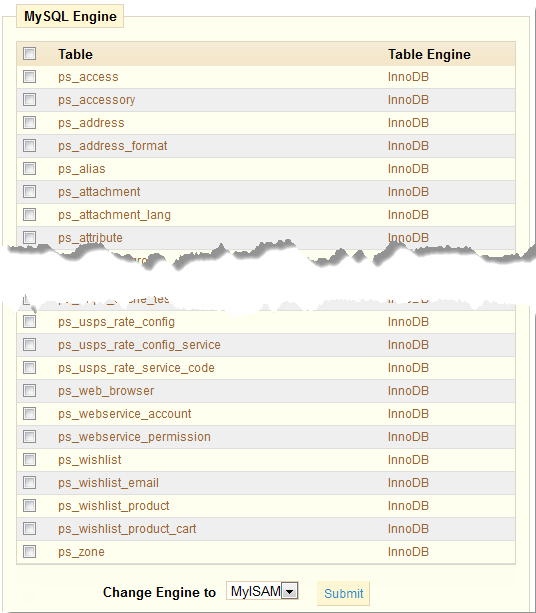
You can change the engine by ticking the appropriate tables, choosing the engine in the drop-down menu, and clicking "Submit".
You can learn more about the various MySQL engines (including some not available to you) on the MySQL website.
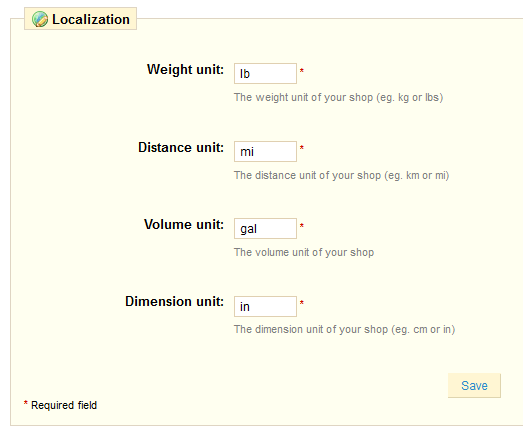
Localization
This sub-tab enables you to set the units used for your products.
In addition to that, PrestaShop provides you with an extensive list of existing unit localization packs.
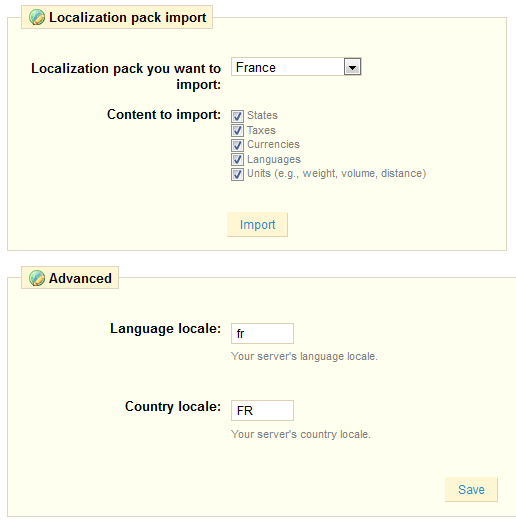
Choose your shop's country, check the box that apply, and whole lot of local data will be imported for you.
Finally, you can indicate your shop's language, using the adequate ISO 639 code for the language, and the adequate ISO 3166 code for the country.
Search
The "Search" sub-tab enables you to configure your shop's search function.
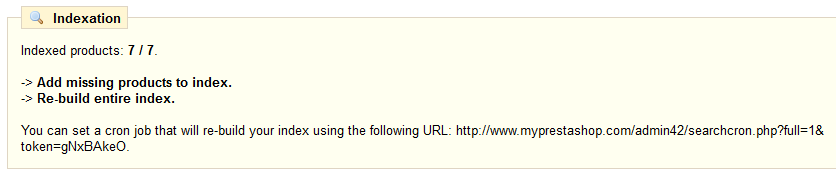
The "Indexation" section provides information on the number of products that can be searched through your shop's search function, and compares it to the number of products present in the database. If the value does not match the number of products you have in your store, you must select the option "Add missing products to the index."
The following section enables you to configure the behavior of your shop's search function.
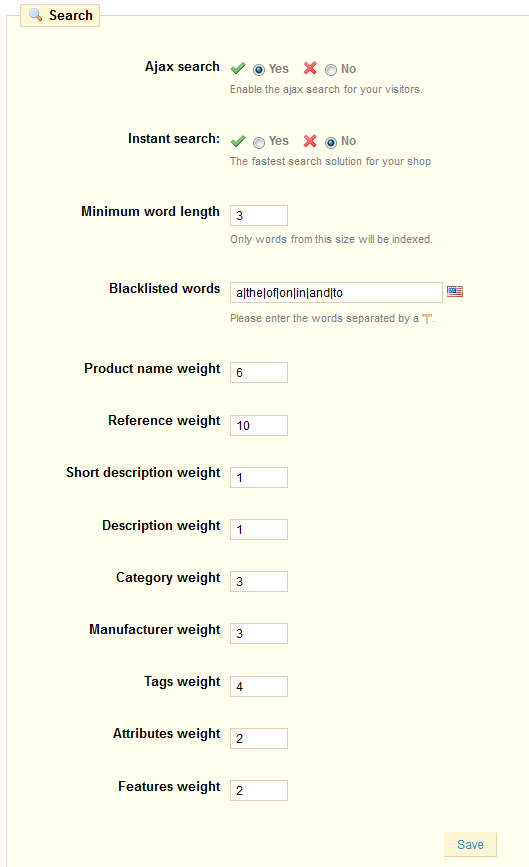
- AJAX search. Enabling it displays a list of results from the moment your customers type a few letters into the search bar.
- Instant Search.
- Minimum word length. You can choose the minimum size at which a word may be registered in the search index and found by your customers. This feature allows you to eliminate short words in the search, such as prepositions or articles (the, and, of, ...).
- Blacklisted words. You can choose the terms that must not be found by your visitors. Enter them directly into the field, separated by "|".
- Product Name Weight. PrestaShop enables you to prioritize certain data when a search is performed on your shop. Here is how: the keyword search term "player" is associated with the product "iPod shuffle" in the test store, and is also the name of an example product that we created, called "Walkman example".
- We will show first the search results that has the word "player" in the name of the product. To do this, we will assign a value to the "Product Name weight" field that is worth far more than others. In our case, we are going to write 10 and place the value of field "Tags Weight" at 1. This way, the product with this term in its name that will appear first.
- We take the same term "Player" but reverse the values in the fields: "Product Name Weight" thus gets a 1, and "Tags Weight" gets a 10.
You have many more factors that you can assign a weight to: short description, category, tags, attributes, etc. You will find that the display order of results is reversed because we changed the weight of the various fields. Fine-tuning these settings will be more visible on a large catalog with many references.
Once your changes have been made, click on "Save" for them to take effect immediately.
Performance
This sub-tab combines many tools and tips that might help you improve your shop's performance (server-wise, not sales-wise).
Smarty
Smarty is the name of the template language used by PrestaShop's themes.

- Force compile. Only enable this if you are making edits theme, and need to see your changes every time you reload your page.
- Cache. Only disable this if you debugging a theme or a module for PrestaShop. Otherwise, you should probably not touch this.
Combine, Compress and Cache (CCC)
CCC is a set of tools aimed at minimizing server load and theme loading time.

- Smart cache for CSS.
- Smart cache for JavaScript.
- Minify HTML.
- Compress inline JavaScript in HTML.
- High risk HTML compression. It is marked as "high risk" because while the HTML code is very much compressed, it will not respect web-standards anymore. Use this at your own risk: some search engines do not deal well with websites that do not respect HTML standards.
Media servers
Enable you to redirect part of your traffic (media files, for instance) to other servers under your control, through other domains or sub-domains.
Cyphering
Cyphering means to encrypt data so as to render it unreadable to unwanted eyes. Your costumers' account details, as well your own, are protected by cyphering. Here you can choose the algorithm you prefer:
- Rijndael with mcrypt lib. Default choice. Fast and secure.
- Custom BlowFish class. Better security, but performance takes a toll, as it takes more time to validate the authentication, for each page load. Your customers might appreciate the added security, but might not like the time spent waiting for the page to load.
Therefore, choose wisely.
Caching
Your server's cache stores static versions of your dynamic webpage, in order to serve these to your customers and thus reduce server load and compiling time.
This section enables you to choose to enable caching, and choose the caching method:
- Memcached. A distributed caching system. Very effective, but you need to make sure that your server/host supports it – most probably, if your PHP configuration features the Memcached PECL extension, you're good to go. You can add Memcached servers by clicking on the "Add server" link.
- File system. The static files are simply stored as any other file, on your server. You can indicate the directory depth

Geolocation
Geolocation is "the identification of the real-world geographic location of an object, such as a radar, a mobile phone or an Internet-connected computer". In our case, geolocation is used to discover the location of a visitor, using his computer's IP and other tools. One of the uses of geolocation is to block visitors from certain cities/countries.
As indicated the first time you open the "Geolocation" sub-tab, in order to use geolocation, you need download this file and decompress it into the /tools/geoip/ directory. This file is the GeoLite City database from MaxMind, an accurate database of cities locations.
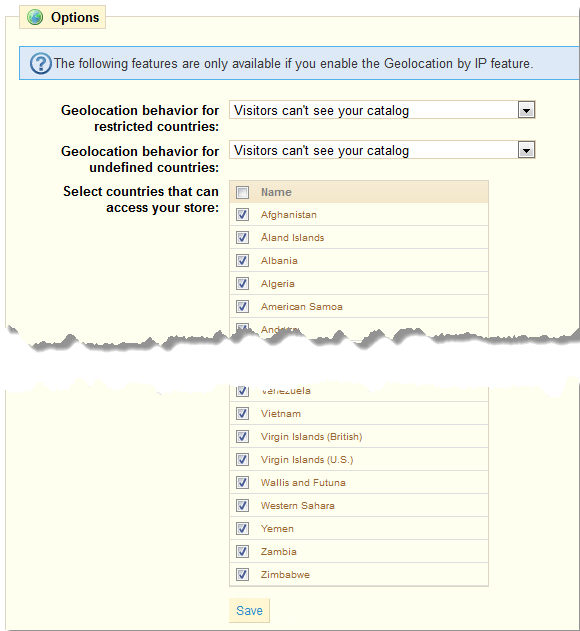
Once the file is in place and geolocation is enabled, you can choose which countries can access your shop (all of them, by default), and set PrestaShop's behavior for restricted and undefined countries:
- Visitors can't see your catalog.
- Visitors can see your catalog but can't make an order.
- All features are available (only for undefined countries).
Click the "Save" button, at the bottom of the form, to confirm your choices.
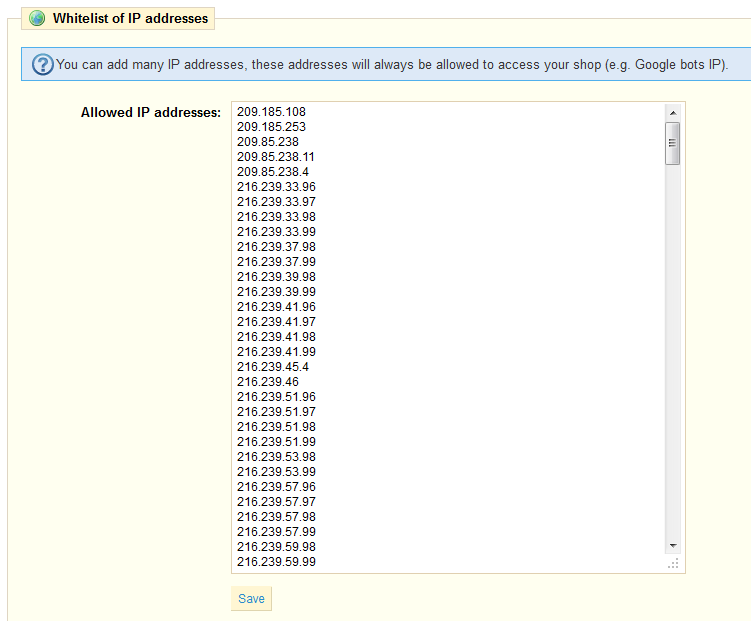
At the bottom of the "Geolocation" sub-tab is the "Whitelist of IP address" section. It enables you to block specific IPs rather than blocking whole countries. It can be useful in case of spammers, bots or attacks. It is already filled with a list of known bad IPs. Add as many as needed, one per line, and click "Save".