...
| Table of Contents | ||
|---|---|---|
|
Discovering the
...
Administration Area
Now that you have installed PrestaShop 1.6 and that you are properly logged-in to your administration area, you should make sure to easily find your way through its administration interface, understand its notifications and know where to find one specific bit of information.
...
We have created this chapter in order to help you make the best of your discovery of PrestaShop's administration interface. It has been designed to be very ergonomic and easy to use, but be aware that you should read the whole guide in order to get a perfect grasp of your new online business tool!
Overview of the main interface
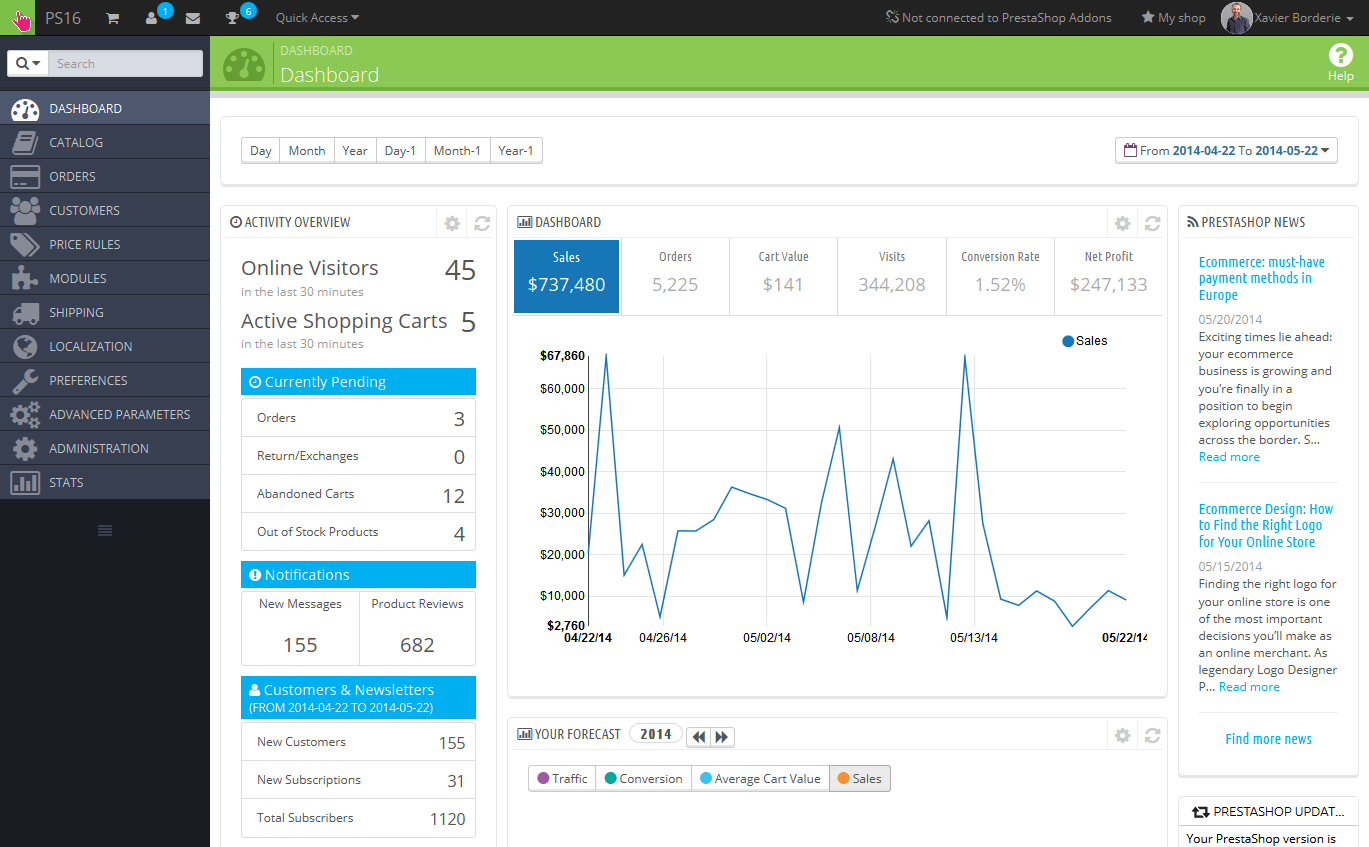
Take the time to survey the Dashboard – that is, the first page you see when logging into your back-office. Not only does it present you with a summary of everything you need to know about your shop at any given time, along with quick links to the main action page, but as a first-timer in PrestaShop, it also gives you tips about what you should have a look at.
The top bar

At the top of the back-office is a black bar containing a handful of links:
- (name of your shop). From any page, this takes you back to the Dashboard.
- Cart icon. A tooltip indicates the number of new orders, if any. Clicking it opens a panel presenting the new orders since you last clicked that icon. From there on, you can either display one of the new orders, or go to the list of orders.
- Person icon. A tooltip indicates the number of new customers, if any. Clicking it opens a panel presenting the last registered customers. From there on, you can either display one of the new customers, or go to the list of customers.
- Letter icon. A tooltip indicates the number of new messages, if any. Clicking it opens a panel presenting the last customer service message. From there on, you can either display one of the new messages, or go to the list of messages.
- Trophy icon. A tooltip indicates the number of new items, if any. Clicking it opens a panel presenting your progress as a merchant. From there on, you can reach the full page of badges and points, from the "Merchant Expertise" module.
- Quick Access. This is the quick links menu, presenting the most useful links, as set in the "Quick Access" page under the "Administration" menu.
- "Not connected to PrestaShop Addons" link. Opens a modal window enabling you to connect your shop to the Addons marketplace, and thus get updates from the modules and themes you bought.
- "My Shop" link. Opens a new browser tab with your shop's front-end.
- (your name) link. A simple dropdown panel with a reminder of the administrative account with which you are currently logged-in.
- "My preferences" link. Takes you to your account's preferences page, where you can set some personal options (for instance, the back-office language or your password).
- "Log out" link. Logs you out of the current user account.
The menus
All along your daily activities administrating your shop, you will have to browse through the many pages and options of the back-office.
...
All the default standard menus, including the "Stock" menu, are explained in depth in this user guide.
The buttons
Many of the back-end pages use recurring buttons, either at the top or at the bottom of the screen. For instance, the product edition page can have up to 8 buttons available at the same time.
...
- Save. Saves the content of the current page and returns to the list of existing items.
- Save and stay. Saves the content of the current page and keep the page open.
- Cancel. Returns to the list of existing items.
Contextual help
Since version 1.6.0.7 of PrestaShop, the software's documentation is directly embedded into administration interface: clicking on the "Help" button from any back-office page reduces the main interface's width in order to add a new column on the right, which contains the documentation for that section of the back-office.
...
At the bottom of the help column, a small form enables you to tell the PrestaShop team whether the help section has been helpful to you or not. Rate the help page by clicking on one of the 5 levels of satisfaction. If you click on one of the two lowest levels, PrestaShop will open a short form allowing to detail your thoughts? You can either fill it and click on the "Submit" button, or close the form by clicking on the cross, in which case only your rating will be sent to our server.
The Dashboard
Let's now explore the content of the Dashboard itself. It can feel crowded to a first-time user, but you will find that it gives an excellent summary of your shop's daily activities at a glance.
...
| Note | ||
|---|---|---|
| ||
By default, the Dashboard uses fake data so that you can better visualize what the various stats are for. When using PrestaShop for a real online store, you must disable this fake data so that your real data is used: click on "No" in the "Demo mode" block at the bottom right of the screen. |
The horizontal bar
At the top of the Dashboard is a single bar which helps you choose the period of time for the currently displayed dashboard statistics. Three sets of options are available:
...
You can also compare two periods of time together by checking the "Compare To" box. Select the second period as would do for the first one (the two can even overlap), then click on the "Apply" button.
When comparing two periods, some of the content blocks will update to indicate the evolution of the data (see for instance the main "Dashboard" block, which presents data from the Dashboard Trends module).
The left column
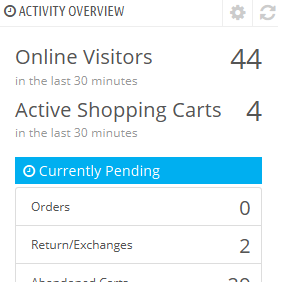 By default, this column presents you with data from the Dashboard Activity module, which gives the main figures from your database in a quick glance:
- Online visitors in the last 30 minutes.
- Active shopping carts in the last 30 minutes.
- Currently pending orders, return/exchange inquiries, abandoned carts and out of stock products.
- Notifications for new messages, order inquiries and product reviews.
- New customers and new newsletter subscriptions.
- Traffic statistics: visits, unique visitors, traffic sources and direct links.
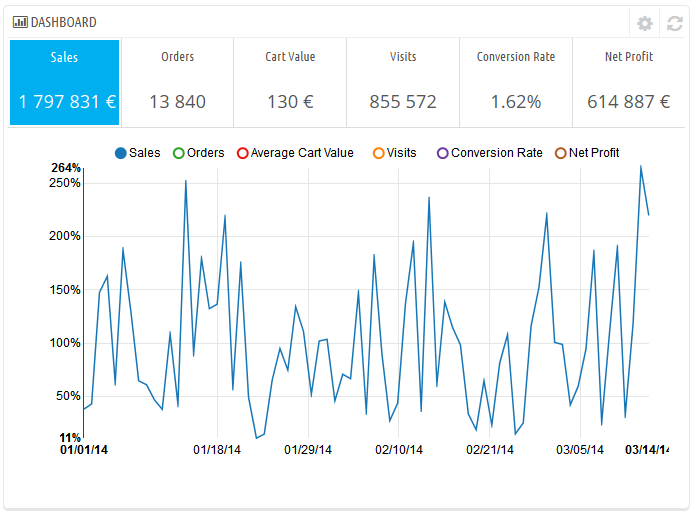
The central column
The central column is where the term "dashboard" takes its importance: this area of the Dashboard presents the user (you) with the most important numbers pertaining to his shop's daily activities, along with a graph of sales and a list of the latest orders. Every time you log into your shop's administration area, you will be first and foremost looking at the evolution that these numbers take. This is where you see your shop live and breathe.
...
- Dashboard (Dashboard Trends module). This is the main block of information on the dashboard. With its various graphics, it really helps you see if your shop is headed in the right direction or not. Click on one of the graphic type to display it. Additionally, when comparing two time periods, it displays the evolution of each figure in percentages. Hover the graphic with your mouse to see the details.
Clicking on its configuration icon (top right) open a new page where you can set various expenses that your shop has (bank wire fee, average shipping fee, hosting expenses, etc.), in order to better indicate your trends. - Your Forecast (Dashboard Goals module). This block presents you with the goals you have for the coming months, and how your shop is doing as compared to them. Hover the graphic with your mouse to see the details.
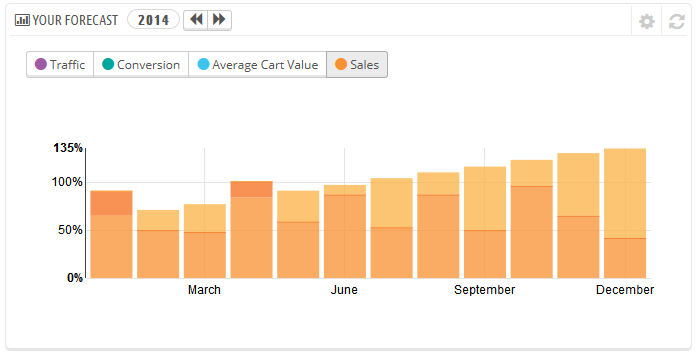
Depending on your monthly results, you should update your forthcoming goals. You can set your goals in the block's configuration form (top right of the block), and fill in your expectations month per month in terms of traffic, conversion rate, and average cart value. The "Sales" column will be updated according to the goals set in the other columns (for instance, for a 1000 visitors with a 2% conversion rate and a $10 average cart, you would get 1000*(2/100)*10 = $200). You can change the currency in the "Currencies" page under the "Localization" menu. - Products and sales (Dashboard Products module). This block presents you with a table of your latest orders and a ranking of your products: best sellers, most viewed and top searches (as searched in your shop's search form, not from search engines).

You can set the number of items to display in each by opening the block's configuration form
The right column
This last column is an informational one: it gives you the latest news from PrestaShop.com, notifications about new PrestaShop versions, and useful links.
...