...
Getting on board of PrestaShop
Since version 1.6.0.11 of PrestaShop, any new installation has the OnBoarding module activated by default. That module has been built from the ground up to help new users quickly understand the way the back-office back office works, taking them from basic customization to the shop's launch, with steps covering adding a product to the catalog, configuring the shop's payment methods, and choose the default shipping options. All this is done using a playful interface.
| Note |
|---|
If you already know your way around the PrestaShop administration panel, you should probably disable that module:
|
How the module works
The module's interface cannot be missed: it is the first thing you'll see at the top of each and every page of the back-officeback office, before the page's own content.

At first sight, you understand how the module works: in a handful of easy steps, it will take beginners by the hand and help them setting up their shop's options.
Clicking the "Let's start!" button launches the whole process – which can be interrupted at any time, and finished later on. That process is shared between in a window which appears on top of the back-office back office interface, which will give you instructions to follow, and the main interface itself, where you are expected to follow those instructions.
Step 1: customizing your shop
The first step helps you customize your shop, in order to make it your own. This is done by installing a new theme and uploading your brand's logo.
...
In the background, the module has already switched the current page to the Themes preference page. Click on "OK, take me to my theme" to hide the module's window and work on your theme: you can either change switch from the default theme for to one that is already available, or you can get a new one from PrestaShop's marketplace, Addons: http://addons.prestashop.com/
...
When you are done with customizing your shop, click on the module's "I'm done, take me to the next step" button.
Step 2: Adding products to your catalog
The second step takes you to the heart of your shop: the products you sell.
...
Click on the "OK, go to my catalog" button to make the module's window disappear. The back-office back office page is now the product creation form. Follow through the available fields and various tabs on the left, and do not hesitate to click on the Help button in order to learn more about all the possibilities the PrestaShop offers.
...
When you are done with creating products, click on the module's "I'm done, take me to the next step" button.
Step 3: Setting up your payment methods
The third step is an essential one: if you do not set your payment methods, you will NOT receive payment for your products sold!
...
Click on the "Show me payment methods" button to make the module's window disappear. The back-office back office page is now the Payment settings page. It presents you with several payment methods.
...
When you are done with setting up your payment methods, click on the module's "I'm done, take me to the next step" button.
Step 4: Set up your shipping methods
The fourth step is also an essential one: if you do not set your shipping options, you have no way to make customers pay for shipping. If you are only selling digital products (PDF, etc.), then it makes sense not to have a shipping partner, but if you do sell real products, you have to indicate who your shipping partner is.
...
Click on the "Let's see about shipping" button to make the module's window disappear. The back-office back office page is now the Carriers settings page. It presents you with two options: adding a carrier yourself, or using a carrier module.
...
You might prefer to use a faster module way and install a carrier module. A few are listed by default on the main page, but you find more on the "Modules" page. Install the one with which you have a contract, and configure the module with your contract information.
When you are done with setting up your shipping methods, click on the module's "I'm done, take me to the next step" button.
All done!
You're (mostly) done!
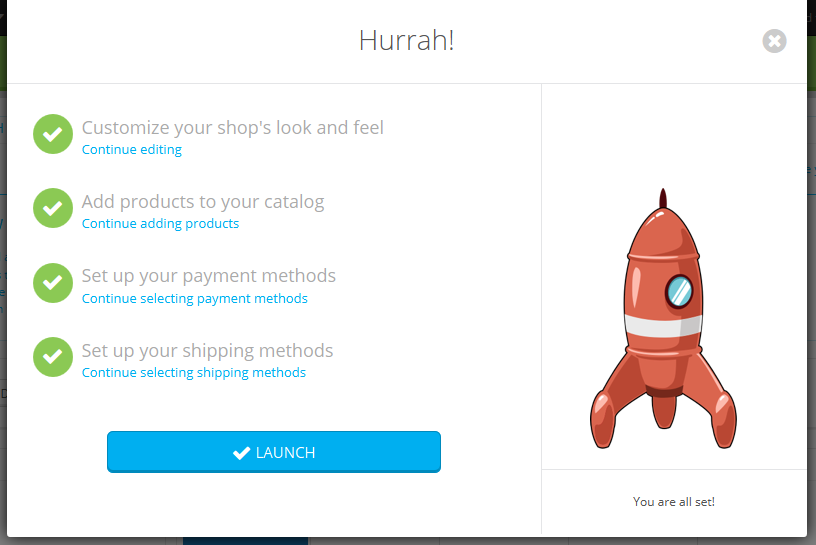
You have gone through all the essential steps in configuring your shop. There are many othersother steps, but those are necessary for selling on the Internet.
...
Before you put your shop out of maintenance mode and make it available to everyone on the Internet, you might want to wait a bit and check all the other preference pages in the back-officeback office, making sure that they are all set the way you want them to. If so, do not click on "Launch" and click on the cross button in order to close the module's window.
Once you have it all set, go to the Maintenance preference page and enable your shop. Done! Good luck with your online endeavors! Start them by promoting your shop: share your launch on social networks using the final window of the module.
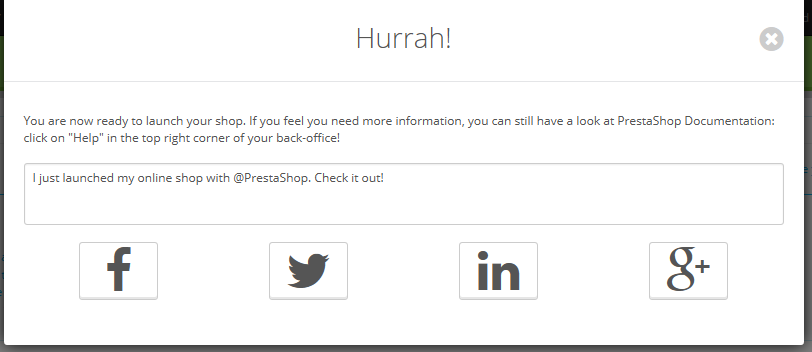
One Once you are done, the module does not appear anymore in your back - office.