...
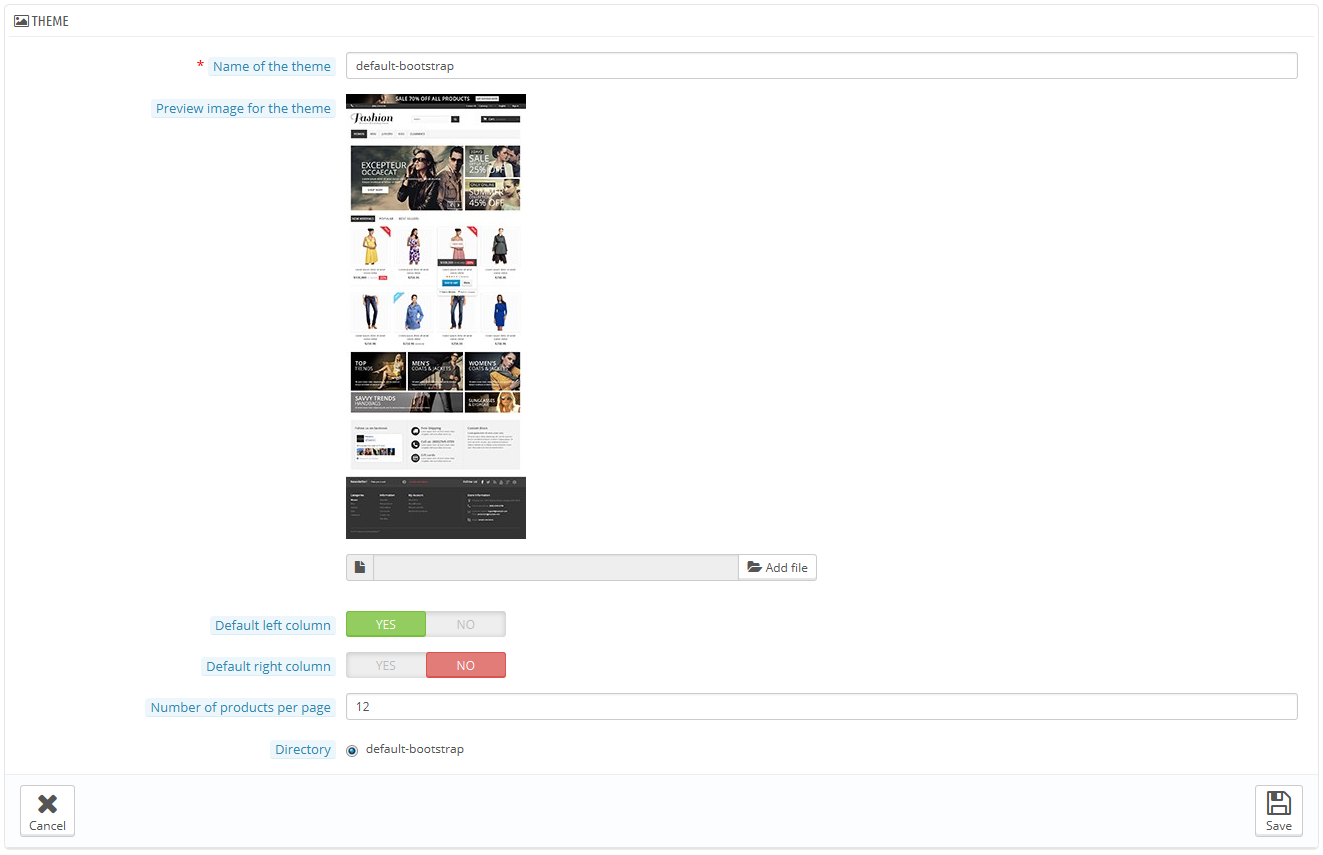
Clicking on the "Edit" button displays the main information about the them, but also many theme (see the "Creating a brand new theme" section below to find an explanation of the fields).
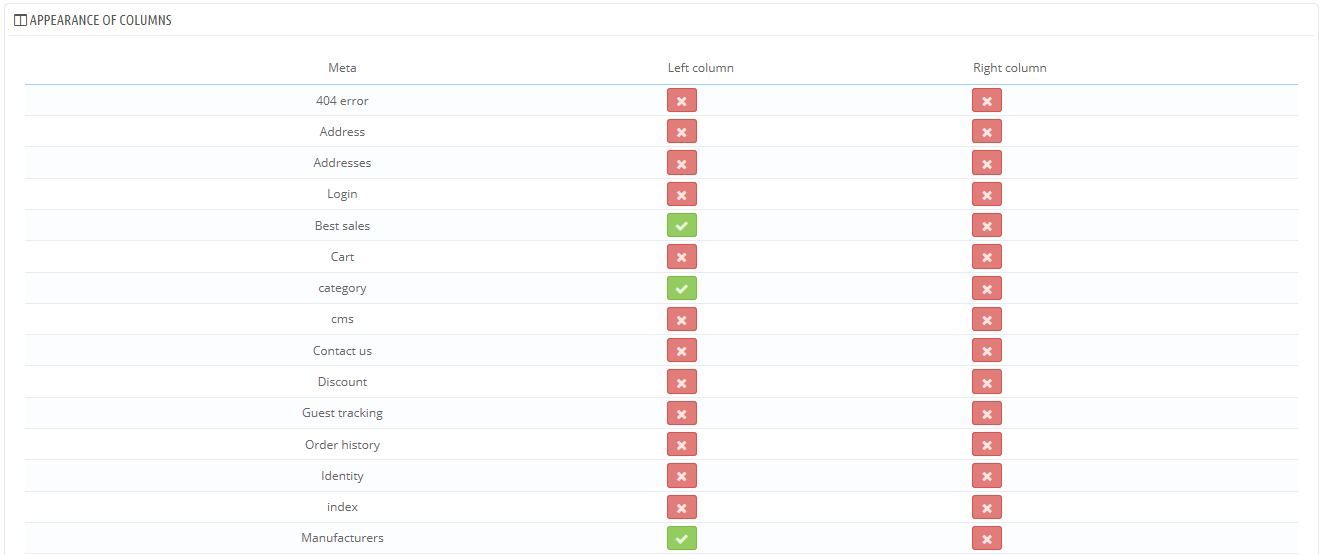
The section displays a lot of information about the way the left and right columns appear:
, depending on the page:
- If the box is checked, the column appears in the page (for instance, the Category page).
- If is is left unchecked, it will not appear on that page.
Note that even if you can click on the buttons at will, these settings are only informational, and the theme will not necessarily be able to adapt to your changes!
Creating a brand new theme
...
All of this is done by clicking on the "Add new" button from the theme list (NOT the "Add new them" button at the top of screen!). It displTheir 'Edit' section lets you change their name and directory (if any another directory is available), as well as many other options. A creation form opens:displays a creation form.
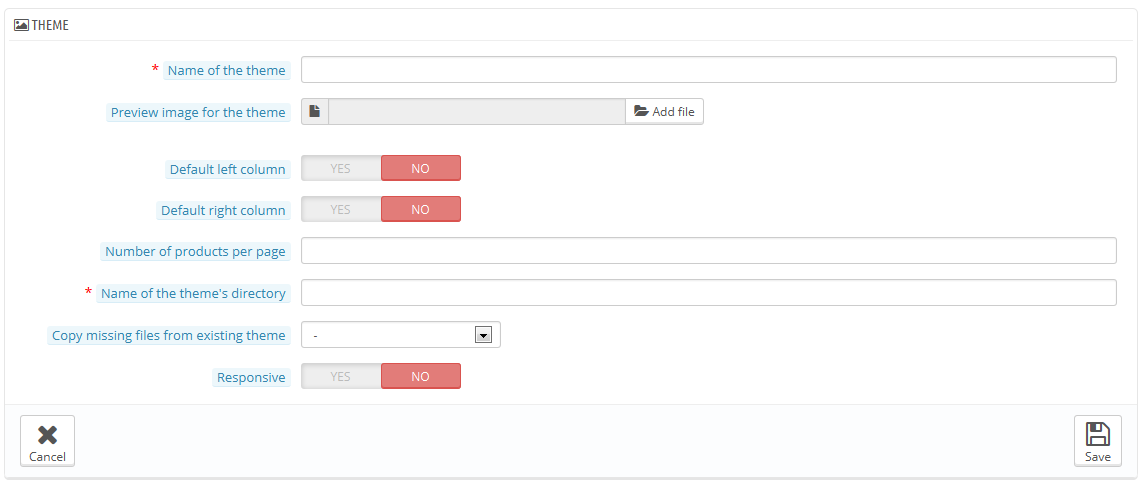
Fill-in the its fields:
- Name of the theme. Make sure the name is not already used by another theme (check on the Addons website).
- Preview image for the theme. You should always add a preview image, as it is a clear reminder of what the theme looks like. If you don do not have one yet, leave that for later, when the time will come to release the theme.
- Default left column and Default right column. Indicate if your theme has a column (or even two columns), and if so, on which side of the screen. This is purely informational, and can be changed at any time.
- Name of the theme's directory. Try to keep it close to your theme's name. If you have not already created a theme folder, PrestaShop will create one for you.
- Copy missing files from existing theme. This is the cleanest method to start a new theme from another theme's files. Choose "default-bootstrap", or any other theme that you would like to base your foundation on.
- Responsive. Indicate if your theme has a responsive design or not (if you do not know what a responsive design is, then you probably should choose "No"). This is purely informational, and can be changed at any time.
...
It is now up to you to change your theme's files in order to make it unique! On your local installation (not a production one!), select your new theme, and start working!
Once you are done with your designing and code it, go back to this setting page and change it accordingly: definitive preview image, default column, number of products, and responsiveness.
...
Two buttons at the top of the screen enable you to import a theme and install it (and its attached modules), or to export a theme and its modules from your shop in order to share it with the world.
Importing a theme: the "Add new theme" button
This screen presents you with 3 methods to install a new theme: from your computer, from a public website, or from your own FTP server. A final button leads you to the theme creation form, presented above.
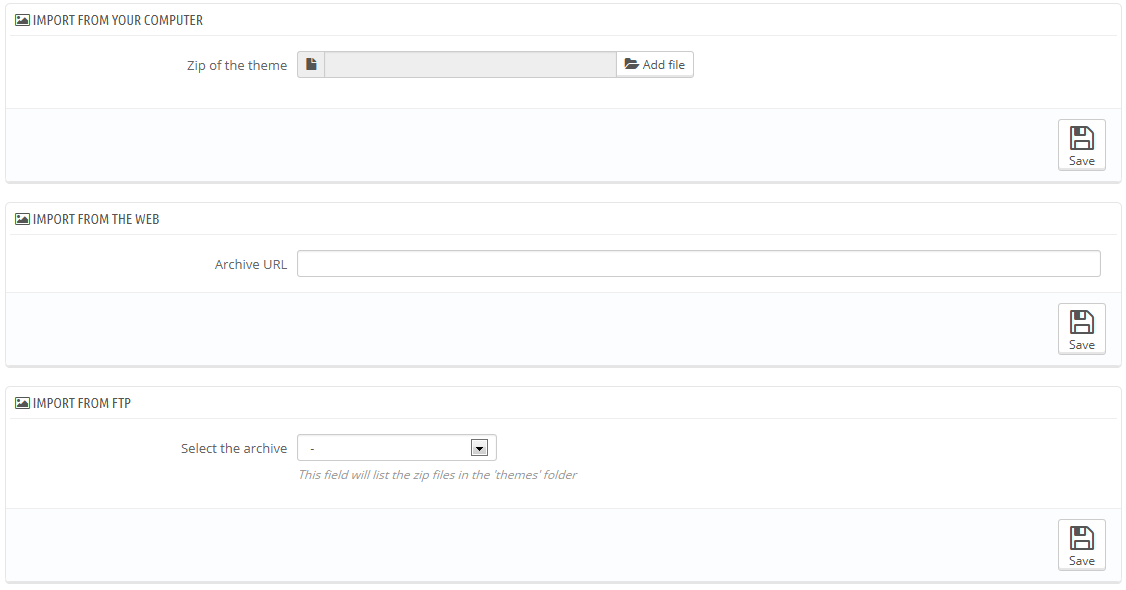
Whatever the method, the process remains the same: indicate the location of the theme's Zip archive, then click "Save".
...
The only that changes is the source of the Zip file:
- Import from your computer. Use the file explorer to find the archive.
- Import from the web. Indicate the direct public URL to the archive.
- Import from FTP. Using your FTP client, upload the archive in the following folder:
/modules/themeinstallator/import/.
A quick summary is displayed in the page that follows.
Click "Save" to validate your choice. The theme is now installed, and PrestaShop asks you if you wish to install modules that were imported along with the theme, what you would rather do with the current modules configuration, and how you would like the images configuration to be taken into account.
...
This section is only available when there is at least one theme installed on your PrestaShop site. It gives you a method to export your module in a the correct format (most notably with a working configuration file).
Exporting a theme is very useful when you want either to back the theme up for safety, and create an archive of the theme for a friend or in order to make it available on the Addons marketplace (http://addons.prestashop.com/). Not only does it generate a complete Zip archive of your theme, but it also adds many information in an XML files, which is very useful both when uploading to Addons, and when important to another PrestaShop site.
...
Select a theme and click on "Export". A configuration form appears where you can set the exported themes parameters: author name, modules to export along, theme name, version compatibility, etc.
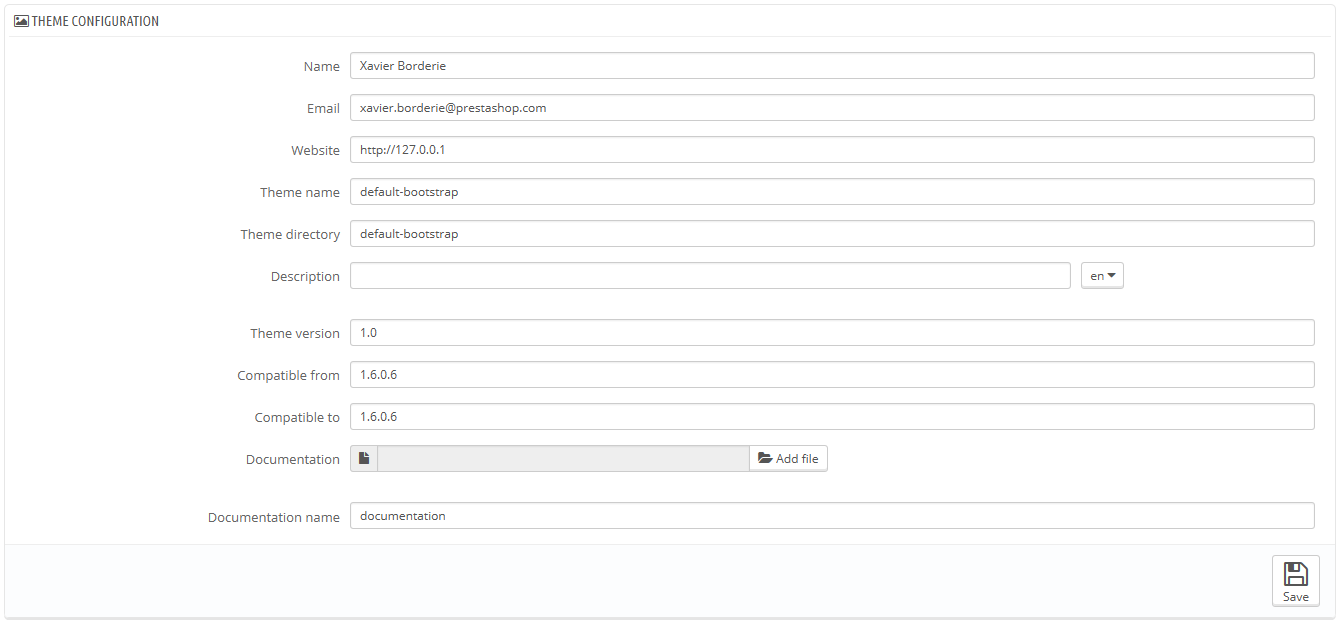
Once all the parameters are correctly set, click on "Save". You will quickly get a file to download from your browser. Save it on your hard-drive, then give the save saved file a proper name instead of the random one it currently has. From there on, you can easily share this theme, and if it is your own creation, you can start selling it on PrestaShop's Addons website marketplace at http://addons.prestashop.com/.
...