...
You can download the latest version of PrestaShop at http://www.prestashop.com/en/download.
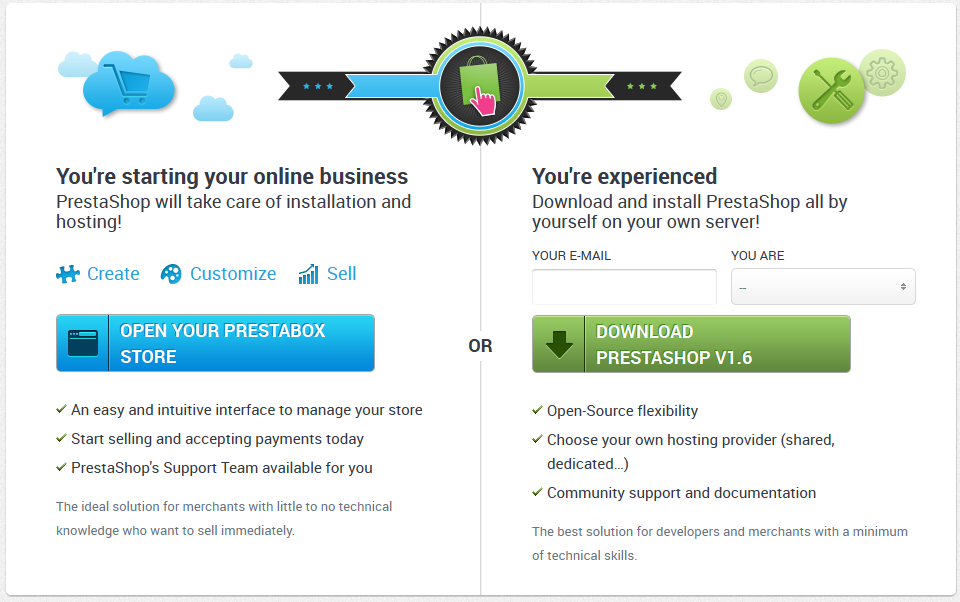
You only have one download option: the latest stable version, ready for all kinds of online stores.
...
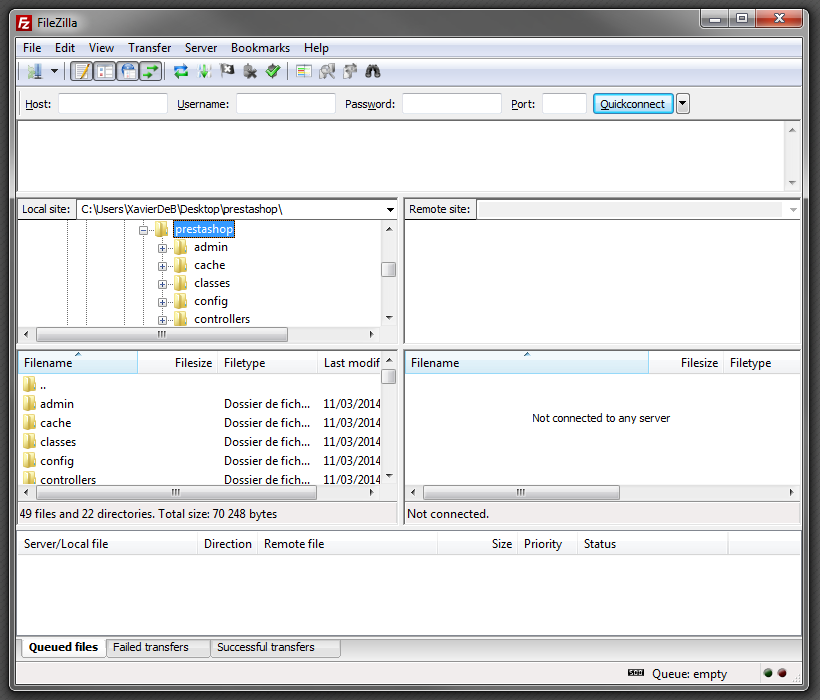
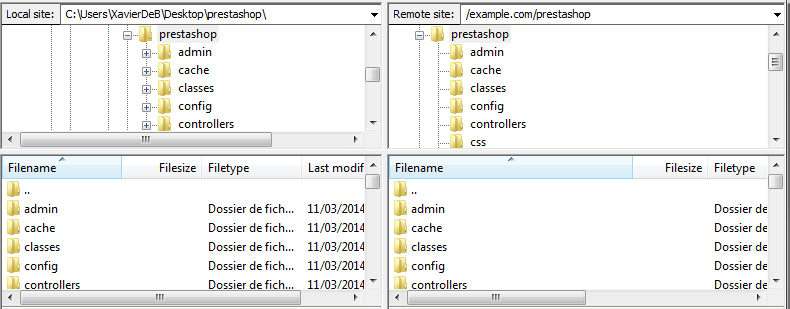
In FileZilla (or any other FTP client), browse your local folders until you find the one that contains the PrestaShop files. Keep it open in the "Local site" section on the left.
In the "Remote site" section (on the right), browse to the location where you want PrestaShop to be publicly available (root of the domain, sub-folder, sub-domain...). This can change a lot, depending on both your host and your needs:
...
On FileZilla's left side, you should now have the local folder where you keep the PrestaShop files from the Zip archive, and on the right side, the destination location. If you haven't done it yet, uploading is simple: select all files and folders from the local folder (use Ctrl-A), and either drag & drop them to the remote folder, or right-click on the selection and choose "Upload" in the context menu.
Uploading can take several minutes, as PrestaShop uses more than 7500 files and almost 1000 folders. After a while, all of PrestaShop's files and folders should be online. Great!
...
Connect to phpMyAdmin using your account credentials, which your host provided you with. It should be accessible through a standard URL, tied to your domain name, or host's domain name.
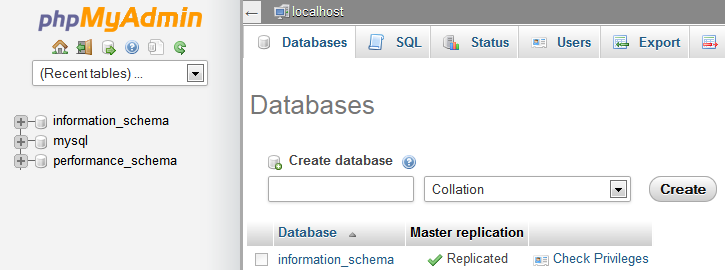
In the left column, you can see the databases currently available on your MySQL server. Some of them should be left alone, because they are either used by phpMyAdmin or by the host: phpmyadmin, mysql, information_schema, performance_schema and others. Read your host's documentation to know if one of these can be used as a default database.
...
There are 6 steps. At the top of the page, the installation assistant gives you a visualization of where you are in the process: the gray faces turn into smiling faces after each step that is completed.

Step 1: Welcome page
This page is a quick intro into the installation process. You can choose the language in which the installer will display its instructions.
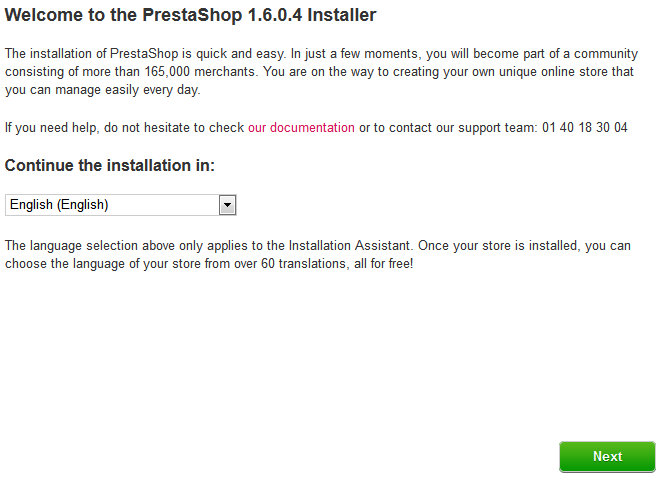
You also get a link to the documentation site (http://doc.prestashop.com/), and the PrestaShop support phone number. You can learn more about our support service by going to http://support.prestashop.com/en/.
...
- Open Software License 3.0 for PrestaShop itself, which you can also read at http://www.opensource.org/licenses/OSL-3.0.
- Academic Free License 3.0 for the modules and themes, which you can also read at http://opensource.org/licenses/AFL-3.0.
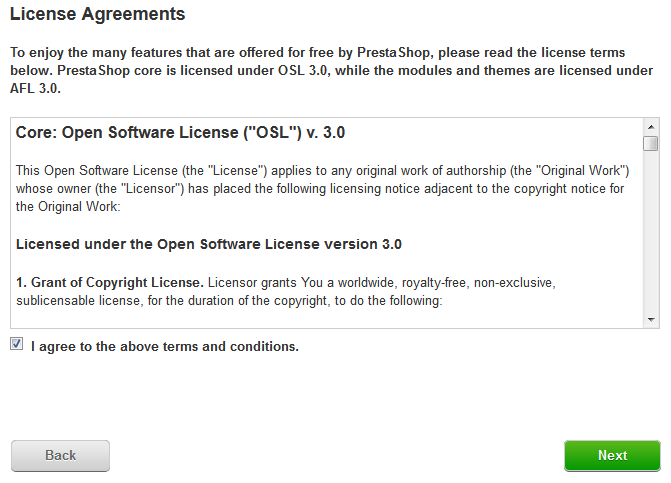
You must agree to both licenses in order to install PrestaShop.
...
This page checks that everything is OK with your server configuration: PHP settings, permissions on files and folders, third-party tools, etc.
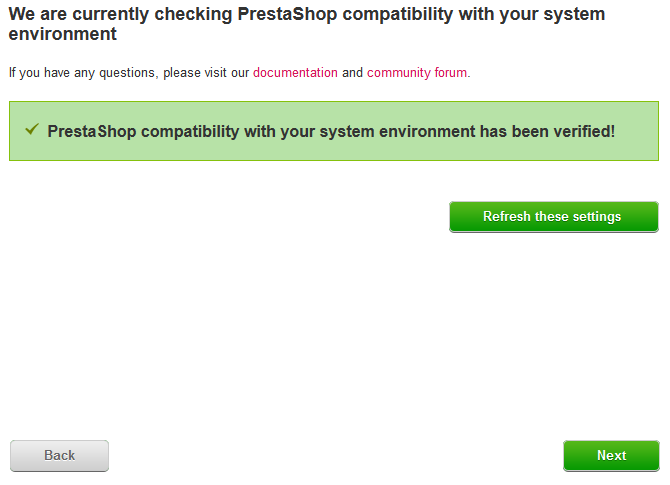
If anything goes wrong, the installer stops you here, enabling you to see the few technical details that need fixing, be it changing the PHP configuration or updating the file permissions.
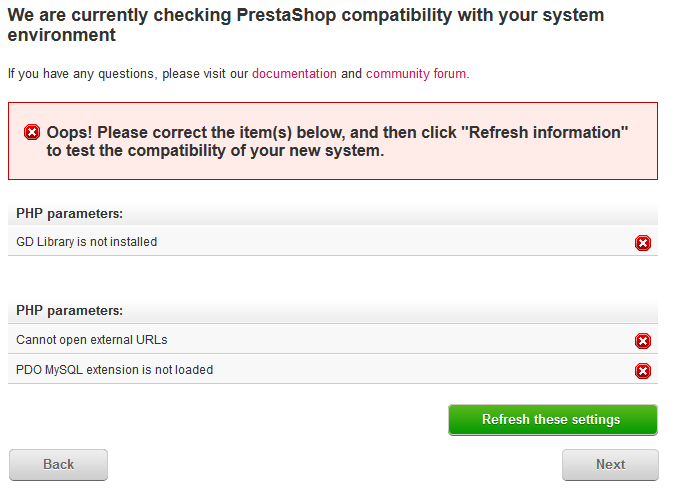
Here is a list of the checks that are performed during this third step:
...
Thanks to FileZilla (and most FTP clients), you do not have to use any Unix command. Most FTP clients make it possible to change permissions easily and graphically: once you have found a file or folder that needs such a change, right-click on it, and in the context menu choose "File permissions...". It will open a small window.
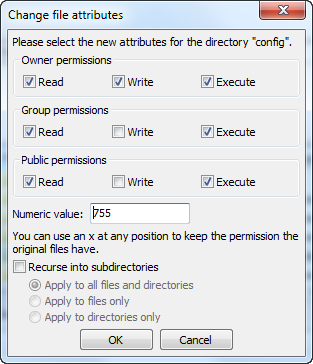
Depending on your server configuration (which you don't always have a hand at), you will need to check both the "Read" and "Execute" columns of boxes, and at least the "Owner" and "Group" rows for the "Write" column. Some hosts might require you to have the public "Write" box checked, but be careful with that: it is rarely a good thing to have anyone on your server be able to edit the content of your PrestaShop installation.
...
| Warning |
|---|
Do not use a colon in your store's name, as it might prevent some feature from working (for instance, e-mail sending might fail). You can replace the colon with a dash if you need to have two sections in the title. For instance, use "MyStore – The best place for items to buy" instead of "MyStore: The best place for items to buy". |
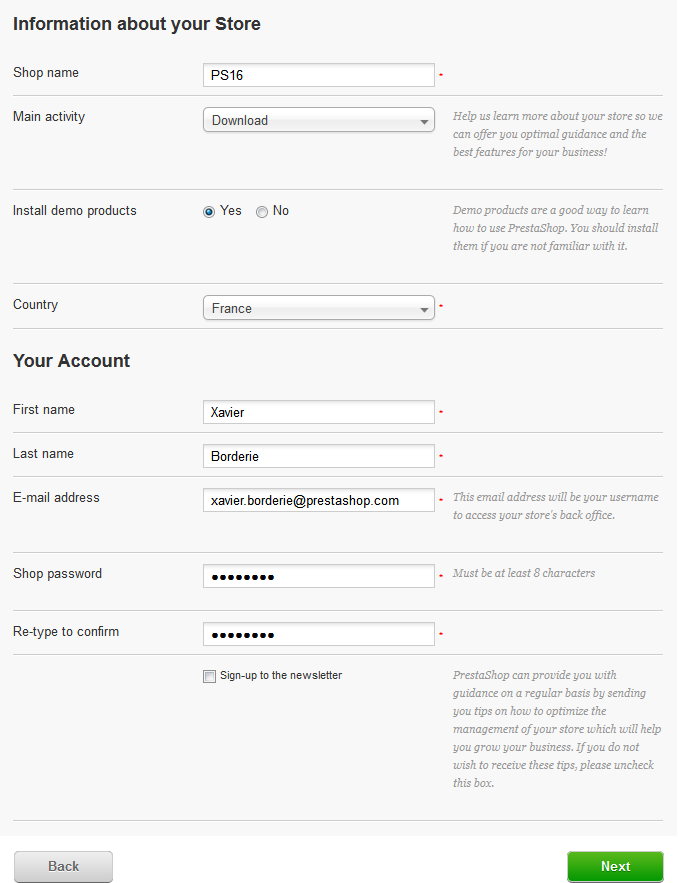
Concerning the logo, you should note that it will appear:
...
This page contains a form that enables you to tell PrestaShop where the database server is, and which database it should use, along with a few other details. All this information should have been provided to you by your web host.
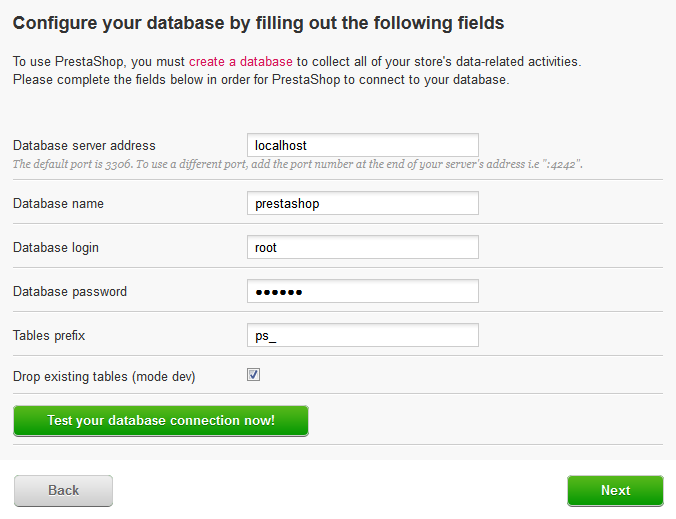
Fill all the fields with the database connection information provided by your web-host:
...
Click "Next": the install will start configuring your shop, creating and populating the database tables, etc. This might take a few minutes: please be patient and do not touch your browser!
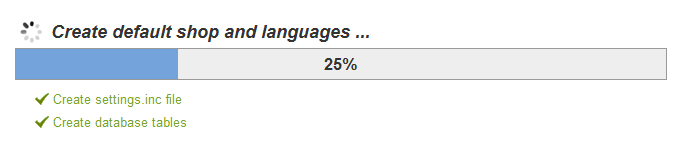
The installer does the following:
...
As you can read right on the final page of the installation process, there are a couple of last actions to perform before you can leave the installer.
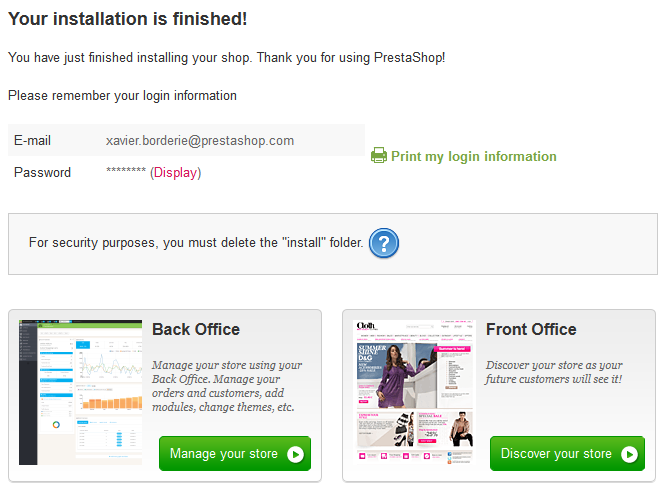
An easy way to improve your installation's security is to delete some key files and folders. This is done using your FTP client, directly on the server. The items to delete are:
...