Table of content
| Table of Contents | |
|---|---|
|
...
|
Updating PrestaShop
New versions of PrestaShop come every few weeks. Some are major, most are minor, but they all bring a slew of innovations, improvements and bug-fixes. It is therefore highly advised to keep up with the latest version.
...
For any support request or help to setup your website, contact us and discover our yearly support offers.Our support team is at your disposition for all technical problems related to the upgrade of your PrestaShop store:
- By e-mail: [email protected] phone: use the contact form at https://www.prestashop.com/en/support
- By phone (9 am – 6 pm Central European Time (Paris)):
- +33.1 40 18 30 04
- if you need advices on how to improve your store (free)
+33.8 90 03 23 20 if you have support questions (0.80€ / min)
- Learn more about our support offers: http://supportaddons.prestashop.com/en/388-support
- And the ever-helping community forumshelpful community forums
Checking the requirements for the new version
Before you do anything to your current install of PrestaShop, check that your server configuration matches or exceeds the minimum requirements for the latest version of PrestaShop. For instance, make sure your web host provides you with the required versions of PHP and MySQL. If not, ask him to update the server. If you are unsure which PHP and MySQL versions you are using, ask your web host.
If you web host won't update your server configuration, then it is time for you to find a better host. Do NOT perform an upgrade unless your server at least meets the system requirements.
The minimum requirements for the latest version of PrestaShop are available on the official PrestaShop download page.
If upgrading from a version below 1.4.x
Older versions of PrestaShop might not make it as easy to upgrade to the latest version: the code base is quite different, many files have moved around, created or deleted, and the risk is high, when skipping from a very old version to the latest one, to see errors and mistakes aplenty.
You should therefore be even more careful; the older your version, the more you should pay attention to details: backups, custom files, edited theme, etc.
Automatic upgrade
PrestaShop introduced automatic upgrade in version 1.4.4. It enables shop owners to backup and update their site in a few clicks and no technical knowledge. It is explained in full details in the User Guide's Tools chapter, in the "Upgrade" section.
If upgrading from a version between v1.3.x and v1.4.3
No version of PrestaShop supported the automatic upgrade until v1.4.4. Therefore, automatic upgrade is not available to you unless you manually upgrade to at least v1.4.4.
Manual upgrade
Step 1 – Save and Backup Your Current Store
| Warning | ||
|---|---|---|
| ||
Not backing up your store constitutes a very important risk if you encounter any difficulties with the upgrade. There is a risk of data loss. Do not ever skip this step. Do not proceed to step 2 unless you are absolutely certain that your backups are completed, successful, and fully functional. Do check several times. |
Backing Up Your Files
You must save all of the files related to your PrestaShop store.
...
- Copy all of your files from your server to your local computer using an FTP client
This method is only possible if your hosting provider has provided you with an FTP access to your server. Create a "Backup" folder on your computer, then, using an FTP client (such as the free FileZilla client), select all the PrestaShop files and folders on your server (use the Ctrl-A command) and copy them to your "Backup" folder.
Deactivating Your Store
| Warning | ||
|---|---|---|
| ||
Disabling your store is very important. |
...
In the "Maintenance IP" field, located just below the "Enable Shop" one, enter your own IP address, so that you can keep on using your store during the update. This will allow you to test the store, while still making sure visitors cannot access the website.
In order to find out your IP address, visit this page: http://www.myip.dk/
Backing Up Your Database
You must absolutely back up the whole database for your PrestaShop store.
...
- Download a Database Backup from your PrestaShop Back-Office
Visit the "Tools" tab, then the "DB backup" sub-tab. This process will take between 1 and 20 minutes depending on the size of your database. Make sure this backup is functional, recent, and especially that it contains of all the data of your website. Open the zip file and make sure that there are absolutely NO ERRORS before proceeding to the next step.
Backing up Your Customized Translation
If you did not edit the available translations or add new ones (either PrestaShop's or your modules'), please proceed to step 2.
...
| Tip | ||
|---|---|---|
| ||
Does it contain...
You have checked the entire backup folder, and made sure that they are all correct and that you would be able to return to your current version / restore all of your data. If you answered yes to all of the questions above, then proceed to Step 2. |
Step 2 - Getting Ready for the New Version
Downloading and Unzipping of the Latest PrestaShop Version
Visit http://www.prestashop.com and download the latest version of PrestaShop (click the "Download" button on the homepage).
...
In that "/prestashop" folder, select the "/admin" folder and rename it to something unique to you (for instance, "/admin436"). Your online store currently also has a unique "admin" folder, from its original installation; you can use that unique name if you wish. If you do not know the unique name of your online store's "/admin" folder, use whichever name you want.
Copying the files backed up during Step 1 to the "prestashop" folder
Some of the folders that you have backed up will need to be copied to your "/prestashop" folder.
...
/mailsfolder has all the mails that you have modified.
If you have never made any modification there, do not worry about this folder./imgfolder contains your logo and all the pictures of your store (categories, products…)/modulesfolder, only copy the modules that you have added./themes/yourthemefolder, only copy your current theme. If you use the default theme from PrestaShop, do not copy it, you must use the one from the new version./downloadand/uploadfolders, which contain all the downloadable products, the attached files and the customizable products. If you do no use any of these functionalities, do not copy these folders./classesfolder: in case you have added customized classes to this folder, copy them to the new/classesfolder.
In order to function properly with the latest version of PrestaShop, all these class files need to have their class name suffixed with "Core":- Open each and every one of the class files, and find the ones where the class name is not
Core-suffixed. If you are upgrading from PrestaShop 1.4.x, you shouldn't have any (except for custom classes). - Rename the class name, adding the "Core" suffix. For instance, "
MyClass" becomes "MyClassCore".
Only change the name in the PHP class within file, not the name of the file itself! - If all the files already have "Core" in their classname class name (such as "
class AttributeCore extends ObjectModel"), then you do not need to change anything. - Save the edited files.
- Open each and every one of the class files, and find the ones where the class name is not
/configfolder, only copy thesettings.inc.phpfile, then modify the following lines:- The line that contains "
PS_BASE_URI" must contain the name of the subfolder where you are going to do your update. For instance, "/prestashop/" instead of "/", or of the name of current folder for your current store. - If you modified your database credentials (you should not have had to do that normally), update all the lines that contain "
DB_NAME", "DB_USER" and "DB_PASSWD" too.
- The line that contains "
Moving the "prestashop" folder to your FTP server
The "prestashop" folder that you have unzipped, now contains all the modifications from your "Backup" folder (and therefore, from your current live store). This next step will have you upload that folder on your FTP server.
...
Using your FTP client, upload the "prestashop" folder to your server.
Checking before going further
Let's say your store is at the following URL: http://www.myprestashop.com.
- To test the update, you first downloaded the latest version of PrestaShop.
- You unzipped this version, which contained a folder called "prestashop".
- You copied your customized files from your backup to this new "prestashop" folder.
You modified the file
config/settings.inc.phpon line "PS_BASE_URI" so that it has the name of the folder on your server (should be "prestashop").
For instance:Code Block html html define('__PS_BASE_URI__', '/');...was replaced by...
Code Block html html define('__PS_BASE_URI__', '/prestashop/');- You uploaded your "prestashop" folder to your FTP server, and it can be accessed at: http://www.myprestashop.com/prestashop
| Tip | ||
|---|---|---|
| ||
If you answered yes to all the questions above, then proceed to step 3. |
Step 3 – Starting the Update
Launching the update script
Visit your shop's install script URL; for instance: http://www.myprestashop.com/prestashop/install (Replace "myprestashop.com" with the actual URL of your store, and "prestashop" with the name of the folder that you have just transferred to your FTP).
That URL should show:

- Select "Update" instead of "Installation".
- Read the license agreement, then select the option "I agree to the above terms and conditions".
- Click on the "Next" button.
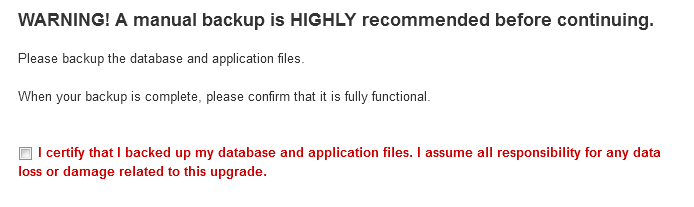
If you did follow the first step of this guide concerning back-ups, you can click "I certify that I backed up my database and application files. I assume all responsibility for any data loss or damage related to this upgrade."
If you did not do the required back-ups or if you did not have a chance to verify the data's integrity and that these backups are functional and recent, please go back to step 1 of this guide.
...
When clicking the "I certify..." checkbox, the update displays more safety instructions that you should follow. Read them carefully and follow them before you click on the "Next" button.
The parameters of your hosting provider should show on the screen, as well as more details about the operation about to be launched.
...
Otherwise, click the "Next" button at the bottom of the page.
Verifying all parameters before the update
If sufficient rights are assigned to your files and folders, the following page will show:

If not, make sure that the folders' rights are properly configured: change the access rights of the folders marked in red in the install/update tool, directly on your FTP server (make a CHMOD 755 or 775, depending on your hosting provider) then click the "Refresh these Check my settings again" button.
In order to perform a CHMOD, using your FTP client, find the folders that have the wrong permission settings, right-click on each of them in order to display their properties (or even better, their access rights), and tick the boxes that are not yet ticked, until a refresh of the "System and Permissions" page gives you only green folder.
If the configuration validator indicates that folder that do not exist do not have the correct permission (for instance, the Smarty /cache and /compile folders), simply create these folders using your FTP client.
Once you're done, click "Next" at the bottom of the page, the update will start and probably last a few minutes.
| Warning | ||||
|---|---|---|---|---|
| ||||
You can check if the update has started in the upper right part of the screen, thanks to the progress bar. Do not leave the page or close your browser; wait for the update to be completed. |
Finishing the update
Once the update is finished, you should see the following screen:
final screen, announcing that "Your update is completed!"
On your FTP server, inside the "prestashop" folder, you should delete:
- The {{
/install} folder (this subfolder contains the update tools). - The
READMEfiles (contain information about the PrestaShop install). - The
CHANGELOGfile (contains information about the latest changes in PrestaShop).
...
| Tip | ||
|---|---|---|
| ||
If you answered yes to all the questions above, then proceed to step 4. |
Step 4 - QA and Testing
Import your Translations
If you did export your custom translations during step 1 (Backups), import them back into your new store by going to the "Tools" tab, then the "Translations" sub-tab.
Verification of the main Domain Name and regeneration of your .htaccess
You should verify that the domain name assigned in the database is indeed the one that you are working with. To do so, visit the "Preferences" tab, then the "SEO & URLs" sub-tab.
...
| Warning | ||||
|---|---|---|---|---|
| ||||
In any case, do not forget to regenerate your |
Verifying your theme's compatibility
You can verify your theme's compatibility with the updated PrestaShop version by visiting the theme validator developed by PrestaShop.
...
If you use an unmodified copy of the default theme of PrestaShop, this step is not necessary.
Tests to be done on your new store
To make sure that everything is working properly on your updated store, you should perform a few tests.
| Tip |
|---|
Testing To-Do List (this is not a complete list, you should do as much testing as possible):
If every test is successful, congratulations! Proceed to step 5. |
Step 5 - Going live with your Up-to-Date Store
...
Swapping your updated store and your production store
...
Congratulations, you have achieved all the essential steps to update your store!
...
| Warning |
|---|
At the end of the process, edit the file |
Activating your store
Visit the "Preference" tab in the back-office of your production (now up-to-date) store and click "Yes" for the option "Enable Shop".
In case of issues
In some rare cases, some modules are not compatible with new version of PrestaShop. You should contact the company / person that provided you with this module to request a few code changes to bring it up to date.
Rolling back your database
...
| Warning |
|---|
Only proceed to this step if you have no other way out |
...
If your update went bad and you do not see any other fix than to roll back to the previous version of your database, there are two mains way of doing so:
...
- Import your backed up data via phpMyAdmin
This is typically done by the database tools provided to you by your hosting provider, most often phpMyAdmin.
You will find the backup data under the/admin/backupsfolder.
If the size of your database is too big, you might encounter an error message. If so, you might need to ask your hosting provider for help by changing the size of the database maximum upload.
You can also download the database from within your back office. Visit "Tools" then "DBBackup". Select your latest database nackup backup and download it to your computer by clicking on it. It should typically take between 1 and 20 minutes to download.
Contact us
For any support request or help to setup your website, contact us and discover our yearly support offers.
...