...
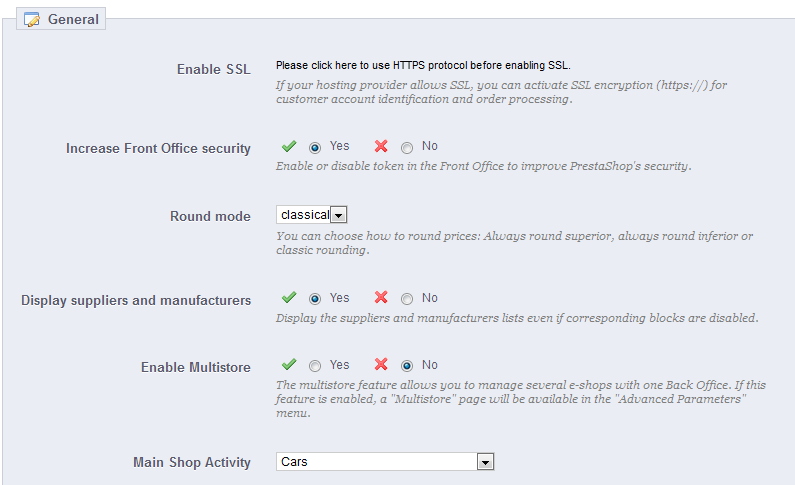
- Enable SSL. SSL means "Secure Sockets Layer", and includes TSL (for "Transport Layer Security"). Both are cryptographic Internet protocols which secure Web communications. You can read more about these protocols on Wikipedia: http://en.wikipedia.org/wiki/Secure_Sockets_Layer.
Providing an SSL connection to your shop is not only excellent for any Internet exchanges, but also a great way to reassure your customers about the safety of their own data (authentication, credit card, etc.) on your shop, as modern browsers now display visual cues showing that the connection is secured. If your hosting provider does support SSL, make sure to activate PrestaShop's SSL support, by clicking on the link. This will reveal a selector, where you should choose "Yes". - Increase Front Office security. This adds security tokens to your shop in order to improve its security. In effect, each URL is specific to a customer's session, and cannot be used as-is on another browser, thus protecting whatever information they might have stored during that session.
- Round mode. Once taxes and discount are applied, a price can feature too many decimals, such as $42.333333333. The round mode is used during the price calculation process (taxes, discount, etc.). There are three modes:
- Superior. Rounding up: 42.333333333 becomes 42.34.
- Inferior. Rounding down: 42.333333333 becomes 42.33.
- Classical. It actually truncates the number at the second decimal: 42.333333333 becomes 42.33.
- Display suppliers and manufacturers. The "Suppliers" and "Manufacturers" blocks can be removed from the front-end of your shop, by disabling their respective modules. Yet, using this option, you can have their list still be available, notably using the
/manufacturer.phpand/supplier.phpURLs. - Enable Multistore. New in 1.5. This little option has major implications: it turns your single-shop installation of PrestaShop into a multiple stores installation. This gives you access to the new "Multistore" page in the "Advanced parameters" menu, and every administration page can be contextualized to apply its settings to either all stores, a specific group of stores, or a single store.
You can read more about PrestaShop's multistore feature by reading the "Managing multiple shops" chapter of this guide. - Main Shop Activity. You might have set the wrong shop activity when installing PrestaShop. You can choose the correct activity here.
Orders
The settings from the "Orders" preference page apply to the orders that your customers make, but also to some other details, such as gifting.
General preferences
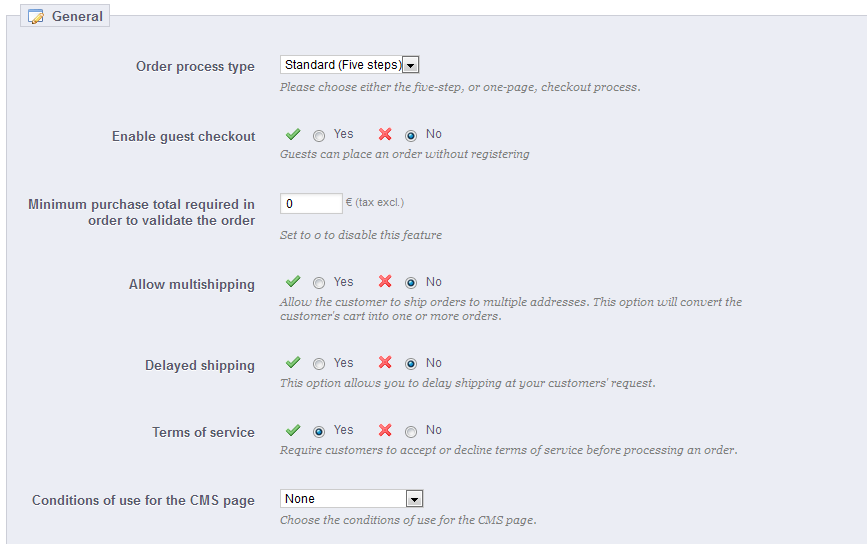
- Order process type. By default, the customer has to go through 5 steps in order to complete the checkout process, each on a different page. However, you can choose to have it all done in a single page. The page will be longer, but some customers might prefer this approach.
- Enable guest checkout. Allows non-registered visitors to place an order, without having to create an account.
- Minimum purchase total required in order to validate order. Indicates the minimum amount that must be in the shopping cart to submit an order. If the amount in this field is not reached, your customer cannot complete their purchase. If you do not want to set a minimum amount, enter "0" in the field.
- Allow multi-shipping. New in 1.5. Makes it possible for your customers to have their order split and sent to more than one address. This is very useful for a gifting shop, for instance.
- Delayed shipping. New in 1.5. If you enable the "Allow ordering of out-of-stock products" option (in the "Products" preference page), you can allow order items to be dispatched as they become available, in as many shipment as needed (depending on how you team sees it fit). Initially, PrestaShop will split the order in two: the available items are sent right away, while the other items become a second order, waiting to be validated.
- Terms of service. Makes your customers have to accept your terms of service before they can validate an order.
- Conditions of use CMS page. Your shop's "conditions of use" are to be stored in a static page (a "CMS page"). Select which page to use so that PrestaShop can point to it correctly.
...
This page contains a few preferences pertaining to how your products are to be handled and displayed by PrestaShop.
General preferences
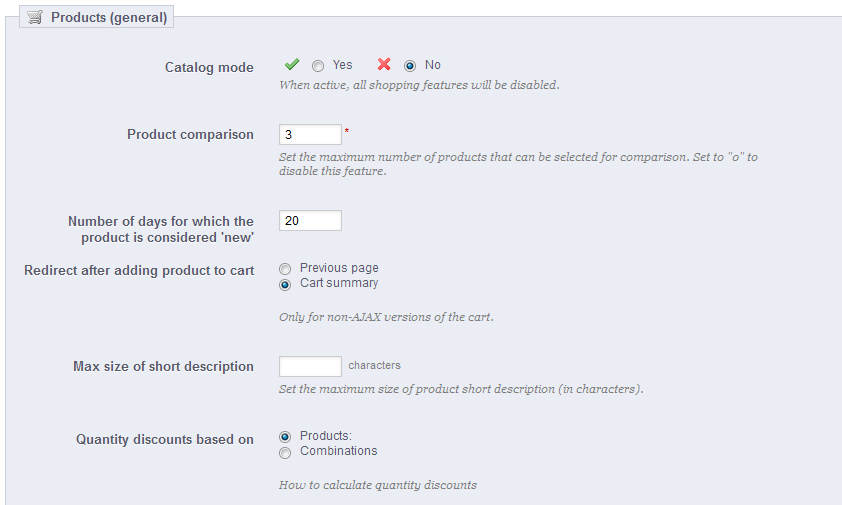
- Catalog mode. Enabling catalog mode turns your shop into a simple gallery of products, with no way to buy the items whatsoever.
- Product comparison. Set the maximum number of products that can be selected for comparison.
- Number of days during which the product is considered 'new'. When you add a product in your shop, it is considered new and it is reported back through the "New products" block and the "New products" page. The field allows you to specify how many days the product will remain visible on the block and page. With this feature, you choose how to display and updated your shop's news. The "New products" page is usually most accessed by your regular customers.
- Redirection after adding product to cart. Short description max size.You can either redirect the customer to the previous page, or to the cart summary.
- Max size of short description. 0 means that there is no limit.
Pagination preferences
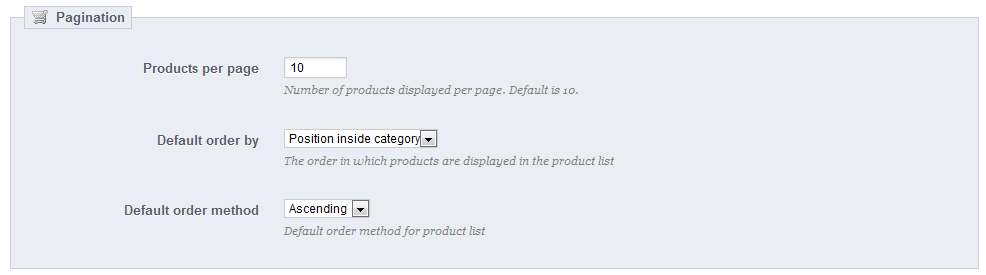
- Products per page. Indicate how many products are displayed on the pages of your categories.
- Default order by. Indicate the order of products in your shop's categories. 6 choices are available:
- Product name. Displays your products based on the alphabetical order.
- Product Price. Displays your products according to their prices.
- Product Added Date. Displays your products according to the date added to your shop.
- Position inside category. Displays your products as they are positioned in the categories in your catalog. The position of the products can be modified directly in the catalog of your shop using the position arrows. This way you have your product in the most attractive fashion for your customers.
- Manufacturer. Displays your products in alphabetical order of their manufacturers' names.
- Project Modified Date. When you edit a product, its modification date is changed. This option makes them appear in the order of modification date.
- Default order method. The above options can be sorted by ascending or descending order.
...
The "Customers" page appeared in version 1.5 to bring together specifically customer-related options, most notably the B2B mode.
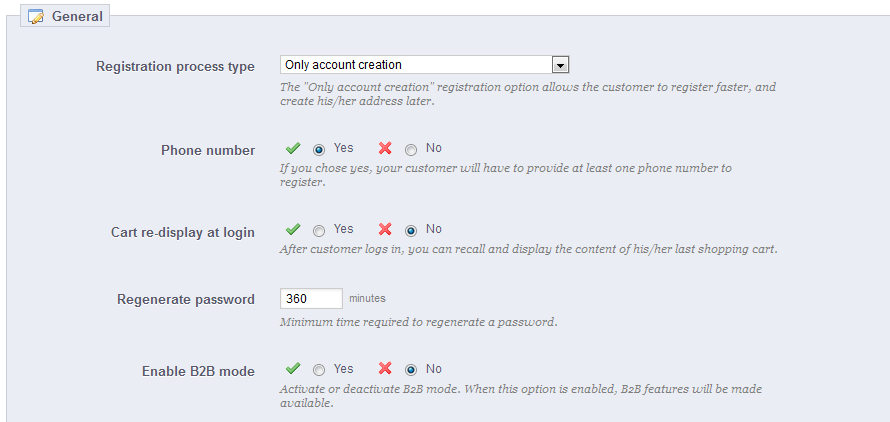
- Registration process type. New in 1.5. You can let visitors create a new account without any immediate obligation to register an address, or force them to register an address as soon as they create their account.
The first option makes it quicker to create account, which is great, but this will add a new mandatory screen once they want to validate an order, which can turn them off.
On the other end, the second option makes account creation longer, but at least they will already have an address registered when they want to validate an order. - Phone number. Likewise, you can require your client to register a phone number, or not. Having a phone number can prove invaluable to you, as this makes it possible to contact a client directly, but some client resent give this kind of information.
- Cart re-display at login. If the customer had a cart that was not checked-out, display it once he or she logs back in.
- Regenerate password. New in 1.5. You can choose to limit the frequency at which a customer can generate a new password for his or her account. By default, it is set at 360 minutes – 6 hours.
- Enable B2B mode. New in 1.5. The B2B mode brings a handful of new features to your store. Customers are no longer considered as individuals but as companies, and therefore some new options appear: customer profile has new fields related to professional information, prices can be masked and be managed on a per-customer basis for the whole catalog or per category, invoices can be generated manually, etc.
...
This section helps you to quickly customize the current theme: header logo, mail logo, invoice logo, favicon, store icon and even the navigation pipe can be easily modified from there.
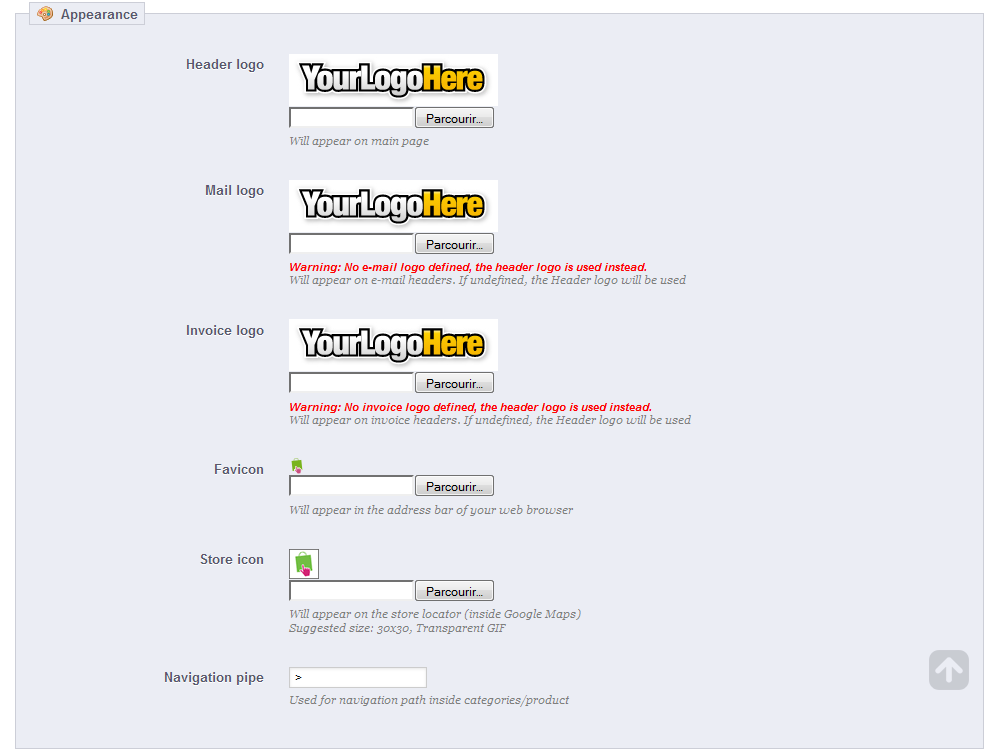
Finally, the The "Enable mobile theme" makes it possible for you to use the default mobile theme. With this theme, any PrestaShop merchant can have his or her shop be accessible to mobile devices: from the home page to the payment process, along with product pages and conversion funnel. You can choose the option you like best: mobile, touchpad, or both.
| Tip |
|---|
The mobile theme only works for PrestaShop's default theme, since it is included in its folder: Nonetheless, you can easily use the default mobile theme with any other theme, at least temporarily: simply copy the mobile theme's folder from the default theme's folder to the new theme's folder, and you should be good to go. For instance, if your new theme's folder is |

Finally, the "Mail color" option enables you to choose the color in which your e-mail will be highlighted.

| Note |
|---|
In multistore mode, you can apply these changes to all your stores or a group of stores at one time, using the multistore menu. |
...
SEO means "search engine optimization". It represents a set of techniques and best practices aimed at improving the visibility of a website on search engines. You can read more about this at Wikipedia: http://en.wikipedia.org/wiki/Search_engine_optimization.
The tools on this page help you improve the presence of your PrestaShop site on web searches, and therefore reach more potential customers.
...
Friendly URL. Change this option if you know that your servercan support URL rewriting. If not, leave it at "No".
Note You may see a message such as "URL rewriting (mod_rewrite) is not active on your server or it is not possible to check your server configuration. If you want to use Friendly URLs you must activate this mod". In this case, PrestaShop cannot detect your server settings, but that does not mean the feature will not work. You must test it yourself.
- Accented URL. PrestaShop is now able to produce URL with special characters, for products with non ASCII names. You can disable that option here.
- Automatically redirect to Canonical URL. Canonical URLs are a way to eliminate self-created duplicate content – which can dramatically bring your search engine rank down, as this is considered spam. To avoid search engines thinking you are spamming their index, PrestaShop uses standard
rel="canonical"link tag to indicate which is the one base URL for a given content.
While it is highly recommended to enable this option, it also depends on your theme actually implementing correctly the<link>header tag. Ask the theme designer for more information. - Disable apache multiviews. Apache is the most popular web server, and is most likely the one your web host uses for your site (although you should check this for yourself). Multiviews is a content negotiation system where the web server tries to serve the user a page in what it thinks is the best matching language version, under the same URL. Unfortunately, this might bring trouble to PrestaShop's friendly URLs. If this is the case, you can try to disable multiviews with this option.
- Disable apache mod security. mod_security is an Apache server module which acts as a firewall, protecting your server from intrusions. It can however block some key features, or even produce errors in some configuration. In such case, disable that firewall here.

| Info |
|---|
In previous version of PrestaShop, you had to manually generate a new |
...
A robots.txt file enables you to block specific automated bots and web spiders , which crawl the Web in order to find more web pages to add to their company's servers. Some bots you want to have full access to your website, such as Google's or Yahoo!'s, and some others you would rather not, such as spam bots, content thiefs, e-mail collectors, etc. Note that the worst of bots do not respect this file's directives, as it is purely advisory.
...
The "Images" preference page enables you to configure the various image sizes that your customers will see on your shop.
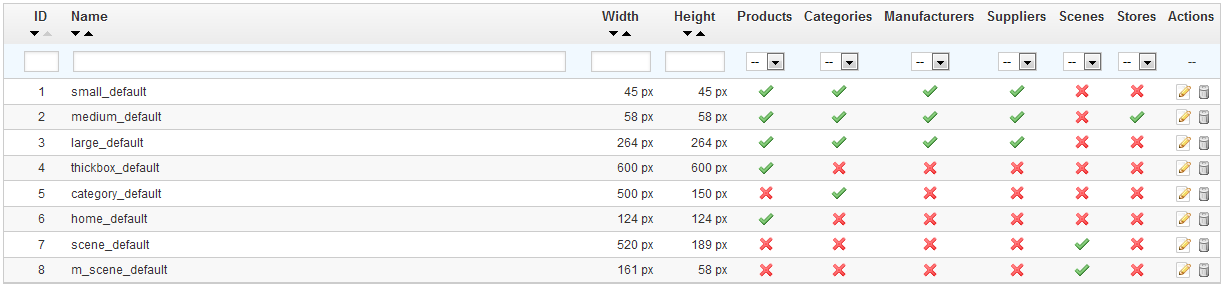
Since version 1.5.4, you can enable image size for specific types of content, directly in the image sizes list.
| Note |
|---|
In the "Products" page under the "Preferences" menu, you can choose to have a zoom appear when the cursor hovers over a product's image. |
...
This section enables you to give the main details of your company, rather than those of a specific shop. You should fill all the fields with information on your headquarters, as this is certainly the address customers will use to contact you, or even visit you.
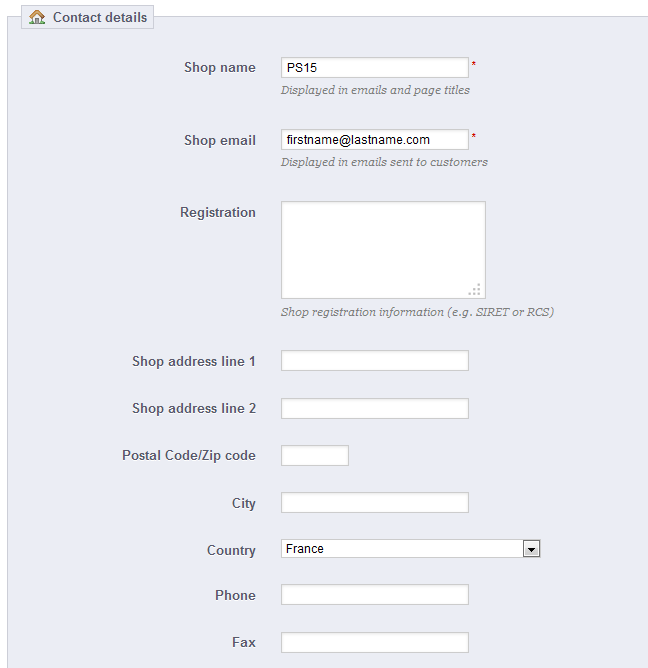
Most of these fields are obvious, but some fields should be carefully crafted:
...