...
The order detail sheet fills a full page.
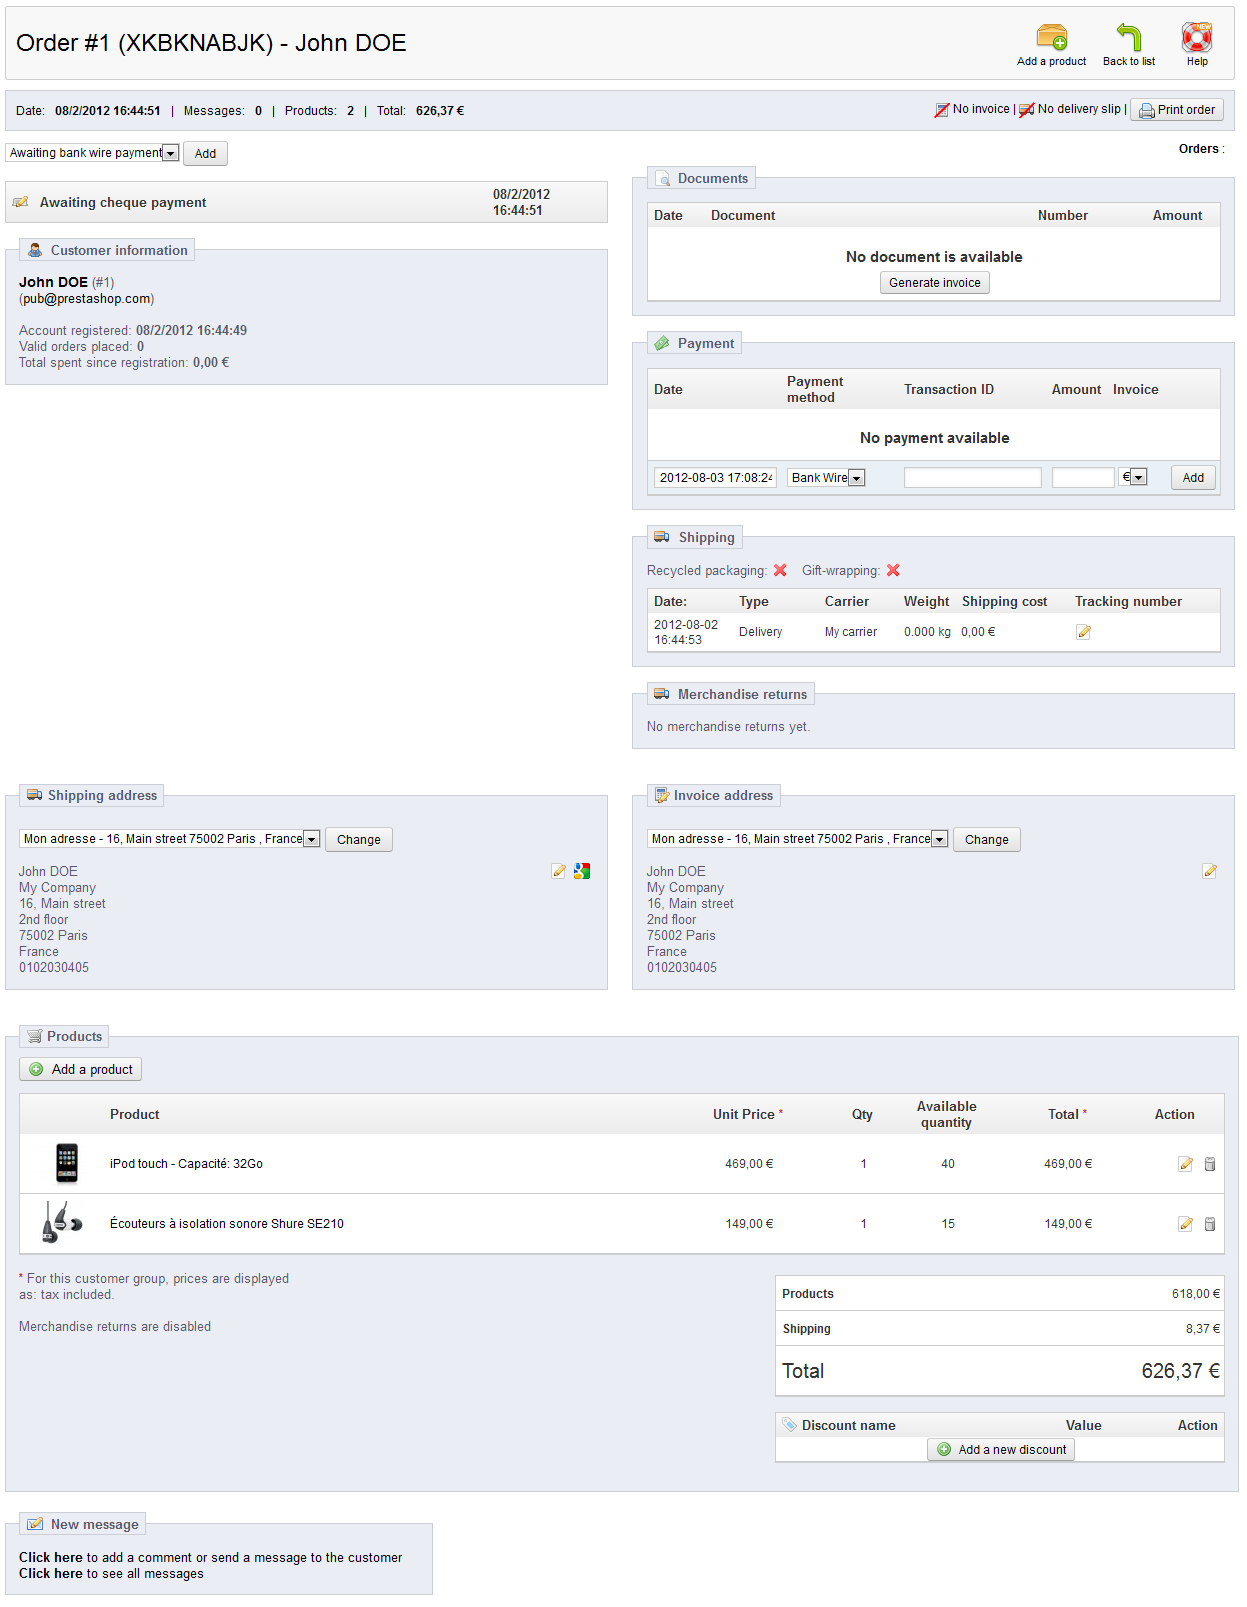
This summary of the order gives you access to:
...
At the top of the page, you can find the "Add a product" button, which triggers two actions upon clicking:
- Scroll Scrolls down the page to the "Products" section.
- Add Adds a field to the ordersorder.

When adding a product, the products table gets a new row added with a handful of fields. The first text field is actually a small search engine: type the first letters of a product to see a list of corresponding products. Select the one you want to add, and the grayed-out field of the row becomes available.
If the product has combinations, you can select it in a drop-down list that appears below the name: the unit price update accordingly.
Set the quantity of products, and then click the "Add product" button: the product is added
...
You can create a new status with the "Add New" button at the top. The creation form opens.
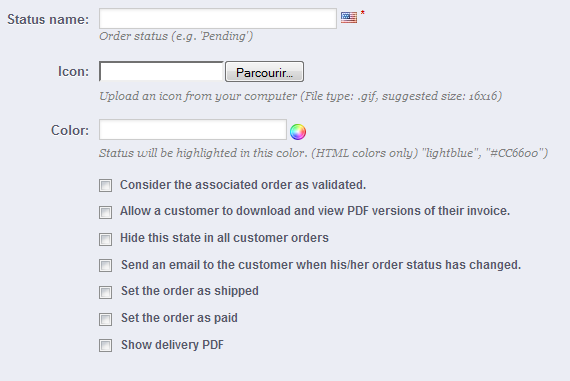
Fill out the form:
- Status name. Keep it very short and distinctive.
- Icon. You can use any 16*16 icon; for instance, the excellent and free FamFamFam Silk icon set: http://www.famfamfam.com/lab/icons/silk/.
- Color. You should strive to have the status' color match the existing colors (if relevant). The default color usages are:
- Red/Orange: canceled or refunded orders,
- Crimson red: payment error,
- Blue: orders which are still awaiting payment,
- Light green: paid orders,
- Dark green: delivered orders,
- Purple: shipped orders,
- Pink: backordered orders.
- Options:
- Consider the associated order as validated. If enabled, this status marks all associated orders as "paid", and puts them in this same status.
- Allow a customer to download and view PDF version versions of their invoice. If disabled, you will have to send customers their invoice yourself.
- Hide this state in order for all customer orders. This enables you to create internal statuses, for you and your team. Customers will never see this in their order status page.
- Send an e-mail to customer when his/her order status is has changed. When enabled, a drop-down menu appears to let you choose which mail template to use.
- Set the order as shipped. Be careful: once an order is set as "shipped", it cannot be set back to the previous status.
- Set the order as paid. Same here: once an order is set as "paid", it cannot be set back to the previous status.
- Show delivery PDF. Displays the delivery PDF.
Creating a new return status
...