...
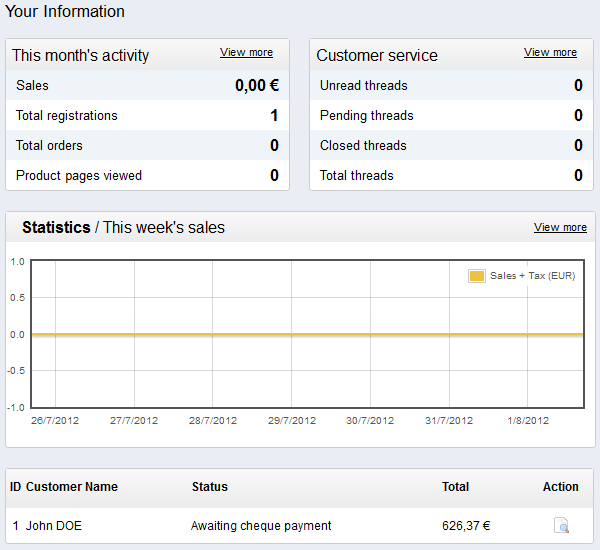
The right column is where the term "dashboard" takes its importance: this side of the Dashboard presents the user with the most important numbers pertaining to his shop's daily activities, along with a graph of sales and a list of the latest orders. Every time you log into your shop's administration area, you will be first and foremost looking at the evolution these numbers take. This is where you see your shop live and breathe.
The button bar
Many of the back-end pages have an button bar between the menu bar and the actual content of the page. For instance, the product edition page can have 8 buttons available.

More than simple shortcuts, they open actual features that you will use very often.
The available buttons vary a lot depending on the context, and therefore two pages might not feature the same set of icons. Still, there are a few that you will often see:
- Add new. Opens the creation page of the current context.
- Save. Saves the content of the current page and returns to the list of existing items.
- Save and stay. Saves the content of the current page and keep the page open.
- Back to list. Returns to the list of existing items.
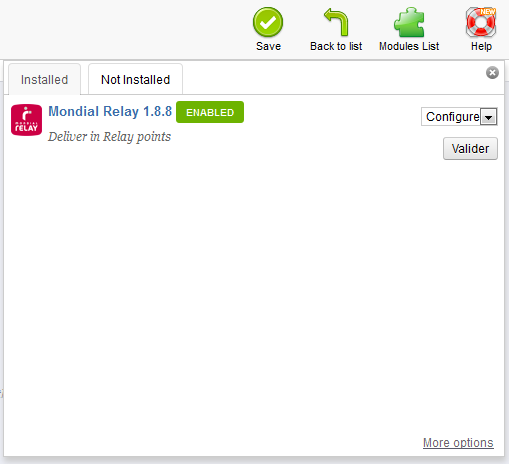
- Modules list. New in v1.5.4. Open a pop-in window containing the modules available in the current context.
- Help. Opens the online documentation for the current page.
The modules list is a new feature brought by PrestaShop 1.5.4, which makes it possible to see modules which apply to the current context. For instance, in the "Shipping > Carriers" page, it will display the modules from the "Shipping & Logistics" category of modules. This is very helpful when you need to quickly find which module to install and configure in order to get a given result.
Preparing your shop
You are now getting a pretty good idea of how complete PrestaShop can be, and the number of possibilities can feel overwhelming. This first chapter will therefore lead you through some basic actions to set up your shop before the big launch. A lot can be done before you launch your shop, but these steps are the essential configuration steps of any shop.
...
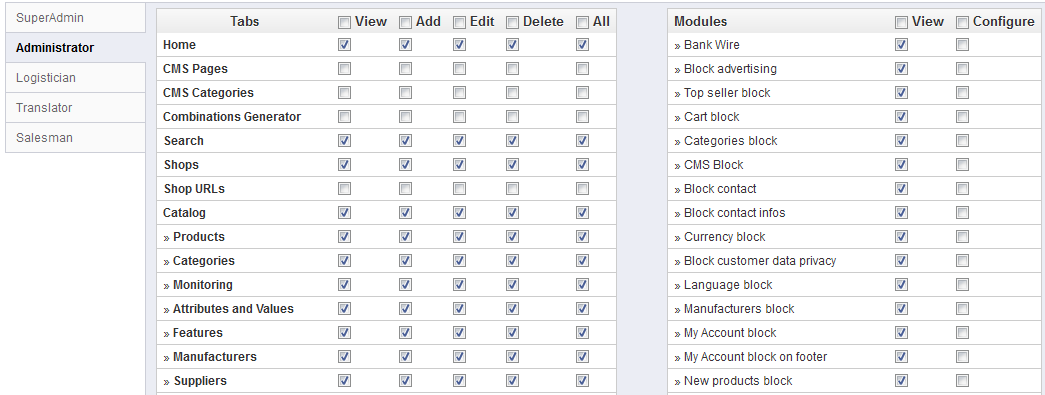
To assign permissions to an employee profile, go to the "Administration" menu, select "Permissions", and select the profile you just created. A long list of permissions appears. By default, a new profile cannot do much. It is up to you to set exactly the parts of your shop which that employee profile should have access to. It can be a tedious task, but it is an important.
Configure payment methods
...