...
Categories are managed in the "Categories" page of the "Catalog" menu.
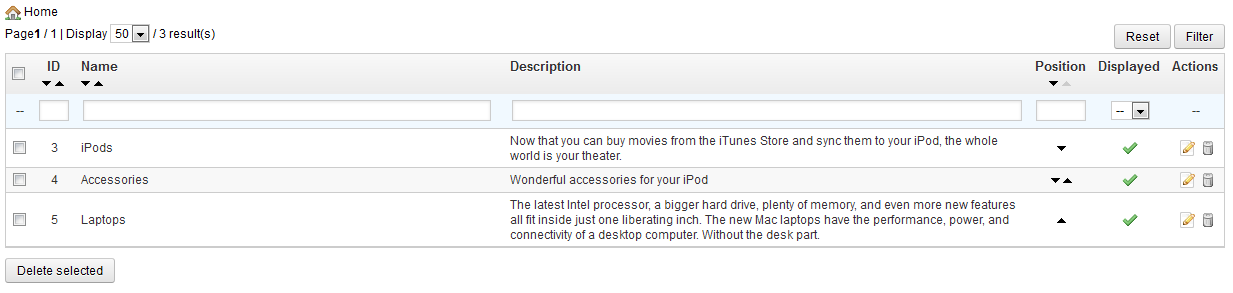
To create a new category, click on the "Add new root categoryNew" button .
To create a sub-category for any category (even the root one), click on the "Add new" button.
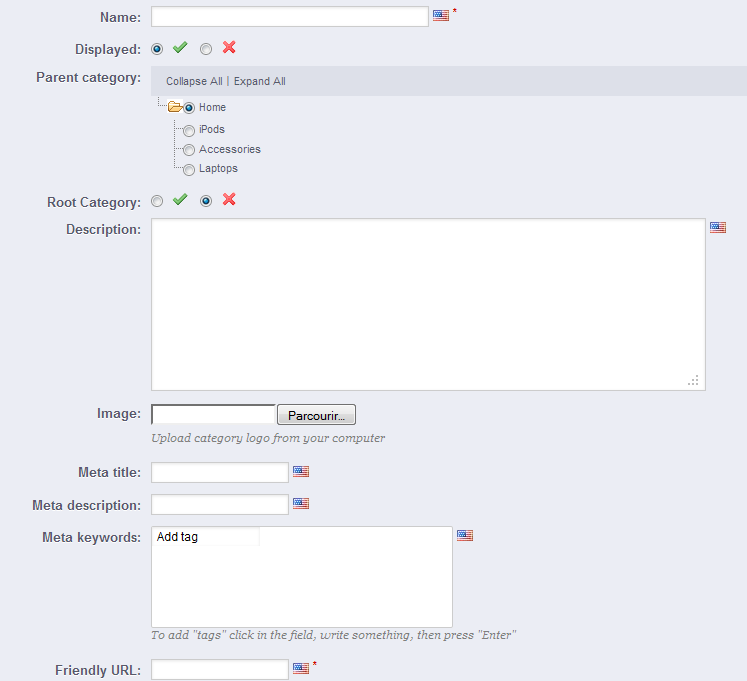
The two forms are almost identical, in that the second one only has two additional fields to choose which should be the parent category, and whether that new category should be the new root onefrom the any level of categories.
The form is the same when creating a root category or a sub-category. The only difference is that when clicking "Add New" from a sub-level of categories, PrestaShop understands that you want to create a sub-category, and therefore sets the "Parent category" option accordingly.
| Tip |
|---|
Make sure to fill each field in every language that your shop supports. In order to do that, click on the little flag next to the field, and choose the flag of the language in which you wish to edit the text. |
...
You can manage the products in your shop using the "Products" page, in the "Catalog" menu. You can see the existing products and few details.
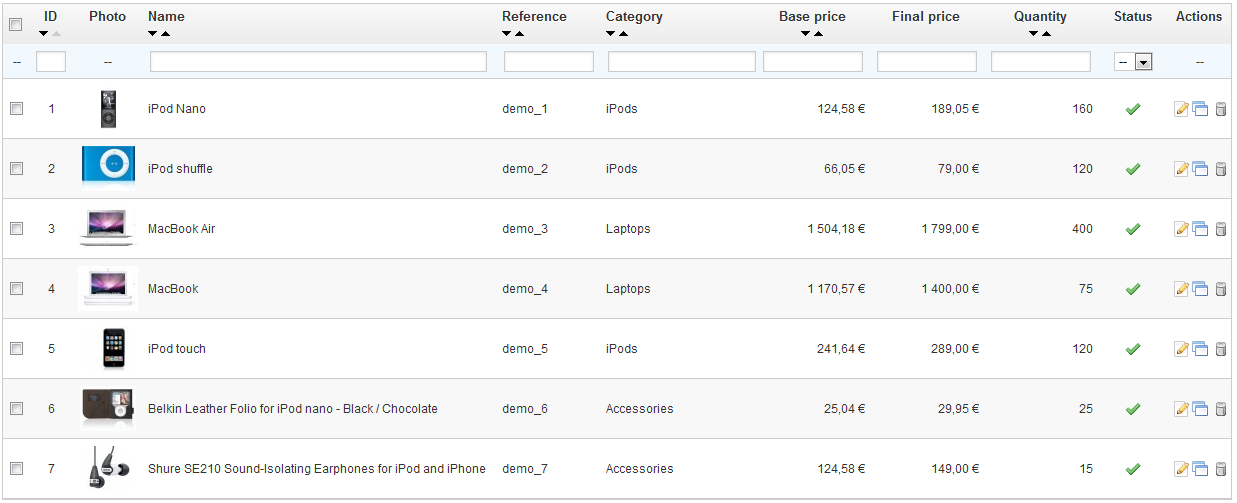
You can add new products by clicking on "Add new". A form appears, with several tabs in the left column.
...
The Product Page Global Buttons
When you open the product creation page, there are only two buttons at the top: "Back to list" and "Help".
As soon as you give your new product a name, the product page features three buttons at the top:adds two buttons: "Save" and "Save and stay".
- Save. This saves any change you have made to any of the data for the current product, and takes you back to the product list.
- Save and stay. This saves any change you have made to any of the data for the current product, and keeps you on the current tab. This is particularly useful when you want to switch tabs without losing your changes to the current tab, or seeing in order to see your changes get applied immediately.
- Back to list. It simply takes you back to the list of product, without saving any change you have made in any of the tab from this page.
- Help. Opens a pop-up window containing the PrestaShop documentation for the current page.

As soon as you save your product, using either the "Save" or the "Save and stay" button, more buttons appear in the product page:
...
Once you have added the needed number for each field, click "Save and stay". The page will reload and display as many text fields as necessary. Fill every one of them with the appropriate public label: this will be an indicator for the customer, so be very specific about what you expect.
For instance, if you allow images for a book cover, you could use the following:
- "Front cover (20.95 x 27.31 cm, color)".
- "Back cover (20.95 x 27.31 cm, black and white)".
- "Spine (20.95 x 1.716 cm, color)".
Same for text: if customers can engrave words to a product, you could use the following:
- "First line (24 chars)".
- "Second line (24 chars)".
- "Last line, signature (16 chars)".
You can make any field necessary to validate the purchase by checking the "Required" box on the right of each of them.
Removing fields. If in the end you added too many fields, simply change the number of needed fields for each of the two types and click "Save and stay". The page will reload with the right number of fields, with the first ones preserved.
...
- Upload a file. Click the "Browse" button to find the file on your hard drive. As soon as you have selected a file, the upload begins.
- Filename. The name of the file. This field is automatically filled after the file has been uploaded. It is not recommended to change it to another value.
- Number of allowed downloads. You can set the number of time the file can be downloaded once the customer has bought it. You might prefer to limit this to 1, or 5. If you want to keep it unlimited, set the text field to 0.
- Expiration date. Virtual files can be of promotional nature, or lose their selling value after a certain date. If so, you can set the expiry date after which the product will not be available on your shop anymore. Leave it blank if there is no expiry date.
- Number of days. You can set the number of days after which the download link becomes nonfunctioningnon-functioning. If there is no limit, set the text field to 0.
...