Table of contentcontents
| Table of Contents | ||
|---|---|---|
|
...
Managing Orders
As a shop managersmanager, you will have to deal through with heaps of orders and their accompanying invoices and customer support requests – at least, that's what we wish for you. The daily task of handling numerous orders can be daunting, luckily . Luckily PrestaShop does its best helping to help you wading wade through them all and successfully handling handle your customers customers’ purchases, along with credit slips and the unavoidable merchandise returnreturns.
The "Orders" tab enables you to see all of the information about all the purchases from your store. All of your store's transactions are available there, organized by date (by default, it is set to sort from latest newest to oldest).
You can filter the results and easily find the orders you're looking for by using the fields above. For instance, to identify Mr. DurandDoe's orders, type Durand Doe into the "Customer" field and then click "Filter".
...
- The status and history of the order.
- The carrier information, total weight of order , and carrier chosen by the customer.
- The method of payment that was used, the cost of the products, and the transportation shipping costs.
- Various details on the ordered products.
In the "Shipping address" of the page, you can see a "G" icon: the enables you to have use Google Maps to locate the address on a map.
...
- You can send a message by writing it in the message box.
- Pre-written message can be saved and used multiple times, saving you the hassle of writing them over and over again. If you would like to send one of these messages, select it from the drop-down menu. You can add further add details to the pre-written message if needed
In both of these cases, once your message is ready, click "Send". Your customer will receive your
message in their inbox (the one indicated in their account).
...
Each time an order from your store is validated, an invoice is sent out to the customer. If there are no problems, the order status will read "OK" or "Payment accepted." You can download it directly from the order summary , by clicking the "Invoice" section on in the top right part-hand corner of the page.
The customer will be able to access the invoice by going to his account.
...
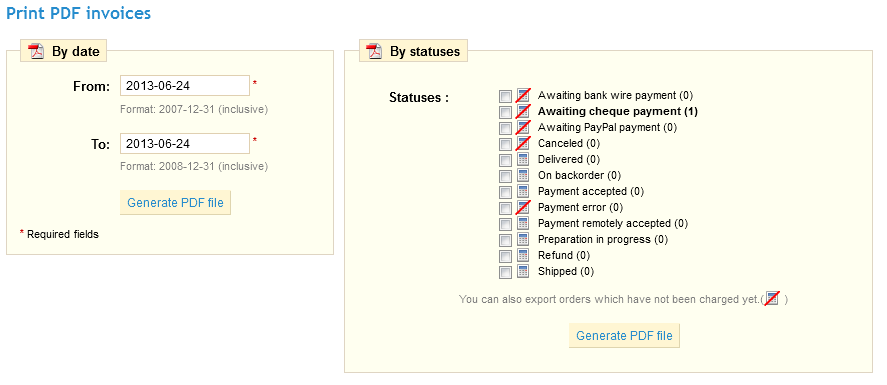
If you want to print several invoices at the same time, head to the sub-tab "Invoices" under the "Orders" tab. A specific interface appearsThe invoice interface will appear.
In order to print several invoices, write fill in the wanted dates date range in the "From" and "To" fields in the "Print PDF invoices" section Create and create PDFs by clicking on "Generate PDF file."
In the second section "Invoice Options", you can choose whether or not the invoices must should be printed as soon as the order is made, as well as the Invoice Prefix and the invoice number you want listed on the printed version of the invoice. This feature can help you simplify the management of your account. Finally, you can add a text that will appear at the bottom of all your invoices.

When your customers ask for their invoices, you can redirect them to the Order History section of their user accounts, in their order history, which keeps all of their invoices available for them.
Statuses
Having different order statuses lets you easily manage your customers. These different statuses are visible and editable in the "Order Statuses" tab.
You can of course create a new status with the "Add New" button. Fill out the form, and save it.
The color will be used to underline order statuses and will be written, like the previously seen color attributes, in HTML code.
Pre-written messages
When you have to send a message to your customers using the PrestaShop administrative interface, you can choose to save this message in order to send it out again to other customers with similar questions, comments, or concerns.
To do this, go to the "Order Messages" sub-tab under the "Orders" tab. One default message is already saved: "Delay". To add others, click on the "Add New" button. You can also edit the default message.
- In the "Name" field, give your message a descriptive name so that you can easily find it again later.
- In the "Message" field, write out the content that you wish to send to your customers.
Once done, click on "Save".
You can create as many messages as you want.
You can send these messages by going directly into a customer's order:
- Select the pre-written message.
- Edit it if needed.
- Click "Send."
Your customer will receive the message on the email address associated with this account.
Delivery Slips
Printing a delivery slip is exactly like printing an invoice. Select the dates, as well as the options you would like, and then confirm them to create your documents.

You can also set the delivery prefix, as well number of the next slip in your series.

Merchandise Returns
Under the "Merchandise Returns" tab, you have the possibility of allowing customers to send products back to you.
...
Once you have activated this option in your Back Office, the customer can choose to return an item. In order to do this, he must do the following:
- Access his orders history, from his the Orders History section of his account.
- Select the order from which he wants to send return an item back from.
- Select the product(s) that he wishes to return by ticking checking the box next to its /their name(s).
- (optional) Add an explanation, in order for the store to understand why the item is to be being returned.
Once the form is complete, the customer clicks on "Make a an RMA slip", and the request is sent to you.
...
- Click on the name of the return to see more details.
- Change the status to continue with the return process.
...
Credit Slip
Once a package has been returned, you must create a credit slip.
In To display more details, go to your list of orders , and click on the order for which the customer is returning the item for more details.
Below the "Products" table, do the following:
...
The credit slip is now created and will be available in the order details...
...as Order Details well as in the "Credit Slips" tab.
You can click the link to download the PDF.
Your customer will see the slip in his user account space"My Account" section.
If you have created a voucher, they will see it in the "My vouchers" section of their account. If they click on it, it should look something like this:
...
The amount of the returned item(s) is added to the voucher. The customer can use the discount code (listed in the far left of the rowcolumn) next time he places an order.
...
Clicking on the message's row takes you to the order that it concerns. You can see the message from this point in the bottom left of the page: it is highlighted in yellow.
Click on the green tick checkmark to signal that you have read and understood the message.
Take a moment to send a message back to your customer! You can do this by clicking on the "New message" section, which can be found right above, and which we have has already been discussed.
Statuses
Having different order statuses lets you easily manage your customers. These different statuses are visible and editable in the "Order Statuses" tab.
You can of course create a new status with the "Add New" button. Fill out the form, and save it.
The color will be used to underline order statuses and will be written, like the previously seen color attributes, in HTML code.
Pre-written messages
When you have to send a message to your customers using the PrestaShop administrative interface, you can choose to save this messages in order to send them out again to other customers with similar questions, comments, or concerns.
To do this, go to the "Order Messages" sub-tab under the "Orders" tab. One default message is already saved: "Delay". To add others, click on the "Add New" button. You can also edit the default message.
- In the "Name" field, give your message a descriptive name so that you can easily find it again later.
- In the "Message" field, write out the content that you wish to send to your customers.
Once done, click on "Save".
You can create as many messages as you want.
You can send these messages by going directly into a customer's order:
- Select the pre-written message.
- Edit it if you need to.
- Click "Send."
Your customer will receive the message on their account's email.
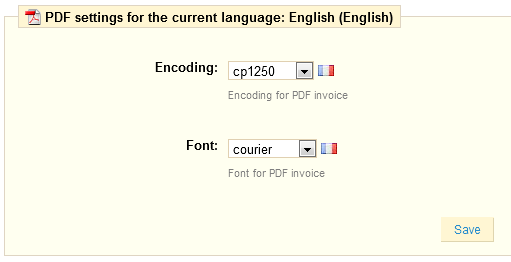
PDF settings
The last sub-tab of the "Orders" tab gives you access to the basic settings of the PDF files that PrestaShop will generated. Two settings are available: encoding and font. Only change these if your PDF files are not generated properly.