...
The "Preferences" menu enables you to configure and fine-tune some of your shop's details. These include a lot of different aspects of the shop, from technical settings to the customer's shopping experience. Therefore, all of the Preference Preferences options should be carefully examined, and you should consider each option, as enabling or disabling any of them can have a real impact on your shop, and ultimately, your sales.
| Note | ||||
|---|---|---|---|---|
| ||||
The "Preferences" and "Tools" tabs from PrestaShop 1.4 have been entirely reorganized into three menus for version 1.5: "Preferences", "Advanced Parameters" and "Administration". |
General
The "General" preference page features a handful of specific settings that could not fit in the other menus. They are nonetheless essential:
- Enable SSL. SSL means "Secure Sockets Layer", and includes TSL (for "Transport Layer Security"). Both are cryptographic Internet protocols which secure Web communications. You can read more about these protocols on Wikipedia: http://en.wikipedia.org/wiki/Secure_Sockets_Layer.
Providing an SSL connection to your shop is not only excellent for any Internet exchangeexchanges, but also a great way to reassure your customers about the safety of their own data (authentication, credit card, etc.) on your shop, as modern browsers now display visual cues showing that the connection is secured. If your hosting provider does support SSL, make sure to activate PrestaShop's SSL support, by clicking on the link. This will reveal a selector, where you should choose "Yes". - Increase Front Office security. This adds security tokens to your shop in order to improve its security. In effect, each URL is specific to a customer's session, and cannot be used as-is on another browser, protected thus protecting whatever information they might have stored during that session.
- Round mode. Once taxes and discount are applied, a price can feature too many decimals, such as $42.333333333. The round mode is used during the price calculation process (taxes, discount, etc.). There are three modes:
- Superior. Rounding up: 42.333333333 becomes 42.34.
- Inferior. Rounding down: 42.333333333 becomes 42.33.
- Classical. It actually truncates the number at the second decimal: 42.333333333 becomes 42.33.
- Display suppliers and manufacturers. The "Suppliers" and "Manufacturers" blocks can be removed from the front-end of your shop, by disabling their respective modules. Yet, using this option, you can have their list still be available, notable notably using the
/manufacturer.phpand/supplier.phpURLs. - Enable Multistore. New in 1.5. This little option has major implications: it turns your single-shop installation of PrestaShop into a multiple stores installation: this . This gives you access to the new "Multistore" page in the "Advanced parameters" menu, and every administration page can be contextualized to apply its settings to either all stores, a specific group of stores, or a single store.
You can read more about PrestaShop's multistore feature by reading the "Managing multiple shops" chapter of this guide.
...
- Order process type. By default, the customer has to complete go through 5 steps in order to complete the checkout process, each on a different page. However, you can choose to have it all done in a single page. The page will be longer, but many some customers might prefer this approach.
- Enable guest checkout. Allows non-registered visitors to place an order, without having to create an account.
- Minimum purchase total required in order to validate order. Indicates the minimum amount that must be in the shopping cart to submit an order. If the amount in this field is not reached, your customer cannot complete their purchase. If you do not want to set a minimum amount, enter "0" in the field.
- Allow multi-shipping. New in 1.5. Makes it possible for your customers to have their order split and sent to more than one address. This is very useful for a gifting shop, for instance.
- Delayed shipping. New in 1.5. If you enable the "Allow ordering of out-of-stock products" option (in the "Products" preference page), you can allow order items to be dispatched as they become available, in as many shipment as needed (depending on how you team sees it fit). Initially, PrestaShop will split the order in two: the available items are send sent right away, while the other items become a second order, waiting to be validated.
- Terms of service. Makes your customers have to accept your terms of service before they can validate an order.
- Conditions of use CMS page. Your shop's "conditions of use" are to be stored in a static page (a "CMS page"). Select which page to use so that PrestaShop can point to it correctly.
...
- Catalog mode. Enabling catalog mode turns your shop into a simple gallery of products, with no way to buy the items whatsoever.
- Set the maximum number of products that can be selected for comparison.
- Number of days during which the product is considered 'new'. When you add a product in your shop, it is considered new and it is reported back through the "New products" block and the "New products" page. The field allows you to specify how many days the product will remain visible on the block and page. With this feature, you choose how to display and updated your shop's news. This The "New products" page is usually most accessed by your regular customers.
- Redirection after adding product to cart.
- Short description max size.
...
- Products per page. Indicate how many products are displayed on the pages of your categories.
- Default order by. Indicate the order of products in your shop's categories. 6 choices are available:
- Product name. Displays a list of your products based on the first letter of the productalphabetical order.
- Product Price. Displays your products according to their prices.
- Product Added Date. Displays your products according to the date added to your shop.
- Position inside category. Displays your products as they are positioned in the categories in your catalog. The position of the products can be modified directly in the catalog of your shop using the position arrows. This way you have your product in the most attractive fashion for your customers.
- Manufacturer. Displays your products in alphabetical order of their manufacturers' names.
- Project Modified Date. When you edit your products the a product, its modification date is changed. They will This option makes them appear in the order of modification date.
- Default order method. The above options can be sorted by ascending or descending order.
...
- Display available quantities on product page. By enabling this feature, your visitors can see the quantities of each object product available in stock. Displaying this information can be used to stimulate sales in the case where the quantity in stock is low. The quantities displayed are the selected attributes and combination.
- Display remaining quantities when qty is lower than. You can choose to display an alert when the remaining available stock for a product gets below a certain level. This option is particularly useful for promoting purchases. The text and placement of the alert depend on the theme; in the default theme, it is "Warning: Last items in stock!", and is placed directly below the "Quantity" field.
- Enable JqZoom instead of Thickbox on product page. By default, at the click of the mouse, a bigger version of the product image is displayed as an overlay of the product page, at the click of the mouse. Once you activate this feature, visitors will still be able to click on the image in order to get the zoom, but a zoom will also appears whenever the mouse hovers over the product's image.
- Display unavailable product attributes on product page. Your products can be composed of many different combinations or attributes: color, size, capacity, etc. Attributes can be edited in the "Attributes" page of the "Catalog" menu. Read the chapter titled "A Look Inside the Catalog" to learn more about attributes, and how to use them.
When one or several attributes are not available anymore, you have two possibilities:- First possibility. : Leave this preference active. Example: The "iPod Shuffle" is no longer available in "Blue" in our shop. By keeping this option enabled, the product's combination will remain visible in the shop. A message will indicate that the product is no longer available in the chosen option, and invite customers to choose another combination. If you enabled the "Allow ordering of out-of-stock products" option (see below), then they will be able to add the unavailable combination to their carts.
- Second possibility. : Disable this preference. If the "Blue" combination of the "iPod Shuffle" product is no longer available, that selection is not displayed the front-office and the customer cannot select it. This feature helps to clearly display the availability of your products.
- Display "add to cart" button when product has attributes. New in 1.5. This option prevents customers from adding a product to their cart directly from the category page, if that product has combinations. This forces customers to visit the product's page and pick a combination, instead of only adding the default one to the cart. Note that products with no combination will still have an "Add to cart" button in the category page.
...
- Registration process type. New in 1.5. You can let visitors create a new account without any immediate obligation to register an address, or force them to register an address as soon as they create their account.
The first option makes it quicker to create account, which is great, but this will add a new mandatory screen once they want to validate an order, which can turn them off.
On the other end, the second option makes account creation longer, but at least they will already have an address registered when they want to validate an order. - Phone number. Likewise, you can require your client to register a phone number, or not. Having a phone number can prove invaluable to you, as this makes it possible to contact a client directly, but some client resent give this kind of information.
- Cart re-display at login. If the customer had a cart that was not checked-out, display it once he or she logs back in.
- Regenerate password. New in 1.5. You can choose to limit the frequency at which a customer can generate a new password for his or her account. By default, it is set at 360 minutes – 6 hours.
- Enable B2B mode. New in 1.5. The B2B mode brings a handful of new features to your store. Customers are no longer considered as individuals but as companies, and therefore some new options appear: customer profile has new fields related to professional information, prices can be masked and be managed on a per-customer basis for the whole catalog or per category, invoices can be generated manually, etc.
...
The "Add new" button gives you access to a form that helps you register a theme on your installation. This is very useful when you need to create a new theme.
...
This section helps you to quickly customize the current theme: header logo, mail logo, invoice logo, favicon, store icon and even the navigation pipe can be easily modified from there.
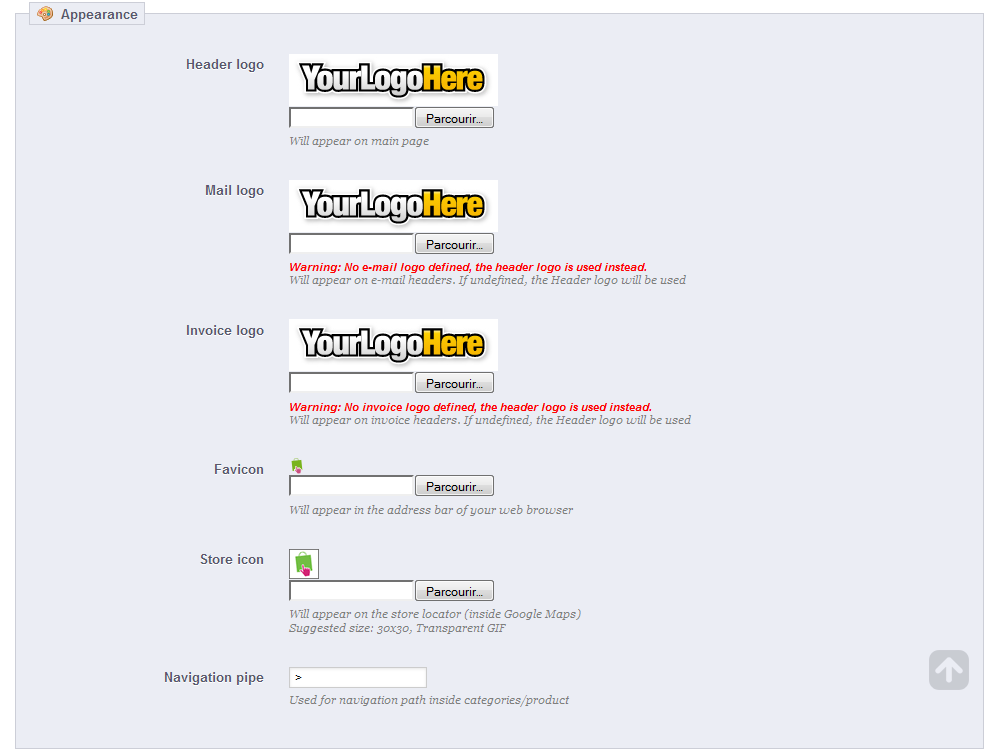
Finally, the "Enable mobile theme" makes it possible for you to use the default mobile theme. With this theme, any PrestaShop merchant can have his or her shop be accessible to mobile devices: from the home page to the payment process, along with product pages and conversion funnel. You can choose the option you like best: mobile, touchpad, or both.
| Note |
|---|
In multistore mode, you can apply these changes to all your stores or a group of stores at one time, using the multistore menu. |
...
SEO means "search engine optimization". It represents a set of techniques and best practices aimed at improving the visibility of a website on search engines. You can read more about this at Wikipedia: http://en.wikipedia.org/wiki/Search_engine_optimization
The tools on this page helps help you improve the presence of your PrestaShop site on web searches, and therefore reach more potential customers.
URL is short for "uniform resource locator", or simply put, the online address of a web page. You can read more about what a URL is at Wikipedia: http://en.wikipedia.org/wiki/URL
By default, PrestaShop's deep URL URLs (that is, specific pages rather than online the domain name) are rather uninformative to both the customer and search engines: an URL such as http://www.myprestashop.com/product.php?id_product=27 does not help visitors know what product is on that page. Friendly URLs are the way to achieve that, and get for instance http://www.myprestashop.com/2-music-players/27-ipod-nano-green.
As you can see in the second example above, both categories and products can have a friendly URL: id_category=2 becomes 2-music-players, and id_product=27 becomes 27-ipod-nano-green. While the ID number cannot be removed by default, the words can be either generated from the category/product name, or written by hand. This is done directly in the configuration page for the product or the category (in the Catalog menu): the "Friendly URL" field cannot can be found directly in the main configuration page of a category, and under the "SEO" tab of the configuration page of a product. This is explained in the "Adding Products and Product Categories" chapter of this user-guide.
...
Adding a New Friendly URL
Friendly URLs are to be set in the configuration page of each product, category, CMS page... This creation page is only useful for some automatic pages, and most of the time you won't have to worry about these.
| Tip |
|---|
Make sure to field fill the fields for all the available languages on your shop: not only is it immensely useful to local users, but some search engines can even make use of this local information. |
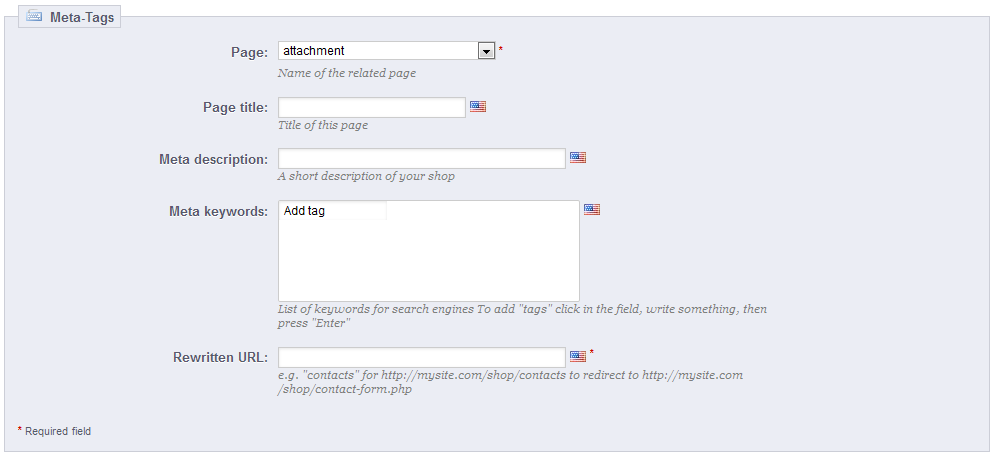
Click the "Add New" link button to reach the friendly URL creation form. It has a handful of fields:
- Page. The drop-down list gives you all the pages that can benefit from a friendly URL.
- Page title. The title that will appear in search engines when a request is made.
- Meta description. A presentation of the product page in just a few words, intended to capture a customer's interest. It will appear in search results.
- Meta Keywords. Keywords that you must define in order to have your site referenced by search engines. You can enter several of them: type the words, press the Return key, and see how the tag gets encapsulated in a yellow blowblock, with a tiny red cross icon to delete it.
- Rewritten URL. This is where you set the friendly URL. Make it short and descriptive, and replace spaces (" ") by hyphens ("-").
...
- Friendly URL. Change this option if you know that your server can support URL rewriting. If not, leave it at "No".
Note You may see a message such as "URL rewriting (mod_rewrite) is not active on your server or it is not possible to check your server configuration. If you want to use Friendly URLs you must activate this mod". In this case, PrestaShop cannot detect your server settings, but that does not mean the feature will not work. You must test it yourself.
- Automatically redirect to Canonical URL. Canonical URLs are a way to eliminate self-created duplicate content – which can dramatically bring your search engine rank down, as this is considered spam. To avoid search engines thinking you are spamming their index, PrestaShop uses standard
rel="canonical"link tag to indicate which is the one base URL for a given content.
While it is highly recommended to enable this option, it also depends on your theme actually implementing correctly the<link>header tag. Ask the theme designer for more information. - Disable apache multiviews. Apache is the most popular web server, and is most likely the be the one your web host uses for your site (although you should check this for yourself). Multiviews is a content negotiation system where the web server tries to serve the user a page in what it thinks is the best matching language version, under the same URL. Unfortunately, this might bring trouble to PrestaShop's friendly URLs. If this is the case, you can try to disable multiviews with this option.
...
Most of the time, you should not touch these fields without knowing exactly what you are doing. One mistake could break your shop.
Robots file generation
A robots.txt file enables you to block specific automated bots and web spiders, which crawl the web Web in order to find more web pages to add to their company's servers. Some bots you want to have full access to your website, such as Google's or Yahoo!'s, and some others you would rather not, such as spam bots, content thiefs, e-mail collectors, etc. Note that the worst of bots do not respect this file's directives, as it is purely advisory.
...
Clicking on the "Generate robots.txt" button " replaces any existing robots.txt file with a new one. Therefore, if you want to add your own rules, do it after PrestaShop has generated its version of the file.
...
PrestaShop enables you create content pages just like as easily as you would create product pages, using its CMS tool. The pages will appear to customers in the "Information" block on your homepage and in the site menu.
The "CMS" page presents you all the content pages that were previously created on your shop, for the currently selected category (by default, the home page is the only category).
...
Creating a New CMS Category
Click the usual link button to create a CMS category – actually, a sub-category of the root category, "Home". You can create as many categories as needed.
...
Creating a New CMS Page

Click the "Add New" link button to reach the content creation form:
- CMS Category. The default category is the home-page of your shop. If you want to have this page in another category, you must first have created.
- Meta title. The name of the page, as displayed in the browser.
- Meta description. Used to describe the content of this page for search engines.
- Meta Keywords. Used by search engines to understand what types of information the page is composed of.
- Friendly URL. Makes it easier for search engines to index your content, and for visitors to understand what they will find in the category. This field is automatically filled as you enter the category name, but you can still edit it manually.
- Page content. This is the main content of your page. In this WYSIWYG editor, you can put as much text as necessary, even images or videos using the "Insert Image" or "Insert Embedded Media".
- Displayed. You can choose to have you page public only once you are done proofreading it, in which case you page is saved as a draft.
Clicking the "Save and preview" button helps you see your page in the graphical context of your shop.
Once all the fields are filled out, click on "Save." If activated, you can then view the result directly on your online shop.
...
You can easily add a new image size, and even set to which categories type of content it applies.
Click the "Add new" button, then:
- Type its the size's name, width and height.
- Choose to which type of content it applies.
- Validate.
...
You may be dissatisfied with your shop's current thumbnails size. This sections section makes it possible for you to regenerate them all – or only those for a specific type of content:
...
- Phone. Use your shop's contact phone. If you would rather customers not call you, do not put anything in there.
- Shop e-mail. Use the general contact e-mail address that the customers should see when they receive an e-mail from your shop.
- Registration. Indication Indicate your shop's legal registrations numbers. This proves that you are a fully registered business, and brings more customer trust to your online shop.
...
To create a new useful alias, you should first find the spelling errors most often typed by your users:
- Go to the "Shop search" tab of the "Stats" page, under the "Stats" menu. You can see the words typed by your customers as well as the most frequent errors.
- Take the most frequent ones, and add them to your list of aliases, in order to point user to the correct productproducts.
- Click the "Add new" button on the "Search" preference page.
...
For instance, let's say your visitor visitors frequently type "player" as "palyer" and "plaier". You can create an alias for each of these typos, which will match the word "Player". Your aliases can be used as soon as they are saved.
We also invite you to consult the sections of this guide on product and categories category meta tags, to better understand how to display products based on words typed by your customers. See the "Adding Products and Product Categories" and "A Look inside the Catalog" chapters.
...
- Enable Shop. You can use this option to disable your shop temporarily, for instance when you need to perform maintenance on your shop.
Note The webservice will still be active, so your data will still be available to those with a key. If you want to also disable the webservice, go to the "Webservice" preference page, in the "Advanced parameters" menu.
- Maintenance IP. The maintenance IP allows people to access the shop even if it is disabled. This means that you can prevent everyone on the Internet from accessing your shop, but still allow access to the computers used by your team-members and yourself. To discover the IP address of a machine, go to http://www.whatismyip.com/ from that machine. Click "Add my IP" if you only want to add the IP of your current computer.
If you want to add more IP addresses, separate them with commas "," or click "Add my IP" if you only want to add your own IP.
Geolocation
Geolocation is "the identification of the real-world geographic location of an object, such as a radar, a mobile phone or an Internet-connected computer". In our case, geolocation is used to discover the location of a visitor, using his or her computer's IP and other tools. One of the uses of geolocation is to block visitors from certain cities/countries.
As indicated the first time you open the "Geolocation" page, in order to use geolocation, you need download a special file first: http://geolite.maxmind.com/download/geoip/database/GeoLiteCity.dat.gz. This file is the GeoLite City database from MaxMind, an accurate database of cities and locations. Download it by clicking on the link, and then decompress it into the /tools/geoip/ directory of your PrestaShop installation.
...
You can select or deselect all countries at once by checking the box at the top of the list. When selecting countries that can access your online shop, make sure to not block any country by mistake, as you would lose all potential sales to its inhabitants!
...
This section enables you to accept specific IPs address despite a blockade. It can be useful in case of spammers, bots or attacks. It is already filled with a list of known good IPs. Add as many as needed, one per line, and click "Save".
...