...
Thema's instellen
| Table of Contents |
|---|
The "Themes" page enables you to efficiently manage your themes.
Your current theme
The first section of the page serves as a reminder of which theme you are currently using, with its details:
- Theme name.
- Theme version.
- Theme author's name, website and email address.
- Thumbnail for the theme.
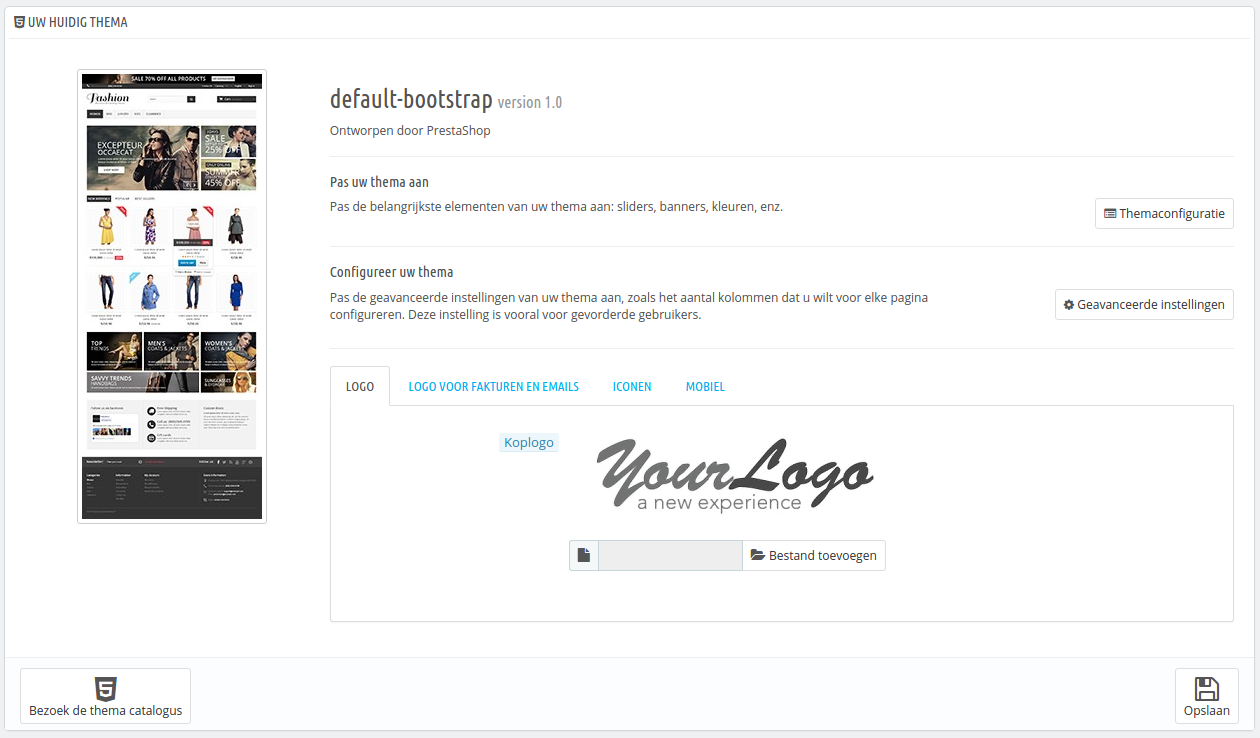
This section also gives you access to a handful of tools, which helps you to quickly customize the current theme: header logo, mail logo, invoice logo, favicon, store icon and even the navigation pipe can be easily modified from there. This section features:
- Customize your theme. A link to the Theme Configurator (provided that the Theme Configurator module is indeed installed and enabled).
- Configure your theme. A link to the theme's advanced settings.
- 4 tabs with the theme's appearance options:
- Logo. The logo that will appear on all the pages of your shop.
- Invoice & email logos. The logos that will respectively appear in your shop's invoices, and its email notifications.
- Icons. Your shop's favicon (displayed in the web browser's address bar) and your Store icon (for use on the Store map as an indicator of where a store is).
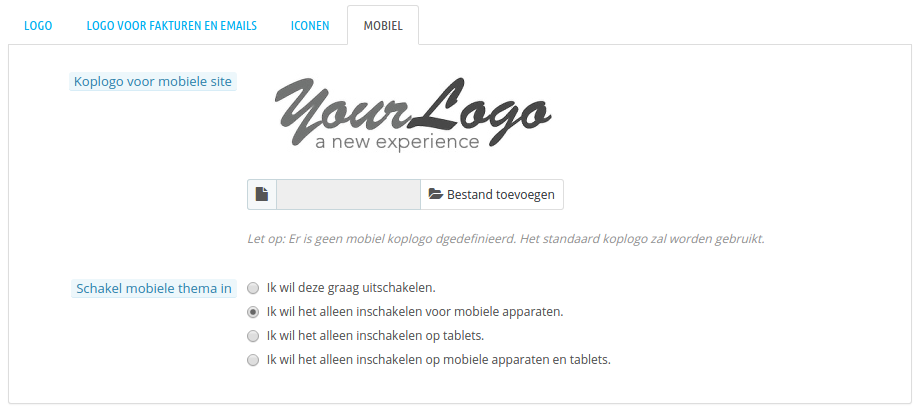
- Mobile. The logo that will appear on all the pages of your shop, when accessed through a mobile device. You can also choose to selectively enable or disable your theme's mobile version (if it does exist) for smartphones, tablets, or both.
| Warning |
|---|
The default theme uses a "YourLogo" logo. It is strongly recommended to change all of the instances of the logo and use yours! |
| Note |
|---|
In multistore mode, you can apply these changes to all your stores or to a group of stores at one time, using the multistore menu. |
The "Enable the mobile theme" makes it possible for you to use the default mobile theme. With this theme, any PrestaShop merchant can have his or her shop be accessible to mobile devices: from the home page to the payment process, along with product pages and conversion funnel.
...
The mobile theme only works for PrestaShop's default theme, since it is included in its folder: /themes/default/mobile. Therefore, it will not work if you use another theme which does not have its own mobile theme.
...
De pagina "Thema's" zorgt ervoor dat u op een efficiënte wijze uw thema's kunt beheren.
Uw huidige thema
De eerste sectie van de pagina dient als herinnering, welk thema u momenteel gebruikt, met daarbij de informatie:
- Naam.
- Versie
- Auteur van het thema, website en e-mailadres.
- Miniatuurweergave.
Deze sectie biedt u ook een aantal tools, waarmee u snel het huidige thema kunt aanpassen: headerlogo, e-maillogo, factuurlogo, favicon, winkelicoon. Deze sectie bevat:
- Uw thema aanpassen. Een link naar de themaconfiguratie (wanneer de themaconfigurator is geïnstalleerd en ingeschakeld).
- Uw thema configureren. Een link naar de geavanceerde instellingen van het thema.
- 4 tabbladen met daarin instellingen voor het uiterlijk van het thema:
- Logo. Het logo dat op alle pagina's van uw winkel verschijnt.
- Logo voor facturen en e-mails. De logo's die verschijnen op uw facturen en in uw e-mails.
- Iconen. De favicon van uw winkel (wordt getoond in de adresbalk van uw browser of naast de titel) en uw winkelicoon (deze wordt gebruikt in de winkelzoeker).
- Mobiel. Het logo dat op alle pagina's van uw winkel verschijnt, als deze met een mobiel apparaat wordt bezocht. U kunt er ook voor kiezen om mobiele thema's helemaal uit te schakelen. In dat geval is deze optie niet meer nodig.
| Warning |
|---|
Het standaardthema gebruikt een logo met de tekst "YourLogo". Dit is bedoeld om u te herinneren om uw logo te veranderen! |
| Note |
|---|
In multistore-modus kunt u deze instellingen toepassen op al uw winkels of een selectie van winkels, door gebruik te maken van het multistore-menu. |
De optie "Schakel mobiele thema in" maakt het mogelijk voor u om het standaard mobiele thema te gebruiken. Met dit thema kan elke PrestaShop-winkelier ervoor zorgen dat zijn of haar site goed is te bekijken op mobiele apparaten: van de homepage tot aan het betaalproces, samen met de productpagina's en de gehele conversietrechter.
| Tip |
|---|
Het mobiele thema werkt alleen met het standaardthema van PrestaShop 1.5, omdat deze is toegevoegd aan de map: Desondanks kunt u alsnog gebruikmaken van het mobiele thema, al dan niet tijdelijk: kopieer simpelweg de map van het mobiele thema van PrestaShop 1.5 naar de map van het nieuwe thema en het is klaar voor gebruik (werkt niet altijd met PrestaShop 1.6; de compatibiliteit wordt op dit moment onderzocht, red.). Als de map van het nieuwe thema bijvoorbeeld |
The Theme Configurator
The Theme Configurator module helps you configure some aspects of your theme.
Clicking on the link from the "Themes" preferences page opens its configuration page. That page gives you direct links to the most usual front office modules: you can enable and disable a dozen of features, such as displaying social buttons or the Facebook block (provided their respective modules are enabled), and get direct access to their configuration page. You can also enable and access the Live Configurator from there, which makes it possible to easily change your theme's main color and font.
...
Dit is in het bijzonder handig als het nieuwe thema geen responsive design heeft: op deze manier kunt u ervoor zorgen dat uw winkel er alsnog goed uitziet op mobiele apparaten – ook al is het de standaard PrestaShop-look. |
| Warning |
|---|
Deze optie dient niet ingeschakeld te worden als u een responsive thema gebruikt, dat zich kan aanpassen aan alle schermbreedtes. Door het mobiele thema in te schakelen toont u een alternatief thema op mobiele apparaten. |
Themaconfiguratie
De module "Themaconfiguratie" maakt het mogelijk om enkele aspecten van uw thema aan te passen.
Door te klikken op de link vanaf de pagina "Thema's" kunt u de configuratiepagina van de module openen. Deze pagina geeft u directe verwijzingen naar de meest gebruikte frontoffice-modules: u kunt features in- en uitschakelen, zoals het tonen van sociale knoppen of het Facebook-blok (hierbij ervan uitgaande dat de bijbehorende modules zijn geïnstalleerd), en direct toegang verkrijgen tot hun configuratiepagina. U kunt ook de Live Configurator inschakelen en gebruiken vanaf deze pagina, welke het mogelijk maakt om gemakkelijk de hoofdkleuren en -lettertype van uw thema aan te passen.
In een tweede gedeelte, maakt de Themaconfigurator het mogelijk om gemakkelijk afbeeldingen toe te voegen met links op specifieke haken van de voorpagina: home, top, left, right, footer. Each available language has its own tab with its own hooks that you can edit from here: this is essential as images often contain text directly on them, making it necessary to have as many versions of the image per available languages.
The module is explained in more details in the "Making the Native Modules Work" chapter of this guide.
The theme's advanced settings
Clicking on the "Advanced settings" button displays the main information about the theme (see the "Creating a brand new theme" section below to find an explanation of the fields).
Below the main section, the "Appearance of columns" section displays a lot of information about the way the left and right columns appear, depending on the page:
- If the box is checked, the column appears in the page (for instance, the Category page).
- If it is left unchecked, it will not appear on that page.
Note that even if you can click on the buttons at will, these settings are only informational, and the theme will not necessarily be able to adapt to your changes!

Select a theme for your "[name]" shop
This section is only display if you have at least two themes installed. It presents you with the other available themes on your PrestaShop installation beside the already-enabled one.
This section simply shows the thumbnails of the available themes, with their names.
Move your mouse cursor over the thumbnail to display a menu with two options:
- Use this theme. This will replace your current theme with this theme.
- Delete this theme. This will delete this theme's files from your web server.
At the top right, the "Visit the theme store" opens a new page to the PrestaShop Addons marketplace, where you can find more themes.
| Note |
|---|
In multistore mode, you cannot apply a theme to all your stores or a group of stores; you must select a single store in the multistore menu, then pick a theme. |
Adding and exporting a theme
Two buttons at the top of the screen enable you to import a theme and install it (and its attached modules), or to export a theme and its modules from your shop in order to share it with the world.
Importing a theme: the "Add new theme" button
This screen presents you with 3 methods to install a new theme:
- from your computer,
- from a public website,
- from your own FTP server.
A final button leads you to the theme creation form, presented in the next section.
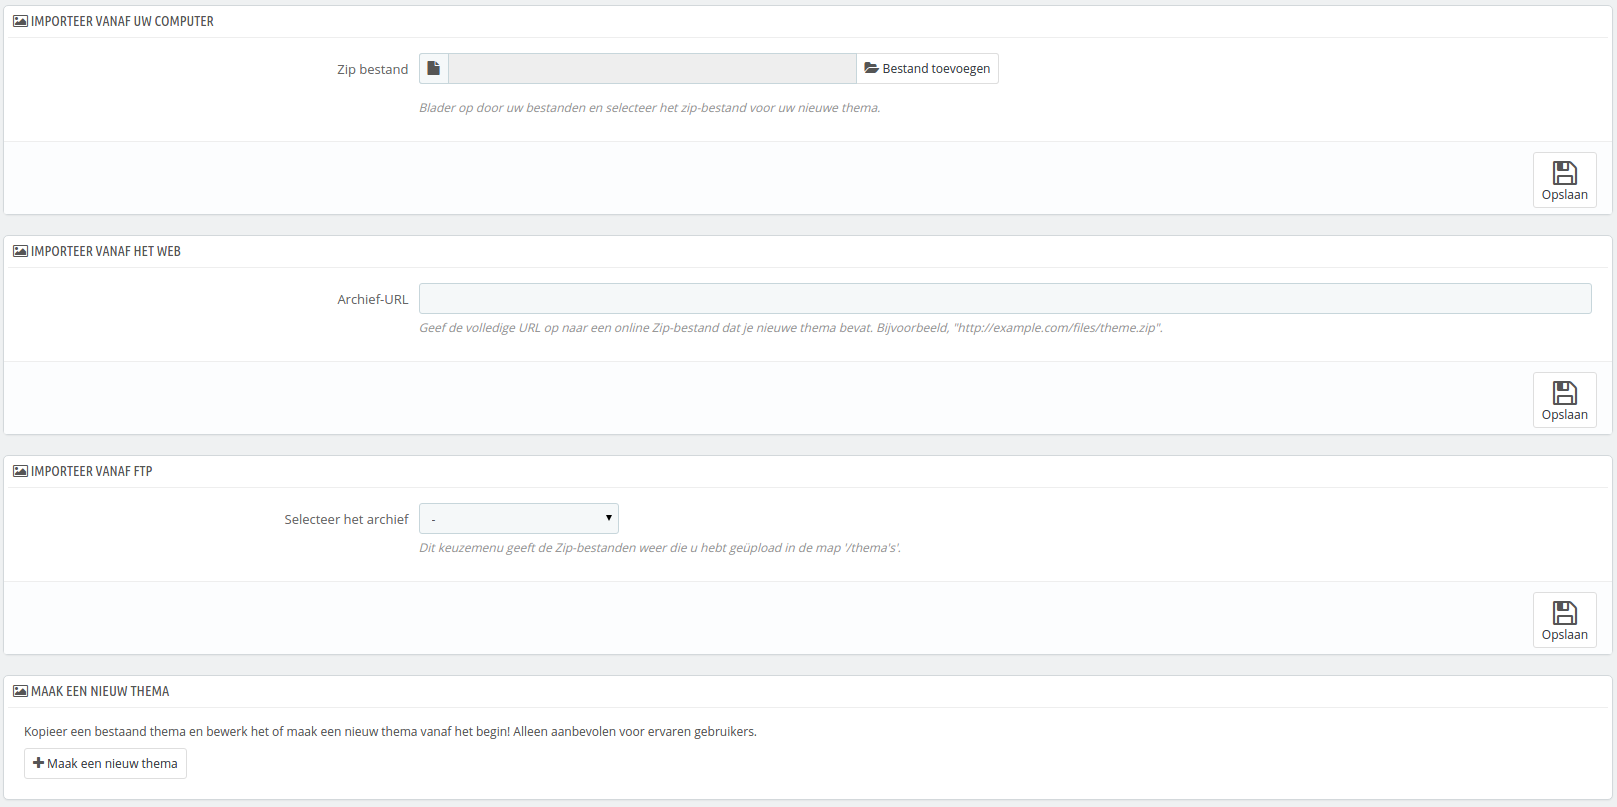
Whatever the method, the process remains the same: indicate the location of the theme's Zip archive, then click "Save". The only thing that changes is the source of the Zip file:
- Import from your computer. Use the file explorer to find the archive.
- Import from the web. Indicate the direct public URL to the archive.
- Import from FTP. Using your FTP client, upload the archive in the following folder:
/themes/.
Click "Save" to validate your choice. The theme is now installed, and PrestaShop asks you if you wish to install modules that were imported along with the theme, what you would rather do with the current modules configuration, and how you would like the images configuration to be taken into account.
Click "Save" one last time. A final confirmation page presents you with all the changes applied to your PrestaShop install. Click "Finish" to end the process.
Creating a brand new theme
The best way to create a new theme for PrestaShop is to copy the files from the default theme, and start modifying its TPL and CSS files to make them your own. The reason is that a PrestaShop theme requires many files to be present: by starting from an existing theme instead of from scratch, you make sure that your own theme will not be missing any part.
You can do this directly on the web server, but PrestaShop makes it easy to copy the files from an installed theme and register your new theme in its system (a step you would have to do in any case).
All of this is done by clicking on the "Create new theme" button from the "Add new theme" button at the top of screen. It displays a creation form.

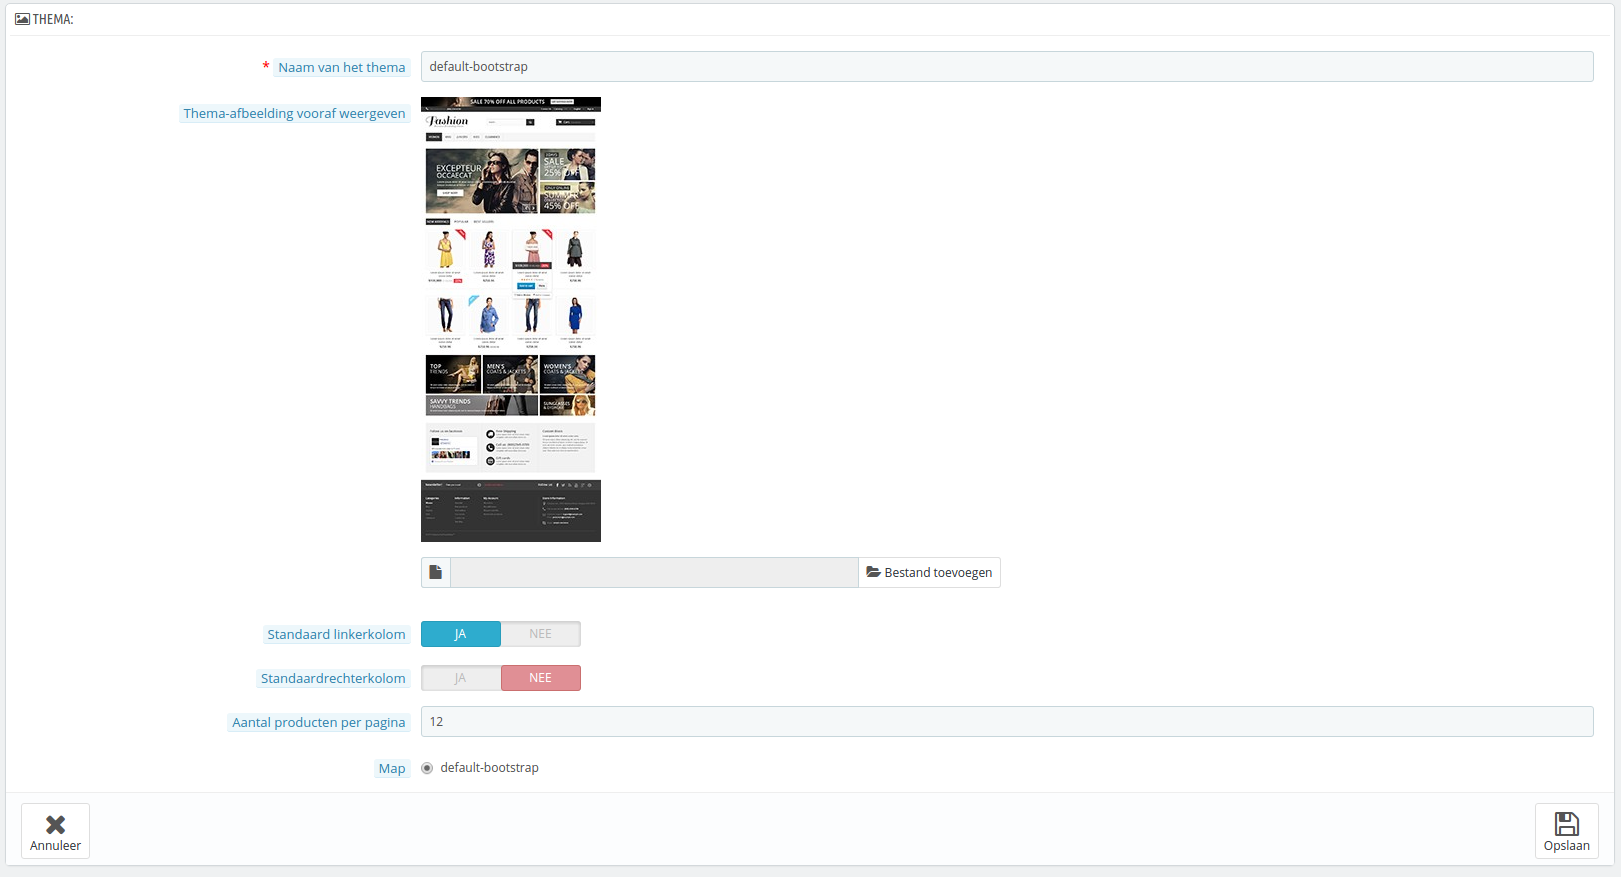
Fill-in its fields:
- Name of the theme. Make sure the name is not already used by another theme (check on the Addons website).
- Preview image for the theme. You should always add a preview image, as it is a clear reminder of what the theme looks like. If you do not have one yet, leave that for later, when the time will come to release the theme.
- Default left column and Default right column. Indicate if your theme has a column (or even two columns), and if so, on which side of the screen. This is purely informational, and can be changed at any time.
- Name of the theme's directory. Try to keep it close to your theme's name. If you have not already created a theme folder, PrestaShop will create one for you.
- Copy missing files from existing theme. This is the cleanest method to start a new theme from another theme's files. Choose "default-bootstrap", or any other theme that you would like to base your foundation on.
- Responsive. Indicate if your theme has a responsive design or not (if you do not know what a responsive design is, then you probably should choose "No"). This is purely informational, and can be changed at any time.
Click save, and PrestaShop will register this information for you: the theme is ready to be enabled, and its preview image appears in the theme selector.
It is now up to you to change your theme's files in order to make it unique! On your local installation (not a production one!), select your new theme, and start working!
Once you are done with your designing and code it, go back to this setting page and change it accordingly: definitive preview image, default column, number of products, and responsiveness.
...
Elke beschikbare taal heeft haar eigen tabblad met haar eigen beschikbare haken die u op deze pagina kunt bewerken: dit is noodzakelijk, omdat er vaak tekst voorkomt in een afbeelding, waardoor er zoveel mogelijk versies beschikbaar moeten zijn voor de beschikbare talen.
De module wordt in meer detail uitgelegd in hoofdstuk Vooraf geïnstalleerde modules gebruiken.
De geavanceerde instellingen van het thema
Door te klikken op de knop "Geavanceerde instellingen" wordt de hoofdinformatie over het thema getoond (bekijk de sectie Een gloednieuw thema aanmaken hieronder om uitleg te vinden over de verschillende formuliervelden).
Onder de hoofdsectie toont de sectie "Kolomweergave" veel informatie over de manier waarop de linker- en rechterkolom verschijnen, afhankelijk van de pagina:
- Als de optie is aangevinkt, verschijnt de kolom op de desbetreffende pagina (bijvoorbeeld de categoriepagina).
- Als het niet is aangevinkt, dan verschijnt de kolom niet op de pagina.
Let erop dat deze instellingen niet bindend zijn en dat uw thema deze instellingen niet hoeft te respecteren, waardoor het mogelijk is dat een kolom toch niet verschijnt of juist wel!
Een thema selecteren voor de "[naam]" winkel
Deze sectie wordt alleen getoond als u minstens twee thema's hebt geïnstalleerd. Het toont de andere beschikbare thema's voor uw PrestaShop-installatie, naast het thema dat al is geactiveerd.
Deze sectie toont simpelweg de miniaturen van de beschikbare thema's, met hun naam.

Beweeg uw muiscursor over de miniatuurweergave om een menu te tonen met twee opties:
- Gebruik dit thema. Dit vervangt uw huidige thema met dit thema.
- Verwijder dit thema. Dit verwijdert de themabestanden van uw webserver.
Aan de onderkant rechts, opent de knop "Bekijk alle thema's" een nieuwe pagina naar de PrestaShop Addons-winkel, waar u nog meer thema's kunt vinden.
| Note |
|---|
In multistore-modus kunt u een thema niet gelijk toepassen voor al uw winkels; u moet een enkele winkel selecteren in het multistore-menu en daarna een thema toewijzen. |
Een thema toevoegen en exporteren
Twee knoppen aan de bovenkant van het scherm maken het mogelijk om een thema te importeren en te installeren (inclusief bijbehorende modules), of om een thema te exporteren en de bijbehorende modules van uw winkel om het te delen met de rest van de wereld.
Een thema importeren: de knop "Voeg thema toe"
Dit scherm toont drie methoden om een nieuw thema te installeren:
- vanaf uw computer,
- vanaf een publieke website,
- vanaf uw eigen FTP-server.
De laatste knop leidt u naar het formulier waar u een thema kunt aanmaken, zoals aangegeven in de volgende sectie.
Welke methode u ook gebruikt, het proces blijft hetzelfde: geef de locatie aan van het zip-archief van het thema en klik vervolgens op "Opslaan". Het enige dat verschilt is de bron van het zip-bestand:
- Importeert vanaf uw computer. Gebruik de bestandsverkenner om het archief te vinden.
- Importeer vanaf het web. Geef de directe publieke URL naar het archief op.
- Importeert vanaf FTP. Door gebruik te maken van uw FTP-client, uploadt u het archief naar de volgende map:
/themes/.
Klik op "Opslaan" om uw keuze te bevestigen. Het thema is nu geïnstalleerd en PrestaShop vraagt of u wenst om modules te installeren di zijn geïmporteerd bij het thema; wat u liever doet met de huidige module-configuraties en hoe u wilt dat er rekening wordt gehouden met de afbeeldingsconfiguratie.
Klik nogmaals op "Opslaan". Een bevestigingspagina toont u alle wijzigingen die zijn toegepast op uw PrestaShop-installatie. Klik op "Bevestigen" om het proces te voltooien.
Een gloednieuw thema aanmaken
De beste manier om een nieuw thema aan te maken voor PrestaShop is om de bestanden van het standaardthema te kopiëren en de TPL- en CSS-bestanden aan te passen naar uw wensen. De reden hiervoor is dat een PrestaShop-thema veel bestanden nodig heeft die allemaal aanwezig moeten zijn: door te starten vanaf een bestaand thema in plaats van helemaal opnieuw te beginnen, zorgt u er gemakkelijker voor dat uw thema geen belangrijke onderdelen.
U kunt dit direct op de webserver doen, maar PrestaShop maakt het gemakkelijk om de bestanden te kopiëren vanaf een geïnstalleerd thema en het nieuwe thema te registeren in het systeem (in elk geval een onvermijdelijke stap).
Dit wordt gedaan met de knop "Maak een nieuw thema" bij het formulier dat verschijnt met de knop "Voeg thema toe" aan de bovenkant. Het toont vervolgens een aanmaakformulier.
Vul de velden in:
- Naam van het thema. Zorg ervoor dat de naam niet al in gebruik is door een ander thema (controleer dit op de Addons-website).
- Thema-afbeelding vooraf weergeven. U zou altijd een preview-afbeelding moeten weergeven, omdat dit een gemakkelijke reminder is van het thema. Als u er nog geen hebt dan kunt u deze optie open houden voor later, wanneer het thema klaar is om te gebruiken.
- Standaardlinkerkolom en Standaardrechterkolom. Geef aan of uw thema een kolom heeft (of zelfs twee kolommen) en als dat het geval is aan welke kant van het scherm. Dit is volledig informatief bedoeld en kan op elk moment worden gewijzigd.
- Aantal producten per pagina. Het standaardaantal producten dat wordt getoond op een pagina. Deze optie kan later nog worden gewijzigd.
- Naam van de thema map. Probeer een naam te kiezen die zo dicht mogeljk tegen de originele naam van het thema zit. Als u nog geen themamap hebt aangemaakt, dan maakt PrestaShop er één voor u aan.
- Kopieer ontbrekende bestanden van bestaand thema. Dit is de schoonste methode om een nieuw thema aan te maken vanaf een bestaand thema. Kies "default-bootstrap" of elk ander thema die u wilt gebruiken als fundering.
- Responsive. Geef aan of uw winkel een responsive design heeft (als u niet weet wat een responsive design is, dan kunt u beter "Nee" kiezen). Dit is informatief bedoeld en kan op elk moment worden gewijzigd.
Klik op "Opslaan" en PrestaShop zal deze informatie voor u bewaren: het thema is klaar om te worden ingeschakeld en de miniatuurweergave verschijnt in het keuzemenu voor thema's.
Het is nu aan u om de themabestanden te wijzigen om het thema uniek te maken! Op uw lokale installatie (niet in uw productieomgeving!), selecteert u het nieuwe thema en kunt u beginnen met werken!
Zodra u klaar bent met het ontwerpen en coderen ervan, gaat u terug naar deze pagina en verandert u de instellingen: definitieve miniatuurafbeeldingen, standaardkolommen, aantal producten en responsive.
| Info |
|---|
Is uw thema zo goed dat andere winkeliers er geld voor over zouden hebben? U kunt het verkopen op Addons, PrestaShop's officiële thema- en modulemarktplaats: http://addons.prestashop.com/. |
Exporting a theme
This section is only available when there is at least one theme installed on your PrestaShop site. It gives you a method to export your module in the correct format (most notably with a working configuration file).
...
Een thema exporteren
Deze sectie is alleen beschikbaar als er minstens één thema is geïnstalleerd op uw PrestaShop-website. Het geeft u een methode om uw module te exporteren in het juiste formaat (waarvan het belangrijkste het configuratiebestand dat gegenereerd wordt).
Het exporteren van een thema is zeer nuttig als u een reservekopie wilt maken voor de zekerheid of een archief wilt maken voor een vriend of om het beschikbaar te stellen in de Addons-marktplaats (http://addons.prestashop.com/). Not only does it generate a complete Zip archive of your theme, but it also adds many information in an XML files, which is very useful both when uploading to Addons, and when importing to another PrestaShop site.

Select a theme and click on "Save". A configuration form appears where you can set the exported themes parameters: author name, modules to export along, theme name, version compatibility, etc.
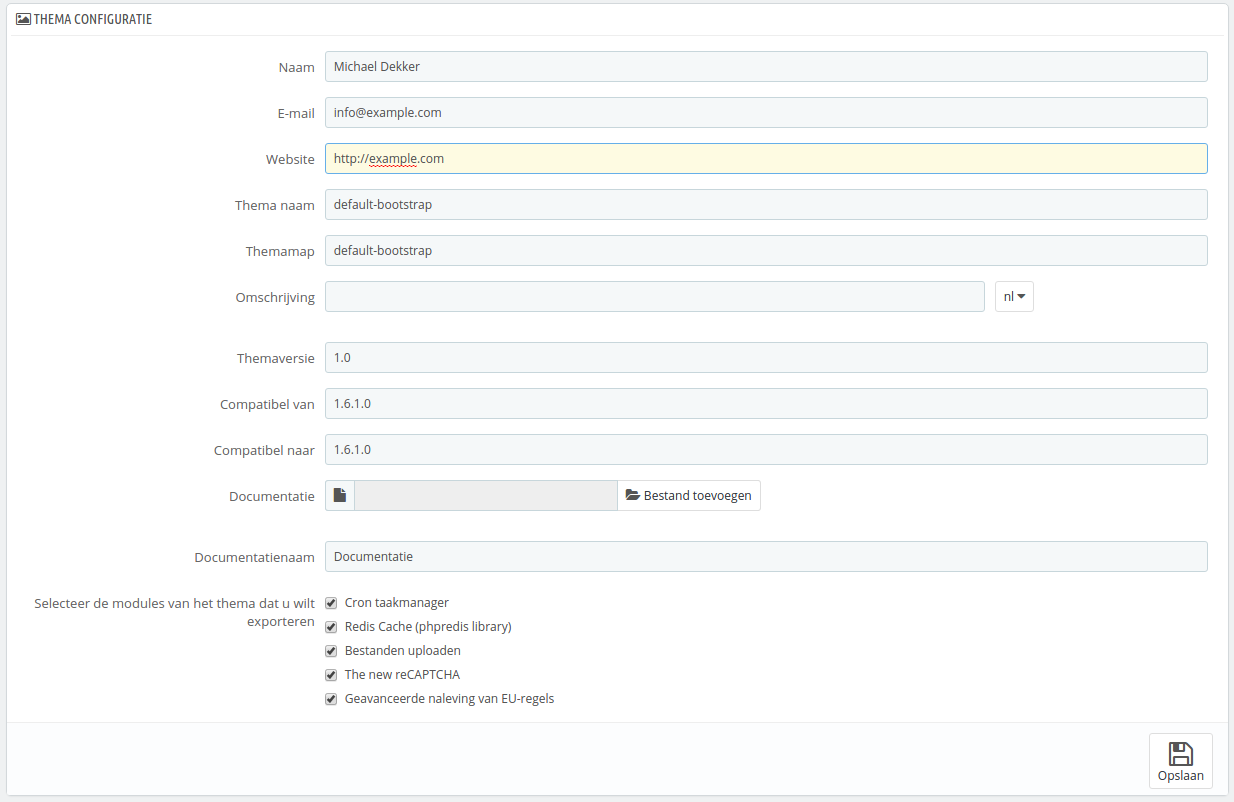
Once all the parameters are correctly set, click on "Save". You will quickly get a file to download from your browser. Save it on your hard-drive, then give the saved file a proper name instead of the random one it currently has. From there on, you can easily share this theme, and if it is your own creation, you can start selling it on PrestaShop's Addons marketplace at Niet alleen genereert het een compleet zip-archief van uw thema, maar ook voegt het informatie toe aan XML-bestanden die erg handig zijn wanneer u uw thema uploadt naar Addons en als u het thema importeert in een andere PrestaShop-winkel.
Selecteer een thema en klik op "Opslaan". Een configuratieformulier verschijnt waar u de instellingen van het geëxporteerde thema kunt wijzigen: auteursnaam, modules om te exporteren, themanaam, compatibiliteit, etc.
Zodra alle instellingen juist zijn ingesteld, klikt u op "Opslaan". U ontvangt gelijk een bestand om te downloaden met uw browser. Bewaar het op uw harde schijf en geef het bestand daarna een goede naam om de willekeurig naam die het nu heeft te vervangen. Vanaf hier kunt u dit thema gemakkelijk delen en als het uw eigen creatie is, kunt u het verkopen op PrestaShop Addons: http://addons.prestashop.com/.
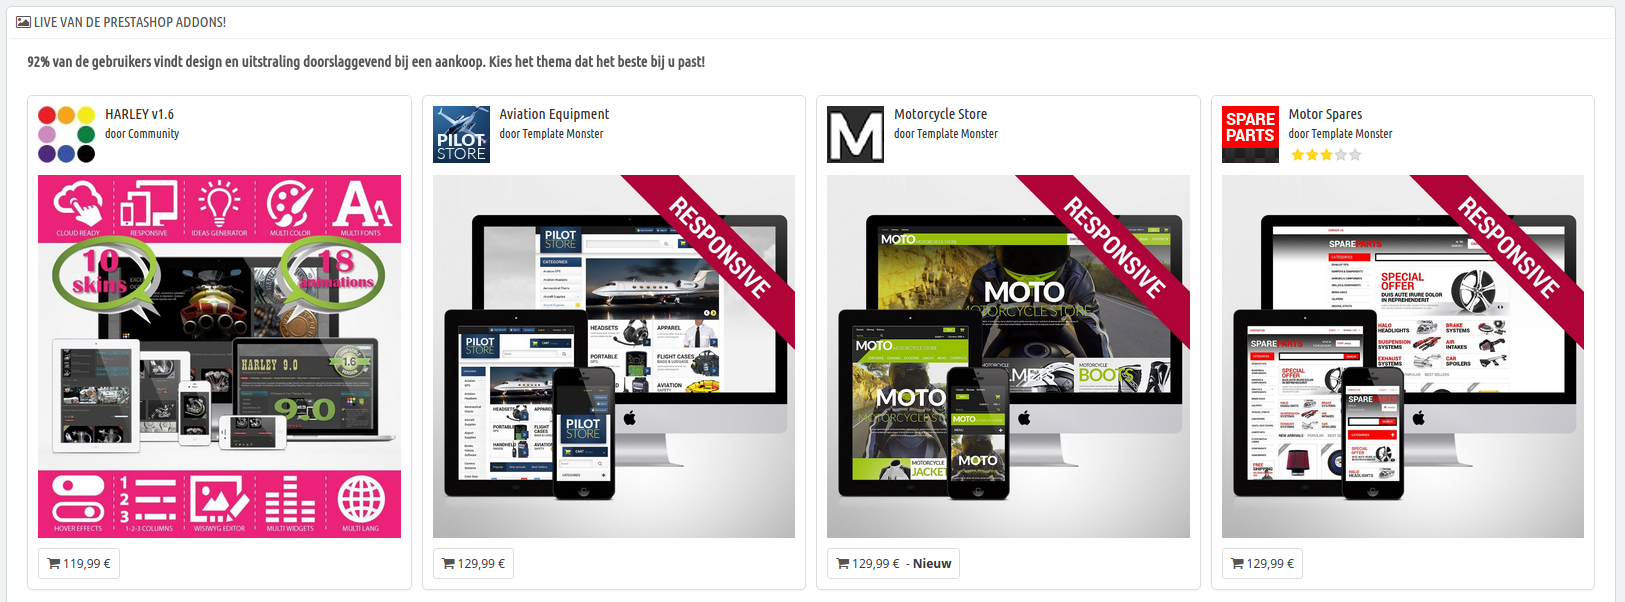
Live
...
van de PrestaShop Addons!
This final section presents you with 12 of the latest themes from PrestaShop's Addons marketplace. You can click on each image to reach the theme's individual Addons page and get a better view of it, and possibly buy it.
You can also use the search form to find the theme that best suits your storeDeze onderste sectie toont u de twaalf meest recente thema's die beschikbaar zijn op PrestaShop Addons. U kunt op elke afbeelding klikken om de Addons-pagina te bekijken van het thema en zo meer informatie te verschijnen, en eventueel kopen.
U kunt ook het zoekformulier gebruiken om het beste thema te vinden voor uw winkel.