...
The most important tool of the "Translation" page is in the "Modify translations" section. This is where you can choose to edit a translation, and completely customize each and every sentence if you wish so.
![]()
Select the part of the current translation that you wish to edit:
...
A long page then appears. It contains the hundreds of available strings for that category, sometimes split in tens of fieldsets.
![]()
By default, only the fieldsets which have untranslated strings are open. If you wish to open them all, click on the button on the top left twice: once to close all of them, once more to expand them all. You can open and close fieldsets one by one by clicking on its title.
...
Some strings might have a warning icon to their right. This indicates strings with placeholders. You can click on the icon to get more information.
In case of a string with a placeholder, you should make sure that the content of that placeholder will be placed in the correct flow of the sentence, and avoid literal translation.
Numbered placeholders (%1$s, %2$d, etc.) enable translators to rearrange the order of the placeholders in the string while maintaining the information each is replaced with. This way, a French translator could choose to translate "Order #%1$d from %2$s" into "Commande n°%1$s du %2$s" or "Le %2$s, commande n°%1$s".

Specific features
Most translation categories present their strings in the same way: the category's strings are grouped into fieldsets that you can close or expand by clicking on their title. The title indicates the number of expressions that the fieldset contains, and when needed, the number of missing expressions, in brackets and in red.
...
- Error messages. Strings are not group into many fieldset, they are all presented together.
- PDF templates. There is only one fieldset, "PDF".
- E-mail templates. Strings are split into fieldsets, but they are not simple text fields anymore. Each e-mail has two templates: a HTML one, which is styled and colored, and a text one, when is plain and simple. While the plain text one can be edited directly in the textfield, the HTML one can only be edited by clicking on the "Edit this e-mail template" button at the bottom of the preview. That click turns the preview into a WYSIWYG textfield (what you see is what you get), with a complete editor at the top (based on TinyMCE: http://www.tinymce.com/). In addition to editing the text, you can change the design as you see fit, for instance you can change the colors in order to adhere to your shop's design.
Note that the e-mail templates feature placeholders, such as{lastname}or{shop_name}, which PrestaShop replaces with the actual values when sending the e-mail. Make sure to keep them in both your translation.
![]()
Add / Update a Language
PrestaShop translations are available in packs, which combine all the different translation categories into a zip file. Many language packs are available freely for you to download and install, directly from the PrestaShop.com servers. PrestaShop will take care of downloading the language pack, unpacking it and creating the correct sub-folder in your installation's /translation folder.
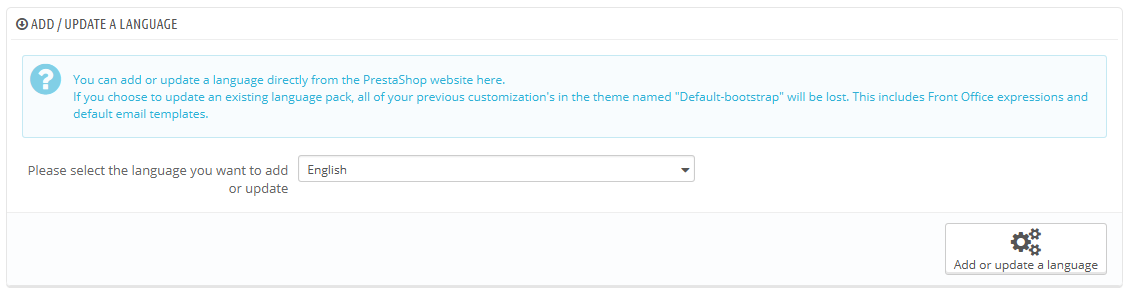
You can also update the currently installed languages, likewise directly from the PrestaShop.com servers, but be reminded that any change that you might have made to your own translations will be lost once you update it.
...
In the case where you do not want to use an official PrestaShop translation pack, but rather a custom one (either provided by someone you know, or one that you exported from another PrestaShop installation), then this tool is for you.
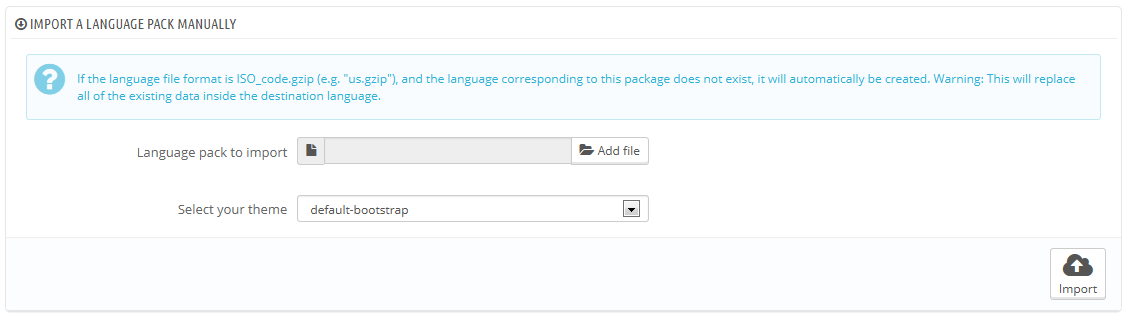
Select the Zip file, select the theme to which you want that pack to be applied to, then click the "Import" button, and it will install the pack in the /translation folder.
...
You can create your own language pack using this tool, either as a way of making a backup of your customizations, or in order to share your translations with other PrestaShop installation – your own or someone else's.
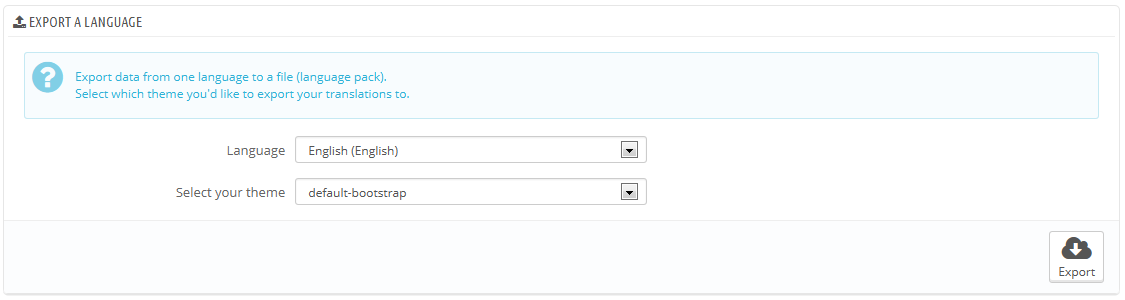
Simple choose the language and the theme of the translation you wish to export, and click the "Export button.
...
You can copy the content of one language to another. This is especially useful when you wish to replace a theme's language with the same language from another theme.
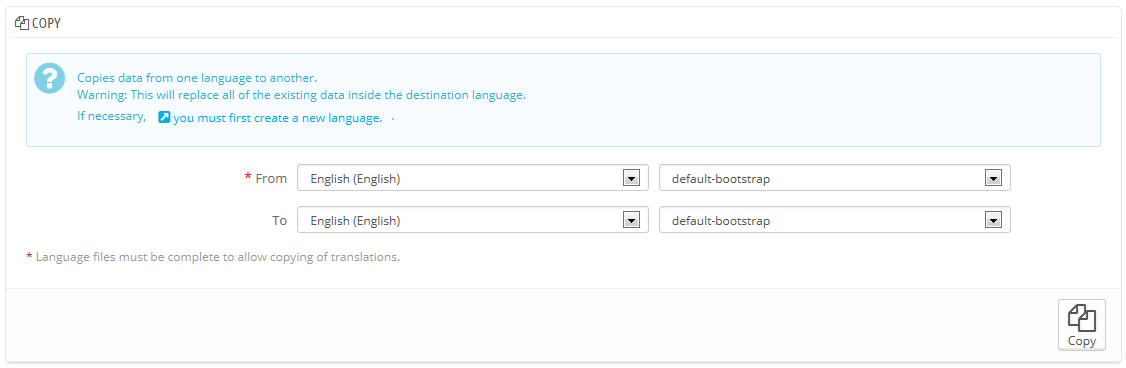
Choose the source language and theme, then the destination language and theme, then click the "Copy" button. In most case, the language should remain the same in both drop-down lists.
...