...
| Table of Contents | ||
|---|---|---|
|
Administering
...
the Back-Office
The "Administration" menu contains a special set of preference pages: rather than giving options that impact the customer or your front-end, they are all about the inner workings of your shop, and even your business itself. In effect, these pages enable you to set how the PrestaShop software will work for you, and how you and your team will be able to use it.
Preferences
The "Preferences" administration page contains general options and settings on the way PrestaShop itself works. It has four sections.
General
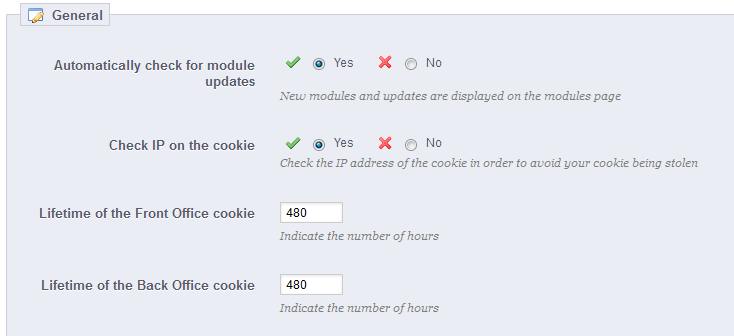
This section is for the more general settings:
- Automatically check for module updates. New in 1.5. You can ask PrestaShop to regularly check if there are new versions of your modules available from the Addons website. If so, the "Modules" page will display a "Update it!" button for installed modules, right next to their "Uninstall" button.
- Check IP on the cookie. This is an added security measure: you can tell PrestaShop to check that the user comes from the IP stored in his or her browser's cookie.
- Lifetime of the Front Office cookie. By default, the longevity of a PrestaShop cookie is 480 hours (20 days). You can reduce it if you feel your security needs it.
- Lifetime of the Back Office cookie. By default, the longevity of a PrestaShop cookie is 480 hours (20 days). You can reduce it if you feel your security needs it.
Upload quota
This page helps you define the authorized size of uploaded files from your own team – not from your customers.
...
- Attachment maximum size. The default value is directly taken from your server's settings, but you can lower it if necessary.
- File value upload limit. If you sell virtual products (services, booking and downloadable products), this setting can limit the size of the files your team can upload – and thus the size of the final product. Plan in advance so that you never leave one of your team members blocked.
- Image value upload limit. Likewise, you can limit the size of image that you or your team can upload to your shop. This can serve as a handy reminder that team-members should strive to reduce the size of image, as it is often not useful to upload anything more than 600x600 (which is roughly 200 kB when correctly compressed). See the "Images" preferences page for the image sizes your shop is set to use. This has the added benefit of saving on both server space and bandwidth usage, as well as processor power (since PrestaShop resizes uploaded image to give you thumbnails and more).
Help
To help you with your everyday usage of PrestaShop, the development team has added many tips & tricks within the interface.
...
- Back Office help boxes. This will display yellow help boxes below some of the more obscure form fields.
- Hide optimization tips. This will display a box with configuration tips on the homepage of the PrestaShop back-office.
Notifications
Notifications are numbered bubbles that are displayed at the very top of any administration page when you have loaded it, right next to the shop's name. They display the number of new items since the last you clicked on them.
...
- Show notifications for new orders. Clicking it display a larger bubble containing the name of the customers that registered since last time. From there on, you can either open any customer's single page, or open the "Customers" page to get the complete list.
- Show notifications for new customers. Clicking it display a larger bubble containing the numbers, amounts and customer names for the order that were last placed on your shop. From there on, you can either open any order's single page, or open the "Orders" page to get the complete list.
- Show notifications for new messages. Clicking it display a larger bubble containing the e-mail of the persons who last sent you a message using the contact form on your shop. From there on, you can either open any message, or open the "Customer Service" page to get the complete list.
Quick Access
PrestaShop has handy shortcuts to your most important pages, which can be accessed through the "Quick Access" menu, at the top right of every page of the PrestaShop back-office (right next to the username).
The "Quick Access" administration page enables you to create customized shortcuts, and make your navigation within the admin administration area even more relevant to you and your team.
...
You can create as many shortcuts as needed – just do not overdo it, obviously, since this would render the "Quick access" menu slower to read.
Adding a new link
Let's create a shortcut the order creation page, from which you can create a new order, and even add new customers and their addresses on the fly.
...
Note that you absolutely can create links to other websites, for instance your PayPal account or your webmail. Simply paste the complete URL in the "URL" field, including the http:// prefix.
Employees
The "Employees" administration page lists all the user accounts that have access to your shop's back-office. By default you will find the account that was created during the store's installation, which is automatically set as SuperAdmin. The SuperAdmin has access to all of PrestaShop's features without restriction.
...
You should make sure to create a new employee account for every actual employee that has anything to do you with your online business. This means that you should never have a general use account that everyone can use, because you need to keep track of who did what on your shop. Indeed, employees can edit orders, accept payments and refund customers, and you need to know who did what. Having a personal administration account for each employee is a good way for you to ensure that your team manages your shop responsibly.
Adding a new employee
The "Add New" button takes you to the employee creation form.
...
- First name and Last name. The name does not appear to customers, but is very helpful when you need to know who did what on your shop.
- Password. Try your best to not make it obvious. You do not want an employee's account to be used by unknown people.
- E-mail address. If allowed to, the employee will receive customer's e-mails and PrestaShop's notifications on this address. It is also used as the account's login identifier.
- Admin panel color. A bit of a cosmetic setting, which can serve as a reminded of which account you are currently logged with. For instance, you could make it so that SuperAdmin accounts have green background color, while logisticians or friends use a yellow color. When you log in using one of your company's computer, this helps you know right away which account (or type of account) you are using, and decide whether you should use it or switch to another.
- Default page. You can decide which page the user sees right after logging-in. This could be the stats page for SuperAdmins, and the orders page for salespersons.
- Back Office width. By default, PrestaShop's back-office interface is as wide as your screen allows. When you have a really wide screen, this can prove a problem. Use this setting to limit the interface's width to a given size, in pixels.
- Language. The default language, since your business might be done in English, but your logisticians might be from another country. Make sure to add the necessary languages, using the "Languages" page under the "Localization" menu.
- Theme. The back-office of PrestaShop can use a different theme than the default one. You can choose which one to use here.
- Show screencast at log in. When enabled, PrestaShop will display a welcome video on the back-office home-page, which tells about the improvement and features of your current version of PrestaShop.
- Status. You can temporarily and definitively disable an account. This enables you to create temporary accounts, for instance when you need help during the holidays or the shopping season.
- Profile. It is very important that you assign a correct profile to each employee account. A profile is tied to a set of permissions and access rights, and you should get to know the existing ones, listed in the "Profiles" page under the "Administration" menu (see below for more information). The profile determines which part of your shop's back-office the employee has access to; for instance, when the employee logs in, only the pages/menus that have been configured as accessible to his or her profile will be displayed. This is a very important setting.
Employees option
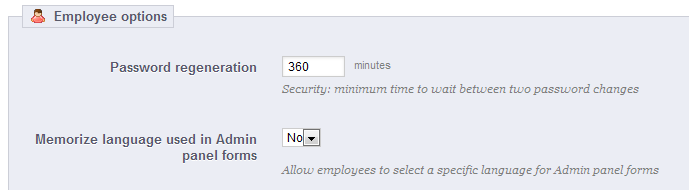
The section at the bottom of the "Employees" page, right below the employees list, has two options available:
- Password regeneration. Enables you to set the frequency at which an employee can change his or her password.
- Memorize language used in Admin panel forms. If enabled, enables employees to save their own default form language.
Profiles
PrestaShop enables you to assign specific duties and rights to each employee who helps you manage the online shop. For example, the administrator will have access to the entire store, without restriction, while an employee can only have access to the catalog or orders.
...
| Note |
|---|
The SuperAdmin profile cannot be deleted, only renamed. |
Adding a new profile
You can add as many profiles as needed.
...
The more complex part comes when setting the new profiles access rights. This is done in the "Permissions" page (see below).
Permissions
Permissions are the central part of PrestaShop's profiles. They enable you to see very precisely what an employee account can and cannot do on your shop.
...
| Note |
|---|
The SuperAdmin permissions cannot be changed: the profile simply has all the rights for every criterion. |
Setting permissions for a new profile
For this example we will create a new profile, "Order Preparer". First create the profile in the "Profiles" page, by filling the "Name" field. As soon as it is saved, it appears in the list of profiles.
...
To avoid mistakes during the configuration of your permissions, PrestaShop automatically saves your settings every time you make a change. This means you do not have to click any "Save" button. Once you have assigned the profile its rights, you can return to the "Employees" administration page and start assigning that new profile to the employees who need it.
Menus
PrestaShop's back-office menu organization is not set in stone: while the default arrangement is built in order to have the most useful pages readily available, you might have a different opinion, and may want to change the organization, in part or in full.
...
This administration page enables you to move, edit, disable and even create pages.
Moving menus
Menus can be moved directly from the list. You can either click on the arrows in the "Position" column, or drag the row itself and drop it in the position you want it to have. As soon as you drop the row, PrestaShop saves the location automatically. You can drag the row when the mouse cursor is over the "Position" column.
You can disable a menu simply by clicking on the green checkmark in the "Enabled" column. Note that this will disable the menu for all back-office users. If you want to hide a menu from a specific set of users, edit their profile's permissions, in the "Permissions" administration page.
Moving pages
To access a menu's pages, click the "+" icon on the right of the row. A new list appears within the main list, with the same columns.
...
You can disable a page simply by clicking on the green checkmark in the "Enabled" column. Note that this will disable the page for all back-office users. If you want to hide a page from a specific set of users, edit their profile's permissions, in the "Permissions" administration page.
Creating a new page or menu
Click on the "Add New" button to reach the page creation form.
...
If you want to create a new menu page, choose "Home" as the parent.
Merchant Expertise
New in 1.5.4.
This page is generated by the module of the same name. It was specifically designed to help PrestaShop users keep track of their progress as e-merchants, see how much they’ve grown and progressed over the days, months and years. It is installed by default.
...