...
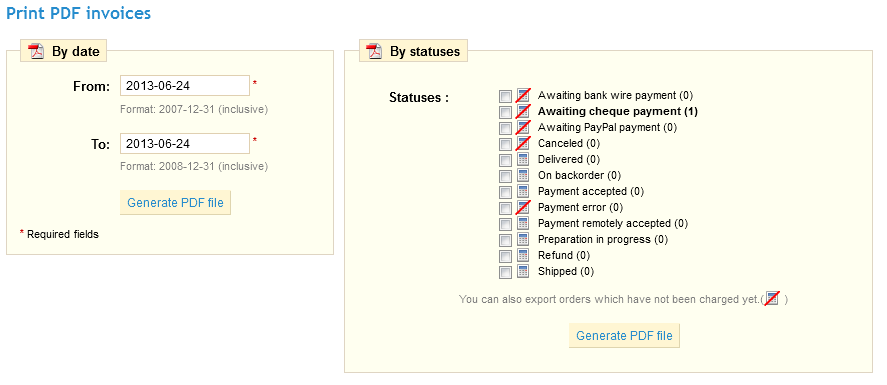
If you want to print several invoices at the same time, head to the sub-tab "Invoices" under the "Orders" tab. The invoice interface will appear.
In order to print several invoices, fill in the date range in the "From" and "To" fields in the "Print PDF invoices" section and create PDFs by clicking on "Generate PDF file."
In the second section "Invoice Options", you can choose whether or not invoices should be printed as soon as the order is made, as well as the Invoice Prefix and the invoice number you want listed on the printed version of the invoice. This feature can help you simplify the management of your account. Finally, you can add a text that will appear at the bottom of all your invoices.

When your customers ask for their invoices, you can redirect them to the Order History section of their user accounts, which keeps all of their invoices available for them.
Statuses
Having different order statuses lets you easily manage your customers. These different statuses are visible and editable in the "Order Statuses" tab.
You can of course create a new status with the "Add New" button. Fill out the form, and save it.
The color will be used to underline order statuses and will be written, like the previously seen color attributes, in HTML code.
Pre-written messages
When you have to send a message to your customers using the PrestaShop administrative interface, you can choose to save this message in order to send it out again to other customers with similar questions, comments, or concerns.
To do this, go to the "Order Messages" sub-tab under the "Orders" tab. One default message is already saved: "Delay". To add others, click on the "Add New" button. You can also edit the default message.
- In the "Name" field, give your message a descriptive name so that you can easily find it again later.
- In the "Message" field, write out the content that you wish to send to your customers.
Once done, click on "Save".
You can create as many messages as you want.
You can send these messages by going directly into a customer's order:
- Select the pre-written message.
- Edit it if needed.
- Click "Send."
Your customer will receive the message on the email address associated with this account.
Delivery Slips
Printing a delivery slip is exactly like printing an invoice. Select the dates, as well as the options you would like, and then confirm them to create your documents.

You can also set the delivery prefix, as well number of the next slip in your series.

Merchandise Returns
Under the "Merchandise Returns" tab, you have the possibility of allowing customers to send products back to you.
...
- Click on the name of the return to see more details.
- Change the status to continue with the return process.
...
Credit Slip
Once a package has been returned, you must create a credit slip.
In To display more details, go to your list of orders , and click on the order for which the customer is returning the item for more details.
Below the "Products" table, do the following:
...
Take a moment to send a message back to your customer! You can do this by clicking on the "New message" section, which can be found right above, and which has already been discussed.
Statuses
Having different order statuses lets you easily manage your customers. These different statuses are visible and editable in the "Order Statuses" tab.
You can of course create a new status with the "Add New" button. Fill out the form, and save it.
The color will be used to underline order statuses and will be written, like the previously seen color attributes, in HTML code.
Pre-written messages
When you have to send a message to your customers using the PrestaShop administrative interface, you can choose to save this message in order to send it out again to other customers with similar questions, comments, or concerns.
To do this, go to the "Order Messages" sub-tab under the "Orders" tab. One default message is already saved: "Delay". To add others, click on the "Add New" button. You can also edit the default message.
- In the "Name" field, give your message a descriptive name so that you can easily find it again later.
- In the "Message" field, write out the content that you wish to send to your customers.
Once done, click on "Save".
You can create as many messages as you want.
You can send these messages by going directly into a customer's order:
- Select the pre-written message.
- Edit it if needed.
- Click "Send."
Your customer will receive the message on the email address associated with this account.
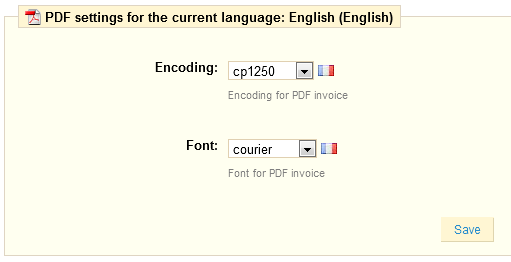
PDF settings
The last sub-tab of the "Orders" tab gives you access to the basic settings of the PDF files that PrestaShop will generated. Two settings are available: encoding and font. Only change these if your PDF files are not generated properly.