...
Actions Buttons
The action buttons in the top bar change depending on the order's status. For instance, once the order is in the "Delivered" state, the "Add a product" and "Remove products" turn into two new buttons: "Return products" and "Partial refund".
...
- Return products. To be used only when the customer has effectively returned products: once the returned product has been received, you can mark it as returned directly in the order form. Click the "Return products" button and a new column will appear in the product list, title titled "Return". Check the box of the affected products, indicate the quantity of items that were returned, and click the "Return products" at the bottom of the table.
- Partial refund. To be used when you need to refund only part of the order and not the whole order, either because the customer returned the ordered product, or simply as a sign of goodwill for a damaged product that the customer chose to keep anyway. Click the "Partial refund" button and a new column will appear in the product list, titled "Partial refund". Set the amount an quantity for each of the affected products, choose one of the option at the bottom of the list (see below), and click the "Partial refund" at the bottom of the table.
When you set a product as returned or to be refunded, three options are available below the tablelist of products:
- Re-stock products. When checked, PrestaShop will consider that the returned product as available for sale again, and will therefore increase the stock for this product.
- Generate a credit slip. When checked, a credit slip will be created for the selected items. A credit slip is an acknowledgment from your shop that merchandise has been returned and that a refund has been issued. The customer can then use it as a credit slip for his or her next purchase.
Generate a voucher. When checked, a voucher will be created for the amount of the selected items. A voucher takes the form of a discount code that the customer can enter during the checkout process.
You can edit the customer's existing vouchers by viewing the customer's page: from the current order's page, click on the link under the customer's name in the "Customer information" section; once in the customer's page, reach the "Vouchers" section. You can edit each voucher by clicking on the "Edit" icon.Warning In PrestaShop 1.5, vouchers are part of a new kind of discount feature: "cart rules". They can be created and edited from the "Cart Rules" page, under the "Price rules" menu. The cart rules creation process in the next chapter, "Creating Price rules And Vouchers".
If the customer paid the order using a credit card, the payment system should refund the cart automatically. If the order was paid using a check or a bank transfer, you have to issue the refund yourself, then mark the order as having been refunded manually in the back-office (in the order's page).
| Tip | ||
|---|---|---|
| ||
A credit slip is first and foremost a written proof that a product has been returned. Most of the time, the customer can use it as a voucher. A voucher is a discount code which does not have to be tied to a merchandise return or a refund, and which can take more forms than a simple credit slip:
You can apply a voucher to all customers, or a group of customers, or a single customer; you can set its expiration date; A cart rule is basically an advanced version of a voucher: in addition to what a voucher could do in PrestaShop 1.4, the cart rules system introduced in PrestaShop 1.5 enables you to:
|
...
When your customers ask for their invoices, you can redirect them to the "Order History" section of their user accounts, which keeps all of their invoices available for them.
Merchandise Returns
Under the The "Merchandise Returns" page gives you a list of all the RMA process.
At the bottom of the page, you have the possibility of enabling customers to send products back to you. Simply make a choice, indicate the time of validitynumber of days during which a return request can be made, and save your settings.

Return process: how the customer sees it
Once you have activated this the RMA option in your back-office, the customer can choose to return an item (provided the order is still in the time of validity). In order to do this, s/he must do the following:
...
Once the form is complete, the customer clicks on "Make an RMA slip", and the request is sent to you. The request appears in the customer's "Return Merchandise Authorization" page, accessible from the account page.
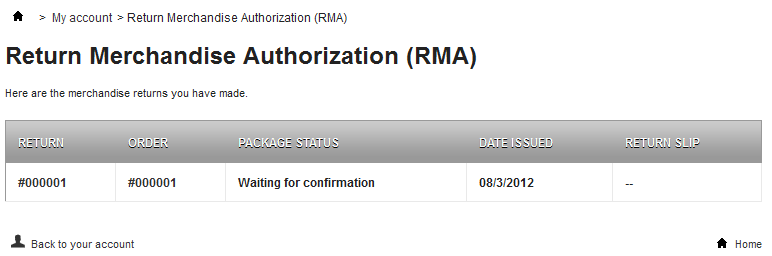 A list of returns will appear
Return process: how you see it
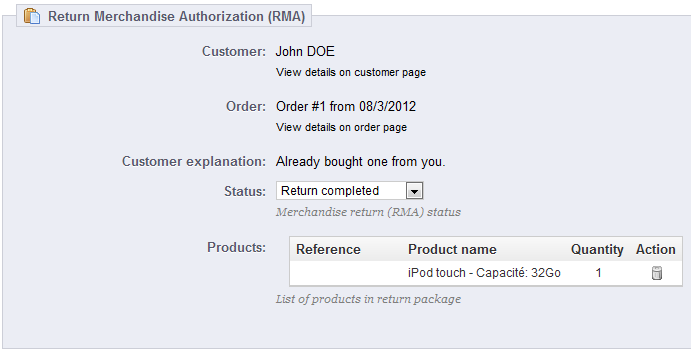
The return request appears in your back-office.

It is now up to you to accept it or deny it:
- Click on the name of the return request to see more details.
- At first, the RMA has the "Waiting for confirmation" status. Change the status to continue with the return process or stop it.
- Validate.
The refund process can take several steps, which are indicated by the RMA status. There is just a handful of statuses, which can follow the whole RMA process:
- Waiting for confirmation.
- Waiting for package.
- Package received.
- Return denied.
- Return completed.
If you want to stop the return process (and deny the customer a refund), simply choose the "Return denied" status.
If you agree with the product being returned and the customer being refunded, follow each step precisely:
- Choose the next step in the process: "Waiting for package". This will send an e-mail to the customer indicating that the product can be sent back to you.
- Once you have received the package, change the RMA's status to "Package received".
- Finally, once the whole process is over (either the customer has been refunded or you have issued a credit slip), change the RMA's status to "Return completed".
Refunding a customer
An order can be refunded, either partially or totally. This is done using two actions buttons located in the top bar of the order's page itself rather than in the RMA page.
The action buttons change depending on the order's status. For instance, once the order is in the "Delivered" state, the "Add a product" and "Remove products" turn into two new buttons: "Return products" and "Partial refund".
| Info |
|---|
Product return is not activated by default. To activate it, go to the "Product returns" page under the "Orders" menu, and activate the option in the option at the bottom of the page. This will apply to all products and all orders. |
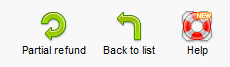
- Return products. To be used only when the customer has effectively returned products: once the returned product has been received, you can mark it as returned directly in the order form. Click the "Return products" button and a new column will appear in the product list, titled "Return". Check the box of the affected products, indicate the quantity of items that were returned, and click the "Return products" at the bottom of the table.
- Partial refund. To be used when you need to refund only part of the order and not the whole order, either because the customer returned the ordered product, or simply as a sign of goodwill for a damaged product that the customer chose to keep anyway. Click the "Partial refund" button and a new column will appear in the product list, titled "Partial refund". Set the amount an quantity for each of the affected products, choose one of the option at the bottom of the list (see below), and click the "Partial refund" at the bottom of the table.
When you set a product as returned or to be refunded, three options are available below the list of products:
- Re-stock products. When checked, PrestaShop will consider that the returned product as available for sale again, and will therefore increase the stock for this product.
- Generate a credit slip. When checked, a credit slip will be created for the selected items. A credit slip is an acknowledgment from your shop that merchandise has been returned and that a refund has been issued. The customer can then use it as a credit slip for his or her next purchase.
Generate a voucher. When checked, a voucher will be created for the amount of the selected items. A voucher takes the form of a discount code that the customer can enter during the checkout process.
You can edit the customer's existing vouchers by viewing the customer's page: from the current order's page, click on the link under the customer's name in the "Customer information" section; once in the customer's page, reach the "Vouchers" section. You can edit each voucher by clicking on the "Edit" icon.
If the customer paid the order using a credit card, the payment system should refund the cart automatically. If the order was paid using a check or a bank transfer, you have to issue the refund yourself, then mark the order as having been refunded manually in the back-office (in the order's page).
Delivery Slips
A delivery slip is a notification of delivery. It can also be called "delivery note" or "advice note".
It is supposed to be put in the shipped package, along with the ordered products. It will have your shop's logo, and indicate the content. On receiving the package, the customer will be able to use the delivery slip in order to double-check the content of the package, see that nothing is missing from the order.
...