...
That is the purpose of this chapter: to take you through all the tabs menus that weren't explored in the previous chapter ("Adding Products and Product Categories"), explaining each form and detailing every field, so that you can get up to speed quickly with your shop, know what data you need in order to prove useful to the customers and in the end, sell more.
Throughout the product set up, we are going to tackle how to use several key tabs menus for your products.
Products
...
The "Monitoring" page is the sections of your shopto which you must pay the most attention in order to manage your catalog.
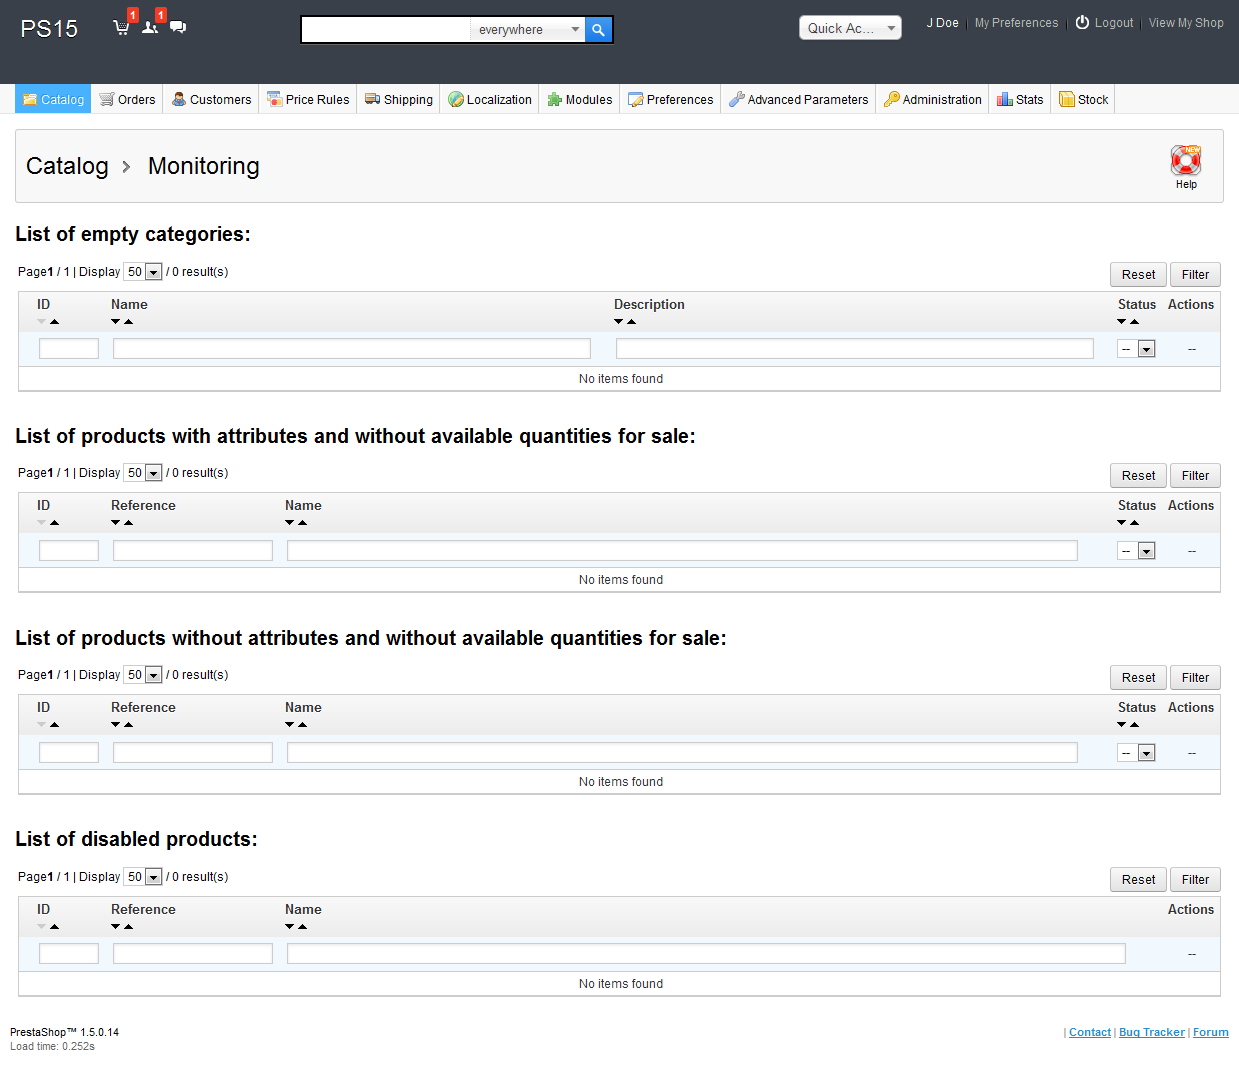
Four sections are shown:
- List of empty categories. Gives you the categories that do not have any products. You should either delete these empty categories, or fill them with at least one product. This prevents customers from finding themselves in an empty category in your shop.
- List of products with attributes and without available quantities for sale. Gives you which products are no longer in stock. Take the necessary measures to restock them.
- List of products without attributes and without available quantities for sale. Likewise, gives you which products are no longer in stock. Take the necessary measures to restock them.
- List of disabled products. Gives you the products that have been disabled in the store and that aren't visible to your customers. Consider either enabling them (maybe after restocking them) or deleting them from your catalog.
...
Attributes are configured on a per-product basis, from the "Product" page under the "Catalog" tabmenu, but they must first be registered on your shop using the tool on the "Attributes and Values" page under the "Catalog" tabmenu.
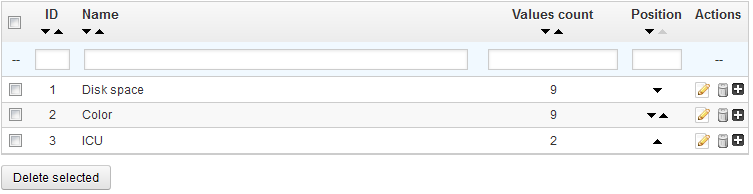
To add a type of attribute, or in other words, to add a group of variation possibilities (colors, capacity, material, etc.), click on "Add new Attributes". A new page appears.
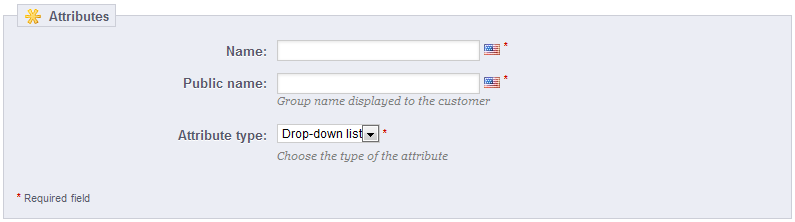
Fill out the form:
- Name. The exact description of the attribute. This needs to be short but precise, so as to not confuse it with another attribute.
- Public name. The attribute name, as displayed to the customers on the product page. Since some attributes might have the same name for varying content, this field enables you to still present it correctly within the product's context, while being able to easily tell a product from another with a similar name but different meaning.
- Attribute type. Enables you to choose whether the product's page should display this attribute's values as a drop-down list, a radio button list, or a color picker.
Save your new attribute to return to the attributes list, then click on "Add new Values". Another page appears.
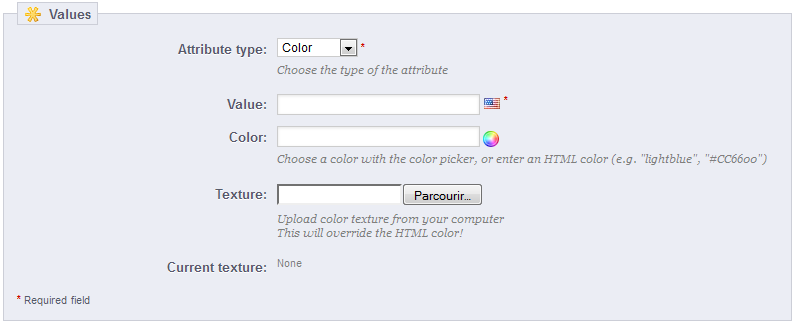
Fill out the form:
- Attribute type. From the dropdown list, select one of the available attributes.
- Value. Give a value to the attribute: "Red", "16 Gb", "1.21 gigowatts"...
...
Features are configured on a per-product basis, from the "Product" page under the "Catalog" tabmenu, but they must first be registered on your shop using the tool on the "Features" page under the "Catalog" tabmenu.

Click on "Add new feature". A very simple form appears. This is where you name the feature itself: for example, the types of headphones provided with a music player.
...
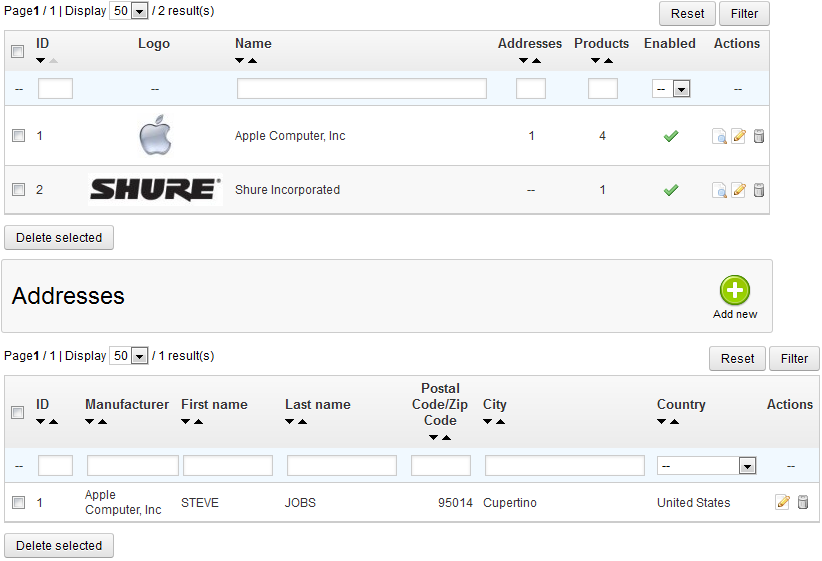
By entering information about the manufacturers, your site's visitors can have rapid access to all of this manufacturer's products. This makes navigating around your site easier for them. In terms of visibility, filling out these fields will improve your position in search engines.
Click on "Add new", and a creation form appears.

Now fill out all of the fields:
...
- click on a manufacturer's name or logo, and get all the product associated with it. If there are none, then you should work on a per-product basis, from the "Products" page under the "Catalog" tabmenu, using each product's "Associations" tab on the left.
The same result is achieved by clicking the view icon on the right. - disable the manufacturer, by clicking on the green check icon. Once disabled, a red cross icon appears in its place: click to re-enable the manufacturer.
- edit/delete the manufacturer by clicking on the respective buttons on the right of the row.
...
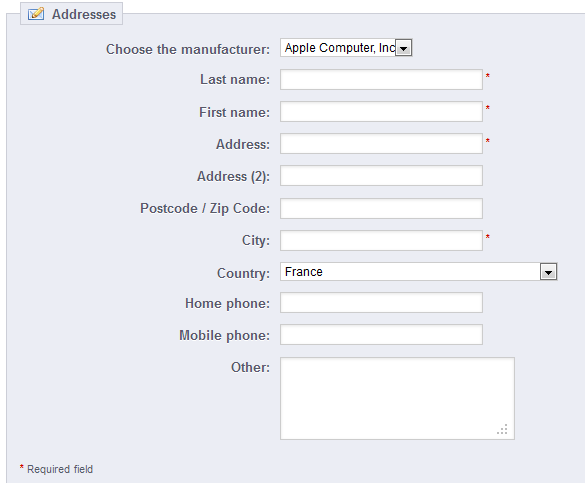
At the bottom of the "Manufacturers" page is an "Addresses" section. Each manufacturer can have its own address registered with PrestaShop. This serves mainly as a reminder for yourself: this way, you'll always have the contact address for a manufacturer available directly within PrestaShop.
Suppliers
Having suppliers registered is optional if you already have manufacturer who directly supply you with their products. It all depends on your needs, but if your product supplier is the same as the product manufacturer, then you should make sure to have both registered in your system, and associated with each product.
Just as for manufacturers, your site's visitors can have rapid access to all of supplier's products. This makes navigating around your site easier for them. In terms of visibility, filling out these fields will improve your position in search engines.
Click on "Add new", and a creation form appears.

Now fill out all of the fields:
...
- click on a supplier's name or logo, and get all the product associated with it. If there are none, then you should work on a per-product basis, from the "Products" page under the "Catalog" tabmenu, using each product's "Associations" tab on the left.
The same result is achieved by clicking the view icon on the right. - disable the supplier, by clicking on the green check icon. Once disabled, a red cross icon appears in its place: click to re-enable the supplier.
- edit/delete the supplier by clicking on the respective buttons on the right of the row.
...
Clicking on the "Image Mapping" tab page takes you to a new page.
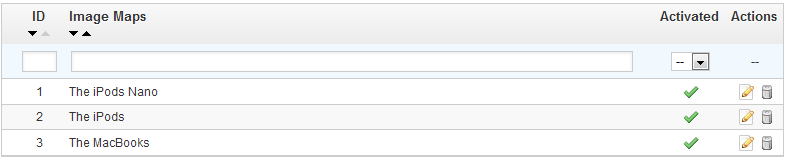
Creating an Image Map
To create a new map, click on the "Add New" button. You are taken to the creation screen.

- Image map name. Enter a name for the image map.
- Status. Whether the image map is available or not. You can choose to delay its availability until you are done settings all the links.
- Image to be mapped. Select the image that you want to represent the image map, then click "Save and stay". The page will then reload, with the photo that you uploaded and many more options.
...
The "Tags" page under the "Catalog tab " menu enables you to create new tags and manage existing tags. Once you have given tags to your products, you will get a very important list of tags. The "Tags" page will help you manage them all.
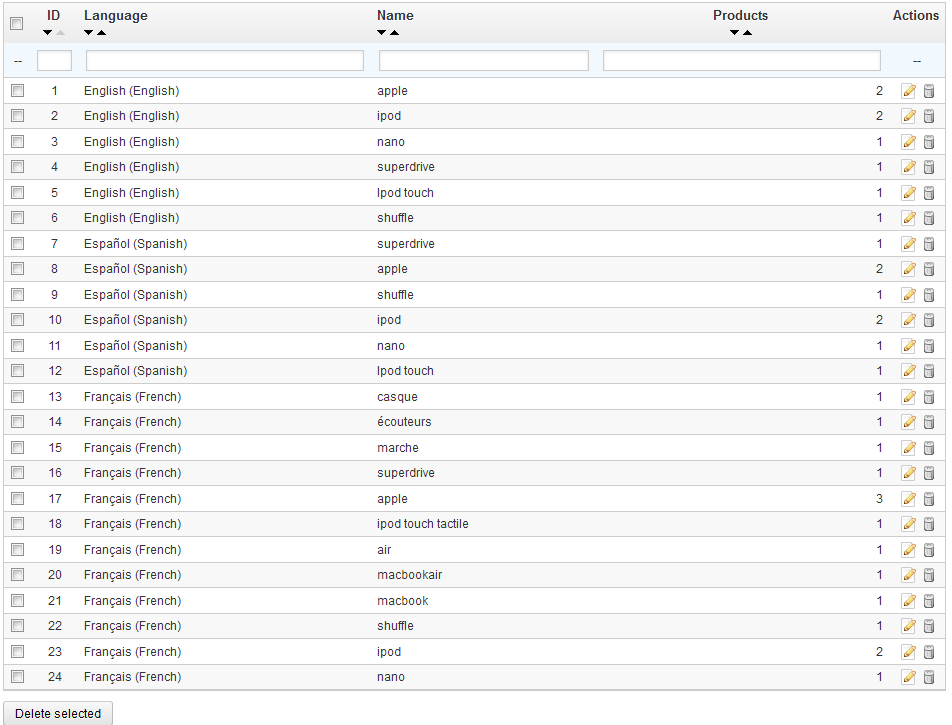
To create a new on, click on "Add New", and a creation page appears.
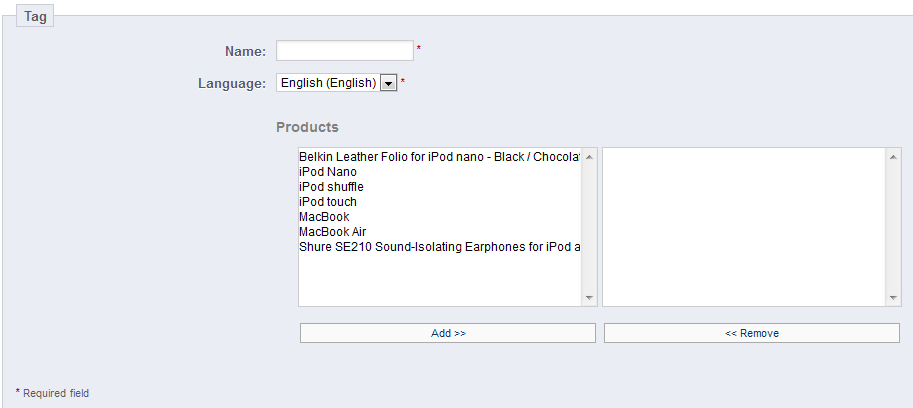
This interface enables you to add tags to one or many of your products.
...
Each product can have attachments, which can be individually set in their own "Attachments" tabpage, as explained in the previous chapter of this guide, "Adding Products and Product Categories". That tab page gives you access to all the attached files of the shop: if you need to apply the associated one file with many products, you will thus only have to upload it once.
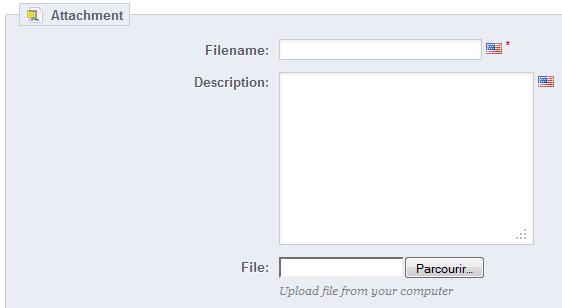
You can also upload attachments on their own, before associating them to products. This is done from the "Attachment" page, under the "Catalog" tabmenu.

The process to register a new attachment to your shop is straightforward:
- Click on the "Add new". A form appears.
- Filename. Give your attachment a name, in all the needed languages.
- Description. Give it a quick description, also in as many languages as needed.
- Click on "Browse" to select a file on your computer to upload.
- Click on "Save".
You are then redirected the attachment list, where your file now appears. It is now available to all products, through their "Attachments" tab.
...