Tabla de contenidos
La herramienta de actualización automática de Prestashop permite a los propietarios de tiendas hacer copias de seguridad y actualizar su sitio en pocos clics sin la necesidad de tener conocimientos técnicos.
El módulo 1-Click Upgrade debería de estar disponible de forma predeterminada en la página "Módulos" de su tienda (dentro de la categoría "Administración"): simplemente realizando un clic en el botón Instalar perteneciente a éste módulo, podrá utilizarlo para actualizar a la última versión de PrestaShop.
Nunca actualice su tienda online directamente. La herramienta de actualización automática puede fallar en algunas situaciones, y probablemente no podría volver a la versión anterior que tenía instalada. La forma más segura de realizar este proceso es tener disponible una copia exacta de su tienda, ya sea en el equipo local o en otra carpeta de su servidor web. Ésta deberá contener todos sus productos, categorías, temas, módulos, traducciones, ajustes personalizados, etc. Realice una actualización de prueba sobre esa copia de su tienda. Una vez que la actualización se haya completado, navegue a través de las páginas del front office y back office de la tienda para asegurarse de que todo está tal y como esperaba. Si no es así, entonces la herramienta de actualización automática tiene un problema con su configuración, y debería utilizar el método manual de actualización, que ahora está obsoleto y requiere de más tiempo, pero que podría serle de ayuda en su situación. |
Si el módulo 1-Click Upgrade no está disponible en su instalación de PrestaShop 1.4 o 1.5, puede descargarlo gratuitamente desde el sitio web de Complementos de PrestaShop (PrestaShop Addons).
Incluso si ya tiene instalado el módulo "1-Click upgrade", asegúrese de que está utilizando la última versión disponible:
|
Tan sólo tiene que seguir los pasos que realiza habitualmente para instalar un módulo en PrestaShop:
Haga clic en el botón "Añadir nuevo módulo", situado en la parte superior derecha de la lista de módulos disponibles.
Si está actualizando desde la version 1.4, haga clic en el enlace "Añadir un nuevo módulo a partir de mi ordenador", situado en la parte superior izquierda. |
/modules.El módulo estará ahora disponible en el listado de módulos, pero todavía tendrá que instalarlo:
El módulo está ahora preparado para que lo configure y lo utilice.
La pantalla de configuración del módulo está disponible en el listado de "Módulos", haciendo clic en el botón o enlace "Configurar".
La pantalla de configuración también está disponible en:
|
La pantalla de configuración le presenta una serie de secciones, proveyendo información, herramientas y ajustes.
Esta pequeña sección sirve como recordatorio de que una actualización nunca es 100% segura, y por lo tanto usted debe asegurarse de que ha hecho una copia de seguridad completa de sus archivos y datos antes de realizar este proceso. De esta manera, si la actualización fallará, podría regresar al estado inicial de su tienda shop – aunque con un poco de trabajo volviendo a poner los archivos y datos en su lugar correspondiente.
Este proceso se explica en detalles en el capítulo "Cómo realizar y restaurar su propia copia de seguridad" de esta guía: http://doc.prestashop.com/display/PS16/Making+and+restoring+your+own+backup.
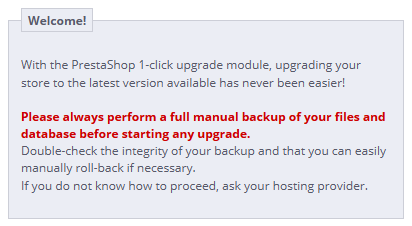
Tenga en cuenta que el módulo 1-Click Upgrade realiza una copia de seguridad propia, con el fin de permitir la reversión total de la actualización. Sin embargo, usted siempre debe realizar sus propias copias de seguridad.
La sección "comprobación pre-actualización" le proporciona información valiosa sobre la instalación actual de PrestaShop, y cómo ésta podría interactuar con la actualización automática.
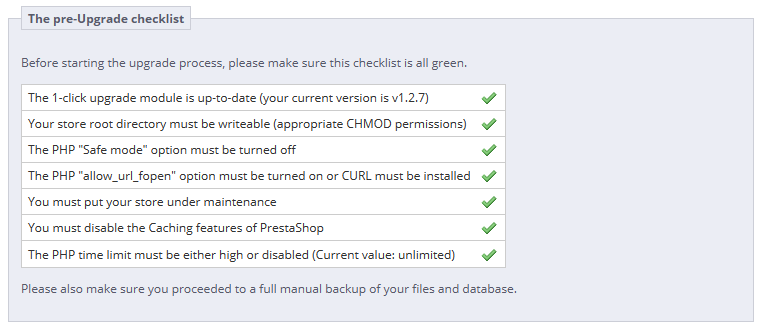
Deberá asegurarse de que todas las comprobaciones se validan antes de poder iniciar la actualización.
All these indicators must be green for the upgrade to work. Otherwise, the upgrade button will not appear.
When your store is hosted on your local server ( |
This section compares your version of PrestaShop with the latest stable one. You can quickly see whether you need to update or not. If you know that there is a newer version available than the one presented, you can trigger a version check by clicking the "Check if new version available" button.
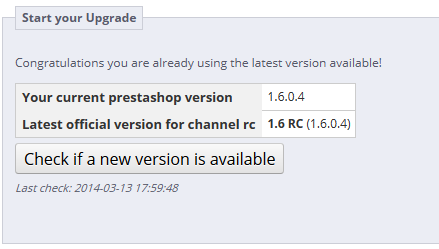
By default, the update tool is set to update your store to the next minor version. This means that if you use a version from the 1.4.x branch, it will not suggest the latest 1.6.x version, but rather the latest 1.4.x version. Therefore, if you want to update from a 1.4.x version to the latest 1.6.x version, you must click on the "More options (Expert mode)" button. This will open a new section, named "More options (expert mode)", where you can choose the distribution channel to which you want to update.
This is also very useful if you want to check for a version other than a stable one (for instance, beta, RC or any other unstable version).
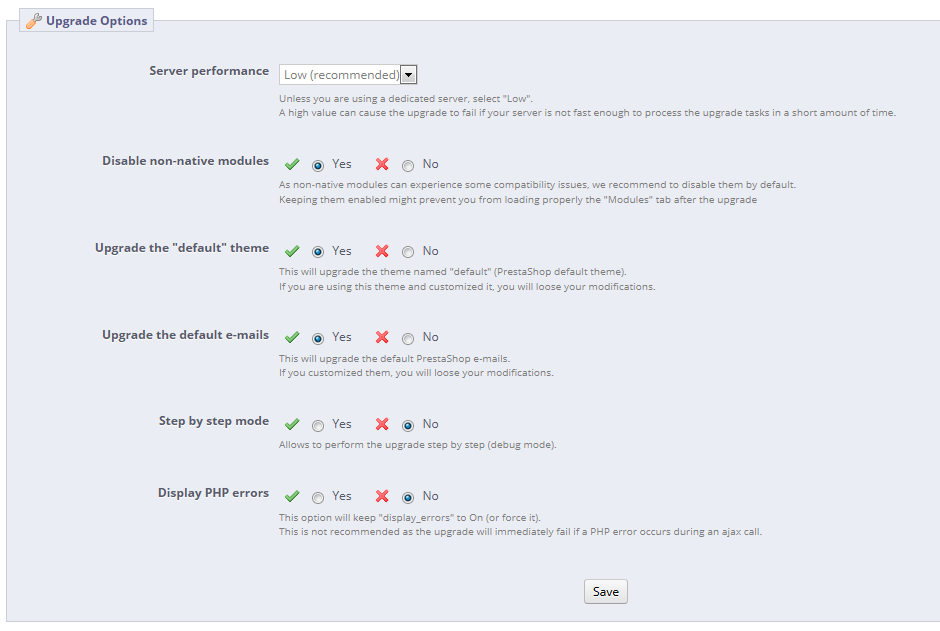
Before launching the upgrade, you must make sure that you understand its settings. The "Backup options" and "Upgrade options" sections are available at the bottom of the page (and are described later in this chapter). Make sure you understand them all.
This section enables you to pinpoint exactly to which version you want to upgrade your current PrestaShop installation.
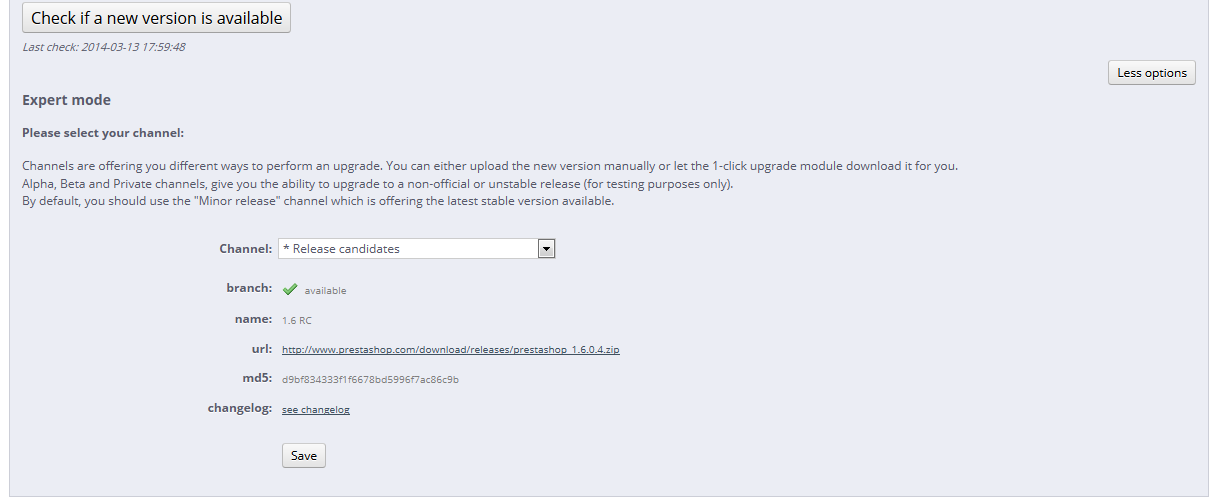
The options are:
/admin/autoupgrade/download. Once you have selected archive in the drop-down selector, indicate the version number in the text field (be very exact!)./admin/autoupgrade/latest/prestashop folder. That /prestashop folder must come directly from the archive that you downloaded.For the curious, the numbered differences between your current version and the latest version in the chosen channel.

In case you have make changes directly to the core files instead of using the overriding possibilities of PrestaShop, these lists can help you know if your changes are safe or not.
Nevertheless, you can improve the lifespan of your custom code by turning it into overriding files. See the developer documentation for more information.
This section only appears when at least one upgrade has been performed.
See below for more information.
These options enable you to have some control on the backup process:

These options enable you to have some control on the upgrade process:
Once all the indicators in the "pre-Upgrade checklist" section are green, the update button appears in the "Start your Upgrade" section, along with the URL from which the new version will be downloaded.
Clicking the "Upgrade PrestaShop now !" button triggers the whole process.
Once the upgrade process is launched, the whole configuration page is replaced by two sections: "Activity Log" and "Rollback".
The activity log gives you a detailed journal of what the updater is doing, in a screen you can scroll through:
auto-backupfiles_V1.6.0.2_20140127-120310-798d3a69.zip form.A lot of files are mentioned during the whole process. You do not need to read all the notifications, it's only there for you to peruse in case of error.
You'll know the upgrade is over when the following message "upgrade complete. Please check your front office theme is functional (try to make an order, check theme)" appears in green, along with the following final log entry: "End of process".
The upgrader also indicates that you should re-enable your shop, but before you do that, you should first check that everything is working in your back office: no errors, all products and categories are in place with their images and attached files, etc. Until you have checked that everything is okay in your shop, it is better to keep it from the public eye.
On first load, pages might look wonky: because your web browser caches files, it is probably using the old CSS files instead of the new ones. Do not hesitate to reload the page several times, or even empty your browser's cache, in order to get the correct interface. |
When you upgrade from version 1.4 to version 1.6, your menus will not be arranged the way they would be if you made a fresh installation of version 1.6. That is because PrestaShop 1.4 tabs got reorganized into 1.6 menus, and a lot of pages were moved around in order to create consistent menus. Additionally, the upgrader assumes that your 1.4 tabs may have been customized or moved around, either by a module or by your own action. Therefore, rather than breaking the existing settings, the upgrader takes the tabs as-is, and does not re-arrange them into the default 1.6 menu order. If you want to change the position of pages within a menu once you have updated to version 1.6, go the to "Menus" page under the "Administration" menu, and start fiddling with positions. |
Once you have made sure your PrestaShop installation is up and running, you can re-enable your shop using the option in the "Maintenance" page of the "Preferences" menu, then make tests on your front office: browse products, sort them, try to order one, etc. In short, go through the entire buying process in order to make sure that you won't miss a sale.
Is everything working fine? Congratulations, you know have successfully upgraded your PrestaShop installation!
In some server configurations, an error message might be displayed, saying "Javascript error (parseJSON) detected for action "upgradeNow". Starting restoration...". Follow these steps to solve the error, :
After you have done all this, start the autoupgrade process again. |
Sadly, not all upgrades are successful – which is the very reason why you should always back-up all your files and data, and why PrestaShop performs an additional backup of said files and data by itself, which you should not always count on. Make your own backup first. See the "Making and restoring your own backup" chapter of this guide for more information.
PrestaShop's own backup files are saved on your server, and if it turns out your update has gone badly, you can find them in the "Rollback" section of the configuration page for the 1-Click Upgrade module.
Backup files are created as soon as the upgrade process is started, and are available immediately in the "Choose your backup" drop-down list.
Choose the most recent one. The date and hour of the creation of the backup file are right within the name: Vversion-date-hour-random, for instance "V1.4.9.0_20120907-114024-f85f41a" for a backup of a previous PrestaShop 1.4.9 installation, made September 7th 2012, at 11:40:24 AM.
The "Rollback" button triggers two actions:
Select the backup archive to which you want to roll back to, and click the "Rollback" button. As with the upgrade process, the whole interface disappears to only leave the "Activity Log" section and the "Rollback" section. You can follow the rollback process in the scrolling journal, and once it is finished, reload the page in order to check that everything is indeed back in place.
This is explained in details in the "Making and restoring your own backup" of this guide: http://doc.prestashop.com/display/PS16/Making+and+restoring+your+own+backup.