
Languages
PrestaShop comes multilingual out of the box: there is one default language (the one you used to install it), and many more are available to download.
Take part in PrestaShop translations
If PrestaShop is not fully translated in your language, you can help to translate it by joining our open community of translators on Crowdin and contribute in your language!
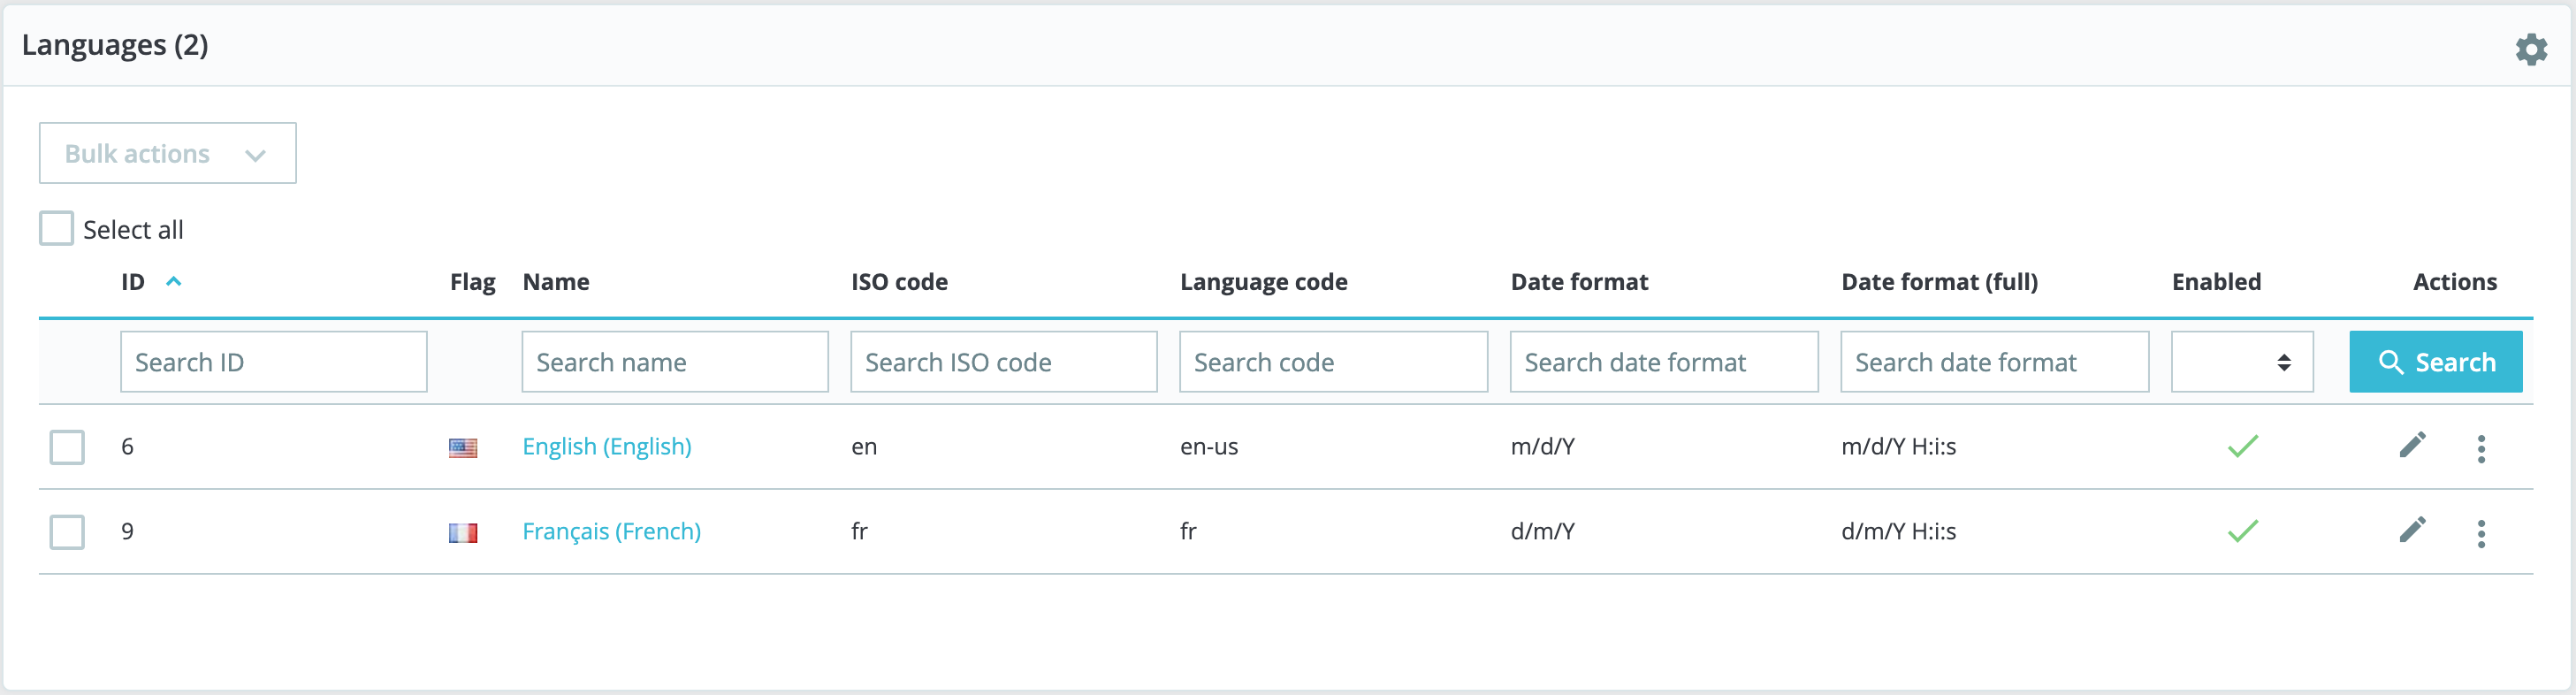
The "Languages" page manages the languages you will see in your administration panel and your shop. The page displays the languages already installed in your shop, along with some information: ISO code, language code, date format (short and full). You can enable or disable a language by clicking on the icon in the "Enabled" column.
Adding a new language is simply a question of importing the localization pack from a country which uses that language (in the "Localization" page). If it turns out this does not work, or that you need something customized, you can add a new language manually, using the form behind the "Add new" button.
You can also add a new language from the "Translations" page, "Add / Update a language" section. Contrary to a localization pack, this will only import the language, and no localization settings (units, currency, etc.).
Adding a new language
Before creating a new language, you should check if this language is available in the "Translations" page in "Add/Update a language section". Indeed, even if it isn't fully completed, it will import official PrestaShop translations and will provide a basis for your translation work.
Creating a new language means you will have to translate all of the text for PrestaShop's front office, back office, modules, etc., or risk using the default English strings. To complete its translation, you should use the "Modify translations" option in the "Translations" page, under the "International" menu.
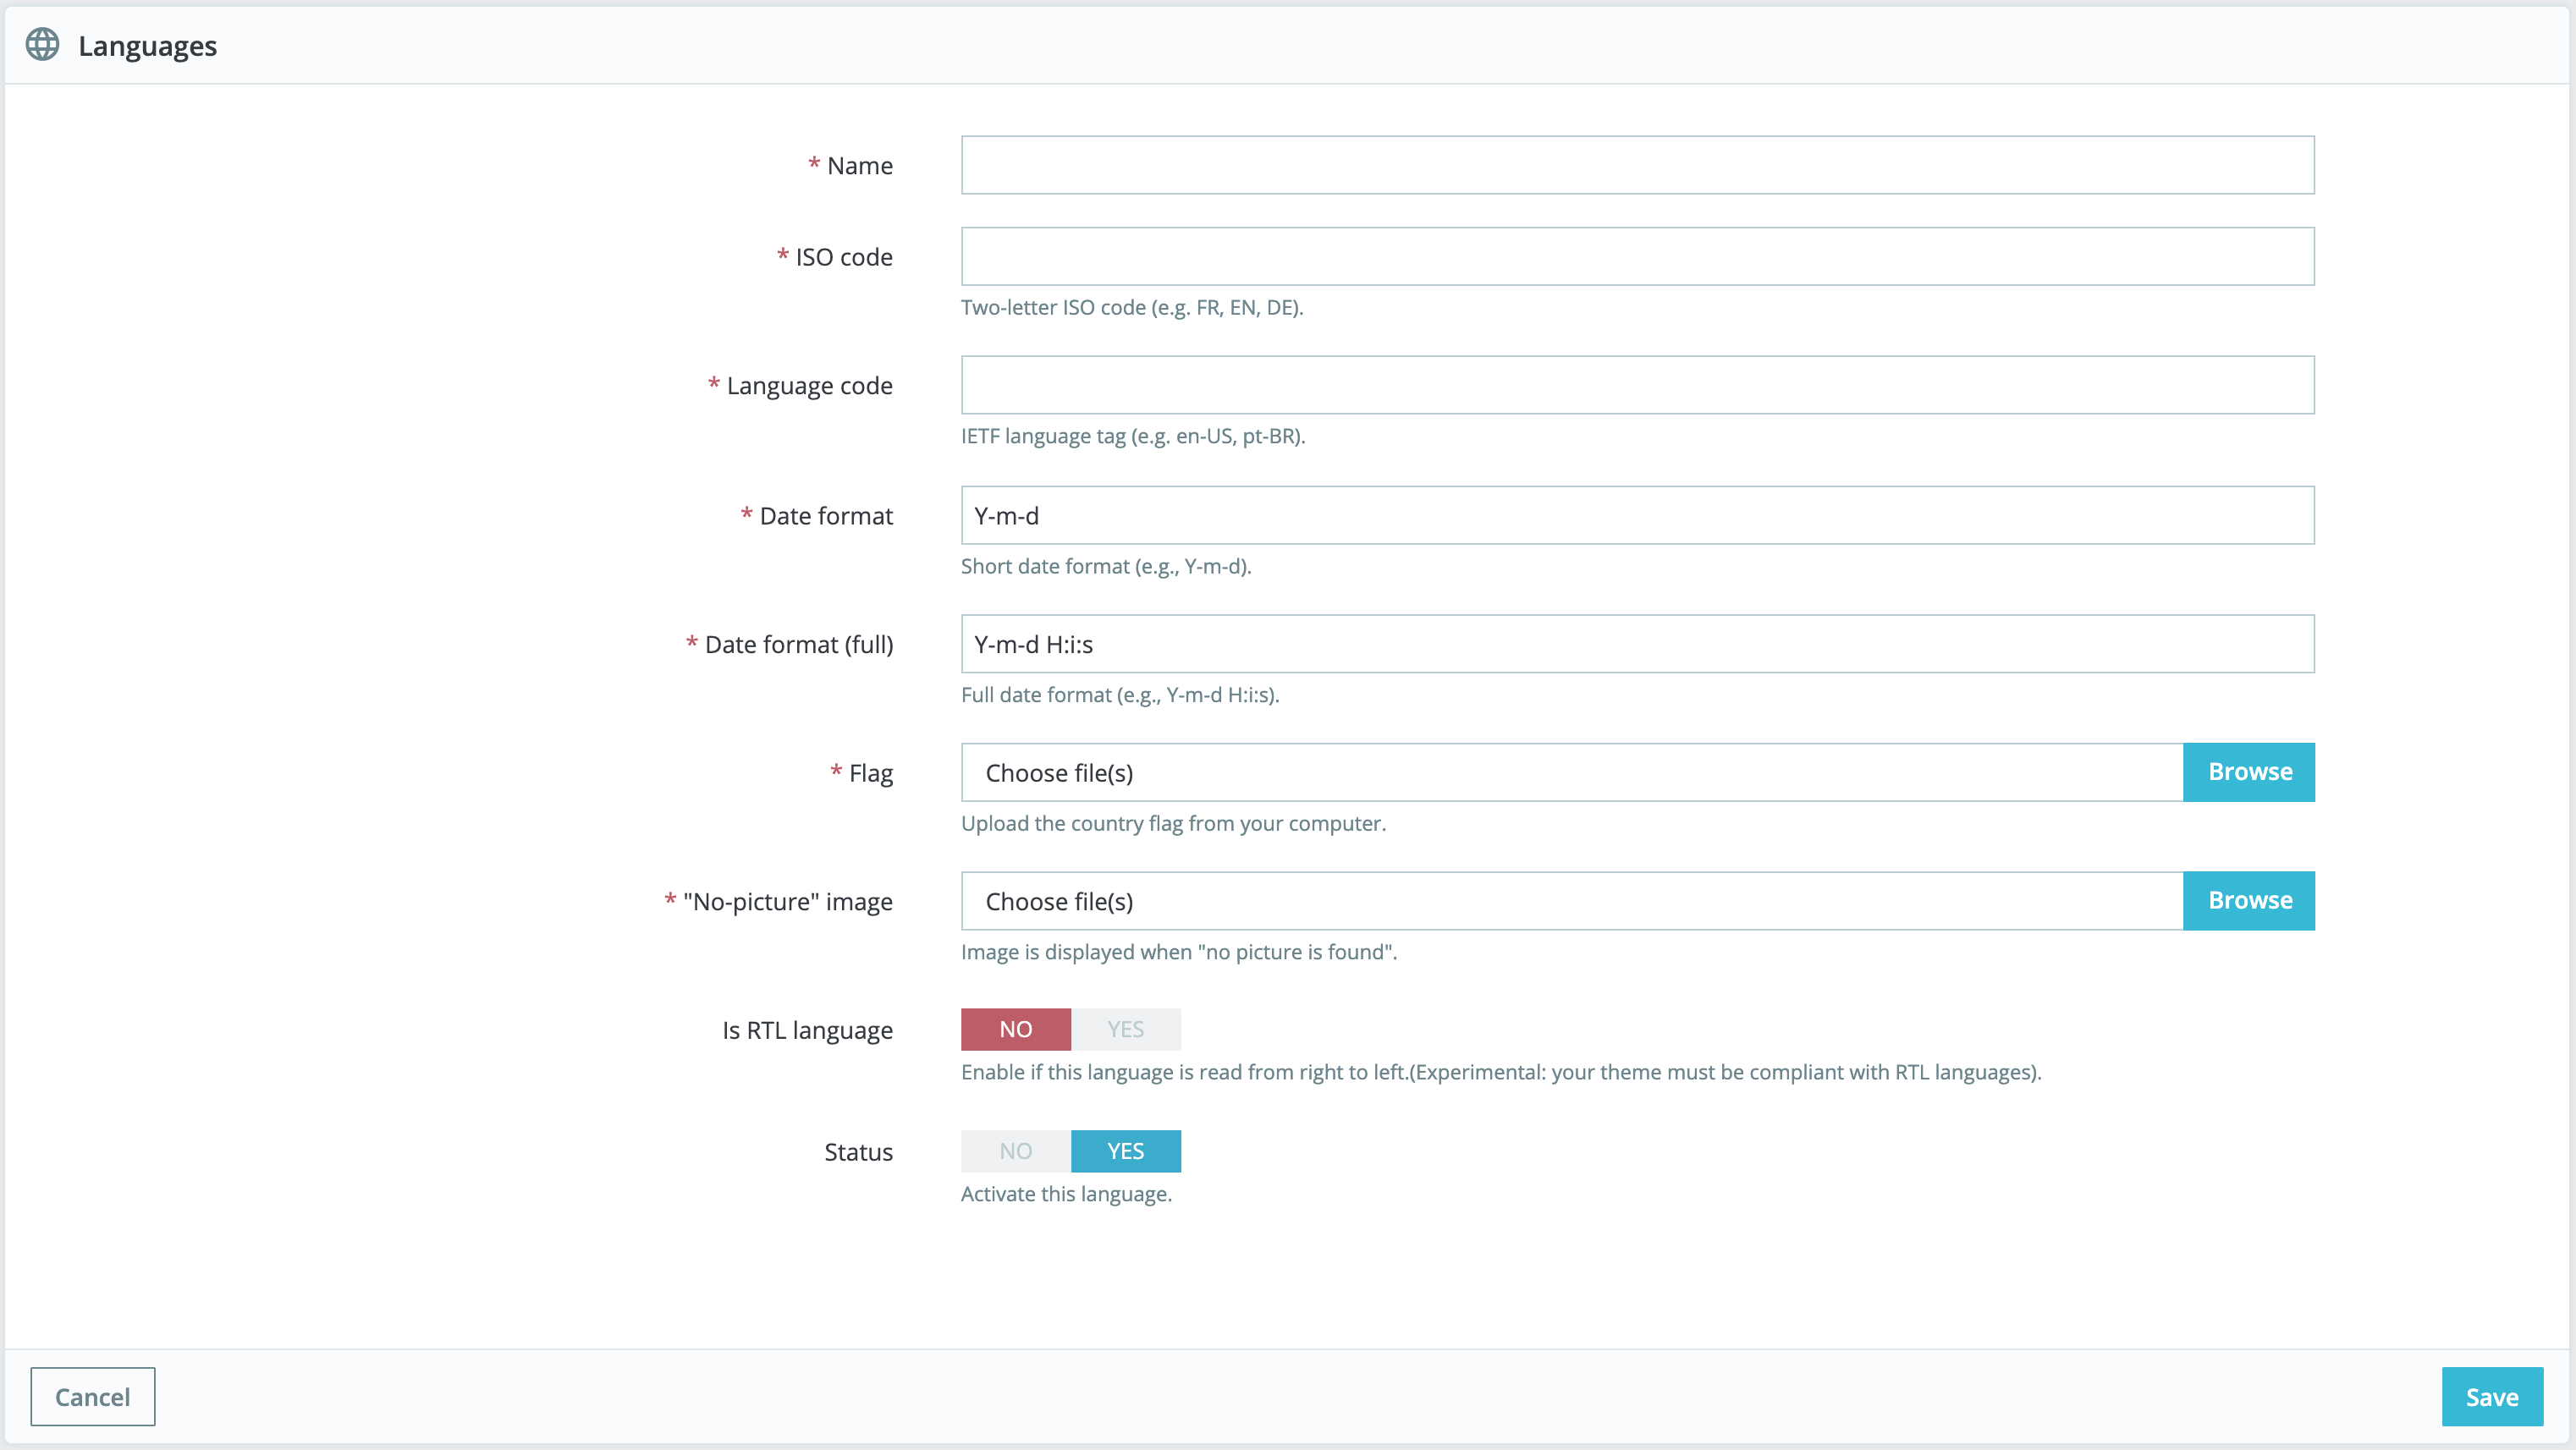
In order to create a new language, you must fill as many of the form's field as possible:
- Name. The name is public. If you are creating that language for a regional purpose, you may indicate that in the name: "French (Quebec)", for instance.
- ISO code. Enter the adequate 2-letter ISO 639-1 code. See http://en.wikipedia.org/wiki/List_of_ISO_639-1_codes for more information.
If you are importing a language pack, this code should exactly match the one of the pack. - Language code. Enter the adequate 4-letter language code, in the form
xx-yy,xxbeing the language ISO code (same as above), andyythe country ISO code, using ISO 3166-1 alpha-2 (http://en.wikipedia.org/wiki/ISO_3166-1_alpha-2). See http://en.wikipedia.org/wiki/IETF_language_tag for more information. - Date format. Countries do not always share the same date representation (See http://en.wikipedia.org/wiki/Date_format_by_country). Hence, when your shop displays 02/08/12, a customer from France will understand "August 2nd, 2012" whereas one from the US will understand "February 8th, 2012" – and a japan customer might even read it as "August 12th, 2002". This is why it is important to indicate the date format tied to your language. The letters used should be that of PHP's
date()function: http://php.net/manual/en/function.date.php. - Date format (full). Same as the date format above, but including the hour-minute format.
- Flag. Upload an image of the flag which best matches the language you want to add. It should be 16*11 pixels. You recommend you use the free FamFamFam Flags image set: http://www.famfamfam.com/lab/icons/flags/.
- "No-picture" image. Upload an image which will be displayed when a product does not yet have a picture. That image is simply a blank image, with "No image" or "No image available" in this language. The picture should be 250*250 pixels. You can find existing "No-picture" images in the
/img/ldirectory of your PrestaShop installation. - RTL language. Some languages are written from right to left, most notably those using Arabic script or the Hebrew alphabet (http://en.wikipedia.org/wiki/Right-to-left). When a PrestaShop theme is well coded, it can handle RTL languages - provided it is set as such.
- Status. You may disable a new language until you are ready to translate everything.
- Shop association. You can make the language only available to a selection of your shops, for instance shops that target a specific locale.
Once your language is saved and enabled, you can import its language pack. This is done in the "Translations" page, under the "Localization" menu. Use the "Import a language pack manually" tool. Finally, make sure everything works: go to your shop's front-office and click on the flags at the top. Similarly, customers can now select an additional language by using these icons.
Sharing your translations with the community
You might have fully translated a new language directly through your PrestaShop interface. You can share it with the PrestaShop community by sending an export to [email protected]. We will upload your contribution to our translation project so that other merchants from your country can also benefit from it!
To see how you can export your translations, go to the "Translations" page of the "International" menu, in the "Export a language" section.