
Tabla de contenidos
Configurar los módulos nativos
En este capítulo se explora el proceso de configuración de todos los módulos por defecto incluidos en PrestaShop 1.5.
Hay más de 120 módulos nativos disponibles en 25 secciones. Las secciones de los módulos sólo se muestran, si estas contienen al menos un módulo.
Algunos módulos tienen páginas de configuración, la cual le da acceso a ciertas herramientas y páginas informativas.
En todas las páginas de configuración, encontará dos bloques de contenido idéntico, en la parte superior e inferior de la página. Su contenido es el siguiente:
- Nombre del módulo. Un recordatorio del módulo que se está configurando.
- Atrás. Un enlace que le redirecciona al listado de módulos.
- Configurar los hooks. Este enlace es un acceso directo a la página "Posiciones de los módulos", del menú "Módulos". Desde esa página, puede cambiar la posición de los módulos en la interfaz front-end de su tienda, o ejecutar la herramienta Live Edit. La página "Posiciones de los módulos" está configurada para sólo mostrar los hooks disponibles para el módulo actual.
- Gestionar traducciones. Los enlaces en forma de bandera son accesos directos a la página "Traducciones" de los módulos instalados. Desde esa página, puede actualizar la traducción del módulo para el idioma seleccionado.
Algunos módulos contienen la palabra "(Addons)" al final de sus nombres. Esto significa que los módulos no serán instalados a partir de archivos existentes en su servidor, sino descargados desde el sitio web PrestaShop Addons.
Los módulos denominados como "Productos Recomendados" también provienen de el sitio web PrestaShop Addons, pero no son gratuitos. Por ello, no figuran en este capítulo.
Administración
1-Click Upgrade - AutoUpgrade
Este módulo facilita en gran medida la actualización de PrestaShop a su última versión.
Vea el capítulo "Actualización automática" de la guía de Actualización de PrestaShop para conocer todos los detalles de este módulo: http://doc.prestashop.com/display/PS15/Automatic+update.
Artichow
Este módulo proporciona una biblioteca gráfica que puede utilizar para crear gráficos estadísticos.
CloudCache CDN
Acelere su tienda con CloudCache.com Content Delivery Network (CDN).
Hay numerosas razones para intalar el plugin CloudCache, y beneficiarse de tener un sitio web que cargue más rápido :
- Mejorar el posicionamiento SEO. Google utiliza la velocidad de carga de la página como un factor clave en su algoritmo de clasificación. Las páginas que cargan más rápido estarán mejor posicionadas, lo que significa que su tienda recibirá más tráfico y posiblemente más ganancias.
- Aumentar su tasa de conversión. Amazon ha descubierto que si su sitio tarda más de 100 milisegundos en cargar, pierden el 1% de sus ingresos. Esta razón por sí sola es suficiente para preocuparse por el tiempo de carga de su tienda.
- ¡Sobreviva y aprovéchese de los picos de tráfico!. En caso de que se convierta en famoso durante la noche (por ejemplo, su tienda es mencionada en televisión), sus ventas se dispararían, pero su servidor podría dejar de responder debido a la demanda de tráfico (carga de trabajo); nosotros le ayudamos a equilibrar la carga de su sitios web cuando estos tengan una afluencia masiva de tráfico.
- SSL personalizados con facilidad. La aceleración SSL reduce hasta un 70% la carga de la CPU de su servidor.
Carta Google
La carta API de Google le permite generar gráficas dinámicamente.
Nota: La biblioteca gráfica usada por este módulo ha sido desaprobada por parte de Google, y probablemente dejará de funcionar el 20 de abril 2015. Vea https://developers.google.com/chart/image/.
Importar / exportar un tema
El módulo "Importar / exportar un tema" es un módulo nativo, y debe estar instalado por defecto. Este es un módulo especial que le permite importar un tema e instalarlo (así como sus módulos adjuntos), o exportar un tema de su tienda junto con los módulos para poder compartirlo con el mundo.
Encuentre este módulo en su listado de módulos (en la página "Módulos"), y abra su pantalla de configuración. Esta pantalla le presenta 3 métodos para instalar un nuevo tema: desde su ordenador, desde un sitio web público, o desde su propio servidor FTP. También le ofrece un método para exportar el módulo en un formato correcto.
Importar un tema
Sea cual sea el método que elija, el proceso seguirá siendo el mismo: indicar la ubicación del archivo Zip del tema, y a continuación hacer clic en el botón "Siguiente".
Importar desde su ordenador: utilice el explorador de archivos para encontrar el archivo.
Importar desde la web: indique la dirección URL del archivo.
Importar desde un servidor FTP: utilizando su cliente FTP, transfiera el archivo a la siguiente carpeta: /modules/themeinstallator/import/ .
La siguiente página mostrará un resumen rápido de lo que el importador está a punto de hacer.
Haga clic de nuevo en "Siguiente" para validar su elección. Una vez instalado el tema, PrestaShop le preguntará si desea instalar los módulos que fueron importados junto con el tema, qué prefiere hacer con la configuración actual de los módulos, y si desea que la configuración de las imágenes sea tomada en cuenta.
Haga clic en "Siguiente" por última vez. Una página final de confirmación le presenta todos los cambios aplicados a su sitio PrestaShop. Haga clic en "Finalizar" para terminar el proceso.
Exportar un tema
Esta sección sólo está disponible cuando haya por lo menos un tema instalado en su sitio PrestaShop.
La exportación de un tema puede ser útil cuando quiera realizar una copia de seguridad del mismo, cuando quiera quiera compartir el tema con un amigo, o para vender el tema en el sitio web PrestaShop Addons (http://addons.prestashop.com/). El exportador no sólo genera un archivo zip del tema, sino que también añade una gran cantidad de información en archivos XML, lo que le resultará muy útil cuando lo suba al sitio web PrestaShop Addons, y cuando lo importe en otra tienda PrestaShop.
Seleccione un tema y haga clic en "Exportar este tema". Un formulario de configuración en la que podrá establecer los parámetros del tema que está exportando: autor, nombre del tema, versión de compatibilidad, módulos adjuntos (si los hay), etc.
Una vez todos los parámetros han sido establecidos correctamente, haga clic en "Generar el archivo ahora". Rápidamente obtendrá un archivo que podrá descargar desde su navegador. Guárdelo en su disco duro, y a continuación, establezca un nombre significativo al archivo. A partir de este momento, puede compartir fácilmente este tema, y si este es una creación propia, también puede ponerlo a la venta en el sitio web PrestaShop Addons: http://addons.prestashop.com/.
Alertas por correo
PrestaShop le permite informar a sus clientes por correo electrónico, en ciertas situaciones, por ejemplo, cuando hayan realizado un pedido en su tienda, o si un producto está fuera de stock. Los clientes pueden ingresar una dirección de email que servirá para ponerse en contacto con ellos cuando el producto vuelva a estar disponible. Haga clic en "Instalar" y luego en "Configurar" para configurar el módulo.
Al marcar la casilla "Disponibilidad del producto", un campo aparecerá en la página de productos de su tienda cuando el producto se encuentre fuera de stock. Este le da la opción a sus clientes de introducir su dirección de correo electrónico en caso de que deseen recibir una notificación cuando el producto agotado se encuentre de nuevo disponible.
En la sección "Notificaciones de negocios", puede especificar si desea que se le notifique cada vez que se realice un nuevo pedido en su tienda. Para ello, active la casilla "Nuevo pedido".
Si desea recbiri una notificación cuando la cantidad disponible de un producto está por debajo del umbral especificado, active la casilla "Fuera de stock" y establezca el valor en el que desea que se le avise.
Las alertas por correo pueden ser enviadas a varias direcciones al mismo tiempo. Para ello, escriba en la opción denominada "Direcciones de correo electrónico" cada dirección de correo electrónico que recibirá la notificación (una dirección de correo electrónico por línea. Para desplazarse a la línea siguiente, pulse la tecla Enter de su teclado).
Experiencia minorista
Novedad en Prestashop 1.5.4.
Este módulo ha sido diseñado específicamente para ayudar a los usuarios de PrestaShop a realizar un seguimiento de su progreso como e-comerciantes, y comprobar cuánto ha ido creciendo y progresando en los días, meses y años desde que inició su tienda. Este módulo se encuentra instalado por defecto.
Para conseguir este objetivo hemos creado un sistema de medallas y puntos para monitorizar fácilmente su progreso como minorista. Hemos desgranado el sistema en tres niveles, todos los cuales están integrados para triunfar en el mundo del e-commerce:
- Características. Su uso de las características clave del comercio electrónico, tales como: Rendimiento del sitio, Tamaño del catálogo, Empleados y SEO.
- Logros. Su cumplimiento de las metas específicas claves del comercio electrónico, como el número de clientes, pedidos, e ingresos.
- Internacional. Seguimiento de su presencia en mercados internacionales clave, tales como las Américas, Oceanía, Asia, Europa, África y el Magreb.
Cuanto más progrese su tienda , más insignias y puntos ganarás. No hay necesidad de entregar esta información, ni de rellenar ningún formulario. Sabemos lo ocupado que está; todo se hace automáticamente. Utilice esta herramienta para impulsar su negocio, ver su progreso y reflexionar sobre sus grandes logros conseguidos.
Newsletter
Sus clientes pueden darle sus direcciones de correo electrónico, ya sea introduciendo esta en el bloque Newsletter localizado en la página de inicio, o bien marcando la casilla "Sí" para suscribirse al boletín de noticias cuando se registran. Necesitará estas direcciones de correo electrónico para realizar funciones y actividades de marketing. Haga clic en "Configurar" para acceder a la página de configuración de este módulo.
Tras el registro, sus clientes tienen dos opciones relacionadas con el boletín de noticias: La primera es suscribirse al boletín de noticias, la segunda recibir ofertas de sus asociados (si dicha opción fue seleccionada).
La primera sección le permite recoger todas las direcciones de correo electrónico registradas por el bloque de noticias de la página principal, haciendo clic en el botón "Exportar un fichero .CSV". Aparecerá una notificación, que le pedirá que haga clic en un enlace para descargar el archivo que contiene las direcciones.
La información de este archivo se presenta en cuatro partes. El ID de cliente, la dirección de correo electrónico, el día de la inscripción, y la dirección IP. Si utiliza estos datos con un software como Microsoft Excel, puede ordenar la información como desee.
La segunda sección, denominada "Exportar clientes", le permite filtrar las direcciones de correo electrónico de sus clientes. A continuación, puede filtrar los clientes, por sus paises de origen seleccionando la opción "País del cliente" en el menú desplegable, y seleccionando posteriormente el país que quiera. El filtrado por paises, es particularmente útil para el envío de boletines de noticias en el idioma del páis seleccionado y para adaptar sus ofertas.
Puede utilizar más filtros para exportar las direcciones de correo electrónico de sus clientes. Utilice el campo "Suscritos a la newsletter" para seleccionar una de las tres siguientes opciones:
- La primera "Todos los clientes" le permite seleccionar todas las direcciones de correo electrónico de los clientes que se han registrado en su tienda. Es decir, tanto aquellos clientes que quieran recibir información por su parte, como aquellos que no lo desean. Teniendo en cuenta este detalle, debe tener cuidado con el uso que haga posteriormente con estos datos .
- La segunda, "Suscritos", le permite seleccionar sólo a aquellos clientes que quieran recibir su boletín de noticias.
- La tercera "No suscritos" le permite seleccionar sólo a aquellos clientes que no desean recibir su boletín de noticias.
En el siguiente campo "Inscritos a publicidades", es donde puede filtrar las direcciones de contacto, realizando un flitrado según la opción seleccionada por sus clientes a la hora de recibir ofertas de sus asociados. Al igual que en el campo anterior, tres opciones están disponibles:
- La primera, "Todos los clientes", le permite seleccionar todas las direcciones de correo electrónico de los clientes que se han registrado en su tienda. Es decir, tanto aquellos clientes que quieran recibir información de sus asociados, como aquellos que no lo desean.
- La segunda, "Suscritos", le permite seleccionar sólo a aquellos clientes que quieran recibir el boletín de sus asociados.
- La tercera "No suscritos" le permite seleccionar sólo a aquellos clientes que no desean recibir el boletín de noticias de sus asociados.
Una vez que haya filtrado las direcciones de correo electrónico para exportar, haga clic en "Exportar un fichero .CSV" para obtener todas las direcciones. Al igual que antes, una notificación en color verde le pedirá que haga clic en un enlace para descargar el archivo. Este archivo contiene seis tipos de información: El ID de cliente, los apellidos del cliente, el nombre del cliente, la dirección de correo electrónico, el día de la inscripción, y la dirección IP. Toda esta información puede ser utilizada para enviar sus campañas de marketing.
PrestaShop Cleaner
Novedad en Prestashop 1.5.4.
Este módulo es muy útil cuando haya terminado de explorar PrestaShop, por primera vez, y ya esté listo para comenzar a añadir sus propios contenidos.
Lo primero que deberá hacer es eliminar todos los datos de ejemplo que se instalan junto con PrestaShop: productos, categorías, clientes, pedidos, etc
La página de configuración tiene tres secciones:
- Catálogo. Esto borrará todos los datos del catálogo actual, incluso los artículos que agregó usted mismo. Marque la casilla y haga clic en el botón "Eliminar catálogo" para iniciar el proceso.
- Pedidos y clientes. Esto borrará todos los pedidos y clientes registrados, incluso los que agregó usted mismo. Marque la casilla y haga clic en el botón "Eliminar catálogo" para iniciar el proceso.
- Restricciones de integridad funcional. Al hacer clic en el botón "Revisar y corregir", Prestashop analizará su base de datos y se asegurará de que todo está en su lugar, y tratará de reparar aquello que no lo esté .
Mostrar HTML simple
Este es utilizado por el sistema de estadísticas con el fin de mostrar los datos en una cuadrícula.
Visifire
VISIFIRE es un componente Open Source que nos permite presentar informacion en modo grafico de una manera muy interesante.
Marca de agua (filigrana)
Este módulo le permite añadir una marca de agua a las imágenes de su tienda. Esta limita su difusión en Internet.
Si tiene la intención de exportar sus productos en Google Shopping, debe saber que en este servicio, no está permitido el uso de textos promocionales / logotipos y marcas de agua en las imágenes. Así que sólo podrá utilizar imágenes que no tengan marca de agua o logo añadido.
La página de configuración le notifica de inmediato qué ajustes faltan por establecer.
- Archivo de la filigrana. La imagen elegida debe estar en formato GIF.
- Transparencia de la marca de agua (0-100). 100 equivale a una imagen no transparente, lo que significa que su logo será muy visible, y ocultará por completo la parte de la imagen donde este se situe. El valor predeterminado, 60, es generalmente una buena elección.
- Alineación X de la marca de agua. Selecciona donde debe aparecer su marca de agua en cada una de sus imágenes. Este campo se refiere al eje horizontal.
- Alineación Y de la marca de agua. Selecciona donde debe aparecer su marca de agua en cada una de sus imágenes. Este campo se refiere al eje vertical.
- Elija el tipo de imagen para proteger la filigrana. El tipo de imágenes a las que se debe aplicar la marca de agua. Quizás sólo deba seleccionar las imágenes de mayor tamaño, ya que estas son los más propensas a ser robadas.
Una vez que haya guardado sus ajustes, habrá finalizado la configuración de este módulo, pero comprobará que las marcas de agua aún no han añadido a las imágenes de su tienda. Diríjase al menú "Preferencias", y abra la página "Imágenes". Haga clic en el botón "Regenerar miniaturas", situado en la parte inferior de la página. PrestaShop procesará todas sus imágenes (seleccionadas en la configuración), y su marca de agua aparecerá en las imágenes que haya seleccionado.
Cartas XML/SWF
Este módulo le permite utilizar una biblioteca gráfica con la que puede crear gráficos estadísticos.
Publicidad y marketing
Plataforma Social de comercios AddShoppers
Novedad en Prestashop 1.5.
Este módulo requiere la extensión cURL de PHP se encuentre habilitada.
Este módulo añade botones para compatir en redes sociales, con el objetivo de aumentar sus ventas de clientes referidos, junto con informes detallados que revelan el retorno de la inversión en la participación social.
Para utilizar este módulo debe tener una cuenta AddShoppers. Puede crear una cuenta directamente desde este módulo.
Una vez que tenga una cuenta, conéctese al servicio a través de este módulo, y siga las instrucciones.
Bloque de publicidad
Añade una imágen publicitaria de su elección al front-office de su tienda, con un enlace a una URL. Al hacer clic en "Configurar" puede cargar una imagen, o indicar la dirección URL de la imagen, y establecer la dirección URL de destino. Para que esta sea mostrada a sus visitantes, debe hacer clic en el botón "Validar".
Retome contacto con sus clientes
Este módulo le permite estar en contacto con sus clientes a través de correo electrónico. Esto le ofrece la posibilidad de enviar automáticamente cupones de descuento a algunos de sus clientes.
Por ejemplo, es posible que desee enviar cupones de descuento a los clientes que han abandonado sus carritos antes de finalizar la compra, a los clientes que realicen un pedido, o a sus mejores clientes como forma de gratitud por ser los más fieles...
Active este módulo, a continuación haga clic en "Configurar". Podrá elegir entre cuatro maneras distintas de estar en contacto con sus clientes.
Programa de apadrinamiento de clientes
A través de sus clientes actuales puede ganar nuevos clientes utilizando un programa de apadrinamiento de clientes. Instale este módulo y haga clic en "Configurar".
He aquí una descripción de cada campo:
- Número mínimo de pedidos que un amigo debe hacer para recibir un vale descuento. Rellene el campo con el valor de su elección. Hasta que no se alcance este número, sus clientes no podrán aprovecharse del descuento.
- Número de amigos en el formulario de invitación por apadrinamiento (cuenta cliente, apartado apadrinamiento):. Rellene el campo con el valor de su elección.
- Tipo de vale. Puede ofrecer dos tipos de descuento, por porcentaje o por una cantidad fija. Seleccione la que prefiera, a continuación especifique el valor del descuento que desea aplicar en las diferentes divisas admitidas por la tienda.
- Descripción del vale. Introduzvca el nombre del cupón.
Una vez haya rellenado los campos, haga clic en el botón "Actualizar ajustes".
Para explicar cómo funciona el programa de referencia, puede escribir una descripción utilizando el editor de texto de la sección "Condiciones del programa de referidos". Una vez haya descrito estas condiciones, haga clic en el botón "Actualizar el texto".
Cuando sus clientes se registren y quieran ver los beneficios que pueden obtener con este programa, ellos deberán dirigirse a la sección "Referencias" de su cuenta. Aparecerá una nueva pantalla.
Su cliente puede introducir el nombre y la dirección de correo electrónico de la persona a la que desea hacer referencia de su sitio. Tras hacer clic en "Confirmar", las personas que indicó recibirán un correo electrónico.
En "Amigos pendientes", la herramienta de referencia muestra al cliente cuales de sus amigos no ha realizado ninguna compra desde que se le envió el correo electrónico. Estos pueden optar por volver a reenviar un email seleccionado el nombre y haciendo clic en el botón "Referir mis amigos". Los amigos seleccionados recibirán un correo electrónico invitándoles a registrarse y a realizar un pedido.
La última pestaña en "Mis referencias", denominada "Amigos patrocinados", permite a los clientes ver quiénes de ellos le enviaron un mensaje de referencia, aceptar la invitación y realizar un pedido en su tienda. Al registrarse, los referidos deberán indicar la dirección de correo electrónico de la persona que les envió el apadrinamiento , para que ellos también puedan beneficiarse del descuento.
Google AdSense (gadsense)
Google AdSense es una solución de publicidad contextual desarrollada por Google.
Este módulo le permite introducir fácilmente el código de Google AdSense en su tienda.
Necesita tener una cuenta de Google AdSense para poder utilizar este módulo. Una vez que tenga una, lo único que tiene que hacer es introducir su código AdSense en el campo de texto.
Este módulo también puede servirle para añadir un código a la cabecera HTML de su front-end.
Análisis y estadísticas
La mayoría de estos módulos crean una nueva sección en el menú "Estadísticas" de PrestaShop. Muchos de estos módulos están instalados por defecto. Por lo tanto, si alguna de las estadísticas de PrestaShop no son de utilidad para usted, puede desactivarla desde aquí. Tenga en cuenta que las estadísticas también son herramientas que consumen recursos; por lo tanto, si el servidor donde está alojada su tienda es lento o tiene poco espacio en disco, debe utilizar las estadísticas más esenciales.
Muchos de estos módulos se describen en detalle en la sección "Comprender las Estadísticas" de esta guía de usuario. En esta sección, sólo describiremos los que no están habilitados de forma predeterminada.
Analytics para eCommerce - Jirafe
Novedad en Prestashop 1.5.
Este módulo no puede ser testeado en una instalación local de PrestaShop: debe activarlo y configurarlo desde un servidor online.
Este módulo utiliza el servicio de terceros, Jirafe: http://jirafe.com. Este módulo recopila datos que luego son enviados y analizados por Jirafe, un analizador de los datos que ha sido diseñado específicamente para las plataformas de comercio electrónico con el objetivo de ayudar a mejorar las tasas de conversión, optimizar su gasto en marketing, y tener más éxito en las redes sociales.
El módulo crea una nueva página en el menú "Estadísticas", denominada "Jirafe analytics". Desde esta página, tendrá acceso a todas las estadísticas que han sido analizadoa por Jirafe desde que se instaló el módulo.
Jirafe solamente es gratuito durante 30 días, tras este periodo debe pagar una cuota mensual, que dependerá del número de visitantes que tenga. Consulte todos los detalles en: https://jirafe.com/dashboard/signup.
Mejores fabricantes
Este módulo añade una opción "Mejores fabricantes" a la lista de estadísticas disponibles.
Así pues, el módulo le permite conocer que fabricante de producto (o que marca) es la que está proporcionando mayores ventas en su tienda. Conociendo este detalle, quizás debería de tomar la decisión de tener siempre disponible artículos de dicho fabricante.
Geolocalización
Este módulo añade una opción "Geolocalización" a la lista de estadísticas disponibles.
Al utilizarlo por primera vez , tendrá que actualizar la ubicación de la mayoría de los países que faltan (especialmente los menos conocidos). Esto le ayudará a conocer la localización de sus visitantes. Simplemente haga clic en el nombre del país, e indique dónde se encuentra en el mapa.
Google Analytics (ganalytics)
Este módulo le permite introducir fácilmente el código de Google Analytics en su tienda. Tras realizar esta acción, podrá disfrutar de la herramienta de estadísticas proporcionada por Google.
Necesita tener una cuenta en Google Analytics para poder utilizar este módulo. Puede crear una cuenta en el siguiente enlace: http://www.google.com/analytics/.
Una vez que tenga una, siga las instrucciones de Google Analytics para crear un perfil para su tienda. Recibirá un identificador único. Introduzca este en el campo "Nombre de usuario" del módulo y guárdelo. Google Analytics comenzará a recopilar información de sus visitantes.
Lea todas las instrucciones proporcionadas por el módulo.
Facturación
Avalara - AvaTax
Establecer los impuestos es un asunto complejo. AvaTax lo hace fácil.
Establecer los impuestos correctamente es fácil de conseguir con Avalara. Ellos se encargan realizar todo el trabajo de investigación y de automatizar el proceso, dándole la seguridad de que su tienda estará al día con las más recientes tasas y reglas fiscales de impuestos pertenecientes a cada estado y país, por lo que no tendrá que perder el tiempo en estas cuestiones tan importantes. Como un servicio basado en la nube, AvaTax elimina el mantenimiento y soporte continuo, proporcionándole una solución completa para gestionar sus tasas de impuestos .
Número de IVA europeo
Este módulo permite a sus clientes poder especificar su número de IVA europeo en sus datos. El número de IVA europeo puede ser comprobado a través de un sistema web, aunque esto dependerá de su pais.
La pantalla de configuración es bastante sencilla:
- Su país. Seleccione el país de su tienda.
- Activar la comprobación del número de IVA con el WebService. Pedirle a PrestaShop que compruebe el número de IVA europeo, a través del servicio web de su país.
El campo IVA europeo, sólo aparece cuando el cliente rellena el campo "Empresa" en el formulario de registro.
OpenSi Connect
Novedad en Prestashop 1.5.
Este módulo le permite sincronizar las actividades de su tienda PrestaShop con el software OpenSi.
Procesos de pedido
No hay módulos nativos en esta sección.
Gestión de Contenidos
No hay módulos nativos en esta sección.
Exportar
No hay módulos nativos en esta sección.
E-Mailing
Mailjet
Este módulo le permite enviar sus correos electrónicos en su tienda PrestaShop a través de Mailjet.
Aplicaciones Front Office
Algunos de estos módulos están instalados de forma predeterminada. Por lo tanto, si algunas de estas funcionalidades no son de utilidad para usted, puede desactivarlas desde aquí.
Bloque informaciones de contacto
Novedad en Prestashop 1.5.
Añade un bloque que contiene la información de contacto de su tienda:
- Nombre de la empresa. El nombre de su empresa puede ser diferente del nombre de su tienda. Indicando el nombre completo dará mayor confianza a su marca.
- Dirección. La dirección de su sede central, o en otro casos también podría ser, la dirección de su tienda principal . No escriba su dirección personal, porque es de suponer que no querrá que los clientes llamen a la puerta de su domicilio particular. Si no desea que los clientes le visiten o le puedan enviar cartas, deje este campo vacío.
- Número de teléfono. El teléfono principal para atender llamadas que tiene su empresa. Tampoco, debe escribir en este campo su teléfono personal. Si no tiene una línea dedicada su negocio, deje este campo vacío.
- Email. La dirección de correo electrónico, donde quiere recibir toda la correspondencia (incluyendo las solucitudes de soporte técnico).
Esta información aparece por defecto en el pie de página.
Bloque CMS
Añade un bloque con varios enlaces a páginas CMS.
Puede configurar cuatro tipos de contenidos CMS:
- Bloques CMS. Le permite ver el contenido CMS en la columna izquierda , en la columna derecha de su tienda. Puede editar el contenido de la página existente haciendo clic en el icono "Editar" a la derecha de su nombre, o añadir nuevos bloques de contenido a cada lado haciendo clic en el botón "Añadir nuevo".
- Enlaces pie de página. Los enlaces de las páginas CMS de esta sección aparecerán la parte inferior de su sitio. Aquí es donde los propietarios de tiendas tienden a poner las páginas de información: condiciones legales, condiciones de uso, etc.
- Información pie de página. Puede añadir una línea de texto o un párrafo de texto debajo del listado de las páginas CMS que se muestran en el pie de página.
- Mostrar "Desarrollado por PrestaShop". Añade un enlace de texto hacía prestashop.com. Tenga en cuenta que este enlace de texto se encontrará entre los enlaces y el texto de pie de página.
Cuando se elimina el texto de pie de página, PrestaShop podría darle este error: "Por favor proporcione el texto de pie de página para el idioma predeterminado".
Esto es devido a que cuando introduce un primer texto de pie de página, PrestaShop replica este en todos los idiomas disponibles disponibles en su tienda. Cuando elimina el texto, debe también eliminarlo de todos los idiomas disponibles: primero elimine el texto del idioma por defecto, a continuación, haga clic en el icono de la bandera al lado del campo de texto, elija otro idioma, y borre el contenido del campo de nuevo. Haga esto para todos los idiomas. Tras realizar este proceso, puede guardar los cambios, y comprobará que PrestaShop no le volverá a mostrar este error .
Bloque carrito
Añade un bloque que muestra los productos que los clientes añaden a sus carritos. Ellos pueden ver el contenido del carrito en todo momento, cambiar la cantidad de cualquiera de los productos añadidos, y añadir o eliminar un cupón de descuento. Si ellos hacen clic en "Carrito (x producto/s)", serán redirigidos a la página "Resumen del carrito" que muestra todos los productos y cantidades añadidas al carrito.
Puede configurar este para que utilice Ajax, lo que significa que cualquier cambio que se produzca, se aplicará inmediatamente sin tener que volver a recargar la página. La configuración Ajax no es compatible con todos los temas, así que asegúrese de probar este ajuste con el tema que esté usando en su tienda.
Bloque de categorías
Añade un bloque que muestra una lista de las categorías de productos de su tienda.
Dispone de varias posibilidades de configuración:
- Nivel máximo. Si tiene un gran número de categorías, o estas tienen nombres demasiado largos, es posible que prefiera no romper su diseño y limitar el número de subniveles a mostrar en este bloque.
- Dinámico. Cuando esta opción está activada, las subcategorías están ocultas de manera predeterminada, y el cliente puede optar por mostrarlas. Esto es ideal para preservar el espacio y evitar el desorden: si está desactivada, este módulo muestra todas las categorías y todas sus subcategorías.
- Orden. Puede ordenar las categorías por orden alfabético para facilitar la lectura y la navegación al cliente. Pero la opción de clasificación "por posición" le permite seleccionar qué categorías deben estar posicionadas antes, lo que le ayudará a promocionarlas.
- Número de columnas para el footer. Le permite elegir el número de columnas en el bloque "Categoría" del pie de página.
Bloque de contacto
Novedad en Prestashop 1.5.
Le permite mostrar información adicional sobre el servicio de atención al cliente:
- Número de teléfono. Este debe ser un número exclusivo para el servicio de atención al cliente, no debe ser utilizado por la sección de ventas ni por ninguno de sus asociados (si los tuviera). Si no proporciona atención al cliente por teléfono, deje este campo vacío.
- E-mail. Al igual que hemos indicado en la opción anterior, Esta dirección de correo electrónico debe ser exclusiva para el servicio de atención al cliente.
Esta información aparece por defecto en el pie de página.
Ventas cruzadas
Muestra un bloque "Clientes que compraron este producto también han comprado..." en cada página de producto. También puede optar por mostrar los precios de esos otros productos o no.
Bloque de moneda
Agrega una pequeña funcionalidad a la interfaz , donde los clientes pueden elegir la moneda que que quieren utilizar para visualizar los precios, así como la forma en la que los clientes pagarán por sus pedidos. El bloque aparece en la cabecera (parte superior) de su tienda, y sólo muestra las monedas instaladas. Para añadir una divisa o configurar las ya existentes, diríjase a la página "Monedas", en el menú "Localización".
Bloque de privacidad de datos de los clientes
Novedad en Prestashop 1.5.
Añade un bloque que muestra un texto sobre la confidencialidad de los datos de los clientes . La pantalla de configuración, presenta un editor de texto. Escriba en él, la política de privacidad de datos que utilizará.
Este es un texto importante, ya que las personas que navegan a través de Internet, cada día están más preocupadas por la privacidad de sus datos. Proporcionar una política clara de cómo maneja la información privada de sus clientes, les dará mayor confiaza a ellos para comprar en su tienda – además de protegerle legalmente. Nunca debe copiar y pegar una política de privacidad de datos de otra tienda o sitio web, pero puede escribir la suya propia, basándose en las leyes de privacidad de su país
Bloque de reaseguros
Añade un bloque con más información que ayuda a tranquilizar a sus clientes. Este bloque aparece en el pie de página del tema por defecto .
Las páginas que muestra por defecto son:
- Reembolso de dinero. Según la Wikipedia, "Reembolsar el dinero, es la acción de devolver una cantidad de dinero a la persona que la ha pagado con anterioridad."
- Devolución en tienda. El texto puede explicar al cliente que su tienda permite la devolución de cualquier producto no deseado, cambiar el producto por otro , o recibir un vale con el valor total de la compra. Si no quiere admitir devoluciones, asegúrese de eliminar esta página.
- Pago contrareembolso. El cliente paga el pedido una vez que lo reciba. No se recomienda este método de envío para tiendas pequeñas.
- Envío gratuito. Aquí es donde indicará su política de envíos. Por ejemplo, puede ofrecer todos los envíos gratuitos, o tan sólo aquellos pedidos que superen cierta cantidad de dinero.
- Pago seguro al 100%. Debido a que seguramente utilice servicios de pago de terceros como PayPal o Moneybookers, debe dar confianza al cliente para que realice sus pagos a través de estos. Así que quizás sería buena idea que pegue la información sobre cada método de pago que utilice su tienda en esta página.
Estas son tan sólo páginas de ejemplo: como verá no incluyen ningún contenido. Por lo tanto, depende de usted (y de su equipo de abogados) rellenarlas adecuadamente. Si algunos de los ejemplos no son necesarios o no se ajustan a las exigencias de su negocio, puede eliminarlas o editarlas.
Para editarlas, haga clic en el icono "Modificar" situado en la columna Acciones. Para añadir una nueva página, haga clic en el botón "Añadir nuevo".
Bloque Compartir en Facebook
Agrega un bloque para mostrar un enlace "Compartir en Facebook" en las páginas de productos. Al hacer clic en el enlace redirecciona al cliente a su página de Facebook, con un enlace precargado del producto.
Productos favoritos
Añade un enlace "Agregar este producto a mis favoritos" en la página de cada producto, solamente visible por los clientes registrados y logueados. Ellos pueden acceder a su lista de productos favoritos dirigiéndose a la página de su cuenta y haciendo clic en el enlace "Mis productos favoritos".
Productos destacados en la página de inicio
Con este módulo, puede seleccionar los productos que quiera destacar colocándolos en el centro de su página de inicio
En la página de configuración, puede establecer el número de productos que desea mostrar. Una vez haya establecido y guardado este valor, diríjase a la página de configuración de un producto de su elección (menú "Catálogo"). Seleccione "Inicio" en la pestaña "Asociaciones", como la categoría asociada a dicho producto, además de dejar intacta su/s actual/es categoría/s a las que está sociada (no lo retire de su categoría original). Guarde los cambios y el producto aparecerá en la página principal de su tienda.
Repita el procedimiento para todos los productos que desee colocar en la página principal.
Sello de Confianza FIA-NET
Solamente disponible para Francia.
Convierte a sus visitantes en compradores promoviendo la confianza en su sitio.
FIA-NET es un asociado Premium de confianza: que protege tanto a los clientes como a las tiendas online, de los fraudes que se producen con tarjetas de crédito y de otras actividades malévolas.
Debe ser socio de FIA-NET para poder utilizar este módulo. Solicite mayor información desde el siguiente enlace: http://www.fia-net-group.com/form_partenaires_fianet.php?p=185. Una vez que tenga los datos de su cuenta, puede configurar el módulo, y el logotipo de FIA-NET se mostrará en su página principal . Este logo es reconocido en Francia, y permite a los visitantes saber que su tienda es de confianza.
Al configurar el módulo, puede optar por utilizar el modo de prueba o el modo de producción. El modo de prueba permite realizar algunas compras de prueba y ver cómo el sistema FIA-NET reacciona ante ellas.
Editor de textos página de inicio
Añade un bloque a la columna central de su página de inicio, con una imagen situada por encima de un texto, las cuales puede modificar mediante la configuración del módulo. Puede mover este bloque utilizando la funcionalidad Live Edit.
La página de inicio es la primera cosa que sus visitantes visualizan cuando acceden a su tienda. Por lo tanto, asegúrese de que sea agradable y eficiente, además de actualizarla periódicamente. Asegúrese de traducir este texto en todos los idiomas soportados por su tienda.
El tema por defecto de la versión 1.4, estaba basado alrededor de este texto bloque de texto. En la versión 1.5, este bloque está desactivado por defecto y ha sido reemplazado por el bloque "Imagen de control deslizante para su página web".
Imagen de control deslizante para su página web (Carrusel de imágenes)
Novedad en Prestashop 1.5.
Adds a slider block on your homepage's central column, where you can define a set of images that will be displayed one after the other, with a sliding motion.
The module's configuration screen presents you with two sections:
- Slider configuration. You can set the size of the block, the time to wait between two images, and whether the slide should loop or not.
- Slides configuration. You can visually arrange the images' order by drag-and-dropping their individual blocks.
Three icons at the right of each block enables you to enable/disable the image, edit its settings, or remove it from the set altogether.
Adding/editing an image
Make sure that all the images have the exact same size, and that this size is reflected in the block's own size (in the "Slider configuration" section).
Clicking the "Add Slide" link brings you to a new screen.
- Select a file. Note that you can have text on the image, and indicate the language of that text using the flag icon.
Additionally, this means you can have a different image for each language. But be aware they these images will be tied: same position, inability to delete one without deleting the others, etc. - Title. The title appears in the "Slides configuration" section, and helps you sort the images.
- URL. You can choose to send the customer to a given page of your shop when he or she clicks the image. This is useful when the image promotes a certain product, category or manufacturer.
- Legend. The alternate text to be used if somehow the image cannot be loaded. This is essential for accessibility.
- Description. The text appears when the mouse pointer hovers over the image.
- Active. You can disable an image whenever needed, for instance when the discount it promotes ends.
Language block
Displays a block of flags at the top of the homepage. This block enables the customer to choose the languages in which he or she wants the shop to appear. If you do not want the customers to be able to change the shop's languages, then uninstall this block.
Layered navigation block
Displays a block with layered navigation filters. Layered navigation enables the customer to define cumulative criteria to filter category products, little by little providing more details in order to reduce the number of displayed products. This is a great tool for customers who know the details of what they want (color, condition, price range...), but are unsure how to find it.
When configuring the module, you are presented with 4 sections:
- Indexes and caches. This module heavily relies on database index and its own content cache.
- Existing filter templates. A filter template is the kind of navigation to which the customer has access to.
- Build your own filter template. You can build various templates, which will serve as the basis for what the customer sees.
- Configuration. You can further detail the way this module operates.
Indexes and caches
In order to work properly, layered navigation needs to be kept up-to-date with your latest products, product attributes and product prices – unless these never change. You should therefore regularly re-index the data, using the buttons provided here. They each have specific actions:
- Index all missing prices. Only adds to the index the prices that were not indexed before. Much faster than the next button.
- Rebuild entire price index. Adds to the index all the prices, whether they were already indexed before or not. Much slower than the previous button when you have many products.
- Build attribute index. Adds to the index all the product attributes.
- Build url index. Adds to the index the URLs for all the products.
You should update your indexes every time your products' data changes. As this can prove pretty painstaking or even boring, PrestaShop enables you to trigger the indexing automatically, using cron tasks. Add the provided URLs to your crontab, and you will not have to handle this yourself anymore. If you do not know about cron and crontab, ask your webhost about it.
Existing filters templates
Layered navigation is based on templates, or groups of criteria. There is one by default, named "My template", which makes use of all the available filters. You should create templates more adapted to your content or needs.
You can have as many templates as needed. This section enables you to edit and delete them when necessary.
Build your own filters template
The template builder enables you to specify what kind of filters your customers should have access to.
Creating a new template requires only three easy steps:
- Select categories. You can either create filter for the whole site, or on a per-category basis.
You could for instance have the whole site display the price filter, while some categories can have additional filters.
When choosing "Specific categories", a small window opens where you can choose in which categories this filter should be available.
Note that filters do not automatically apply to sub-categories of the selected category: if there is no product on your "Home" category, then the layered navigation will not appear there. - Selected filters. The number of available filters depends on the content of your shop. Six default filters will appear here: price, weight, condition, manufacturer, available stock and sub-categories. Along with these are the attribute groups for all products in the selected categories (with the number of products). Check a filter's box to move if from the "Available" section to the "Selected" one. You can move the filters up and down with your mouse cursor, which will influence their display in the front-page.
Each filter has a two drop-down menu included:- Type of display. You can choose how the filter is displayed to the customer. The visualization depends on the type of the filter.
- Numerical (price & weight): check-box, radio button, drop-down list. Note that only the check-box setting allows for multiple selection.
- Alphabetical (all others): slider, inputs area, list of values.
- Limit. If some of your categories have too many choices for a given filters, you can limit the number of displayed items using this selector.
- Type of display. You can choose how the filter is displayed to the customer. The visualization depends on the type of the filter.
- Name your template. Customers will not see the name, but it will prove very useful to you when you have to edit one template among the dozen or hundred you may create in the lifespan of your shop.
Note that saving the filter will not save the whole configuration: you have to save the filter first, then click on "Save configuration".
Configuration
Two options are available:
- Hide filter values with no product is matching. If disabled, you will still see filters, even if they are useless because of the lack of matching product (which can make the layered navigation over-crowded with options).
- Show the number of matching products. Displays the number after the name of the filter, between brackets. If there is no matching product, it will display "(0)".
- Show products from subcategories. The filter applies to more than just the current category.
- Category filter depth (0 for no limits, 1 by default). If the above option is enabled, you risk having too many products taken into account, and lose the interest of layered navigation. The depth is of 1 by default, but you can use even deeper sub-categories.
- Use tax to filter price.
- Allow indexing robots (google, yahoo, bing, ...) to use condition/availability/manufacturer filter. These four filters help you define whether search bots should be able to browse your navigation and index it. This can prove beneficial for SEO (search engine optimization).
These options apply to all templates and filters.
Link block
With this module, you can add links to the sites you want, or to pages of your shop.
The configuration page is divided in three sections:
- Add a new link. Enables you to specify the link's name and URL, and whether it should open in a new page or not.
When adding a link, do not forget the "http://"" part. For instance, http://www.myprestashop.com.
Note that it is often said that opening a link in a new page is bad practice. At the very least, you should keep your shop's own page in the same window. - Block title. Enables you to rename the link block itself, and even link to a page from the block's title.
- Settings. Enables you to sort the links. By default the links are ordered by most recently added link. If you want to invert this setting, select instead "by oldest links" from the drop-down list.
At the bottom of the page, you will find all of the links that you have entered. If you would like to modify the links, click the edit icon. To delete a link, click the trashcan icon.
Manufacturers block
Displays a block of manufacturers/brands.
The block's content can be displayed in two ways: either as a list of links, or as a drop-down list. It can even display both, with the text links being limited in number, whereas the drop-down list gives access to all the manufacturers.
Manufacturers are displayed alphabetically.
My Account block
Displays a block containing links to the logged customer's various account pages: previous orders, package tracking, product returns, registered addresses, available coupons, etc. Once the client is connected, this block is displayed.
My Account block on footer
Novedad en Prestashop 1.5.
This is the equivalent to the "My Account block" module (see above), but specifically designed to be used in the theme's footer.
New products block
Displays a block presenting the recently added products, in order to make them more visible. With this block, you can drive more traffic to your new products. You can set the number of visible links by configuring this module.
By default, a product is considered as new if it has been added to the shop's catalog in the last 20 days. You can change that setting in the "Products" page under the "Preferences" menu.
If you do not have recent product, displaying this block will hint that you do not renew your catalog much. Therefore, it is not recommended to enable the "Always display block" option for this module.
Newsletter block
Displays a block which invites your shop's visitors to subscribe to your newsletter.
In the configuration screen, you can set several options:
- Display configuration in a new page.
- Send verification e-mail after subscription. This is important, as it prevents unsuspecting people to be subscribed without their knowledge.
- Send confirmation e-mail after subscription. Likewise, a customer should always confirm they he or she chose to be subscribed to your newsletter. This way they cannot say you are sending them spam without their consent.
- Welcome voucher code. You can thank new subscribers with a voucher code. For instance, you can offer them 10% off their next order.
To create a new voucher code, go to the "Cart rules" page under the "Price rules" menu. See how to create a voucher in the "Creating Price Rules And Vouchers" chapter.
Payment logo
Adds a block to display all payment logos.
The module's configuration page enables you to choose where to display these logos. Therefore, you should first create a CMS page where you would put the payment logos and descriptions for all the payment services you support, then link to that page from the module's configuration page.
Permanent links block
Adds a block on the front-end, which displays permanent links to your CMS pages, such as sitemap, contact, etc.
Product Comments
Enables logged-in customers or visitors to leave a message on your product page. Comments will appear in a new tab right on the product page, next to the "More info" section. They can also rate your products, between 0 and 5 stars.
You can also manage comments from this module, such as moderate them or delete them.
Logged-in customers can also report spam or useless comments to you: when a comment is displayed on a product page, it has two options:
- "Was this comment useful to you?" If the customer clicks "No", other visitors will see this.
- "Report abuse". If the customer clicks this button, the comment goes to the "Reported comments" queue.
The configuration screen gives you access to several sections:
- Configuration.
- All comments must be validated by an employee. This makes sure that no spam or insult ever appears on your live site, which could ruin your content. Note that in some countries, validating content is akin to publishing them yourself, and therefore can make you responsible for their content.
- Allow guest comments. You can allow non-logged visitors to publish comments too. Be careful, as this can greatly increase spam comments.
- Minimum time between 2 comments from the same user. This prevents spam bot to fill your inbox with comments – or at least limits the impact.
- Moderate Comments. If you chose to have comments validated by your staff before they are public, they will be displayed in this section, and can choose to put them offline if you feel they are detrimental.
- Reported Comments. Customers can click a "Report abuse" link on any comment, which will bring it to your attention here. You can choose to dismiss the report and accept the comment, or remove the comment altogether.
- Add a new comment criterion. You can motive your customers to leave comments by providing them with criteria, or "themes": text fields with a title indicating what the comment should be about, such as "scent", "taste", "robustness". This helps your customers come up with ideas for their comment.
- Name. The name is visible to your customers, so choose a short and specific one.
- Apply to. You can choose to have the chosen criterion field appear on all products ("Valid for the entire catalog"), or on a set of products.
If you choose to restrict the criterion to a subset of your catalog (either some categories or some products), a new section will appear after saving your criterion: "Manage criterions scope". See below. - Active. You can disable a criterion at any time.
- Manage criterions scope. This section only appears when you have at least one criterion that is restricted to a subset of your catalog.
In the drop-down list, choose the criterion for which you want to set the scope. The page will reload with a table of all your categories or products (depending on the scope choice). Check the boxes for all the items that apply, and validate. - Manage Comments. This is where all the public comments appear. You can choose to delete them by clicking on the red icon (the "Do Not Enter sign"-like icon), either one by one or in batch.
Product tooltips
Displays live notifications on your shop. This module helps the visitors know what is happening on your shop in real time. Whenever a visitor visits a product's page, three kinds of notification can be displayed over the content at the top right of the page:
- The number of people who are currently also watching this page. In effect, it displays the number of people who have been on this page in the last 30 minutes, 30 being the default value, which you can change using the "Lifetime" option.
- The last time this product has been bought.
- The last time this product has been added to a cart.
The first option is always a nice thing to have. The other two are a bit trickier: on a successful product, it can be nice to see it has been recently bought; on the other hand, less-successful products will be seen as failures if they have not been bought for a long period of time.
This is why the "Do not display events older than" option is important: make sure not to change it to double-digit number, or you will without doubt make fewer sales of already-disappointing products.
Products Category
On each product page, displays suggestions of other products that are in the same category. This module is particularly useful for discovering what your shop has to offer.
In the configuration page, you can choose whether to display the other products' prices or not.
RSS feed block
Adds a block displaying an RSS feed. A RSS feed is a website content syndication format, which enables anyone to display the latest content from a website on another.
With this module, your visitors can stay informed about news from a site that you specify in the field provided in the module configuration. The RSS feed will then appear on the front of your shop in a block. Visitors can sign up for the RSS feed in this block.
This module has three configuration options:
- Block title. Give the block a comprehensible name: you might not want your visitors to think that the content displayed is from your own website.
- Add a feed URL. Do not put your shop's address in this field, as it could create an error.
- Number of threads displayed. Usually, a RSS feed contains 10 to 20 of the latest articles from the source website. You could limit that to 5 or fewer, in order to not clutter your homepage with content other than your products.
RSS products feed
Enables you to generate a RSS Product feed for your shop's catalog. A RSS feed is a website content syndication format, which enables anyone to display the latest content from a website on another.
With this module, loyal customers will be able to get regular updates about products added to your catalog, by adding this feed to their own feed reader, without the need to subscribe to your newsletter. Also, other websites will be able to display your new products on their page. Finally, search engines may use it to discover your new content.
In case of a multistore installation, you can display the new products from one shop, right in the sidebar of another of your shop using its RSS Feed Block module.
The module is enabled by default. If you would rather not have your content be available to anyone, disable it.
Send to a Friend module
Displays a "Send to a friend" link at the bottom of every product pages. Clicking it opens a window where the customer can enter the name and e-mail of the person who he wants to tell about this product. The e-mail sent contains a simple link to the product's page.
This module can be important, because as a shop owner, you want to give your customers the opportunity to spread knowledge of your products and your shop.
Social networking block
Novedad en Prestashop 1.5.
Allows you to add extra information about social networks where your customers can find you. Specifically, you can indicate your account URLs for:
- Facebook. Try to create a page for your shop/company, and avoid using your own userpage.
- Twitter. Likewise, use your company's user account, not your CEO's.
- Your RSS feed. A RSS feed is a special file that is generated automatically by your shop, and can be used by RSS readers tools (such as Google Reader) to send your latest news to your customers. While it is not a social network, it is an important aspect of sending regular news out there. Note: you must have the "RSS products feed" module installed in order for this to work.
Store locator block
Displays a block with a link to the store locator. If you do not have any physical location where customers can buy products, then be sure to disable this module.
Your list of physical stores is available in the "Store Contacts" page, under the "Preferences" menu. By default, there are a handful of sample stores lists, which you should delete in order to replace them with your own.
The configuration page simply enables you to choose a picture to display as the link to the store locator.
Suppliers block
Displays a block of suppliers.
The block can display two types of content: either as a list of links, or as a drop-down list. It can even display both, with the text links being limited in number, whereas the drop-down list gives access to all the suppliers.
Suppliers are displayed alphabetically.
Tags block
Each of your products can have tags added to its description page. Basically, they help create on-the-fly categories of products which have the same tags, but this module makes tags even more useful by adding a block in one of the theme's columns, where the most popular tags are displayed in order of importance, with the most prominent ones using a bigger font.
In the configuration page, indicate how many keywords should appear.
Top horizontal menu
Novedad en Prestashop 1.5.
This is an important module: it adds a whole new block at the bottom of the header, where you can display links to the various categories and pages of your shop.
This is very useful, as it helps your customer quickly find their way through your shop. You can have simple links or menus with sub-menus, thus enabling customers to have a good bird's eye view of your content.
Top seller block
Adds a block displaying the shop's top selling products.
The configuration page enables you to set if the block should be displayed even when there is no product or even no product sale yet.
The block is not present in the default theme at first. You will have to hook it to a location, for instance the right column.
To hook the module to the right column, go to the module's configuration page, then:
- Click the "Manage hooks" link at the top. You are taken to the "Positions" page.
- As you can see in the "Positions" page, the module does not appear in any hook. Click the "Transplant a module" button at the top right to hook the module.
- In the hooking tool, select "Right column blocks" from the "Hook into" drop-down list.
- Save your change, then reload the homepage to see the module's block appear. You can then change the module's location by using the Live Edit tool.
User info block
Adds a block that displays information about the customer:
- Link to his or her cart, with a quick view of its content.
- Link to the customer's account.
- Link to log out of the shop.
Viewed products block
Displays the latest products that a customer has recently consulted. You can set the number of products shown using the "Products displayed" field.
Wishlist block
Adds an "Add to my wishlist" link on all product pages. Logged-in customers can then build a wishlist of products from your shop, and send it as a link to their friends. A customer can have many wishlists.
The module also adds a "Wishlist" block on every pages of the shop, which only the customer can see. The block is there so that the customer knows exactly what is in it, and can review it regularly. The block features a "My wishlists" link to access the wishlists management tool.
The module's configuration page enables you to view your customers' lists: simply select a customer in the drop-down list to have the page reload with the chosen customer's lists.
Internationalization & Localization
No native module in this section.
Merchandising
No native module in this section.
Migration Tools
Importer osCommerce
This is an import module for the shop importer tool: the Shop Importer module must be installed first (see below).
Install this module in order to import data from a previous osCommerce shop. Once installed, go the Shop Importer module's configuration in order to start importing.
Shop Importer
This is a generic module to import your stock of products from another e-commerce system to your PrestaShop shop. By default it does not provide anything, it needs platform-specific modules in order to work. Once at least one such module is activated, this module's configuration page gives access to a drop-down menu. Choose the platform of the source system, and enter the required authentication details. Click "Next Step" and follow the module's instructions.
Caution
Do make a backup of both platforms before doing anything! It is vital that you be able to restore your data in case of import failure.
Payment & Gateways
With PrestaShop, you can accept your customer's transactions through several different payment methods, such as checks, bank wire, cash on delivery, and some partner modules such as Hipay, Moneybookers, PayPal and others. They are already included in your store and are ready to be used. However, it is necessary to configure them.
PrestaShop has three basic payment modules, that you can use out-of-the-box, without any 3rd-party service registration:
- Bank wire
- Cash on delivery
- Check
Additionally, several modules for 3rd-party payment services are available by default:
- Directly as a native file:
- Authorize.net
- PayPal
- Stripe
- Available from Addons:
- Allied Wallet
- DIBS
- Hipay
- Moneybookers
- Ogone
- Google Checkout (gcheckout)
There is strictly no difference in quality between the native 3rd-party modules that are available directly as files, and the ones that PrestaShop downloads from Addons. Many are developed by the PrestaShop developers themselves, in close collaboration with the services' developers. All are safe to use.
The module download from Addons is done transparently when clicking in the "Install" button. Therefore, it is not different from installing a module whose files are already available locally.
Note that you can find many other payment modules on Addons: http://addons.prestashop.com/en/4-payments-gateways.
Allied Wallet

How customers pay for products in their shopping cart is just as important as the shopping cart itself. So when choosing a payment processing solution, make sure you chose one that works for you, and Allied Wallet is one of the best payment solutions available to PrestaShop users.
You must have an Allied Wallet account in order to use this module, and you can easily create one by going to this URL: https://www.alliedwallet.com/sign-up.
Configure the module with your Allied Wallet Merchant ID, your Allied Wallet Site ID and your Redirect URL. The redirect URL is the page to which Allied Wallet should return paying customers once they have validated their purchase on their server. Generally, you can keep the suggested URL, which is in the form of http://URL-OF-YOUR-SHOP/history.php.
Once you have filled out the necessary information and have received a confirmation email from Allied Wallet, you’ll be able to start accepting payments securely from customers all over the world.
Authorize.net AIM
The Authorize.net AIM module makes it possible for your shop to accept payments by credit card.
You must have an Authorize.net account in order to use this module. You can access the website by clicking the Authorize.net logo in the module's configuration page (right of the page).
Then, configure the module with your Login ID and your key. Indicate whether you are in Test mode or in Production mode, select the types of cards that you want your shop to accept, and finally, indicate what should be the matching PrestaShop order state for the Authorize's "Hold for Review" state (by default: "Payment error").
Once the settings are in place, your customers will see the "Authorize.net AIM" option appear in the shop's front-office as part of the available payment methods.
Bank Wire module
This module makes it possible for your customers to pay using a bank wire.
In order for the module to accept bank wires, you need to fill out the address of the bank that your store uses. This is done in the module's configuration page.
Once the settings are in place, your customers will see the "Pay by bank wire" option appear in the shop's front-office as part of the available payment methods. After they have selected it and indicated their choice of currency, your bank information will appear.
Note that when receiving the customer's bank wire, you must manually change the payment status of the order to "Payment accepted" in your back-office. This is different from a credit card order, where the payment is carried out automatically. You can find the order and change its status in the "Orders" page, under the "Orders" menu.
Cash on delivery (COD)
This module makes it possible for your customers to tell you that they will pay for the product directly to the one who delivers it. This could be in-store, or you could have your own employees bring the product to your customers. This is mostly useful for local deliveries.
Google Checkout (gcheckout)
The Google Checkout module makes it possible for your shop to accept payments by credit card or Google's own payment service.
You must have a Google Checkout account in order to use this module. You can reach the sign-up form here: https://checkout.google.com/.
Then, configure the module with your Merchant ID, and your Merchant Key, and finally choose whether you want to use the module in Test mode (Sandbox) or in Production mode (Real). You should also make sure the other settings fit your needs.
Once the settings are in place, your customers will see the "Google Checkout" option appear in the shop's front-office as part of the available payment methods.
Hipay
The Hipay module makes it possible for your shop to accept payments by credit card.
You must have a Hipay account in order to use this module.
Then, configure the module with your Account number, your Merchant password, and your Site ID.
Finally, you can choose the authorized age group, and restrict the module to certain zones.
Once the settings are in place, your customers will see the "Hipay" option appear in the shop's front-office as part of the available payment methods.
Kwixo
Novedad en Prestashop 1.5.
The Kwixo module makes it possible for your shop to accept payments through Kwixo's own payment service. Kwixo is part of FIA-Net, the French e-commerce trust seal, and two major French banks, Crédit Agricole and LCL. Customers need to have a Kwixo account, and to have registered a credit card on their service.
You must have a Kwixo account in order to use this module. You can reach the sign-up form by clicking on the link in the configuration page.
Then, configure the module with your Merch Id, you Crypt Key, and indicate whether you want to work in Test mode for now, the type of payment you want to accept, and your delay for delivery.
From there on, complete the configuration information by indicating your main product types in the "Information on products sold on your shop" section, and your carrier types in the "Carrier Configuration" section.
Once the settings are in place, your customers will see the "Kwixo" option appear in the shop's front-office as part of the available payment methods.
As a merchant, you have access to a Kwixo-specific back-office at the URL located in the "Manage your payments in your Kwixo administration interface" section.
Moneybookers Skrill
The Moneybookers Skrill module makes it possible for your shop to accept payments by credit card.
You must have a Moneybookers account in order to use this module. You can reach the sign-up form by clicking on the image in the "Open Account" section.
Then, click on the "I already have a Moneybookers account" button to continue configuring the module.
Once the settings are in place, your customers will see the "Moneybookers Skrill" option appear in the shop's front-office as part of the available payment methods.
Ogone
The Ogone module makes it possible for your shop to accept payments by credit card.
You must have an Ogone account in order to use this module. You can reach the sign-up form by clicking on the "Create your free Test account!" button in the configuration page.
Then, configure the module with your PSPID, your SHA-in signature, your SHA-out signature, and finally choose whether you want to use the module in Test mode or in Production mode.
Once the settings are in place, your customers will see the "Ogone" option appear in the shop's front-office as part of the available payment methods.
PayPal
The PayPal module makes it possible for your shop to accept payments by credit card or PayPal's own payment service.
You must have a PayPal account in order to use this module. You can reach the sign-up form by clicking on the "Opening your PayPal account" button in the configuration page.
Then, configure the module and enter your API Username, your API Password and your API Signature. You should also make sure the other settings fit your needs.
Once the settings are in place, your customers will see the "PayPal" option appear in the shop's front-office as part of the available payment methods.
Payments by check
This module makes it possible for your customers to pay by sending a check (or "cheque" in UK English) to you.
To configure payment by check, open the module's configuration page and indicate the order to which your customer must make the check payable – most of the time, your name or your company's name and your address.
This information will then appear to the user at the end of the ordering process, after clicking the "Pay by check" option, and validating with a click on the "I confirm my order" button.
Note that when receiving the customer's bank wire, you must manually change the payment status of the order to "Payment accepted" in your back-office. This is different from a credit card order, where the payment is carried out automatically. You can find the order and change its status in the "Orders" page, under the "Orders" menu.
Stripe
Novedad en Prestashop 1.5.
Stripe (https://stripe.com/prestashop) is a premier online payment solution that offers something many competitors do not… simplistic transparency.
After clicking configure, you will need to create a free Stripe account. Simply enter your email address and choose an account password. From there, you will need to confirm your email before entering Stripe's dashboard (Check your chosen email's inbox for the required URL.)
After your email address has been confirmed, you will automatically be logged into the Stripe dashboard. From here, you will need to enter your business' information under "Your Account" settings (top right hand corner of the dashboard). Fill out the required fields while paying particular attention to the bank information at the bottom of the form. Once complete, click "Save."
You will now need to copy and paste the API Keys into the module itself. Both the "Test" and "Live" API Keys can be found under "Account Settings" in the Stripe dashboard. After copying them into the module, click "Save." Once complete, you will be ready to start accepting secure online payments from customers in USD or CAD. It's that easy.
weXpay e-money
Novedad en Prestashop 1.5.
The weXpay module makes it possible for your shop to accept payments through weXpay's own pre-paid system. weXpay is a French solution.
You must have a weXpay account in order to use this module. You can contact their team using the information in the "Contactez l'équipe weXpay" section on the right.
Then, configure the module with your weXpay merchant ID.
You can find more information on the configuration by reading the weXpay PDF, found under the "Pour plus d'infos, cliquez-ici" link at the bottom.
Once the settings are in place, your customers will see the "weXpay" option appear in the shop's front-office as part of the available payment methods.
Payment Security
Certissim
FIA-Net is a French third-party e-commerce trust partner: it protects both customers and online shops against credit card frauds and other malevolent activities.
You must already have a FIA-Net account in order to use the module. You can ask for one here: https://www.fia-net.com/marchands/devispartenaire.php?p=185.
Then, configure the module with your login, your password, and your Site ID, and finally choose whether you want to use the module in Production mode or not. You must also indicate the global business type of your shop.
Additionally, you should indicate the business type of each of your categories, the carrier type of each of your carriers, and what kind is your default carrier.
Once the settings are in place, a FIA-Net logo will appear on your homepage, and your orders will be analyzed by FIA-Net to make sure no fraud is happening.
Secuvad (Lutte contre la fraude)
Secuvad is a French solution for fighting against international online fraud. It can also offer a guarantee against unpaid orders, and act as debt collector.
You must have a Secuvad account in order to use the module. You can create one directly from the module. Make sure to fill all the fields with the exact details of your shop, including the types of products that you are selling.
Then, configure the module with your login, your password, your ID, and finally choose whether you want to use the module in Test mode or Production mode.
Once the settings are in place, a Secuvad logo will appear on your homepage, and your orders will be analyzed by Secuvad to make sure no fraud is happening.
Trusted Shops trust solutions
Trusted Shops provides two services:
- Verifiable customer ratings of your shop,
- Quality seal and buyer protection
You must have a Trusted Shops account in order to use the module. You can reach the sign-up form by clicking on the "Apply now!" link in the module's configuration page.
Then, configure the module with your Trusted Shops ID, and follow the instructions.
Once the settings are in place, a Trusted Shops logo will appear on your homepage.
PrestaShop Security (prestafraud)
PrestaShop Security is a service provided by PrestaShop in order to protect the security of your shop against fraudulent payments.
If you do not have an account, you can create one directly from the module: fill in the first field with your e-mail, and check that the second one does contain the correct URL for your shop, then click "Create Account". You will have to agree with the terms and conditions of the module.
If you do already have an account, change the top selector accordingly in order to make the full configuration form appear. Fill the various fields with the exact details of your shop, along with your Shop ID and Shop KEY (as provided by PrestaShop Security).
Once the settings are in place, orders will be analyzed by the module to make sure no fraud is happening.
Pricing & Promotion
Customer loyalty and rewards
PrestaShop's loyalty module offers an advanced tool for building automatic vouchers depending on your customers' purchases and reward points.
Your customers get a certain amount of loyalty points depending on the amount they spend at your shop.
The configuration screen enables you to be very specific about the generation of vouchers:
- Ratio. Basically, the conversion rate of money spent in reward points, and of reward points in money won. The module uses the default currency of the shop.
The first field indicates how much money the customer should spend in order to get 1 reward point.
The second field indicates how much money the customer gets for each reward point.
By default, the settings are 10 and 0.2, which means that the customer wins 2€ for each 100€ spent on your shop. - Voucher details. This is simply the name of the voucher. It will appear in the customer's account page.
- Minimum amount in which the voucher can be used. You can set a limit in order to keep customers from using vouchers as soon as there is the smallest sum of money on it. By default, it is set to 0, which mean that they can use the voucher whenever they want.
- Give points on discounted products. Choose whether discounted products count when calculating the voucher.
- Points are awarded when the order is.... By default, the reward points are awarded only when the product is delivered. But you might prefer to have them awarded at any other order status, for instance as soon as it is paid.
- Points are canceled when the order is.... Points can be canceled if the order reach a given status, for instance if it is canceled.
- Categories. You might want the awarded vouchers to not work in some specific categories. Choose which ones are okay using this form.
- Loyalty points progression. This section contains the messages that are displayed to the customer. You might want to change the phrases to better fit your shop's "attitude". Also, make sure to translate the phrases in all your supported languages.
Specials block
This module adds a block to your shop's home-page, where the customer can discover the current specials, chosen at random in your catalog.
You can add more products to the "Specials" by giving them a discount: go to the product's catalog page, open its "Prices" tab on the left, and in the "Specific prices" section, click the "Add a new specific price" button to open the creation form.
Quick /Bulk Update
No native module in this section.
Search & Filter
Quick Search block
This module installs a block with search field in your shop front-end. The search block can display results as soon as the first letters are typed.
The module is installed and enabled by default, and you should leave it enabled to facilitate visitor's navigation.
SEO
Google sitemap
This module helps you build a sitemap for your shop, and keep it up to date.
In order to optimize your SEO, it is essential to have a sitemap, which is a XML file that lists all the products and pages on your shop. This file will enable search engines to index all pages easily and efficiently. Your products will then appear perfectly in the search engines when a visitor conducts a search. You can create a sitemap for PrestaShop, and be indexed by all the search engines that support the file format (Google, Yahoo, Bing...), using tools such as Google's Webmaster Tools.
The configuration page has few options:
- Sitemap also includes products from inactive categories. You must decide whether or not to display the products that you have not activated in your shop. If you want to use all products, check "Sitemap contains all products". Inactive products will then be indexed by Google so that you can make them visible as soon as you put them back online.
- Sitemap also includes CMS pages which are not in a CMS block. Likewise, you may want the sitemap to also include CMS pages that are not directly available
Once you have finished configuring the module, click on "Update sitemap file". You are then given the Sitemap's address (e.g., myprestashop.com/sitemap.xml). Copy this URL to save it to your Google Webmaster Tools account. The module will then show you the file size and the number of pages indexed. Remember to update it regularly so that search engines index your content perfectly.
The last section of the configuration page gives a cron link. A good sitemap is an updated one, and unless you are willing to click on the "Update sitemap file" button every time there is a change on your shop, you might want to have your server do the work for you. Create a cron task with the given URL, and never worry about this again.
If you do not know what a cron task is, ask your web host.
Shipping & Logistics
Date of delivery
This module displays an approximate date of delivery during the checkout process.
The configuration page has two sections:
- Carrier configuration. The module relies on indications from your carriers. You must therefore add rules for each of your carriers, by clicking on the "Add a new carrier rule" link.
- More options:
- Extra time when a product is out of stock. Estimate the time it might take for your team to re-stock products. This is only useful if customers can order out-of-stock products (the option for this is in the "Products" preference page, in the "Products stock" section).
- Extra time for preparation of the order. Estimate the time it might take for your team to prepare an order.
- Preparation option. If your packaging team also works on weekends, indicate it, as the module takes this into account.
- Date format. The format in which the expected delivery date is displayed. It uses PHP
date()format: each letter has a meaning, as explained in the indicated link. The default, "l j F Y", means the date will be displayed in the format "Saturday 21 January 2012". There are many more letters that you can use to build the date format as you see fit.
Adding a new carrier rule is pretty straightforward:
- Carrier. Choose the carrier for which you want to add the rule.
- Delivery between. Set the timeframe in which the chosen carrier promises to deliver products. You have to gather this information from the carrier itself.
- Delivery options. Some carriers also deliver on weekend days. Be sure to indicate it if so.
You should create as many carrier rules as necessary.
Kiala Advanced (Kiala contract holders only)
Novedad en Prestashop 1.5.
This module makes it possible for your customers to have their parcels delivered in a Kiala collection point. Kiala points are widely available in France, and also in other select European countries.
You must have a Kiala account in order to use this module. You can reach the sign-up form here: http://www.kiala.com/.
Then, configure the module with all the information about you and your shop in the form in the "Kiala Module Status" section.
The "Country settings" section further down helps you indicate in which countries you want to make Kiala delivery available for your customers.
Finally, the "Kiala advanced settings" section adds a few more options:
- Export folder. The local folder where the module will save its export, containing a lot of useful information.
- Prefix for order and parcel number. You can have a shop-specific prefix for your shop, which make it look more personalized for your customers.
- Export on each order?. You may prefer to have several order-specific export files rather than a big one.
- Parcel tracking criterion?. Should the parcel be tracked on a per-customer or a per-order basis? If you are unsure, keep it to per-order.
Once the settings are in place, your customers will see the "Kiala" option appear in the shop's front-office as part of the available delivery methods.
Mondial Relay
This module enables you to display rates for delivering in Mondial Relay points. This service is available in France, Luxembourg, Spain and Belgium.
You must have a Mondial Relay account in order to use this service. You can reach the sign-up form here: http://www.mondialrelay.com/.
Then, from the module's configuration page, click on the "Account details" icon and enter the necessary information, as provided by Mondial Relay: Webservice Enseigne, Code marque, Webservice, KeyEtiquette's Language and Weight Coefficient. The KeyEtiquette's Language can only use the languages that are enabled on your shop; you can enable more language from the "Languages" page, under the "Localization" menu. Click "Update Settings" in order to connect your shop to the Mondial Relay webservice, and from there on, follow the module's instructions in the "Shipping" and "Advanced settings" screens.
Once the settings are in place, your customers will see the "Mondial Relay" option appear in the shop's front-office as part of the available delivery methods.
Shipping Estimate
This module enables the customer to compare carrier possibilities before continuing with the checkout process.
This module is very straightforward: just install it to display its option on your front-office.
All the available carriers must have their fees properly set. This is done at the bottom "Shipping" page, in the "Fees by carrier, geographical zone, and ranges".
The module configuration page only has one option, "Refresh carrier list method". This enables you to display a carrier either only when all the information is set, or at any time.
So Colissimo
Novedad en Prestashop 1.5.
This module enables you to display rates for deliveries via SoColissimo, a service by La Poste, France's historical postal service. This service is available mainly in France.
You must have a SoColissimo account in order to use this module. This is done by calling La Poste from a French phone, using this number: 3634.
Then, configure the module with your SoColissimo information: ID So, key, preparation time, overcost, URL So, Fancybox, Supervision and Supervision URL.
A full documentation is available (in French) as a PDF file, which you can find under the "Documentation" link on the configuration page.
In order to finalize the installation, copy/paste the two final URLs in your SoColissimo back-office.
Once the settings are in place, your customers will see the "SoColissimo" option appear in the shop's front-office as part of the available delivery methods.
TNT Express France
Novedad en Prestashop 1.5.
This module enables you to display rates for deliveries via TNT express services. This service is available worldwide.
You must have a TNT account in order to use this module. You can reach the sign-up form here: http://www.tnt.com.
Then, configure the module with your TNT login, password and account number, all in the "Account settings" tab.
From there on, you can keep configuring the module using the "Shipping Settings" and "Service Settings" tabs. This last tab enables you to be very specific about the delivery service you want to make available for your customers, as well as any additional charge you might require depending on the package's weight.
Once the settings are in place, your customers will see the "TNT Express France" option appear in the shop's front-office as part of the available delivery methods.
Tracking - Front office
This module completes PrestaShop with an integrated affiliate program feature, which enables your affiliates to access their own statistics.
The affiliate program tool is located in the "Referrers" page, under the "Stats" menu. Once you have installed the "Tracking - Front office" module, these affiliates can access their statistics by going to http://www.yoursite.com/modules/trackingfront/stats.php.
To create a new affiliate, click the "Add new" button, and in the creation form, add the affiliate account username and password, then specify the fee they receive per click, per order and per percentage of sales.
Click on the header of the "Help" section to display instructions on how to set up the referrer URLs.
The "Technical information - Expert mode" enables you to use regular expression instead of plain text URLs.
Slideshows
No native module in this section.
Smart Shopping
Shopping Feed
Novedad en Prestashop 1.5.
This module makes it possible to list your shop and its products on hundreds of price comparison sites and marketplaces (mostly French), through the Shopping Flux service (http://www.shopping-flux.com/).
You must have a Shopping Flux account to make this module work. You can request one using the form at the bottom of the module.
Then, configure the module with your login and token, and set the various options to your likings.
You can find more information about this module on the Shopping Flux website: http://www.shopping-flux.com/module-prestashop-shopping-flux/.
Twenga Ready to Sell
This module makes it possible to list your shop and its products on Twenga. Twenga is an online open shopping platform that aims to bring together "all online products and shops in one place". This module exports your list of products to their service, and helps you track your sales through them.
You must have a Twenga account to make this module work. You can reach the sign-up form here by clicking the "List my website on Twenga" link.
Then, configure the module with your hashkey, login and password. The module will take care of send your catalog to Twenga.
Each visitor who comes to your website will cost a few cents. You can view the pricing grid by clicking on the "Twenga Prices" link at the bottom of the configuration page.
Mercado
eBay
Este módulo le permite exportar fácilmente su catálogo de productos desde Prestashop a eBay.
Debe tener una cuenta de eBay para trabajar con este módulo. Puede crear una desde: http://www.ebay.com/.
Then, configure your module with eBay login and click on the "Register the module on eBay". This will link your shop to eBay, using a specific token.
From there on, follow the module's instructions.
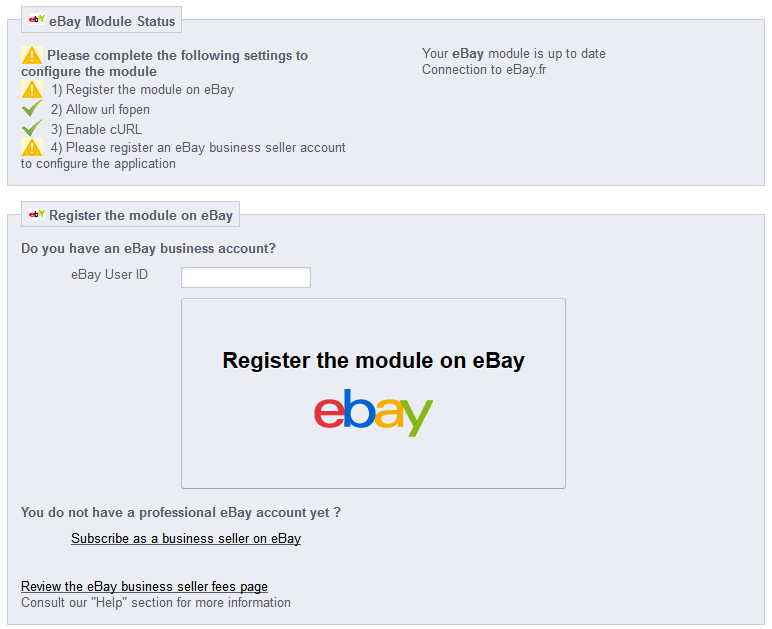
Redes sociales
No hay módulos nativos en esta sección.
Otros Módulos
No hay módulos nativos en esta sección.