
Table content
Exploring PrestaShop's Tools
PrestaShop's "Tools" tab provides access to various tools that enhance your PrestaShop experience.
Languages
PrestaShop comes multilingual out of the box: there are 5 default languages (English, French, Spanish, Deutsch and Italian), and many more are available to download.
The "Language" tab manages the languages you'll see in your back office and your shop. When you click on this tab the page below is displayed.

This screen displays the languages already installed on your shop.
In the "Language options" section, you can select which language will be displayed by default, both in the back office and the front office.
If you want to add a language to your store, click the “Add New” to reach the form below.
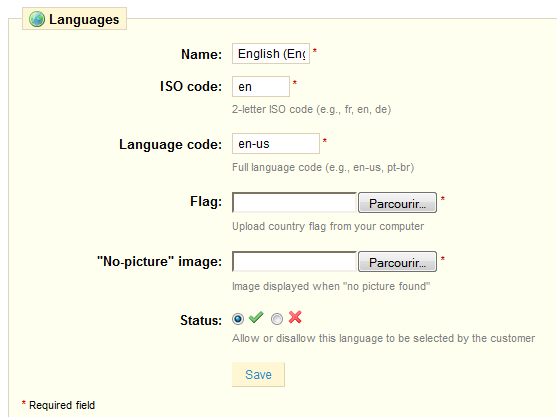
In order to add a new language:
- Enter the Name.
- Enter the adequate ISO 639-1 code.
- Enter an image of the flag of the language you want to add (Remember to upload a very small sized picture that does not exceed the resolution of 16*11 pixels.)
- Then upload an image in the new language that will appear when an image is missing from your store. In French, this image contains the words "Aucune image", for example.
- Click "Save".
- Go to the "Translations" sub-tab to finalize the installation of the new language.
- In that sub-tab's "Import a language pack" section, click on "Browse" to select the language pack that was already
downloaded to your computer. - Select it, and click on "Import". The "Translations added" notification then tells you that the import was successful.
You can click on the flags at the top of your shop to verify this operation. Similarly, visitors to your shop can now select an additional language by using the icons at the top of the page, as shown in the screenshot below.

Translations
PrestaShop provides you with full translation tool for your shop. This helps you add and edit the current translations. This way, you are the master of your shop, and can handle your translated strings without having to wait for translators to publish their corrections.
Even if you do not want to correct the translators' work, you might want to change the wording they chose to use (less formal, less wordy, etc.), and customize the various available text, thus tailoring your website to your audience (for instance, a hip-hop clothing shop might be better off by replacing "Hi!" with "Yo!").
Translation exchange
The "Translation" provides a few tools for your translation needs.
![]()
Add / Update a language
Many languages are available for your to download and install, directly from the PrestaShop servers. PrestaShop will take care of downloading the language pack, unpacking it and create the correct sub-folder in your install's /translation folder.
You can also update the currently installed languages, likewise directly from the PrestaShop servers. But be reminded that any change that you might have made to a language pack will be lost if you update it.
Import a language pack manually
In the case where you do not want to use an official PrestaShop translation pack, but rather a custom one (either provided by someone you know, or one that you exported from another PrestaShop install), then this form is for you. Select the zip file, click the "Import" button, and it will install the pack in the /translation folder. Warning: if there already exist a language folder with the same ISO 639-1 code, it will be replaced by the files from the archive you are importing.
Export a language
Either as of a way of backuping your customizations, or of sharing them with other PrestaShop installs, you can create your own language pack using this form, which will contain the theme that your pack is supposed to support.
Copy
You can copy the content of one language to another. This is especially useful when you wish to replace a theme language with the same language from another theme.
Modifying a Translation
The most important tool of the "Translation" sub-tab is in the "Modify translations" section. This is where you can choose to edit a translation, and completely customize each and every sentence if you wish.
![]()
Select the part of the current translation that you wish to edit:
- Front Office translations. Text visible to your customers about your shop.
- Back Office translations. The texts accessible from your store’s admin panel
- Error message translations. The error message translations that may appear.
- Fields Names translations. The name of the fields in the front office or back office.
- Module translations. The terms used by the installed and activated modules.
- PDF translations. The terms used in the generated PDF files.
- E-mail template Translations. The terms used in default e-mail templates.
Once done, click the flag of the language that you wish to edit that translation in.
A long form then appears. It contains, split in tens of section, the hundreds of available strings.
![]()
Click on a section title to open or close it, edit at will, and click "Update Translation" when you are done.
At the right of each text field is a an icon. Hover the mouse cursor over it to display the Google Translate suggestion.
![]()
Quick Access
PrestaShop has handy shortcuts to your most important pages, which can be accessed through the "Quick Access" menu, at the top of the PrestaShop back-office.
!_Images^252-tools-quickAccessMenu.png |border=1!
The "Quick Accesses" sub-tab enables you to create shortcuts to make your navigation even easier.
You will see all the shortcuts that have already been created. You can create as many shortcuts as needed – just don't overdo it, obviously.
Click "Add New" to access this form:
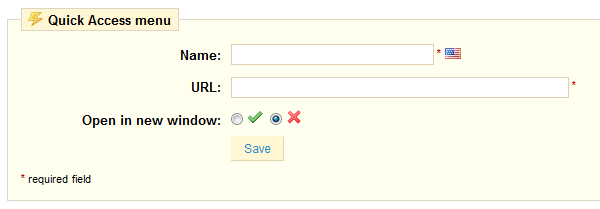
Let's create a shortcut the "Tracking" sub-tab of the "Catalog" tab.
- Give the shortcut a unique name.
- Indicate the page's address.
- Go to the "Tracking" sub-tab.
- Copy it's address; for instance, http://www.myprestashop.com/admin42/index.php?tab=AdminTracking&token=6ebfba8b18a50168a20a97fb9614d750
- Paste the important bits (i.e., not the domain and admin folder, and not the token): index.php?tab=AdminTracking
- Indicate whether you want to have this tab open in a new window or not.
- Save.
Import
The import function PrestaShop lets you fill your product catalog easily when you have a very large amount of products. By clicking the "Import" tab, the page below appears.

PrestaShop enables you to quickly import seven types of information files:
- categories,
- products,
- versions,
- customers,
- addresses,
- manufacturers,
- suppliers.
We will here only address the first two types of data.
Imported data file must be in text-file, using the CSV format (Coma Separated Value), and the accompanying .cvs file extension. We recommend using a semicolon ";" as a separator.
You can create such a file using any text editor (we recommend Notepad++), but we do advise you to use a spreadsheet program, such as the commercial Microsoft Excel or the free software OpenOffice.org Calc. Using a spreadsheet program enables you to have an easier and more visual grasp of your data, in comparison to the plain text file.
Once you have all your data in CSV format, you can upload it using the form in the "Import" sub-tab of the "Tools" tab. Load your file from your computer by clicking "Browse", confirm by clicking "Upload".
The name of your file will appear in the drop-down menu “select your CSV file." Next, select the type of data contained in your file (“select which entity to import”) In our case these are products so next, select into the language of the file.
Select the field separators. In most cases, we suggest you leave the default values. That is to say, "field separator" with a semicolon ";" and "multiple value separators" with a comma ",". If you want to remove all the products in your catalog before importing, select the appropriate option. You can skip to the next step by clicking on the button.
You will note that:
- The price column will use your store’s default currency
- In-stock text. The text that appears on your shop when your product is in stock
- Supplier. If the provider does not exist, it will be automatically created during import
- Ordering Text. This is the text displayed on the front office of your store when your product is out of stock.
- Image URL. The URL of the image must be specified in full. In other words, the link that may
be used in a web browser to display the image. Example: http://www.monhebergement.com/images/product/125
Import values and file format
You can import the following values (PrestaShop 1.1):
- ID
- Active
- Name
- Categories (x,y,z…)
- Prices
- Tax rate
- On sale
- Reductions
- Reference #
- Supplier reference #
- Supplier
- Manufacturer
- EAN13
- Weight
- Quantity
- Short description
- Description
- Tags (x,y,z…)
- Meta-title
- Meta-keywords
- Meta-description
- Text when in-stock
- Text if back-order allowed
- Image URLs (x,y,z…)
- Features
Here is a sample import file:
"Actif";"Nom";"Catégories";"Prix";"ID Règle de taxes";"Prix d'achat";"En solde";"Référence";"Poids";"Quantité";"Résumé";"Description";"URL Images"
1;"Test";"1,2,3";130;1;75;0;"PROD-TEST";"0.500";10;"Test résumé";"Test desc.";"http://www.video2brain.com/fr/images/v2b_logo.gif"
Subdomains
Authentication on PrestaShop is partly based on HTTP cookies, which are very small file stored by your browser to remember crucial part of your login credentials, or of your navigating state. By design, cookies are limited to one domain (or sub-domain): a cookie created on www.myprestashop.com will not work for www.myprestashop2.com or www2.myprestashop.com.
As solution to this is to have PrestaShop cater for all of your shop's sub-domain, in order to create coherent cookies on each. That is exactly what you can do with this sub-tab.
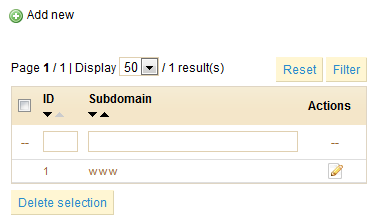
Add a new sub-domain is trivial.

DB backup
You must perform regular backups in your shop, so that in case of a crash, you can reboot your shop quickly and in the best conditions. The database contains all the information in your shop. To create database backups of your shop, you have several solutions. You can use tools such as phpMyAdmin, reserved for advanced users, or use the tool integrated into PrestaShop seen on the "DB Backup" tab displayed below.
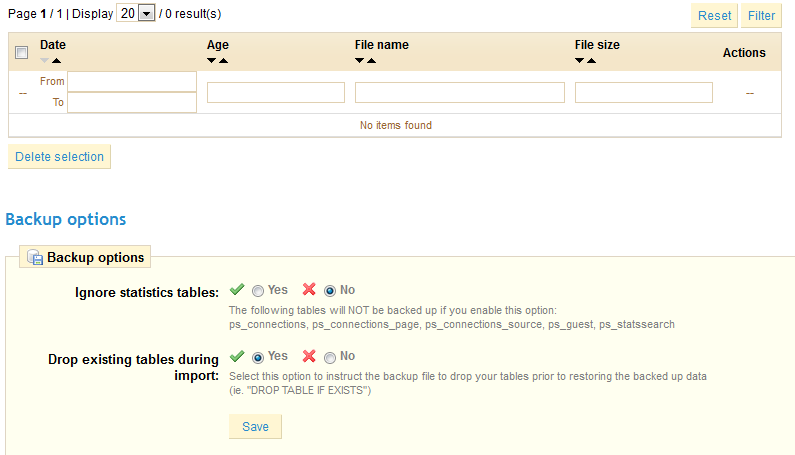
The table above lists all backups that have already been made, specifying the date of creation, age, file name and size.
To create a new backup of the database, on "Create a new backup". You then arrive on the following notification:

You are then prompted to click on the link "download the backup file" to save your database in the SQL format (and .sql file extension), archived in BZip2 format (.bz2). Put your backup in a safe place, for you might need it at any given time. Furthermore, you can find these backups directly on your server, in the "backup" folder, under the custom-named "admin" folder.
CMS - Creating a Text Page
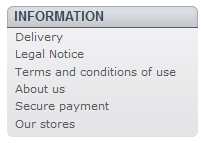
PrestaShop enables you create content pages just like you create product pages, using its CMS tool. The pages will appear to customers in the "Information" block on your homepage.
The CMS sub-tab presents you all the content pages that were previously created on your shop, for the currently selected category (by default, the home page).
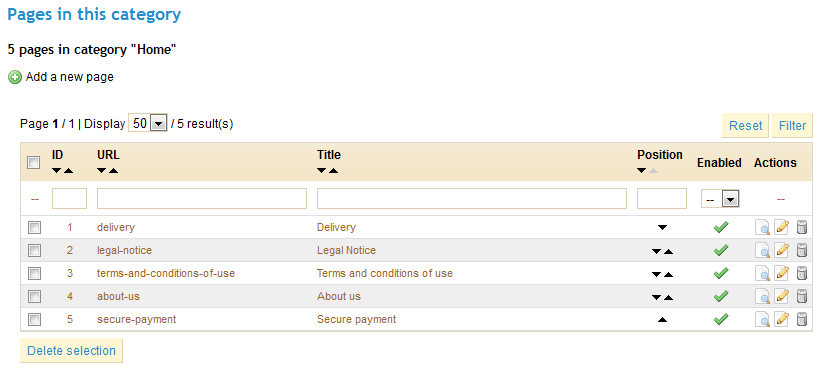
Do not forget to create one version of each page for each of your supported languages! Click on the flag for each field in order to change language.
Creating a New CMS Page
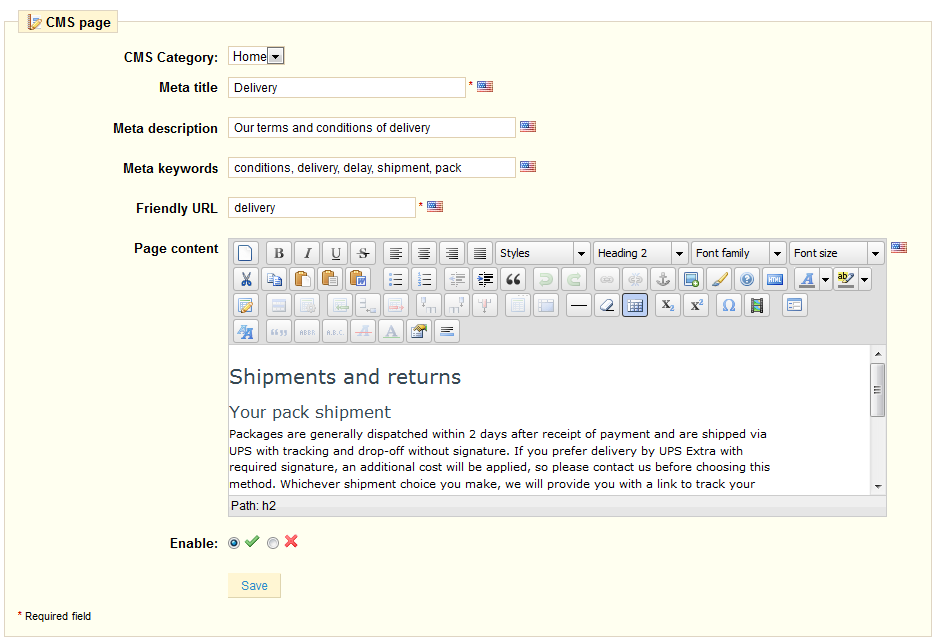
Clicking the "Add a New Page" link takes you to this page:

Here we find the usual fields:
- CMS Category. You must first have created new categories, otherwise you will be limited to the home-page.
- Meta title. The name of the link to access the page.
- Meta description. Used to describe the content of this page for search engines.
- Meta Keywords. Used by search engines to understand what types of information the page is composed of.
- Friendly URL. Appears in the browser; also, make it easier for search engines.
- Page content. Must be entered to submit your information.
- Enable. You can choose to have you page public only once you are done proofreading it, in which case you page is saved as draft.
Once all the fields are filled out, click on "Save." You can then view the result directly on your online
store.
Here is a sample page:
Creating a New CMS Category
Click the usual link to create a CMS category – actually, a sub-category of the root category, "Home". You can create as many categories as needed.
!_Images^261-tools-cmsCategorieAddNew.png|border=1
- Name. The category title.
- Displayed. Whether the category (and its page) is available to the public, or hidden.
- Parent CMS category. The category under which this category is placed. By default, "Home". You can have an unlimited number of levels of categories.
- Description. Describes the category content.
- Meta title. The name of the link to access its pages.
- *Meta description *. Used to describe the content of this page for search engines.
- Meta keywords. Used by search engines to understand what types of information the category is composed of.
- Friendly URL. Appears in the browser; also, make it easier for search engines. This field is automatically filled as you enter the category name.
Click "Save and back to parents CMS category" to keep on configuring your CMS content.
Generators
This sub-tab contains two tools that generate complex server files for, so that you don't have to create them by hand – and risk breaking your shop.
.htaccess file generation
A .htaccess file (short for "hypertext access") is a server configuration file, mostly found on the Apache line of servers, and few others. It is commonly used to control folder authorization, URL rewriting, blocking, directory listing and cache control. Contrary to global configuration files, such as Apache's httpd.conf file, it can act locally, as its rules apply to the directory it is in, and its sub-directories.
Warning: since a .htaccess file only works with servers that support it (Apache, iPlanet, Zeus), DO NOT use this tool if your shop runs on any other server (IIS, nginx, lighttpd...).
This tool is mostly useful when you choose to use friendly URLs: it will generate the correct rules. It also adds a few optimization rules.
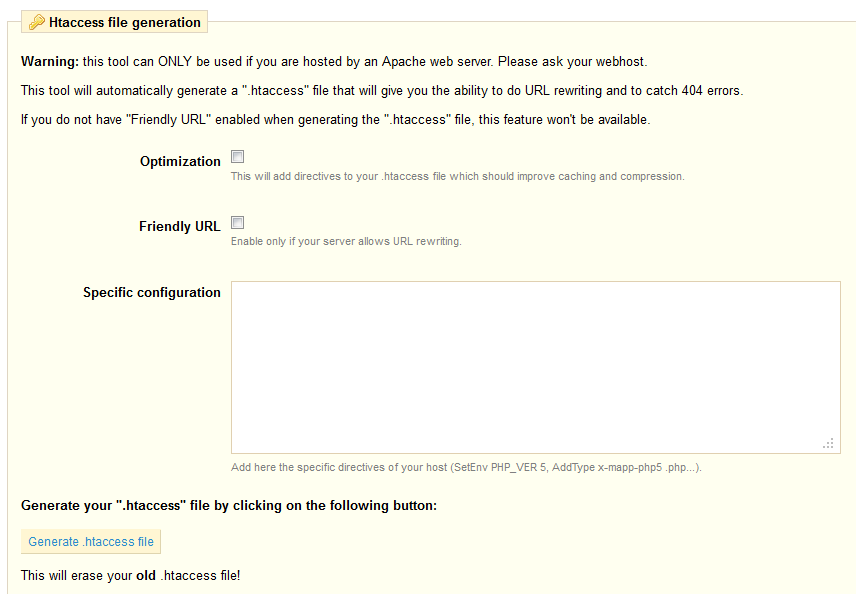
All fields are optional.
- Check the optimization box.
- Check the friendly URL box.
- Put your specific rules in the adequate text field.
- Click the "Generate .htaccess file" button
Warning: your current .htaccess will be delete and replaced by the one generated by PrestaShop! Be sure to copy/paste your specific configuration rules in the text-field!
Robots file generation
A robots.text file enables you to block specific automated bots and web spiders, which crawl the web in order to find more webpages to add to their company's servers. Some bots you want to have full access to your website, such as Google's or Yahoo's, and some others you'd rather not, such as spam bots, content stealers, e-mail collectors, etc. Note that the worst of bots do not respect this files directive, as it is purely advisory.
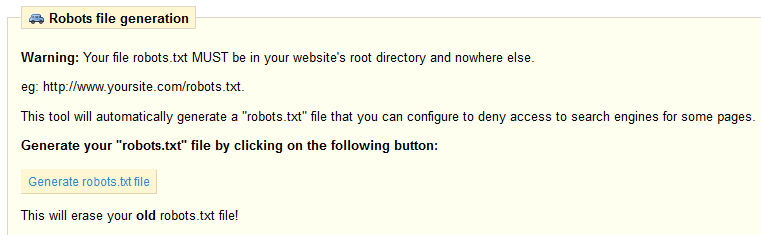
PrestaShop's robots.txt generation tools simply creates a file with exclusion directives for files and directories that are not meant to be public, and should not be indexed.
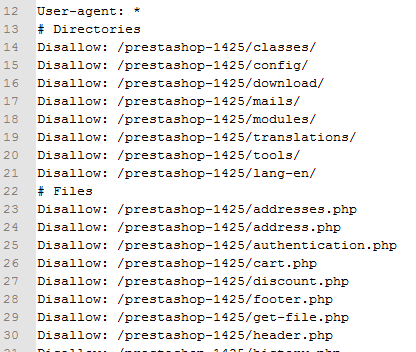
These rules apply to all bots (note the "User-agent: *" string).
If you want to add your own rules, do it after PrestaShop has generated this file, as it will delete any existing version of it.
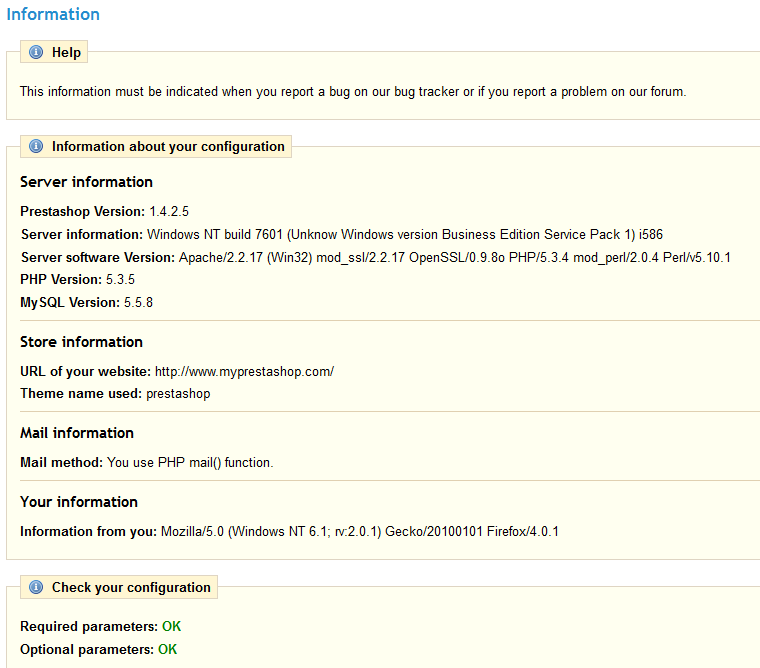
Configuration Information
This sub-tab serves as a handy reminded of your PrestaShop configuration: version, server info, PHP version, MySQL version. All these prove really useful when you need to report an issue to the PrestaShop developers, or simply your webmaster.
Stores
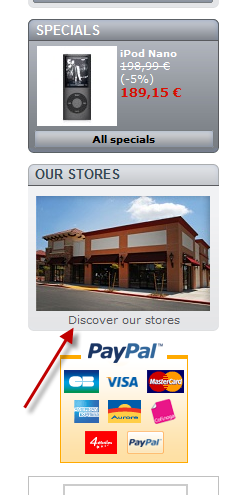
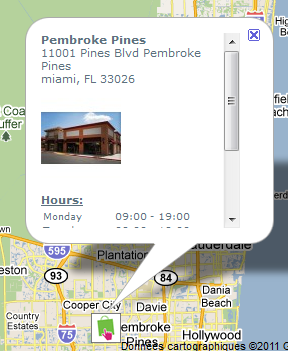
PrestaShop provides a complete store-locating tool for your customers.
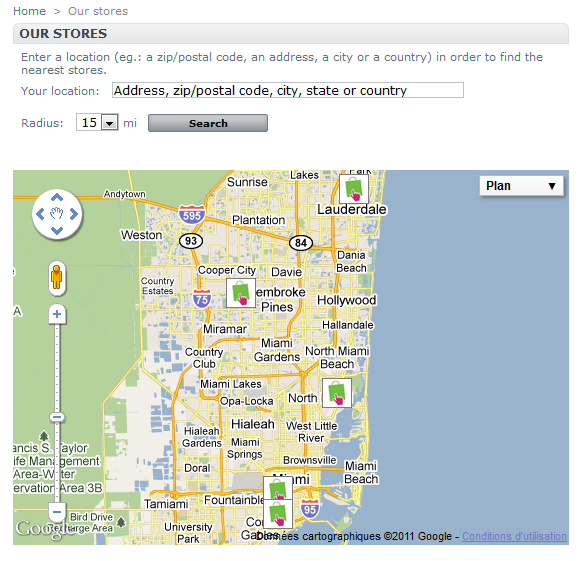
They can reach form by clicking on the box on the front-office:
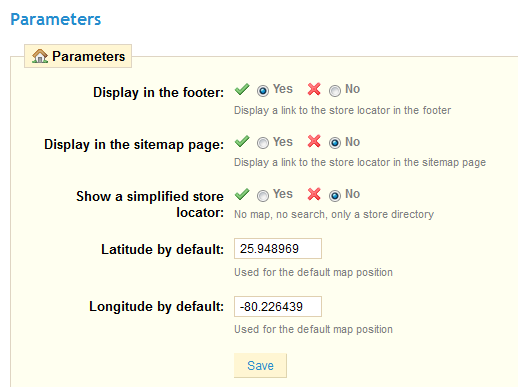
You can choose how these stores are displayed in the front-office.
All your stores are listed in a handy list.
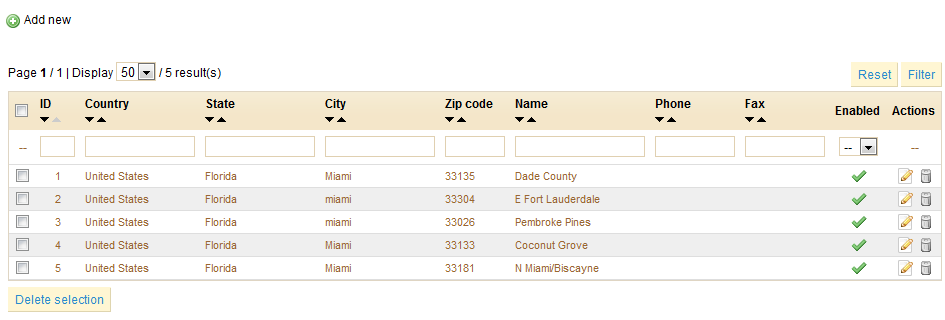
As usual, click "Add New" to reach the following form:
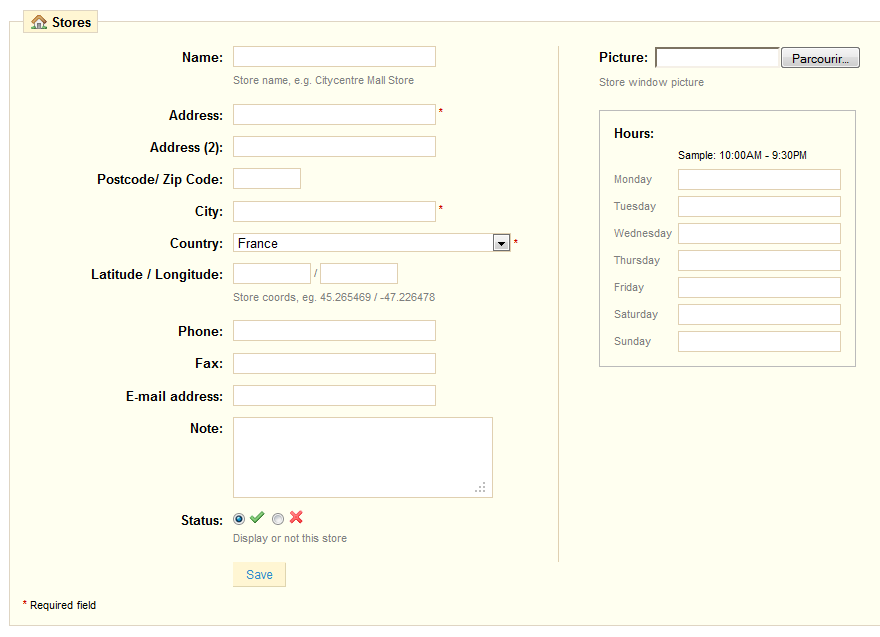
Fill-in as many of the fields as possible, as it will be displayed to your customers right within the map:
Webservice
A Web service is a method of communication between two electronic devices over a network. It relies on a known set of methods, formats and access rights, so as be able to use the webservice's content on any other authorized tool, and build upon the original tool.
You can enable PrestaShop webservice, so that third-party tools can access your data. This potentially makes it possible for interesting tools to help you or your customers better use your shop (such as mobile applications).
The configuration is pretty basic: if you don't want anyone to access your shop through third-party tools and apps, just keep it disabled.
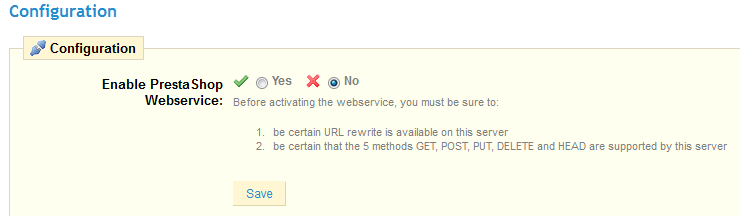
Warning: For security reasons, make sure your shop supports SSL connection!
Not any app can access your store through the PrestaShop webservice: you decide which can, and what they can do. Every app as a unique connection key, with specific access rights.

You can add more with the usual "Add New" link and form:
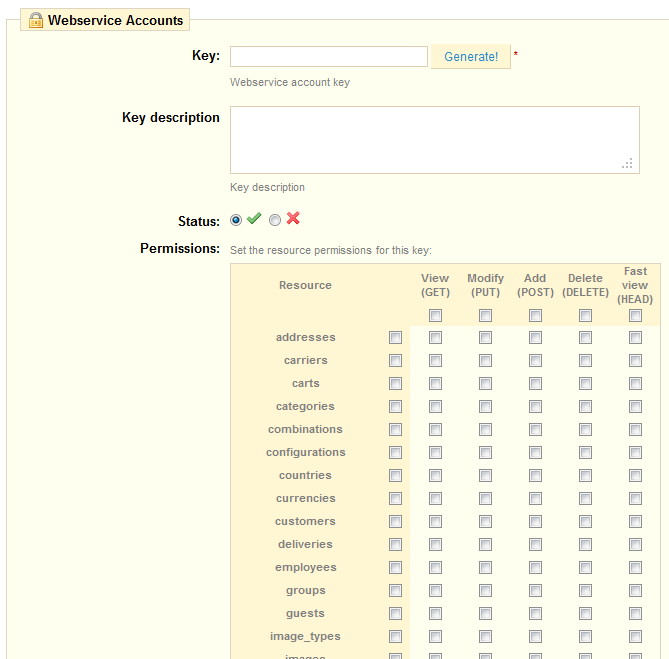
- Key. A unique key. You can either create your own, or choose to use a generated one.
- Key description. A reminder of who that key is for, and what it gives access to
- Status. You can disable a key anytime.
- Permissions. You can choose among a wide array of permissions, either by section and by type of access. Some apps you'll want to only be able to view a handful of items, some others (for instance, ones that you would use) to be able to edit and delete just about everything. Choose wisely.