
Table content
Managing Modules
PrestaShop 1.4 comes bundled with over 110 modules that can be installed/uninstalled and configured as desired, so as to customize and complete your shop. The "Modules" tabs gives you access to the list of modules. On this page you can install, uninstall, and configure each module.
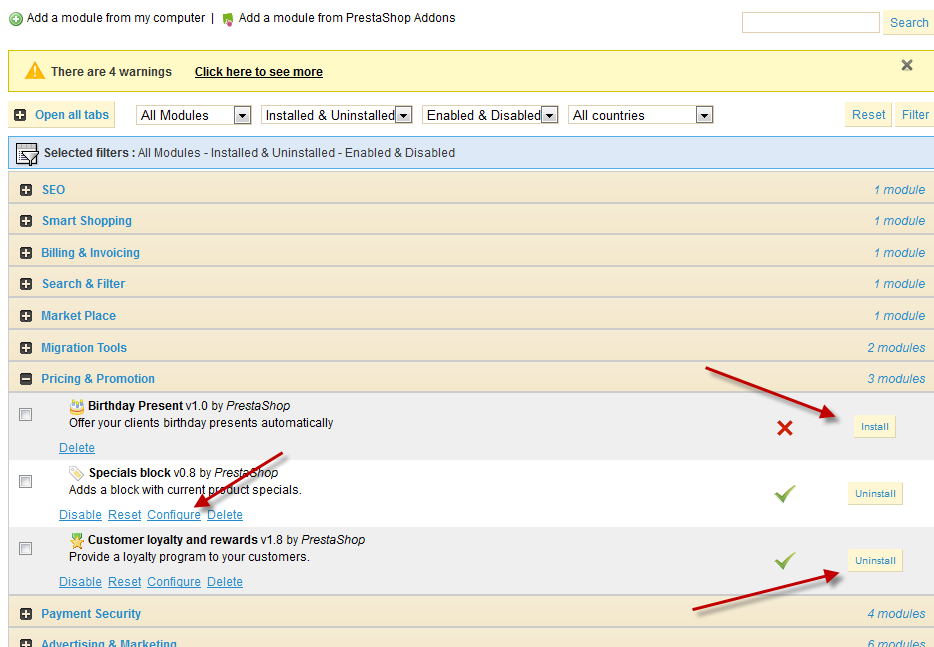
- Click on "Install": in one click, the module is installed.
- When a module needs to be configured, a click on "Configure" will lead you to a set-up wizard.
- Uninstalling can also be done with a single click. You will lose your settings for this module
- If you'd rather keep your settings for this module, you can disable it by clicking on the green tick. You will keep .
Here, we present the modules that already exist as part of PrestaShop, and how to configure them. Click the "+" sign for each category in order to expand them.
SEO
This section contains only one module.
Google Sitemap
In order to optimize your SEO, it is essential to have a sitemap, which is a XML file that lists all pages and products on your store. This will allow search engines to index all pages easily and efficiently. Your products will then appear perfectly in the search engines when a visitor conducts a search. You can create a sitemap using PrestaShop and be indexed by Google (and other search engines that support the file format) using tools such as “Webmaster Tools”. Once installed, click the "Configure" link to reach this page.
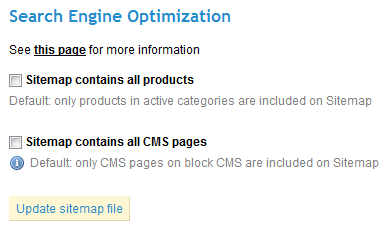
The first step is to decide whether or not to display the products that you have not activated in your shop. If you want to use all products, check "Sitemap contains all products". Inactive products will then be indexed by Google so that you can make them visible as soon as you put them back online.
Once you've finished configuring the module, click on "Update sitemap file”. You are given the Sitemap’s address (e.g., myprestashop.com/sitemap.xml). Copy this URL to save it to your Google Webmaster Tools account. The module will then show you the file size and the number of pages indexed. Remember to update it regularly so that search engines index your content perfectly.
Smart Shopping
This section contains only one module.
Twenga API
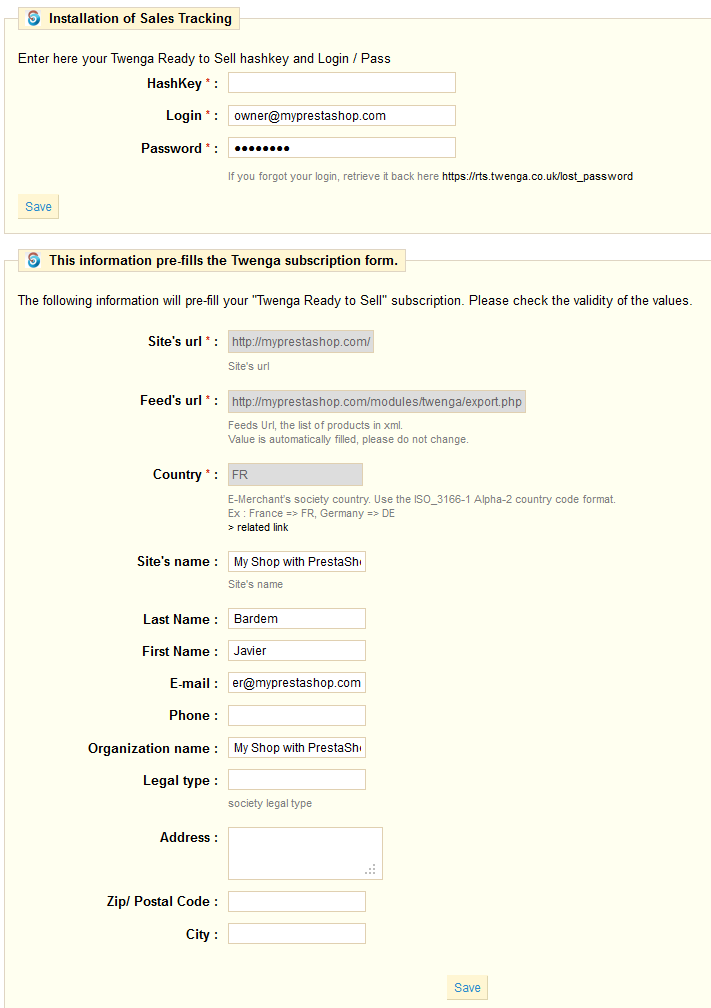
Twenga is an online open shopping platform, that aims to bring together "all online products and stores in one place". This module helps you put your product on the Twenga platform: it exports your list of products on their service, and helps you track your sales through them.
You must have a Twenga account to make this module work.
Once installed, click the "Configure" button and follow the instructions.
Billing & Invoicing
This section contains only one module.
European VAT Number
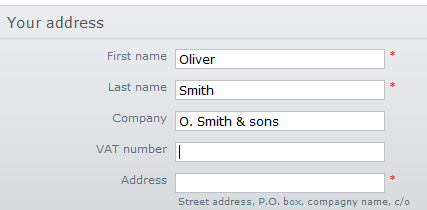
This module enables you customer to fill in their VAT number in their details. The VAT can be fetched through a web service, based on your country.
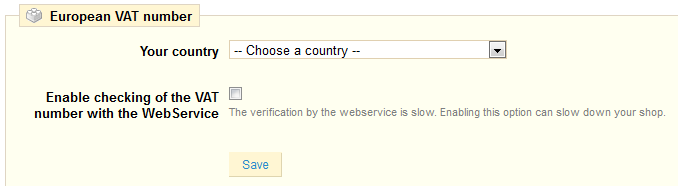
The VAT field appears only when the user enters the company name.
Search & Filter
This section contains only one module.
Quick Search block
This module installs a search field in your store. It is installed and enabled by default, and you should leave it enabled to facilitate visitor's navigation. The search block can display results as soon as the first letters are typed.
There is no configuration page.
Market Place
This section contains only one module.
eBay
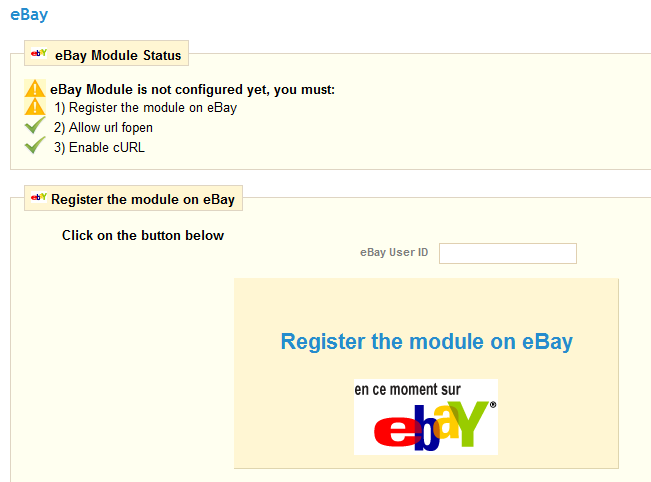
This module enables you to easily bring your your product catalog on eBay. This is an excellent way of widening your shop's audience.
Install the module, click on the "Configure" link, and follow the module's instructions. For instance, you will have to register your module/shop on eBay first in order for it to work.
Migration Tools
This section contains two modules.
Shop Importer
A generic module to import your products stock from another e-commerce system to your PrestaShop shop. By default it doesn't provide anything, it needs platform-specific modules in order to work. Once at least one such module is activated, this module's configuration page gives access to a drop-down menu. Choose the platform of the source system, and enter the required authentication details. Click next and follow the module's instructions.
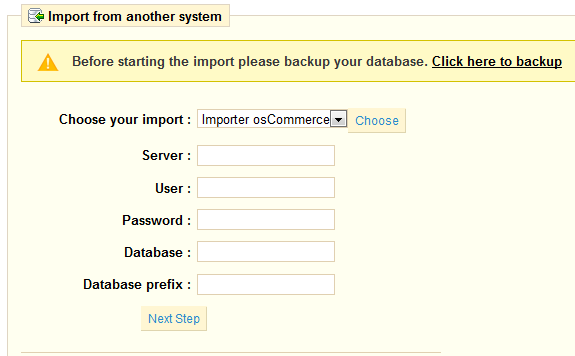
CAUTION: Do make a backup of borth platforms before doing anything! It is vital that you be able to restore your data in case of import failure.
Importer osCommerce
This is an import module for the Shop Importer. Install it in order to use it with the Shop importer module.
Pricing & Promotion
This section contains three modules.
Birthday Present
This module can create and send discount vouchers to your clients on their birthdays. Install it and then click “Configure” to include this feature. Several options will appear:
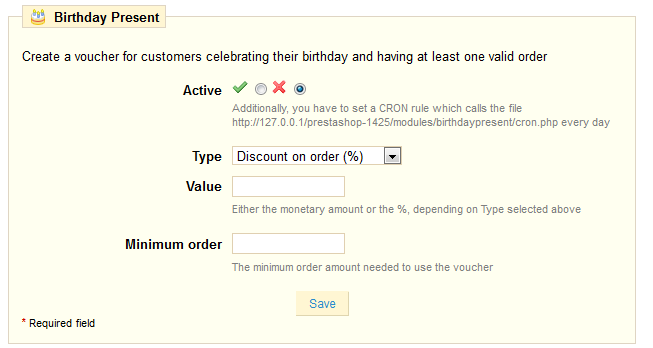
- Activate the module.
- Choose what type of discount you want to send, i.e. discount on order %, etc.
- Enter the amount in the "Value" field and specify the minimum amount that the customer must buy to use this voucher.
In order for this module to work, you must configure a cron task on your server that will be run every day. The address of the file is:
http://www.myprestashop.com/modules/birthdaypresent/cron.php
Note: A CRON task automatically and regularly executes a task. You can configure it from your admin server. If you are not comfortable with this operation, please contact your administrator.
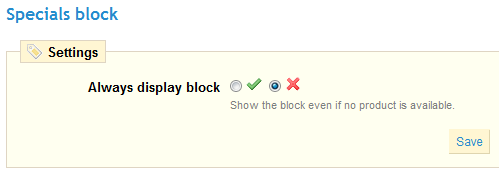
Specials block
This module adds a block to your shop's home page, where the customer can discover the current specials (randomly chosen).
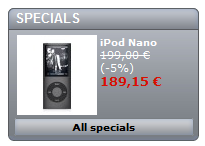
Install it, and see how simple the configuration is:
Customer loyalty and rewards
PrestaShop’s loyalty tool offers your clients a certain amount of loyalty points depending on the amount they spend at your store Install it and click "Configure" to access this form:
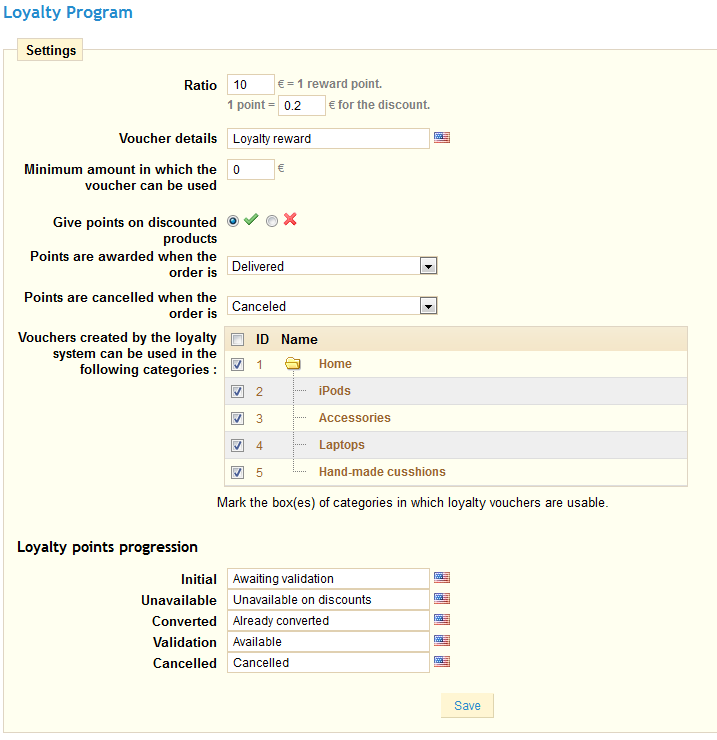
Fill in the various fields and selectors according to your needs, and save.
Payment Security
This section contains 4 modules.
FIA-NET - Système d'Analyse des Commandes
FIA-NET is a French third-party e-commerce trust partner: it protects both customers and online shops against against credit card frauds and other malevolent activities. You have to already have a FIA-NET account in order to use the module. Ask for one here. Once you have an account, configure the module with your details.
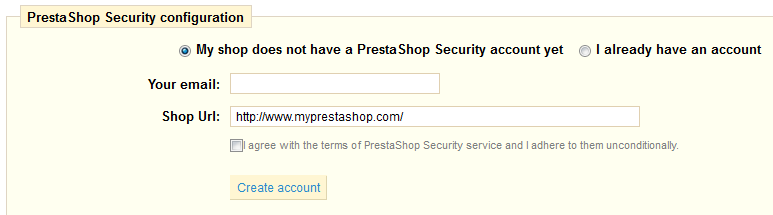
PrestaShop Security
PrestaShop Security is a service provided by PrestaShop in order to protect the security of your shop against fraudulent payments.
If you do not have an account, you can create one directly from PrestaShop: fill in the first field with your e-mail, and check that the second one does contain the correct URL for your shop, then click "Create Account".
If you do already have an account, change the top selector accordingly in order to make the following form appear:
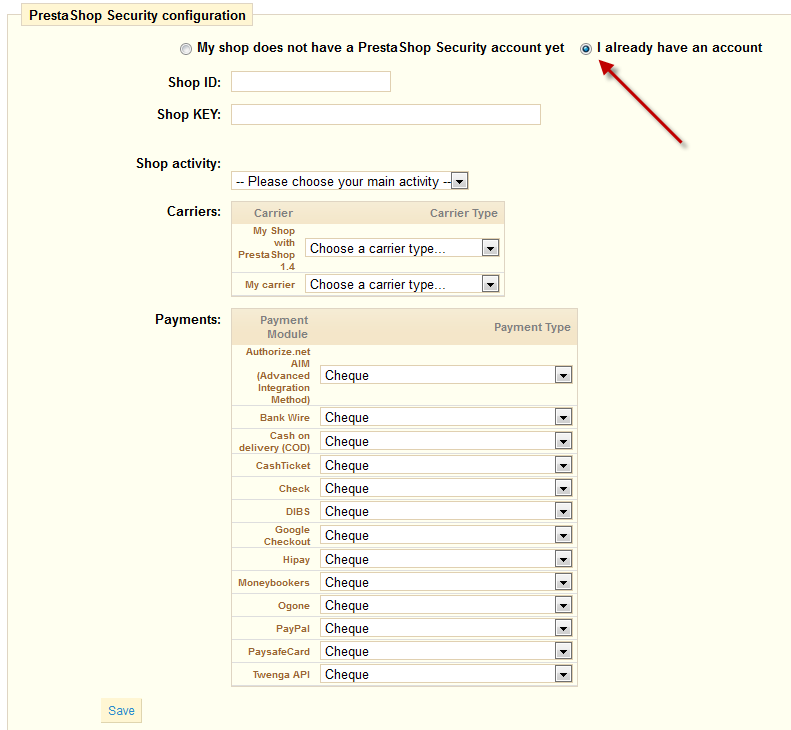
Fill it in with your credentials and choices from your shop, and save.
Secuvad module
Secuvad is a solution fighting against online fraud.
You must have an account in order to use this module. You can contact Secuvad using their online form: http://www.secuvad.com/contact.php
Once you have an account, fill in the form with your details, and click "Register".
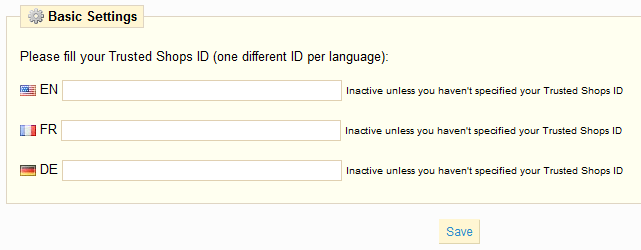
Trusted Shops Customer Rating
Trusted Shops is "the leading seal of approval for online shops in Europe which includes buyer protection for consumers and a rating system".
You must have an account in order to use this module. You can create one through this [partner link|http://www.trustedshops.com/merchants/membership.html?partnerPackage=presta&shopsw=PrestaShop&website=http%25253A%25252F%25252F127.0.0.1%25252Fprestashop-1425%25252F&firstName=&lastName=&email=&language=EN&ratingProduct=RATING_PRO&et_cid=53&et_lid=3361.
Once you have an account, fill in your details. Do not forget the second module's tab
Advertising & Marketing
This section contains 6 modules.
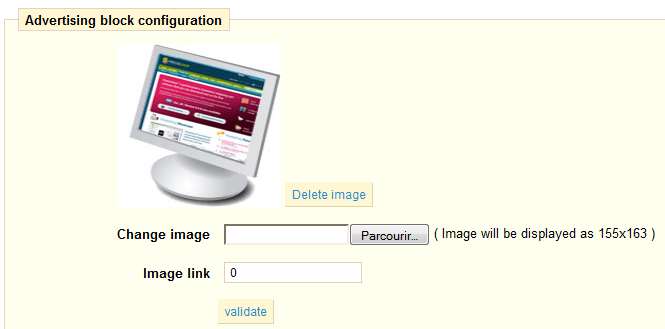
Block Advertising
It will display on the front office of your store an image of your choice. Clicking on "Configure" you can load the image of your choice, or indicate the image URL. Validate and the image will appear as follows.
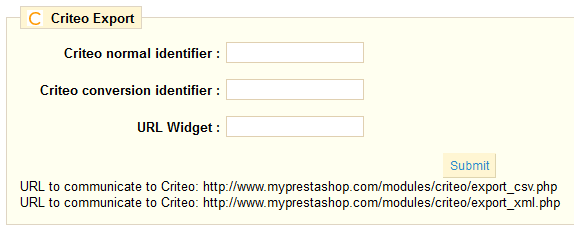
Criteo
Criteo is "the world leader pay per click solution in retargeting. Criteo's personalized banners have proven to drive 4 times the click-through-rate (CTR) compared to other retargeted banners".
You must have a Criteo account in order to use this product. You can contact them using the form on their homepage.
Once you have an account, you can fill the module's fields with your details.
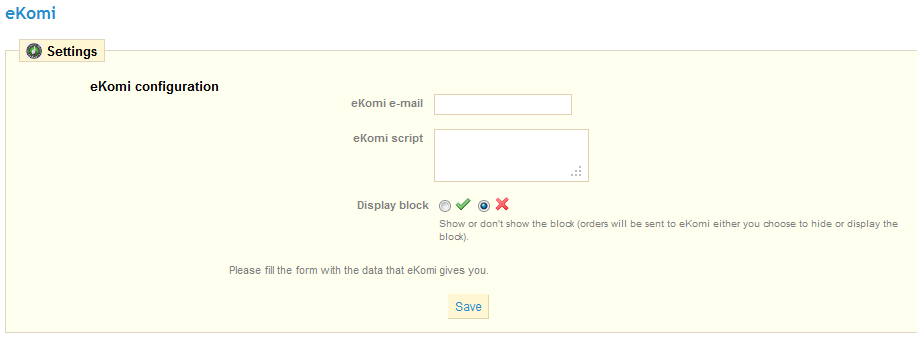
eKomi
eKomi "helps companies through their web-based social SaaS technology with authentic and valuable reviews from customers and helps increasing the customer satisfaction and sales". This module ads an eKomi block to your front-office.
You must have an eKomi account in order to use this module. You can create one on their website.
Once you have an account, you can fill the module's fields with your details.
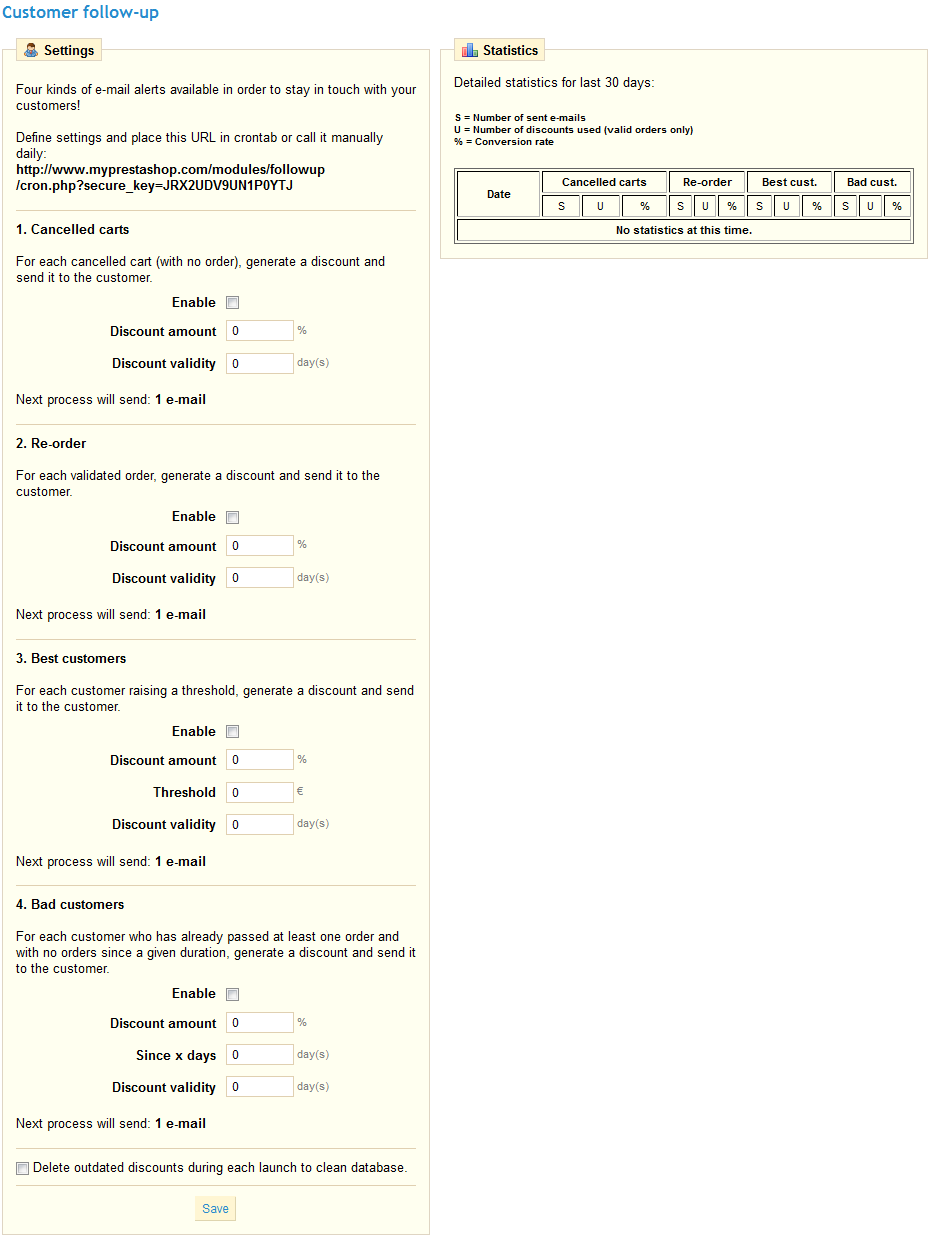
Customer follow-up
This module enables you to create e-mail alerts for your customers. It gives you a way to automatically send discount vouchers to some of your customers.
For example, you may want to send vouchers to those who have abandoned their shopping carts, or to those who you want to thank for their order, to the best clients to thank them for their purchases and for being faithful.
Enable it, then click "Configure". You may choose among four kinds of e-mails.
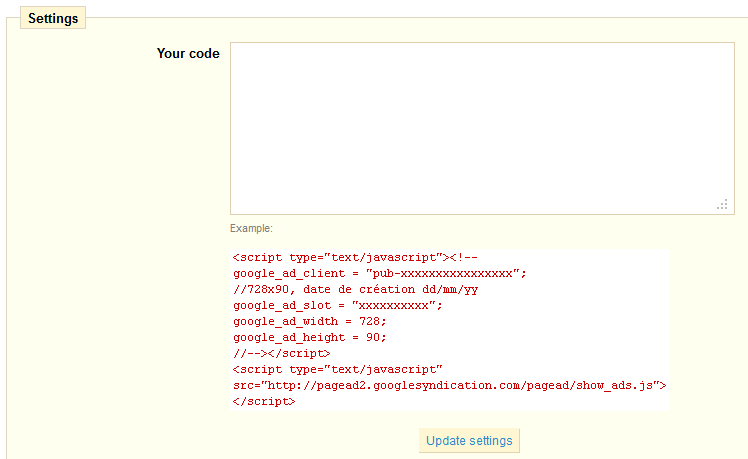
Google AdSense
Google AdSense "offers a contextual advertising solution to web publishers. Delivers text-based Google AdWords ads that are relevant to site content pages."
This module enables you to easily integrate Google AdSense script into your shop. You need to have a Google AdSense account in order to use this module.
Once you have one, all you have to do is to add your AdSense script code into the textfield.
Customer referral program
You shop can use your current customers to win new customers with a customer referral system. Install this module then click "Configure”.
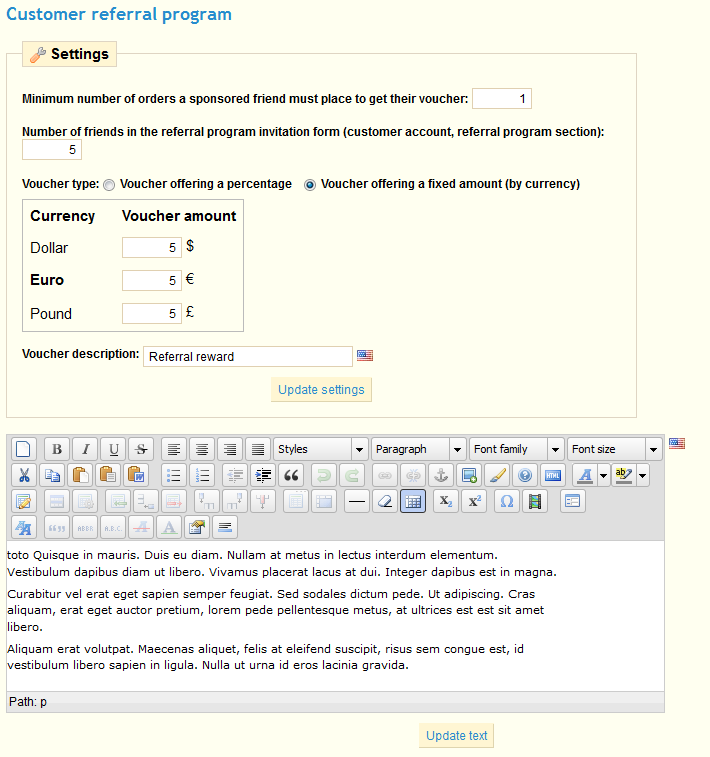
Here is a description of each field:
- Minimum number of orders a sponsored friend must place to get their voucher. Fill in the field with the value of your choice. Until this number is reached, your clients can’t take advantage of the discount.
- Number of friends in the referral program invitation form. Fill in the value of your choice.
- Voucher type. You can give two types of reduction, either in percentage or amount. Select the one you prefer, then specify the value of the discount you want to apply in the various currencies supported by your shop.
- Voucher Description. Enter the name for the coupon.
Once the setup is complete, click "Update text” .
To fully explain how the referral program works, you can write a description in the "Referral Program Rules." Once the conditions are completed, click on "Update text".
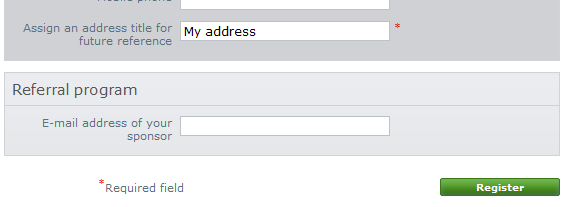
When your customers register and want to view the benefits they will reap, they must go to the “Referral" section of their account. They will see the screenshot below appear.
Your customer can then enter the name and email address of the person he wishes to refer to your site. After he clicks "Confirm," the persons he entered will receive an email.
In "Pending Friends", the referral tool displays to the customer which of his referrals did not make a purchase after the email was sent. They may choose to resend an email by selecting the name and clicking "Refer my friends". Friends will then receive an email inviting them to register and submit an order.
The last tab in “my referrals”, named "Friends I have sponsored", enables customers to see who among those to whom they sent a referral message, did accept the invitation and ordered an item on the store. When registering, the referees must indicate the email address of the person who referred them, so that they in turn may benefit from the discount:
Administration
This section contains 10 modules.
Artichow
This module enables a graphic library, that can be used in order to create stats graphs.
Google Chart
This module enables a graphic library, that can be used in order to create stats graphs.
Visifire
This module enables a graphic library, that can be used in order to create stats graphs.
XML/SWF Charts
This module enables a graphic library, that can be used in order to create stats graphs.
Simple HTML table display
Mail alerts
PrestaShop enables you to alert your clients by e-mail in certain cases, e.g., when a new order is placed in your shop, or if a product is almost out of stock. Guests can enter an email address at which they will be contacted when the product becomes available again. Click "Install" then "configure" to configure the module.
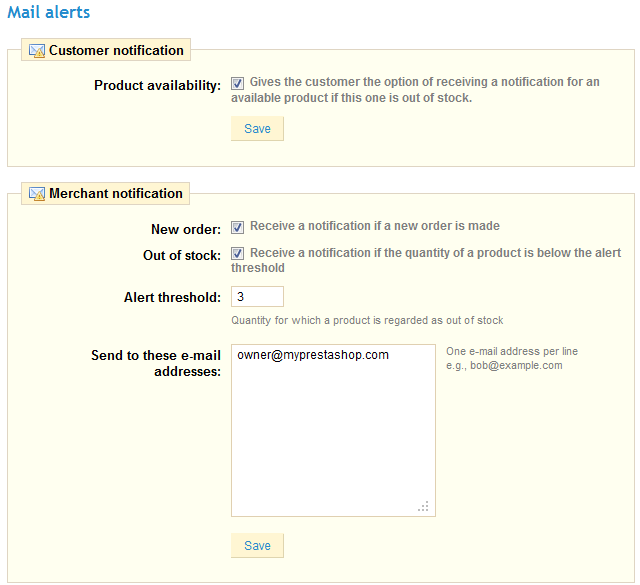
When you check the "Product Availability" box, a field appears on the product page of your store when the product is out of stock. It asks your customers to leave their contact information so that they may be contacted when you store will have this product back in stock.
In the Mail Alert section, you can specify whether you wish to be alerted of each new order. To do so, check the box labeled "New Order".
If you want to be alerted when a product reaches a level of stock that you set, select "Out of stock" and set the value at which you wish to be alerted.
Mail alerts can be sent to multiple addresses at the same time. To do so, list each e-mail address that will receive the notification (one e-mail address per line. To move to the line, press the Enter key on your keyboard). Once the setup is complete, click "Save."
Newsletter
Your customers can give you their e-mail address either by entering it in the Newsletter block located on the homepage or by checking the "Yes" box to subscribe to the newsletter when they register. You need these e-mail addresses in order to do some marketing. Install it and click "Configure" in order to see this page:
Upon registration, your customers have two choices related to the newsletter: The first asks users to subscribe to the newsletter, the second to receive offers from partners (Opt-In).
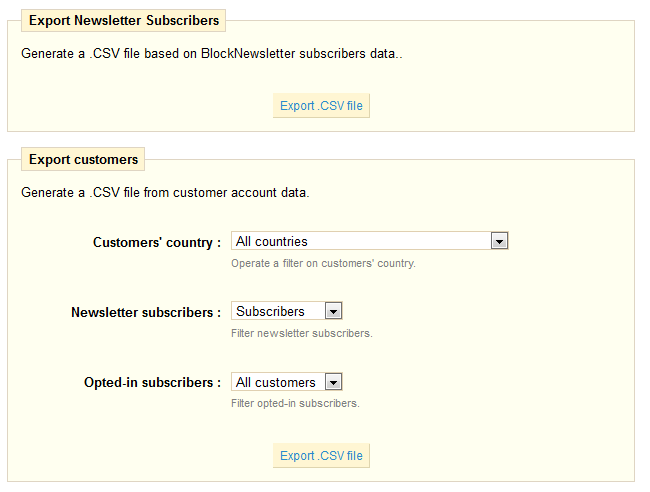
The first section allows you to collect all the email addresses recorded by the newsletter block on your homepage, by clicking the button “Export .CSV file”. A notification will appear, asking you to click on a link to download the file containing the addresses.
Four pieces of information will be present in this file. The customer id, e-mail address, the day of registration, and the IP address. If you use this data with software such as Microsoft Excel, you can sort the information as you wish.
The second item, named "Export clients”, enables you to filter your customers' e-mail addresses. You can then filter the clients by country of origin by selecting "Customer Country" from the drop-down menu, and then selecting the country you want. Filtering by country is particularly useful for sending newsletters in the right language and for adapting your offers.
You can then take more information into account, when exporting the e-mail addresses. Select the field "Newsletter’s subscribers", and select from the drop-down menu one of the following three items:
- The first "All customers" allows you to select all the e-mail addresses of your customers who open an account on your store. That is to say, those who do want to receive information from your part, as well as those who don't. Be careful what you did with it, then.
- The second, "Subscribers," allows you to select only those customers who do want to receive a newsletter from you.
- The third "Non-subscribers" allows you to select only those customers who do not want receive a newsletter from you.
Next is the “Opted-in Subscribers” field, where you can filter the contacts based on their desire to register for messages from advertising partners. Similarly, three choices are available:
- The first "All customers" allows you to select all the e-mail addresses of your customers who open an account on your store. That is to say, those who want and do not wish to receive information from your part.
- The second, "Subscribers," allows you to select only those customers who do want to receive a newsletter from your partners.
- The third "Non-subscribers" allows you to select only those customers who do not want receive a newsletter from your partners.
Once you have filtered the e-mail addresses to export, click "Export .CSV File" to retrieve all addresses. As before, a notification on a green background appears asking you to click and download the file. This document contains six types of information: The customer ID, Last Name, First Name, email address, IP address, and date of registration. You can then use this information to send your marketing campaigns.
Import/export a theme
This module enables you to export a theme and its modules from your shop, or to import one in order to install it.
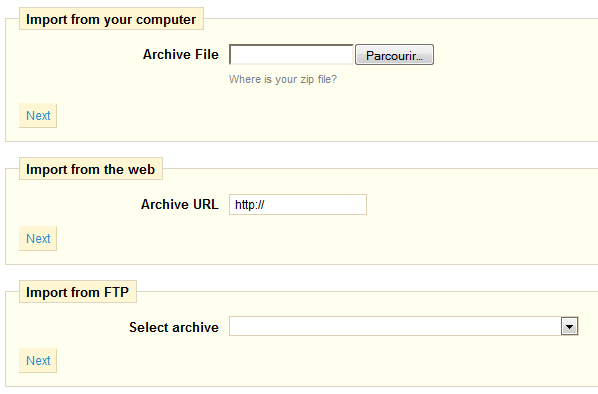
The module presents you with 3 ways to install a new module: from your computer, from a public website, or from your own FTP server.
SMS Tm4b
TM4B (Text-Messaging for Business) is "an SMS Gateway that provides text-messaging solutions for the business community".
PrestaShop enables you to receive texts with important information concerning your store, such as a new order, a change of stock, or a daily activity report. Install it then click "Configure", and the page below appears.
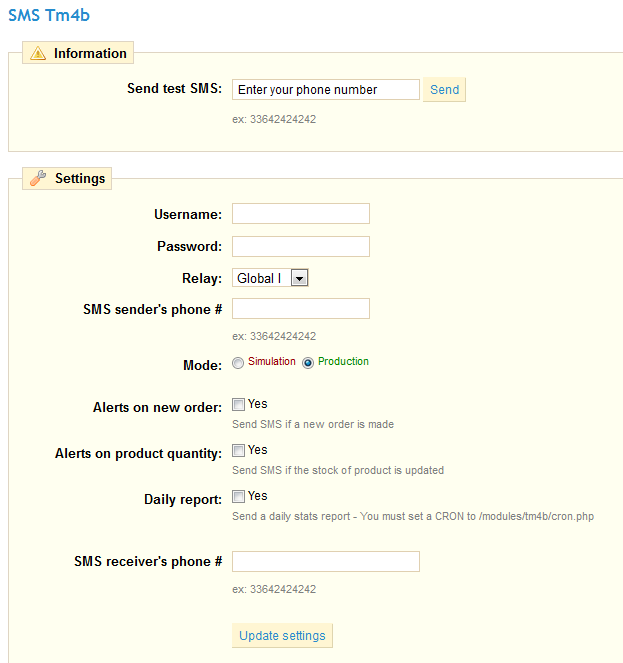
All information that you must enter into the various fields will be provided when you register on the Tm4b site.
Choose what information you want to receive by text/SMS. In order to receive the report, set a CRON job in your shop by adding your URL, such as www.myprestashop.com/modules/tm4b/cron.php, in your server's crontab.
Watermark
This module enables you to add a watermark to images from your store. This limits their diffusion on the Internet.
Note: if you intend to export your products on Google Shopping, know that on this service, the usage of promotional text / logos and watermarks in the images is not allowed. You may only upload images which are free of any further watermarks / logos
Install it, then click on "Configure".
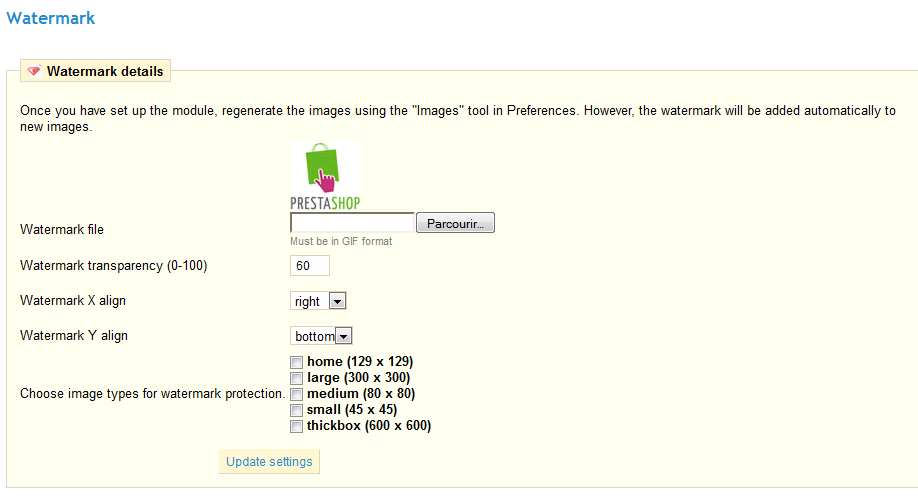
First select the image (the ‘watermark’) that you want to apply to images (the image must be in GIF format). Then select the watermark transparency value (100 amounts to a non-transparent image). Select where your watermark should appear on each of your images. The X alignment corresponds to the horizontal axis. The drop-down menu proposes three options:
- Left
- Medium
- Right
Then select the Y alignment (vertical alignment) and choose from the these options :
- Top
- Middle
- Bottom
Combine the two axis to choose where to place your watermark. Then select what type of image it is being applied to. Once you have configured the module to your convenience, click on "Save." At this stage the configuration is completed but the watermarks are not yet implemented. Go to the "Preferences" tab, then under the "Images". Click "regenerate thumbnails".
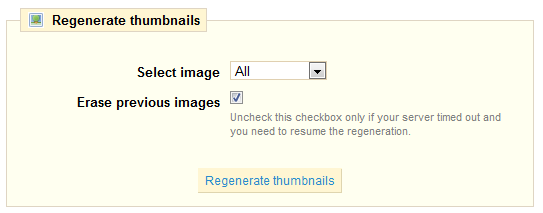
After this process, your watermark image will appear on the images that you selected.
Shipping & Logistics
This section contains 10 modules.
Shipping Estimation
This module enables the customer to compare carrier possibilities before going under the checkout process. Just install it to display this on your frontoffice.
Note that all your carriers must have their fees properly set. This is done at the bottom "Shipping" page, in the "Fees by carrier, geographical zone, and ranges".
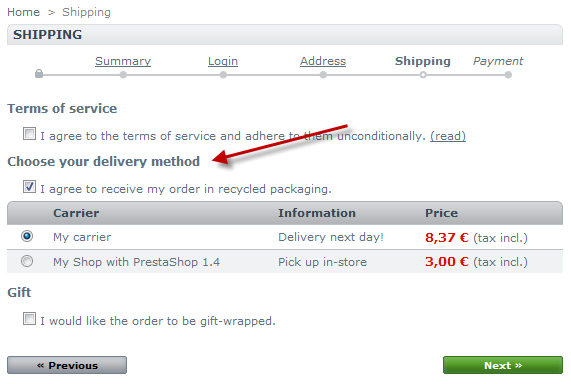
Date of delivery
This module displays an approximate date of delivery during the checkout process.
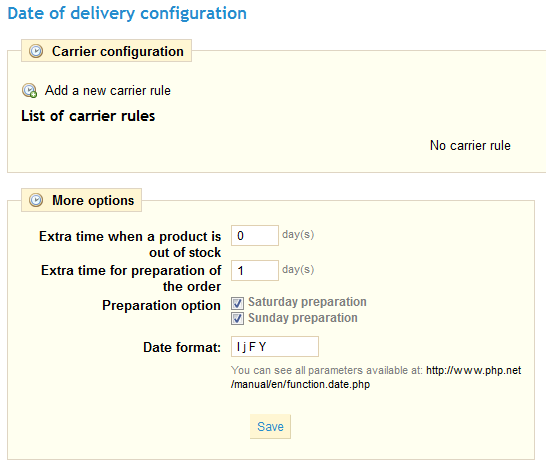
You need to set delivery rules for each carrier. Click "Add Now" to find that form.
You should create as many delivery rules as necessary.
Set the remaining module options, and finally click "Save".
Dejala.com : Courier delivery
Dejala enables your customer to choose a 3 hours delivery time slot BEFORE the payment step. You must have a Dejala account in order to use it. you can create one right from the module's configuration page. Once you have your account, sign in using the second form in the module's configuration page, and follow the instructions.
Dejala only works locally. Currently they have staff in France's Ile-de-France region, and in Madrid, Spain.