
Table of content
Creating a PrestaShop module
What is a PrestaShop module
PrestaShop's extensibility revolves around modules, which are small programs that make use of PrestaShop's functionality and changes them or add to them in order to make PrestaShop easier to use or more customized.
Technical principles behind a module
A PrestaShop module consists of:
- A root folder, named after the module, which will hold all of the module's files, and will reside in PrestaShop's
/modulesfolder. - A main PHP file, named after the module, located in that root folder. This PHP file should have the same name as its root folder.
- Two icon files representing this module in the back-office.
- One file for PrestaShop 1.4:
logo.gif, 16*16 pixels. - One file for PrestaShop 1.5:
logo.png, 32*32 pixels.
- One file for PrestaShop 1.4:
- Optional: template files
.tpl, containing the module's theme. - Optional: language files, if the module or its theme have text to display (and therefore, text that should be translated).
- Optional: in a
/themes/modulesfolder, a folder with the same name as the module, containing.tpland language files if necessary. This last folder is essential during modifications of existing module, so that you can adapt it without having to touch its original files. Notably, it enables you to handle the module's display in various ways, according to the current theme.
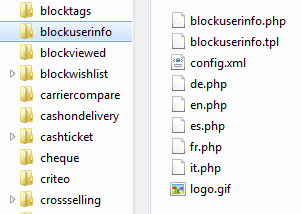
Let's see an example with PrestaShop's blockuserinfo module:
Any PrestaShop module, once installed on an online shop, can interact with one or more "hooks". Hooks enable you to "hook" your code to the current View at the time of the code parsing (i.e., when displaying the cart or the product sheet, when displaying the current stock...). Specifically, a hook is a shortcut to the various methods available from the Module object, as assigned to that hook.
TODO: multiboutique: module par boutique, voire hook par boutique
Modules' operating principles
Modules are the ideal way to let your talent and imagination as a developer express themselves, as the creative possibilities are many.
They can display a variety of content (blocks, text, etc.), perform many tasks (batch update, import, export, etc.), interface with other tools...
Modules can be made as configurable as necessary; the more configurable it is, the easier it will be to use, and thus will be able to address the need of a wider range of users.
One of the main interest of a module is to add functionalities to PrestaShop without having to edit its core files, thus making it easier to perform an update without having the transpose all core changes. Indeed, you should always strive to stay away from core files when building a module, even though this can prove hard to do in some situations...
Module file tree
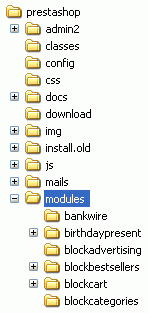
PrestaShop's modules are most often found in the /modules folder, which is at the root of the PrestaShop main folder. This is true for both default modules (provided with PrestaShop) and 3rd-party modules that are subsequently installed.
Modules can also be part of a theme if they are really specific to it. In that case, they would be in the theme's own /modules folder, and therefore under the following path: /themes/mytheme/modules
Each module has its own sub-folder inside the /modules folder: /bankwire, /birthdaypresent, etc.
Basic structure of a module
All modules use the same basic structure, which makes it easier to learn by observing existing modules' source code.
Creating a first module
Let's create a simple first module; this will enable us to better describe its structure. We will call it "My module".
First, create the module folder. It should have the same name as the module, with no space, only alphanumerical characters, the hyphen and the underscore, all in lowercase: /mymodule.
This folder must contain a PHP file of the same name, which will handle most of the processing: mymodule.php.
That is enough for a very basic module, but obviously more files and folders can complement it.
The front-office part of the module is defined in a .tpl file placed in a specific folder: /views/templates/front/. TPL files can have just about any name. It there is only one such file, it is good practice to give it the same name as the folder and main file: mymodule.tpl.
In the case of this tutorial, the module will be hooked to the left column. Therefore, the TPL files should be placed in /views/templates/hook/ in order to work.
In PrestaShop 1.4, the module's template file were to be placed at the root of the module's folder.
For compatibility reasons, template files can still reside in the root folder in PrestaShop 1.5, although it is not recommended anymore. Therefore, if you intend your module to also work in PrestaShop 1.4, you should keep your files there.
The main mymodule.php file must start with the following test:
if (!defined('_PS_VERSION_'))
  exit;
This checks for the existence of a PHP constant, and if it does not exist, it quits. The sole purpose of this is to prevent visitors to load this file directly.
The file must also contain the module's class. PrestaShop uses Object-Oriented programming, and so do its modules.
That class must bear the same name as the module and its folder, in CamelCase: MyModule.
Furthermore, that class must extend the Module class, and thus inherits all methods and attributes. It can just as well extend any class derived from Module: PaymentModule, ModuleGridEngine, ModuleGraph...
<?php
if (!defined('_PS_VERSION_'))
  exit;

class MyModule extends Module
{
  public function __construct()
  {
    $this->name = 'mymodule';
    $this->tab = 'Test';
    $this->version = 1.0;
    $this->author = 'Firstname Lastname';
    $this->need_instance = 0;

    parent::__construct();

    $this->displayName = $this->l('My module');
    $this->description = $this->l('Description of my module.');
  }

  public function install()
  {
    return parent::install();
  }
}
?>
Let's examine each line from our MyModule object...
public function __construct()
This section defines the class' constructor.
$this->name = 'mymodule';
$this->tab = 'Test';
$this->version = 1.0;
$this->author = 'PrestaShop';
This section assign a handful of attributes to the class instance (this):
- 'name' attribute. Serves as an internal identifier, so make it unique, without special characters or spaces, and keep it lower-case.
- 'tab' attribute. The title for the table that shall contain this module in PrestaShop's back-office modules list. You may use an existing name, such as
Products,BlocksorStats, or a custom, as we did here. In this last case, a new table will be created with your title. - 'version' attribute. The version number for the module, displayed in the modules list.
- 'author' attribute. This is displayed in the PrestaShop modules list.
$this->need_instance = 0;
The need_instance flag indicates whether to load the module's class when displaying the "Modules" page in the back-office. If set at 0, the module will not be loaded, and therefore will spend less resources to generate the page module. If your modules needs to display a warning message in the "Modules" page, then you must set this attribute to 1.
parent::__construct();
Calling the parent's constructor. This must be done after the creation of $this->name and before any use of the $this->l() method.
$this->displayName = $this->l('My module');
This assigns a public name for the module, which will be displayed in the back-office's modules list.
The l() method is part of PrestaShop translation's tools, and is further explained below.
$this->description = $this->l('Description of my module.');
This assigns a public description for the module, which will be displayed in the back-office's modules list.
public function install()
{
  return (parent::install());
}

// this also works, and is more future-proof
public function install()
{
  if (parent::install() == false)
    return false;
  return true;
}
In this first and extremely simplistic incarnation, this method does the minimum, since all it does is return the value returned by the Module class' install() method, which returns either true if the module is install, or false otherwise. Moreover, if we had not created that method, the superclass' method would have been called instead anyway, making the end result identical.
Nevertheless, we must mention this method, because it will be very useful once we have to perform checks and actions during the module's installation process: creating SQL tables, copying files, creation configuration variables, etc.
If your module does create SQL data, whether in its own MySQL tables or in the XXXX table, then it should also feature an uninstall() method, so as to have a custom uninstallation process. This method could look like so:
public function uninstall()
{
  if (!parent::uninstall())
    Db::getInstance()->Execute('DELETE FROM `'._DB_PREFIX_.'mymodule`');
  parent::uninstall();
}
To put the finishing touch to this basic module, you should add an icon, which will be displayed next to the module's name in the back-office modules list. In case your module is made for a prominent service, having that service's logo visible brings trust.
The icon file must respect these requirements:
- placed on the module's main folder.
- In order to work with PrestaShop 1.4:
- 16*16 image.
- GIF format.
- Named
logo.gif. - Tips:
- FamFamFam's free Silk icon set is probably the best there is http://www.famfamfam.com/lab/icons/silk/.
- If the logo is written for a particular online service, you could use that site's favicon file (if they agree).
- In order to work with PrestaShop 1.5:
- 32*32 image.
- PNG format.
- Named
logo.png. - Tips:
- There are many free 32*32 icon libraries available. Here are a few: http://www.fatcow.com/free-icons (very close to the FamFamFam one) or http://www.jonasraskdesign.com/downloads/downloads.html (Danish Royalty Free),
- Make sure you do not use a logo already used by one of the native modules.
Now that all basics are in place, put the module's folder in the /modules folder of your PrestaShop test install, open PrestaShop, and in the "Modules" tab, under "Other Modules", you should find your module. Install it in order to be able to manage it for the rest of this guide.
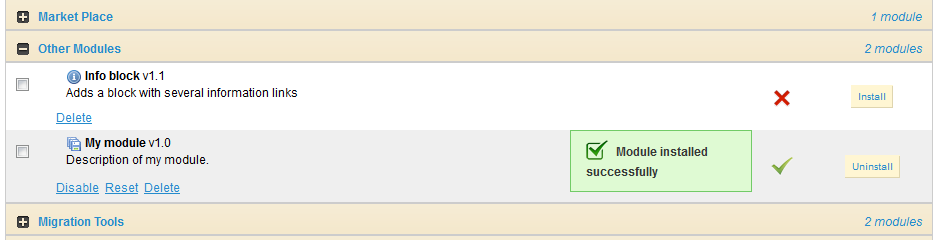
PrestaShop automatically creates a small config.xml file in the module's folder, which stores a few configuration information. You should NEVER edit it by hand.
On installation, PrestaShop also adds a line to the ps_module SQL table.

Hooking a module
Displaying data, starting a process at a specific time: in order for a module to be "attached" to a location on the front-office or the back-office, you need to give it access to one of the many PrestaShop hooks, described earlier in this guide.
Let's hook your module to the leftColumn hook:
public function install()
{
  if (parent::install() == false OR !$this->registerHook('leftColumn'))
    return false;
  return true;
}

// then...

public function hookLeftColumn( $params )
{
  global $smarty;
  return $this->display(__FILE__, 'mymodule.tpl');
}

public function hookRightColumn($params)
{
  return $this->hookLeftColumn($params);
}
Let's explore these new or changed lines.
if (parent::install() == false OR !$this->registerHook('leftColumn'))
  return false;
return true;
We changed the original line to add a second test.
This code checks:
- the boolean value returned by the
Moduleclass'install()method: iftrue, the module is installed and can be used. - the boolean value returned by
registerHook()for theleftColumnhook: iftrue, the module is indeed registered to the hook it needs, and can be used.
If any of these two boolean values is false, install() returns false too, and the module cannot be installed. Both values have to be true for the module to be considered installed.
Therefore, this line now reads this way: if installation or hooking fail, we inform PrestaShop.
public function hookLeftColumn($params)
{
  global $smarty;
  return $this->display(__FILE__, 'mymodule.tpl');
}
The hookLeftColumn() method makes it possible for the module to hook into the theme's left column.
$smarty is the global variable for the Smarty template system, which PrestaShop uses, and which you need to access.
The display() method returns the content of the mymodule.tpl template file, if it exists.
public function hookRightColumn($params)
{
  return $this->hookLeftColumn($params);
}
Likewise, hookRightColumn() gives access to the theme's right column. In this example, we simply call the hookLeftColumn() method, in order to have the very same display, whatever the column.
Save your file, and already you can hook your module's template into the theme, move it around and transplant it: go to the "Positions" page under the "Modules" tab in the back-office, then click on the "Transplant a module" button (top right of the page).
In the transplantation form:
- find "My module" in the "Module" drop-down list
- choose "Left column blocks" in the "Hook into" drop-down list.
![]()
It is useless to try to attach a module to a hook for which it has no implemented method.
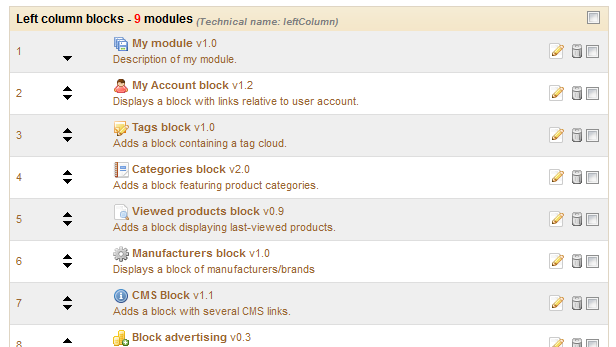
Click the "Save" button. The "Positions" page should reload, with the following message: "Module transplanted successfully to hook". Congratulations! Scroll down, and you should indeed see your module among the other modules in the "Left column blocks" list. Move it to the top of the list by drag'n'dropping the module's row.
Displaying content
Now that we have access to the left column, we should display something there.
As said earlier, the content to be displayed in the theme should be stored in template files .tpl. We will create the mymodule.tpl file, which was passed as a parameter of the display() method in our module's code.
So, let's create the mymodule.tpl file, and add some lines of code to it.
<!-- Block mymodule -->
<div id="mymodule_block_left" class="block">
  <h4>Welcome!</h4>
  <div class="block_content">
    <ul>
      <li><a href="{$base_dir}modules/mymodule/mymodule_page.php" title="Click this link">Click me!</a></li>
    </ul>
  </div>
</div>
<!-- /Block mymodule -->
This is just regular HTML code... except for the {$base_dir} variable in the link's href attribute: this is a Smarty variable created by PrestaShop, which provides developer with PrestaShop's root directory.
Save the file in the module's root folder, reload your shop's homepage: it should appear on top of the left column, right below the shop's logo (if you have indeed moved it at the top of the "Left Column" during the transplanting part).

The link that the module displays does not lead anywhere for now. If you need to test it, add the needed mymodule_page.php file in the module's folder, with a minimal content, such as "Welcome to my shop!". The resulting page will be very raw, so let's see if we can use the theme's style instead.
As you would expect, we have to create a TPL file in order to use the theme's style. Let's create the mymodule_page.tpl file, which will contain the basic "Welcome to my shop!" line, and call that file from mymodule_page.php, which we will rewrite in order to put that basic line within the theme's header, footer, etc.
You should strive to use explicit and recognizable names for your TPL files, so that you can find them quickly in the back-office – which is a must when using the translation tool.
Welcome to my shop!
<?php
global $smarty;
include('../../config/config.inc.php');
include('../../header.php');

$smarty->display(dirname(__FILE__).'/mymodule_page.tpl');

include('../../footer.php');
?>
Let's explore this new PHP file:
- We first load the current Smarty instance. This must be done before any call to the
display()method. - The various
include()calls in the file enable us to load:- The current PrestaShop configuration.
- The theme's header file (through
header.php, which acts as a load file). - the theme's footer file (through
footer.php, which acts as a load file).
- In the middle of the
include()calls, we place your custom template file, whose single action will be to display the "Welcome to my shop!" line.
Save both files and reload your shop's homepage: with just a few lines, the end result is already much better, with the "Welcome" line neatly placed between header, footer and columns!

If you make multiple changes and reloads to your homepage, it may seem those changes are not applied. This is because Smarty caches a compiled version of the homepage, for performance reasons. In order to force Smarty to recompile templates on every page load, you must go to the "Performance" page under the "Advanced parameters" tab, and choose "No" for the "Cache" option.
Alternatively, the "Compile cache if templates are updated" option for the "Templates cache" choice should work with the Cache enabled.

Do not disable the cache on production sites, as it severely slows everything down!
Using Smarty
Smarty is a PHP template engine, and is used by PrestaShop's theming system. It is a free and open-source projet, hosted at http://www.smarty.net/.
It parses template files .tpl, looking for dynamic elements to replace with their contextual equivalents, then send the generated result to the browser. Those dynamic elements are indicated with curly brackets : { ... }. Programmers can create new variables and use them in TPL files; PrestaShop adds its own set of variables.
For instance, in our mymodule_page.php, we can create such a variable in PHP, and have it displayed by our template file:
<?php
global $smarty;

include('../../config/config.inc.php');
include('../../header.php');

$mymodule = new MyModule();
$message = $mymodule->l('Welcome to my shop!');
$smarty->assign('messageSmarty', $message); // creation of our variable
$smarty->display(dirname(__FILE__).'/mymodule_page.tpl');

include( '../../footer.php' );
?>
From there on, we can ask Smarty to display the content of this variable in our TPL file.
{$messageSmarty}
PrestaShop includes a number of Smarty variables. For instance, {$hook_left_column} will be replaced with the content for the left column, meaning the content from all the modules that have been attached to the left column's hook.
All Smarty variables are global. You should therefore pay attention not to name your own variable with the name of an existing Smarty variable, in order to avoid overwriting it. It is good practice to avoid overly simple names, such as {products}, and to prefix it with your module's name, or even your own name or initials, such as: {$henryb_mymodule_products}.
Here is a list of Smarty variables that are common to all pages:
File / folder | Description |
|---|---|
img_ps_dir | URL for PrestaShop's image folder. |
img_cat_dir | URL for the categories images folder. |
img_lang_dir | URL for the languages images folder. |
img_prod_dir | URL for the products images folder. |
img_manu_dir | URL for the manufacturers images folder. |
img_sup_dir | URL for the suppliers images folder. |
img_ship_dir | URL for the carriers (shipping) images folder. |
img_dir | URL for the theme's images folder. |
css_dir | URL for the theme's CSS folder. |
js_dir | URL for the theme's JavaScript folder. |
tpl_dir | URL for the current theme's folder. |
modules_dir | URL the modules folder. |
mail_dir | URL for the mail templates folder. |
pic_dir | URL for the pictures upload folder. |
lang_iso | ISO code for the current language. |
come_from | URL for the visitor's origin. |
shop_name | Shop name. |
cart_qties | Number of products in the cart. |
cart | The cart. |
currencies | The various available currencies. |
id_currency_cookie | ID of the current currency. |
currency | Currency object (currently used currency). |
cookie | User cookie. |
languages | The various available languages. |
logged | Indicates whether the visitor is logged to a customer account. |
page_name | Page name. |
customerName | Client name (if logged in). |
priceDisplay | Price display method (with or without taxes...). |
roundMode | Rounding method in use. |
use_taxes | Indicates whether taxes are enabled or not. |
There are many other contextual hooks. If you need to display all of the current page's Smarty variables, add the following call:
{debug}
Comments are based on asterisk:
{* This string is commented out *}

{*
This string is too!
*}
Unlike with HTML comments, commented-out Smarty code is not present in the final output file.
Module translation
Our module's text strings are written in English, but you might want French shop owners to use your module too. You therefore have to translate those strings into French, both front-office and back-offices ones. This could be a tedious task, but Smarty and PrestaShop's own translation make it far easier, as they provide with already-translated strings; thus provided you use the exact same text, your translation needs should be lessened.
Strings in PHP files will need to be displayed through the l() method, from the Module.php abstract class.
...
$this->displayName = $this->l('My module');
$this->description = $this->l('Description of my module.');
...
Strings in TPL files will need to be turned into dynamic content, which Smarty will replace by the translation for the chosen language. In our sample module, the file mymodule.tpl:
<li>
  <a href="{$base_dir}modules/mymodule/mymodule_page.php" title="Click this link">Click me!</a>
</li>
...becomes:
<li>
  <a href="{$base_dir}modules/mymodule/mymodule_page.php" title="{l s='Click this link' mod='mymodule'}">{l s='Click me!' mod='mymodule'}</a>
</li>
...and the file mymodule_page.tpl:
<h4>Welcome!</h4>
...
Click me!
...becomes:
<h4>{l s='Welcome!' mod='mymodule'}</h4>
...
{l s='Click me!' mod='mymodule'}
Notice that we use the mod parameter. The translation tool needs it in order to match the string to translate with its translation. This parameter is mandatory for module translation.
Strings are delimited with single quotes. If a string contains single quotes, they should be escaped using a backslash (
).
This way, strings can be directly translated inside PrestaShop:
- go to the "Translations" page under the "Localization" tab,
- in the "Modify translations" drop-down menu, choose "Module translations",
- click the flag of the country of which language you want to translate the module into.
The page that loads displays all the strings for all the currently-installed modules. Modules that have all their strings already translated have their fieldset closed, whereas if at least one string is missing in a module's translation, its fieldset is expanded.
In order to translate your module's strings (the ones that were "marked" using the l() method), simply find your module in the list (use the browser's in-page search), and fill the empty fields.
The destination language must already be installed to enable translation in it.
![]()
Once all strings for your module are correctly translated, click on the "Update translation" button at the top.
PrestaShop then saves the translations in a new file, named using the languageCode.php format (for instance, /mymodule/translations/fr.php). If it does not exist yet, PrestaShop takes care of creating the /mymodule/translations folder. The translation file looks like so:
<?php

global $_MODULE;
$_MODULE = array();
$_MODULE['<{mymodule}prestashop>mymodule_b268021027834ab9a4fe675f0c0a93ef'] = 'Mon module';
$_MODULE['<{mymodule}prestashop>mymodule_8dc6964360034754105d1328b04d7727'] = 'Description de mon module';
$_MODULE['<{mymodule}prestashop>mymodule_19d8055bcd0e60a5f99c807e50094c4e'] = 'Cliquez sur ce lien';
$_MODULE['<{mymodule}prestashop>mymodule_526fdd5deb77218de6497b4f3f5b5c65'] = 'Cliquez-moi \!';
$_MODULE['<{mymodule}prestashop>mymodule_page_9cfb297375a799e0f130804c089bd034'] = 'Bienvenue dans ma boutique \!';
This file must not be edited manually! It can only be edited through the PrestaShop translation tool.
Now that we have a French translation, we can click on the French flag in the front-office, and get the expected result: the module's strings are now in French.
![]()
They are also translated in French when the back-office is in French.
![]()
The translated strings can only be taken into account by the PrestaShop tool, the PHP and TPL files have to be located at the root of the module's folder.
Creating the module's back-office tab, and its class
In this section you will learn how to give your module its own tab or tab-page, in a matter of minutes.
Follow these steps:
- Add a new table to your PrestaShop database, named
ps_test. Give it three fields:id_shop(INT 11)id_test(INT 11)test(VARCHAR 32)
- Create a blank file named
Test.phpin PrestaShop's/classesfolder. - Add the following lines to that file:
<?php
class Test extends ObjectModel
{
  /** @var string Name */
  public $test;

  protected $fieldsRequired = array('test');
  protected $fieldsSize = array('test' => 64);
  protected $fieldsValidate = array('test' => 'isGenericName');
  protected $table = 'test';
  protected $identifier = 'id_test';

  public function getFields()
  {
    parent::validateFields();
    $fields['test'] = pSQL($this->test);
    return $fields;
  }
}
?>
- Create a blank file named
AdminTest.phpin PrestaShop's/admin/tabs. - Add the following lines to that file:
<?php
include_once(PS_ADMIN_DIR.'/../classes/AdminTab.php');

class AdminTest extends AdminTab
{
  public function __construct()
  {
    $this->table = 'test';
    $this->className = 'Test';
    $this->lang = false;
    $this->edit = true;
    $this->delete = true;
    $this->fieldsDisplay = array(
      'id_test' => array(
        'title' => $this->l('ID'),
        'align' => 'center',
        'width' => 25),
      'test' => array(
        'title' => $this->l('Name'),
        'width' => 200)
    );

    $this->identifier = 'id_test';

    parent::__construct();
  }

  public function displayForm()
  {
    global $currentIndex;

    $defaultLanguage = intval(Configuration::get('PS_LANG_DEFAULT'));
    $languages = Language::getLanguages();
    $obj = $this->loadObject(true);

    echo '
      <script type="text/javascript">
        id_language = Number('.$defaultLanguage.');
      </script>';

    echo '
      <form action="' . $currentIndex . '&submitAdd' . $this->table . '=1&token=' . $this->token . '" method="post" class="width3">
        '.( $obj->id ? '<input type="hidden" name="id_'.$this->table.'" value="'.$obj->id.'" />' : '' ).'
        <fieldset><legend><img src="../img/admin/profiles.png" />'.$this->l('Profiles').'</legend>
          <label>'.$this->l('Name:').'</label>
          <div class="margin-form">';

    foreach ($languages as $language)
      echo '
          <div id="name_'.$language['id_lang'|'id_lang'].'" style="display: '.($language['id_lang'|'id_lang'] == $defaultLanguage ? 'block' : 'none').'; float: left;">
            <input size="33" type="text" name="name_'.$language['id_lang'|'id_lang'].'" value="'.htmlentities($this->getFieldValue($obj, 'name', intval($language['id_lang'|'id_lang'])), ENT_COMPAT, 'UTF-8').'" /><sup>*</sup>
          </div>';

    $this->displayFlags($languages, $defaultLanguage, 'name', 'name' );
    echo '
          <div class="clear"></div>
        </div>
        <div class="margin-form">
          <input type="submit" value="'.$this->l('Save').'" name="submitAdd'.$this->table.'" class="button" />
        </div>
        <div class="small"><sup>*</sup> '.$this->l('Required field').'</div>
      </fieldset>
    </form> ';
  }
}
?>
Put the files online, then create the tab by going to the "Employee" tab, then its "Tabs" sub-tab. Click the "Add new" button, and fill-in the fields with the class' name, "AdminTest". Do not confuse "class" with "modules"! Choose an icon (like one from the FamFamFam icon pack: http://www.famfamfam.com/lab/icons/silk/), choose where the tab should go, and save. You are set! Now start customizing it to your needs!
To go further
This section includes some techniques that you can use for your modules.
Add a quick link on DashBoard
With your module, you can add a quick link on DashBoard to let's the user go faster. You can do it like this:
public function hookDisplayAdminHomeQuickLinks($params)
{
	return $this->display(__FILE__, 'views/templates/admin/quick_links.tpl');
}
Don't forget to register the hook in your install ($this->registerHook('displayAdminHomeQuickLinks')) !
The template file can be like this:
<li>
  <a href="{$link->getAdminLink('AdminModules')}&configure=yourmodule" style="background: url('{$img_dir}admin/package_add.png') no-repeat center 25px #F8F8F8">
    <h4>{l s='Title' mod='yourmodule'}</h4>
    <p>{l s='Your description' mod='yourmodule'}</p>
  </a>
</li>
In this one, we set a button to let's the user go faster in the module configuration.
A list of PrestaShop hooks
Here's a recap of PrestaShop's module architecture:

When one of the shop's page is loaded, the PrestaShop engine checks which are the modules to call for each of the hooks that make up the page.
Here is a list of the 53 hooks available in PrestaShop 1.5.
Front-office
Homepage and general website items
Hook name | File location | Visible | Description |
|---|---|---|---|
header | header.php | No | Called between the HEAD tags. Ideal location for adding JavaScript and CSS files. |
top | header.php | Yes | Called in the page's header. |
leftColumn | header.php | Yes | Called when loading the left column. |
rightColumn | footer.php | Yes | Called when loading the right column. |
footer | footer.php | Yes | Called in the page's footer. |
home | index.php | Yes | Called at the center of the homepage. |
Product sheet
Hook name | File location | Visible | Description |
|---|---|---|---|
extraLeft | product.php | Yes | Called right before the "Print" link, under the picture. |
extraRight | product.php | Yes | Called right after the block for the "Add to Cart" button. |
productActions | product.php | Yes | Called inside the block for the "Add to Cart" button, right after that button. |
productOutOfStock | product.php | Yes | Called inside the block for the "Add to Cart" button, right after the "Availability" information. |
productfooter | product.php | Yes | Called right before the tabs. |
productTab | product.php | Yes | Called in tabs list, such as "More info", "Data sheet", "Accessories"... Ideal location for one more tab, the content of which is handled by the |
productTabContent | product.php | Yes | Called when a tab is clicked. Ideal location for the content of a tab that has been defined using the |
Cart
Hook name | File location | Visible | Description |
|---|---|---|---|
cart | Class: Cart.php | No | Called right after a cart creation or update. |
shoppingCart | order.php | Yes | Called right below the cart items table. |
shoppingCartExtra | order.php | Yes | Called after the cart's table of items, right above the navigation buttons. |
createAccountTop | authentication.php | Yes | Called within the client account creation form, right above the the "Your personal information" block. |
createAccountForm | authentication.php | Yes | Called within the client account creation form, right before the "Register" button. |
createAccount | authentication.php | No | Called right after the client account creation. |
customerAccount | my-account.php | Yes | Called on the client account homepage, after the list of available links. Ideal location to add a link to this list. |
myAccountBlock | Module: blockmyaccount.php | Yes | Called within the "My account" block, in the left column, below the list of available links. Ideal location to add a link to this list. |
authentication | authentication.php | No | Called right after the client identification, only if the authentication is valid (e-mail address and password are both OK). |
Search
Hook name | File location | Visible | Description |
|---|---|---|---|
search | Class: Search.php | No | Called after a search is performed. Ideal location to parse and/or handle the search query and results. |
Carrier choice
Hook name | File location | Visible | Description |
|---|---|---|---|
extraCarrier | order.php | Yes | Called after the list of available carriers, during the order process. Ideal location to add a carrier, as added by a module. |
Payment
Hook name | File location | Visible | Description |
|---|---|---|---|
payment | order.php | Yes | Called when needing to build a list of the available payment solutions, during the order process. Ideal location to enable the choice of a payment module that you have developed. |
paymentReturn | order-confirmation.php | Yes | Called when the user is sent back to the store after having paid on the 3rd-party website. Ideal location to display a confirmation message or to give some details on the payment. |
orderConfirmation | order-confirmation.php | Yes | A duplicate of |
backBeforePayment | order.php | No | Called when displaying the list of available payment solutions. Ideal location to redirect the user instead of displaying said list (i.e., 1-click PayPal checkout).. |
Merchandise Returns
Hook name | File location | Visible | Description |
|---|---|---|---|
orderReturn | order-follow.php | No | Called when the customer request to send his merchandise back to the store, and if now error occurs. |
PDFInvoice | Class: PDF.php | Yes | Called when displaying the invoice in PDF format. Ideal location to display dynamic or static content within the invoice. |
Back-office
General
Hook name | File location | Visible | Description |
|---|---|---|---|
backOfficeTop | header.inc.php | Yes | Called within the header, above the tabs. |
backOfficeHeader | header.inc.php | No | Called between the HEAD tags. Ideal location for adding JavaScript and CSS files. |
backOfficeFooter | footer.inc.php | Yes | Called within the page footer, above the "Power By PrestaShop" line. |
backOfficeHome | index.php | Yes | Called at the center of the homepage. |
Orders and order details
Hook name | File location | Visible | Description |
|---|---|---|---|
newOrder | Class: PaymentModule.php | No | Called during the new order creation process, right after it has been created. |
paymentConfirm | Class: Hook.php | No | Called when an order's status becomes "Payment accepted". |
updateOrderStatus | Class: OrderHistory.php | No | Called when an order's status is changed, right before it is actually changed. |
postUpdateOrderStatus | Class: OrderHistory.php | No | Called when an order's status is changed, right after it is actually changed. |
cancelProduct | AdminOrders.php | No | Called when an item is deleted from an order, right after the deletion. |
invoice | AdminOrders.php | Yes | Called when the order's details are displayed, above the Client Information block. |
adminOrder | AdminOrders.php | Yes | Called when the order's details are displayed, below the Client Information block. |
orderSlip | AdminOrders.php | No | Called during the creation of a credit note, right after it has been created. |
Products
Hook name | File location | Visible | Description |
|---|---|---|---|
addproduct | AdminProducts.php | No | Called when a product is created or duplicated, right after said creation/duplication. |
updateproduct | AdminProducts.php | No | Called when a product is update with a new picture, right after said update. |
deleteproduct | Class: Product.php | No | Called when a product is deleted, right before said deletion.. |
updateQuantity | Class: PaymentModule.php | No | Called during an the validation of an order, the status of which being something other than "canceled" or "Payment error", for each of the order's items. |
updateProductAttribute | Class: Product.php | No | Called when a product declination is updated, right after said update. |
watermark | AdminProducts.php | No | Called when an image is added to an product, right after said addition. |
Statistics
Hook name | File location | Visible | Description |
|---|---|---|---|
GraphEngine | Class: ModuleGraph.php | Yes | Called when a stats graph is displayed. |
GridEngine | Module: GridEngine.php | Yes | Called when the grid of stats is displayed. |
AdminStatsModules | AdminStatsTab.php | Yes | Called when the list of stats modules is displayed. |
Clients
Hook name | File location | Visible | Description |
|---|---|---|---|
adminCustomers | AdminCustomers.php | Yes | Called when a client's details are displayed, right after the list of the clients groups the current client belongs to. |
Carriers
Hook name | File location | Visible | Description |
|---|---|---|---|
updateCarrier | AdminCarriers.php | No | Called during a carrier's update, right after said update. |
Troubleshooting
If your module does not work as expected, here are a few ways to find help.
PrestaShop official forum
Join our forum at http://www.prestashop.com/forums/, and search for an answer using the relevant keywords. If your search needs refining, use the advanced search form. And if your search doesn't yield anything useful, create a new thread, where you can be as wordy as necessary when writing your question; you will need to registered first.
Some forums keep certain threads pinned on top of all threads; they contain some useful information, so be sure to read them through.
Our bug-tracker
If it turns out your issue stems from a PrestaShop bug rather than your code, please do submit the issue in the PrestaShop bug-tracker: http://forge.prestashop.com/ (you will need to register). This enables you to discuss the issue directly with the PrestaShop developers.
Official PrestaShop websites
URL | Description |
|---|---|
Official website for the PrestaShop tool, its community, and the company behind it. | |
Marketplace for themes and modules. | |
Host your shop with us! |