| Section | ||||
|---|---|---|---|---|
|
Table of content
| Table of Contents | ||
|---|---|---|
|
...
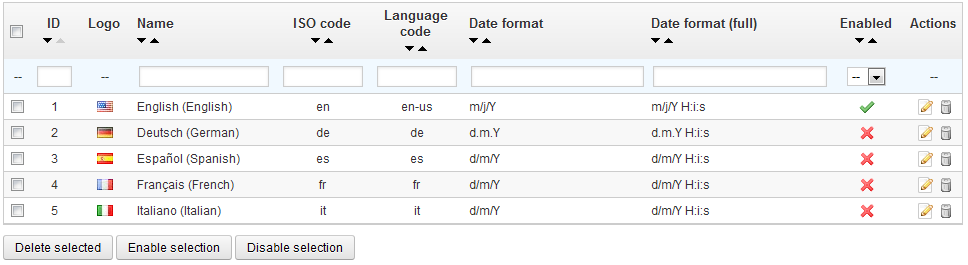
Adding a new language is simply a question of importing the localization pack from a country which uses that language (in the "Localization" page). If it turns out this does not work, or that you need something customized, you can add a new language manually, using the form behind the "Add new" button.
Creating
...
a New Language
| Warning |
|---|
Creating a new language means you will have to translate all of the text for PrestaShop's front-end, back-end, modules, etc., or risk using the default English strings. Translation is made using the tool in the "Translations" page, under the "Localization" menu. You can also create a new language in order to cater for a language pack that you would have downloaded from the PrestaShop site. |
...
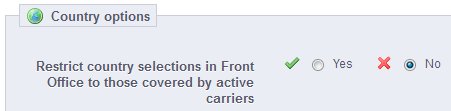
At the bottom of the list, the "Country options" section to only display on your front-office the countries that your carriers cover. We recommend that you enable this setting, as it prevents customers from having to scroll through all the country names to find their own.
Adding
...
a New Country
Normally, PrestaShop comes with all current countries in the database. But in the case new ones are created, you would need to add a new country.
...
| Note |
|---|
The PrestaShop address form currently only lists states which are available for the customer to choose. Therefore, make sure to use a sensible list when adding content to your states list. That is the reason why, for instance, the list contains Italian province rather than regioni. |
Adding
...
a New State
Let's create a new state. Click the "Add New" button to get to the creation form.
...
The two sections at the bottom of the "Currencies" page are very simple yet essential, as relate to your currencies exchange rates (or "conversion rates"). To quote Wikipedia, "In finance, an exchange rate between two currencies is the rate at which one currency will be exchanged for another. It is also regarded as the value of one country’s currency in terms of another currency." Rates change daily, sometimes drastically depending on current events, and your shop should always be updated to the latest values.
...
| Tip |
|---|
In order to change the default currency, you must go to the "Localization" page of the "Localization" menu, and use the "Default currency" option from the "Configuration" section. |
Updating the Currency Rates
In PrestaShop, there are two ways to update your conversion rates:
...
| Info |
|---|
Note that the rates are provided as-is: the PrestaShop team does pay attention to have correct rates in these file, but might slightly differ from the actual ones, if only because these rates can fluctuate greatly in a short time. |
Adding
...
a New Currency
The easiest way to add a country's currency is to import its localization package. This is done in the "Localization" page, under the "Localization" menu. Once import, you must go the "Currencies" page to enable it.
...
- Currency. The name of the currency, preferably in English that as many customers as possible can read it.
- ISO code. The currency's three-letter ISO 4217 code. See this Wikipedia page: http://en.wikipedia.org/wiki/ISO_4217.
- Numeric ISO code. Its three-digit code ISO 4217 code. Same Wikipedia page as above.
- Symbol. The currency's symbol, if any. See this Wikipedia page: http://en.wikipedia.org/wiki/Currency_sign.
- Exchange rate (or Conversion rate in earlier version). This rate is to be defined according to your shop's default currency. For example, if the default currency is the Euro and this currency is dollars, type "1.2931", since 1€ usually is worth $1.29 31 (at the time of this writing). Use the converter here for help: http://www.xe.com/ucc/.
- Formatting. Set up how you want your price to be displayed. The X corresponds to the currency's symbol. You have five possibilities.
- Decimals. You can indicate whether your shop should display decimals. While you may choose to have all your prices be a round number, discounts and other price variations might warrant decimals. You can prevent them with this option.
- Spacing. Once you have chosen the currency's formatting, you can choose whether to have a space character between the symbol and the price itself. Some languages require this. For instance, Spanish people would use "50€" whereas French people would use "50 €". Choose whichever you feel is best.
- Enable. Any currency can be disabled at any time, both from its own edit page, and the currencies table on the "Currencies" page.
- Shop association. You can make the currency only available to a selection of your shops, for instance shops that target a specific locale.
...
| Info |
|---|
Taxes are a complex subject, which should be fully understood as it can have a significant impact on your product prices or your shipping fees. While this user-guide is not meant to teach all the ins-and-outs of taxes, we will try our best to give you pointers. Taxes are "compulsory contribution to state revenue, levied by the government on workers' income and business profits or added to the cost of some goods, services, and transactions". In short, every product you sell is subject to sales taxes, which depend on your state's tax laws. In effect, you contribute to your state or government functioning (public goods and services) with a percentage of all your sales, as defined by local tax rates. There are hosts of tax rates in the World, and they vary considerably from one country to another, and even within a single country if it has federal states (USA, Germany, Spain, Russia...). You should therefore make sure to strictly conform to your country's tax laws, and even those of your state or town if they apply to you. Check with your local tax representative as soon as possible in order to get all the official details. |
...
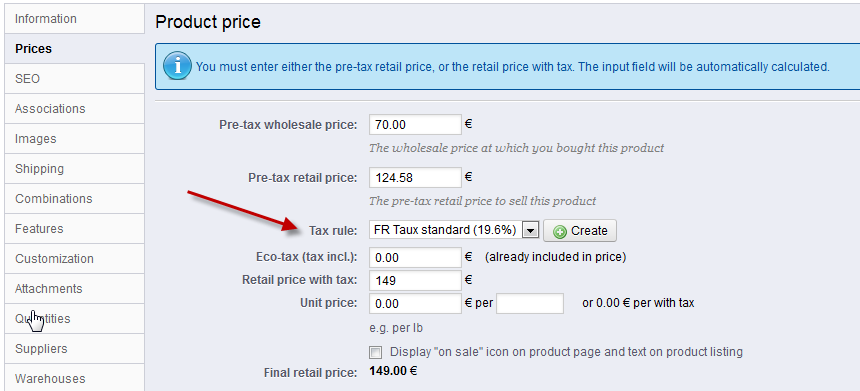
If you decide to enable the ecotax after having added products, you will have to edit them all in order to set the tax properly for each product.
Note that if you have set ecotaxes for your products already, and that you choose to disable ecotax, then all your products will lose their ecotax settings. Re-enabling the ecotaxe will mean having to set all your products' ecotaxes again.
The ecotax will also appear to the customer, on the product's page.
Adding
...
a New Tax
Adding a new tax is very easy, because tax rules take out all the burden of having to specify the countries where the tax applies. The tax creation form is therefore very short:
...
A few sample taxes rules are already in place, which depend on the country you chose for your shop during the installation of PrestaShop. The tax rules are set for each tax: the rules actually serve as a kind of country filter, limiting the use of that tax to a specific set of countries.
You should edit a couple of the presented rules in order to get a better grasp of how tax rules can be set.
Adding
...
a New Tax Rule
You can add as many tax rules as needed to your PrestaShop installation. Not only that, but you should make sure that all of the needed tax rules are registered in your shop.
...
| Tip |
|---|
The process of adapting a program to foreign languages is called internationalization and localization, or i18n and L10n for short. The PrestaShop team has chosen to use its own built-in translation tool, so that anyone with a PrestaShop installation may customize their shop to their needs. The official translation packs can be downloaded manually from this address: http://www.prestashop.com/en/translations. |
Modifying
...
a Translation
The most important tool of the "Translation" page is in the "Modify translations" section. This is where you can choose to edit a translation, and completely customize each and every sentence if you wish so.
...
- Error messages. Strings are not group into many fieldset, they are all presented together.
- PDF templates. There is only one fieldset, "PDF".
- E-mail templates. Strings are split into fieldsets, but they are not simple text fields anymore. Each e-mail has two templates: a HTML one, which is styled and colored, and a text one, when is plain and simple. While the plain text one can be edited directly in the textfield, the HTML one can only be edited by clicking on the "Edit this e-mail template" button at the bottom of the preview. That click turns the preview into a WYSIWYG textfield (what you see is what you get), with a complete editor at the top (based on TinyMCE: http://www.tinymce.com/). In addition to editing the text, you can change the design as you see fit, for instance you can change the colors in order to adhere to your shop's design.
Note that the e-mail templates feature placeholders, such as{lastname}or{shop_name}, which PrestaShop replaces with the actual values when sending the e-mail. Make sure to keep them in both your translation.
![]()
Add / Update
...
a Language
PrestaShop translations are available in packs, which combine all the different translation categories into a zip file. Many language packs are available freely for you to download and install, directly from the PrestaShop.com servers. PrestaShop will take care of downloading the language pack, unpacking it and creating the correct sub-folder in your installation's /translation folder.
...
You can also update the currently installed languages, likewise directly from the PrestaShop.com servers, but be reminded that any change that you might have made to your own translations will be lost once you update it.
Import
...
a Language Pack Manually
In the case where you do not want to use an official PrestaShop translation pack, but rather a custom one (either provided by someone you know, or one that you exported from another PrestaShop installation), then this tool is for you.
...
| Warning |
|---|
If there is already a language folder with the same ISO 639-1 code, it will be replaced by the files from the pack you are importing. |
Export
...
a Language
You can create your own language pack using this tool, either as a way of making a backup of your customizations, or in order to share your translations with other PrestaShop installation – your own or someone else's.
...
| Warning |
|---|
If there is already a language folder for this language in the destination theme, it will be replaced by the files from the language and theme you are copying. You might prefer to first create a new language for the destination theme before copying the source language to it. |
| Section | ||||
|---|---|---|---|---|
|