...
You can export a list of your clients by clicking on the "Export" button at the top.
You can also import customer customers using the "Import" button. You will need your CSV file following to follow this format:
| Code Block |
|---|
ID;Title;Last name;First Name;Email address;Age;Enabled;News.;Opt.;Registration;Last visit; 2;1;Gorred;Francis;[email protected];-;1;0;0;2013-07-04 15:20:02;2013-07-04 15:18:50; 1;1;DOE;John;[email protected];43;1;1;1;2013-07-02 17:36:07;2013-07-03 16:04:15; |
More import options are available in the "CSV Import" page of the "Advanced parameters" menu.
Creating
...
a New Customer Account
To create a customer account manually, select "Add New". A form appears.
...
| Info |
|---|
If your customers are mostly companies, you should enable the B2B mode in order to get additional options: go to the "Customers" page of the "Preferences" menu, and choose "Yes" for the "Enable B2B mode" option. |
Viewing
...
a User's Information
In the case where you would like to have more information on a given customer, you can click on the "view" button, located at the end of the row in the customer's list. A new page appears.
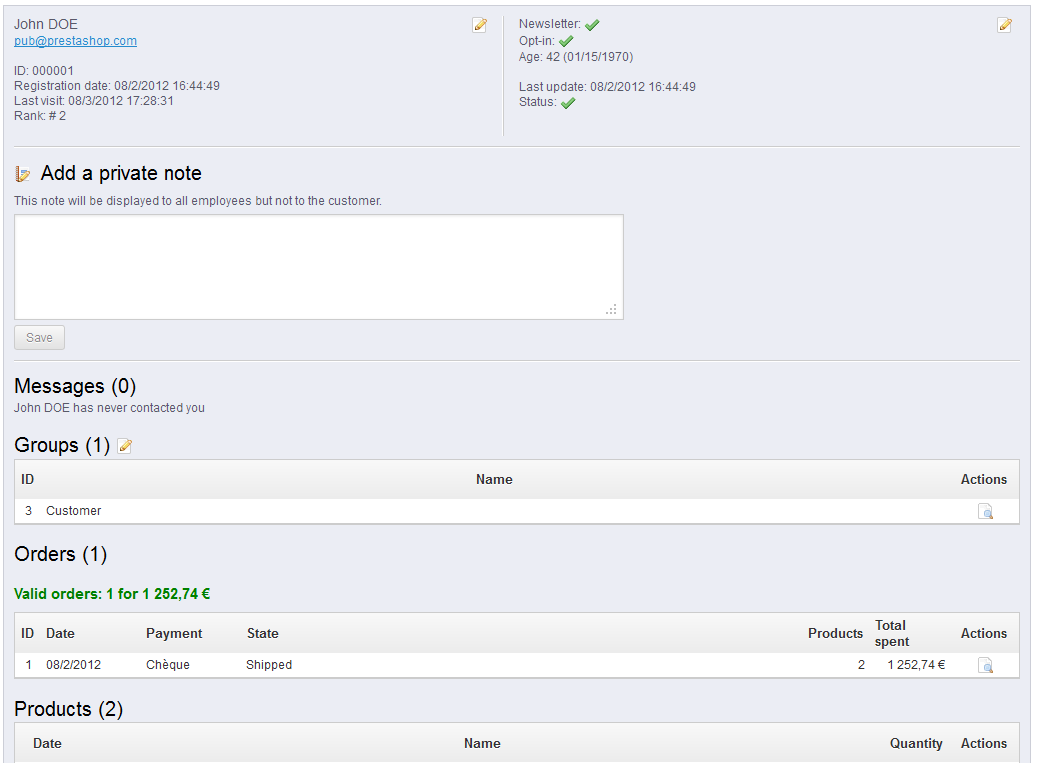
The various sections provide you with some key data on the user:
...
- Name. Use a short and descriptive name.
- Discount (%). The discount that you set for members of this group applies to all products on your shop.
You may prefer to not set any discount value, and create cart rules. You can learn more about cart rules in the next chapter of this guide, "Creating Price Rules and Vouchers". - Price display method. PrestaShop is frequently used in the Business to Business (B2B) sector. You can create a group of customers who can buy products without paying the tax. The drop-down list gives you a choice between "tax included" and "tax excluded".
- Show prices. By default, all users of your shop can view the prices. You may prefer some to not have access to your product prices. For instance, you could make it so users can only view prices if they have an account: from the groups list, click on the green checkmark check-mark in the "Show prices" column for the "Visitors" group to turn it into a red cross.
...
Click the "View" icon on the right to get the cart's details.
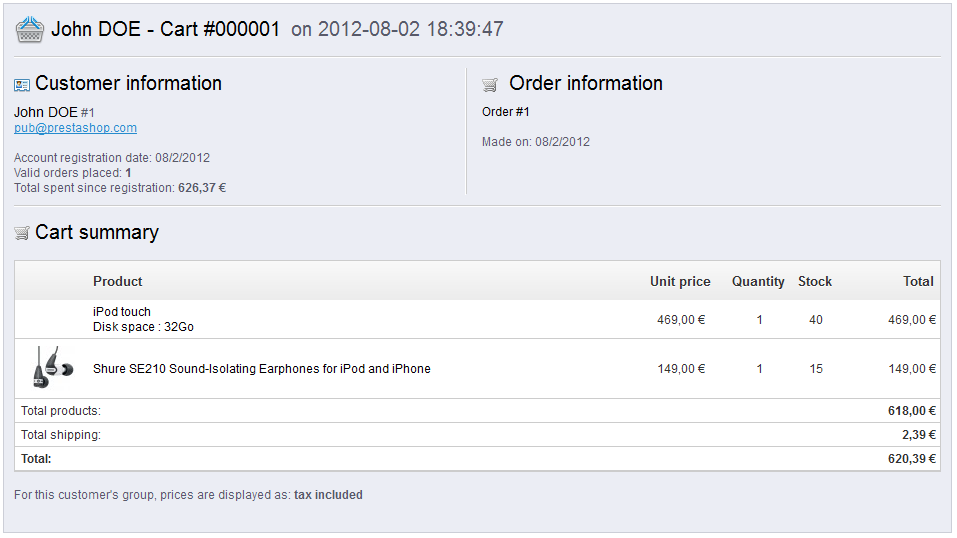
In the cart's page, the most important information is in the "Cart Summary" section, where you can see what products the customer chose to purchase, the price of each item, the quantity they put in their cart, and the total value of their cart.
| Info | ||
|---|---|---|
| ||
Cart abandonment often means that a sale has been lost. The "Shopping cart" page indicates the carts that have not been turned into proper orders, and it is up to you to remind the customer that they can still come back to finish their purchase. Abandoned carts (or "ghost carts") will have a delete link at the end of each row, while carts without delete links are processed carts, i.e. the purchase has been confirmed and you are supposed to send the products. By default, it is up to you to contact the customer about his abandoned cart. You can install the Customer Follow-up module, which is available in the default installation and enables you to send vouchers to those who have abandoned their shopping carts, or to those who you want to thank for their order, to the best clients to thank them for their purchases and for being faithful... Note that this can lead to abuse: some customers might abandon carts on purpose in order to receive a voucher... You can also buy PrestaShop's Abandoned Cart Reminder module for a complete tool: http://addons.prestashop.com/en/checkout-modules/3503-abandoned-cart-reminder.html. |
Customer Service
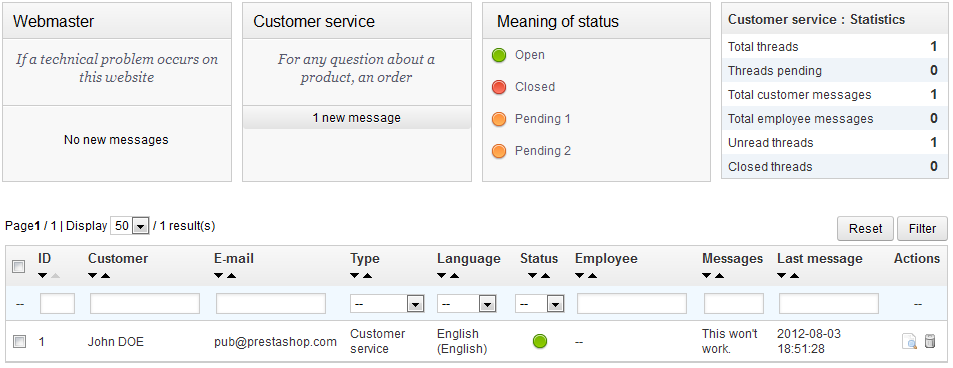
PrestaShop enables you to centralize all the customers' request within its confines. This helps you keep track of which discussion threads needs answering, rather than having to check with all the recipients of the mail to see if someone did answer it.
In practice, the contact form of your shop, available under the "Contact us" link at the bottom of your front-office, presents the customer with two contacts by default: "Webmaster" and "Customer Service". The customer only has to choose who to contact, and then fill the rest of the fields. The message is then recorded in PrestaShop's customer service tool.
| Tip |
|---|
Discussion threads are only included in the customer service tool if the contact has the "Save Message?" option enabled. You can change this setting, or add more contacts, by going to the "Contact" page, under the "Customers" menu. This page is explained in detail in the next section of this chapter of the PrestaShop User Guide. If the option is disabled for the contact that the customer chooses, the message is simply sent to the contact's e-mail address, and is not stored in PrestaShop. You also need to properly configure your IMAP settings, so that PrestaShop can retrieve the customer's answers to e-mail that were sent from the customer service tool. This is done in the "Customer service options" section. |
...
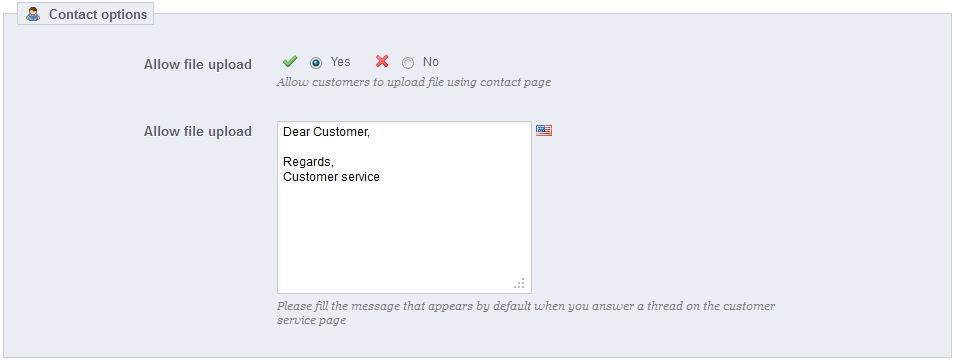
Each conversation with a customer can be entirely handled through PrestaShop's complete interface, without having to use an e-mail client such as Outlook or Thunderbird.
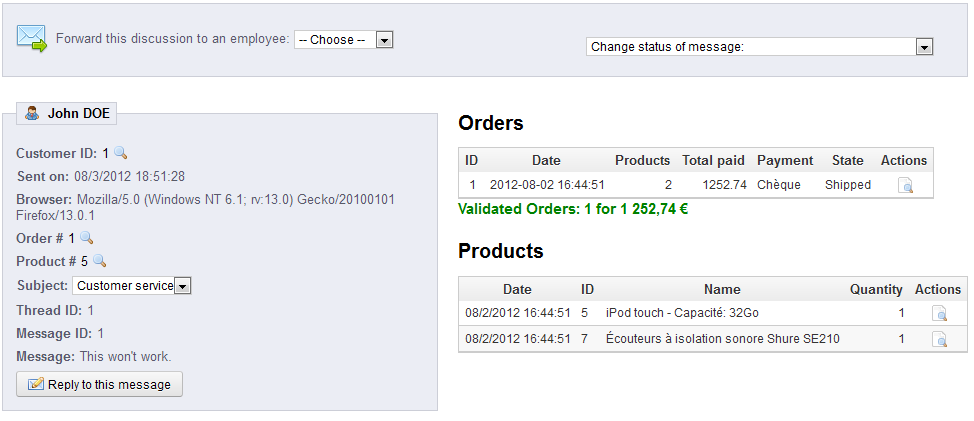
In the conversation list, click on a row to view to view the conversation's details:
...
This section basically enables you to precisely configure PrestaShop's access to your e-mail server through its IMAP interface. You should make sure all fields are filled in order for the customer service tool to work properly. Most of this information should be provided by your webhost.
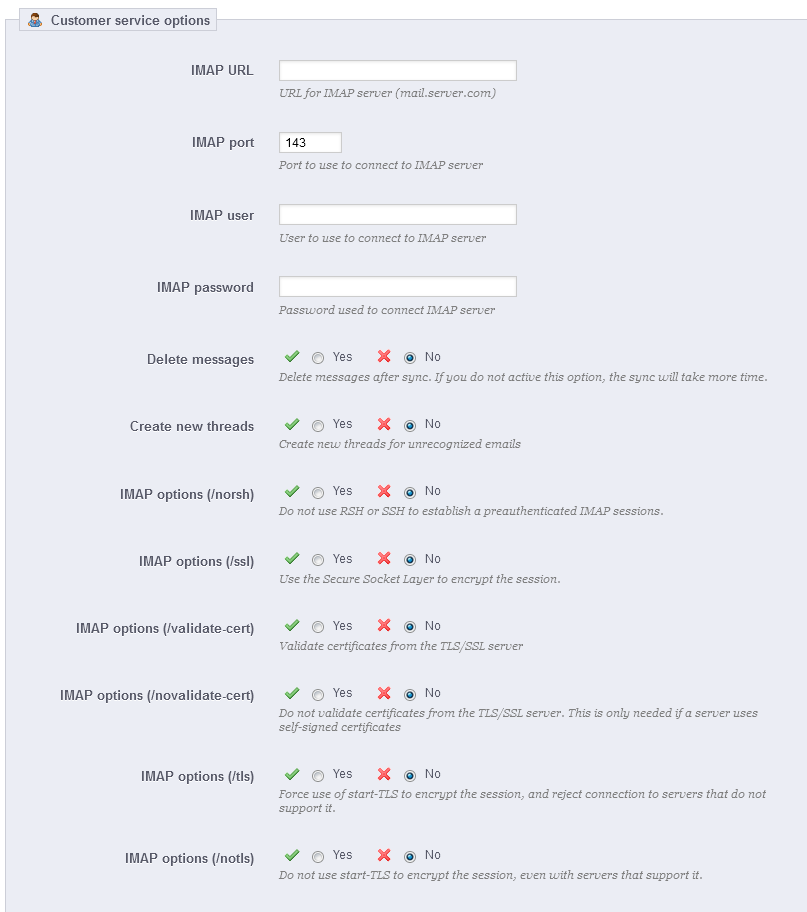
- IMAP URL, IMAP port, IMAP user and IMAP password. Essential details to access the e-mail server using the IMAP protocol.
- Delete message. If enabled, messages on the server will be deleted as soon as PrestaShop has retrieved them. Use with caution: this would make your messages unavailable to other e-mail clients.
- /norsh. If enabled, the connection to your e-mail server will not pre-authenticated. Not recommended.
- /ssl. If enabled, the connection to your e-mail server will not be encrypted. Not recommended.
- /validate-cert. If enabled, PrestaShop will force the validation of the server's TLS/SSL certificate.
- /novalidate-cert. If enabled, PrestaShop will never try to validate the server's TLS/SSL certificate. Essential for servers with self-signed certificates.
- /tls. If enabled, PrestaShop will force use of StartTLS to encrypt the connection. Servers that do not support StartTLS will be rejected.
- /notls. If enabled, PrestaShop will not use StartTLS to encrypt the session, even with servers that support it.
...
By clicking on the "Contacts" page under the "Customers" menu, you can access the existing list of contacts.
Click the "Add new" button to access the contact creation form:
...
Previous versions of PrestaShop had hard-coded customer genders: a customer could only choose between "Mr.", "Ms." and "Miss".

The social title tool helps you better define your customers: in the customers list, you can choose to only display customers having a given social title. Modules may also rely on social titles for certain features.
...