...
- Basic settings: it contains all you need to create a product quickly and easily. If however, you need to add more details to your product, then you should have a look at the others tabs.
- Quantities, Combinations or Virtual product: define you your product quantities and other stock-related options. When your product has combinations the tab will be renamed Combinations. This is where you manage all your combinations. On the other hand, if you have a virtual product, this is where you upload its associated file , if any.
- Shipping: give details that can have an impact on the delivery of the product.
- Pricing: refine your pricing with specific prices or price per unit (among other pricing options).
- SEO: manage the meta description or product URL to make sure it's optimized for search engines.
- Options: additional functionalities to manage your product's visibility, specific references, attached files or suppliers. It is also here that you can set up the customization.

Product Name
The first field to fill is the product name, which will appear in the search engine results and in your product sheet's URL by default. Next to the field, you will find a language selector , which enables you to choose the language into which you wish to edit or create the product.

| Info |
|---|
You must give the product a name in at least the default language before you can save it. You won't be able to save until it has a name. Make sure to translate each field in every language that your shop supports. In order to do that, click on the language selector next to the product type field, and choose the language in which you wish to edit the product. |
Type of product
This second option is an essential one: indicate whether the product is a pack (a combination of at least two existing products), a virtual product (downloadable file, service, etc.), or simply a classic, mail-sent product. For now, we will only explore the standard product with no combinations, and deal with products with combinations, packs and virtual products in their own sections of this chapter.
...
| Tip |
|---|
To add new languages to your shop, go to the International section. You can either add just a language in "Translations" or add a localization pack in "Localization". You will find more information in the international section of the documentation. |
Global Buttons
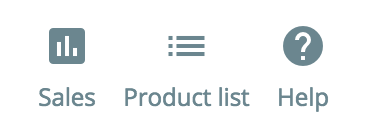
- Sales. Redirects you to the "Product detail" page of the statistics dashboard ("Stats" menu), which gives you a graphic of both the visits to this product's page , and also its sales.
- Product list. New in PrestaShop 1.7. Displays a list of all your products to allow you to quickly navigate from a product to another.
- Help. Opens the contextual help in a column, with the page from the User Guide corresponding to the product page.
...
- Delete (trash icon). Removes all the data for the current product and deletes it, including its images, combinations, features, etc.
- Preview. Displays the front office page of your product. This is very handy, as it works even if the product is disabled.
- Online / Offline. This is where you enable or disable your product. By default it is disabled, so your customers won't be able to see it in your shop.
Duplicate. Save the current product, then creates an exact copy of the current product and takes you to the new product page. This is very useful when you'd rather use the current product's data as a template for another new product, and not have to create every data of the new product by hand. For instance, two products might be very different , but could share the same associations, carriers or supplier settings.
Note title Don't over-duplicate! If you need to create different versions of the same product, because of its variety of colors, capacity, size, etc., then you should create product combination for the current product rather than duplicate it X times. See the "Combinations" option in the "Basic settings" tab, which is explained in the "Creating a product with combinations" section of this chapter.
- Go to Catalog. This saves any change you have made to any of the data for the current product , and takes you back to the product list.
- Add new product. This saves any change you have made to any of the data for the current product , and opens a new page to create a new product.
- Save. This saves any change you have made to any of the data for the current product , and keeps you on the current tab. This is particularly useful when you want to switch tabs without losing your changes to the current tab, or in order to see your changes get applied immediately.

| Tip | ||
|---|---|---|
| ||
Some keyboard shortcuts have been introduced in PrestaShop 1.7 to help you save time when you create several products in a row. The behavior is the same as described above, and it works for the following options:
|
...
The product page, which has been redesigned in PrestaShop 1.7, makes it easier to create a product thanks to enhanced tabs.
Basic settings
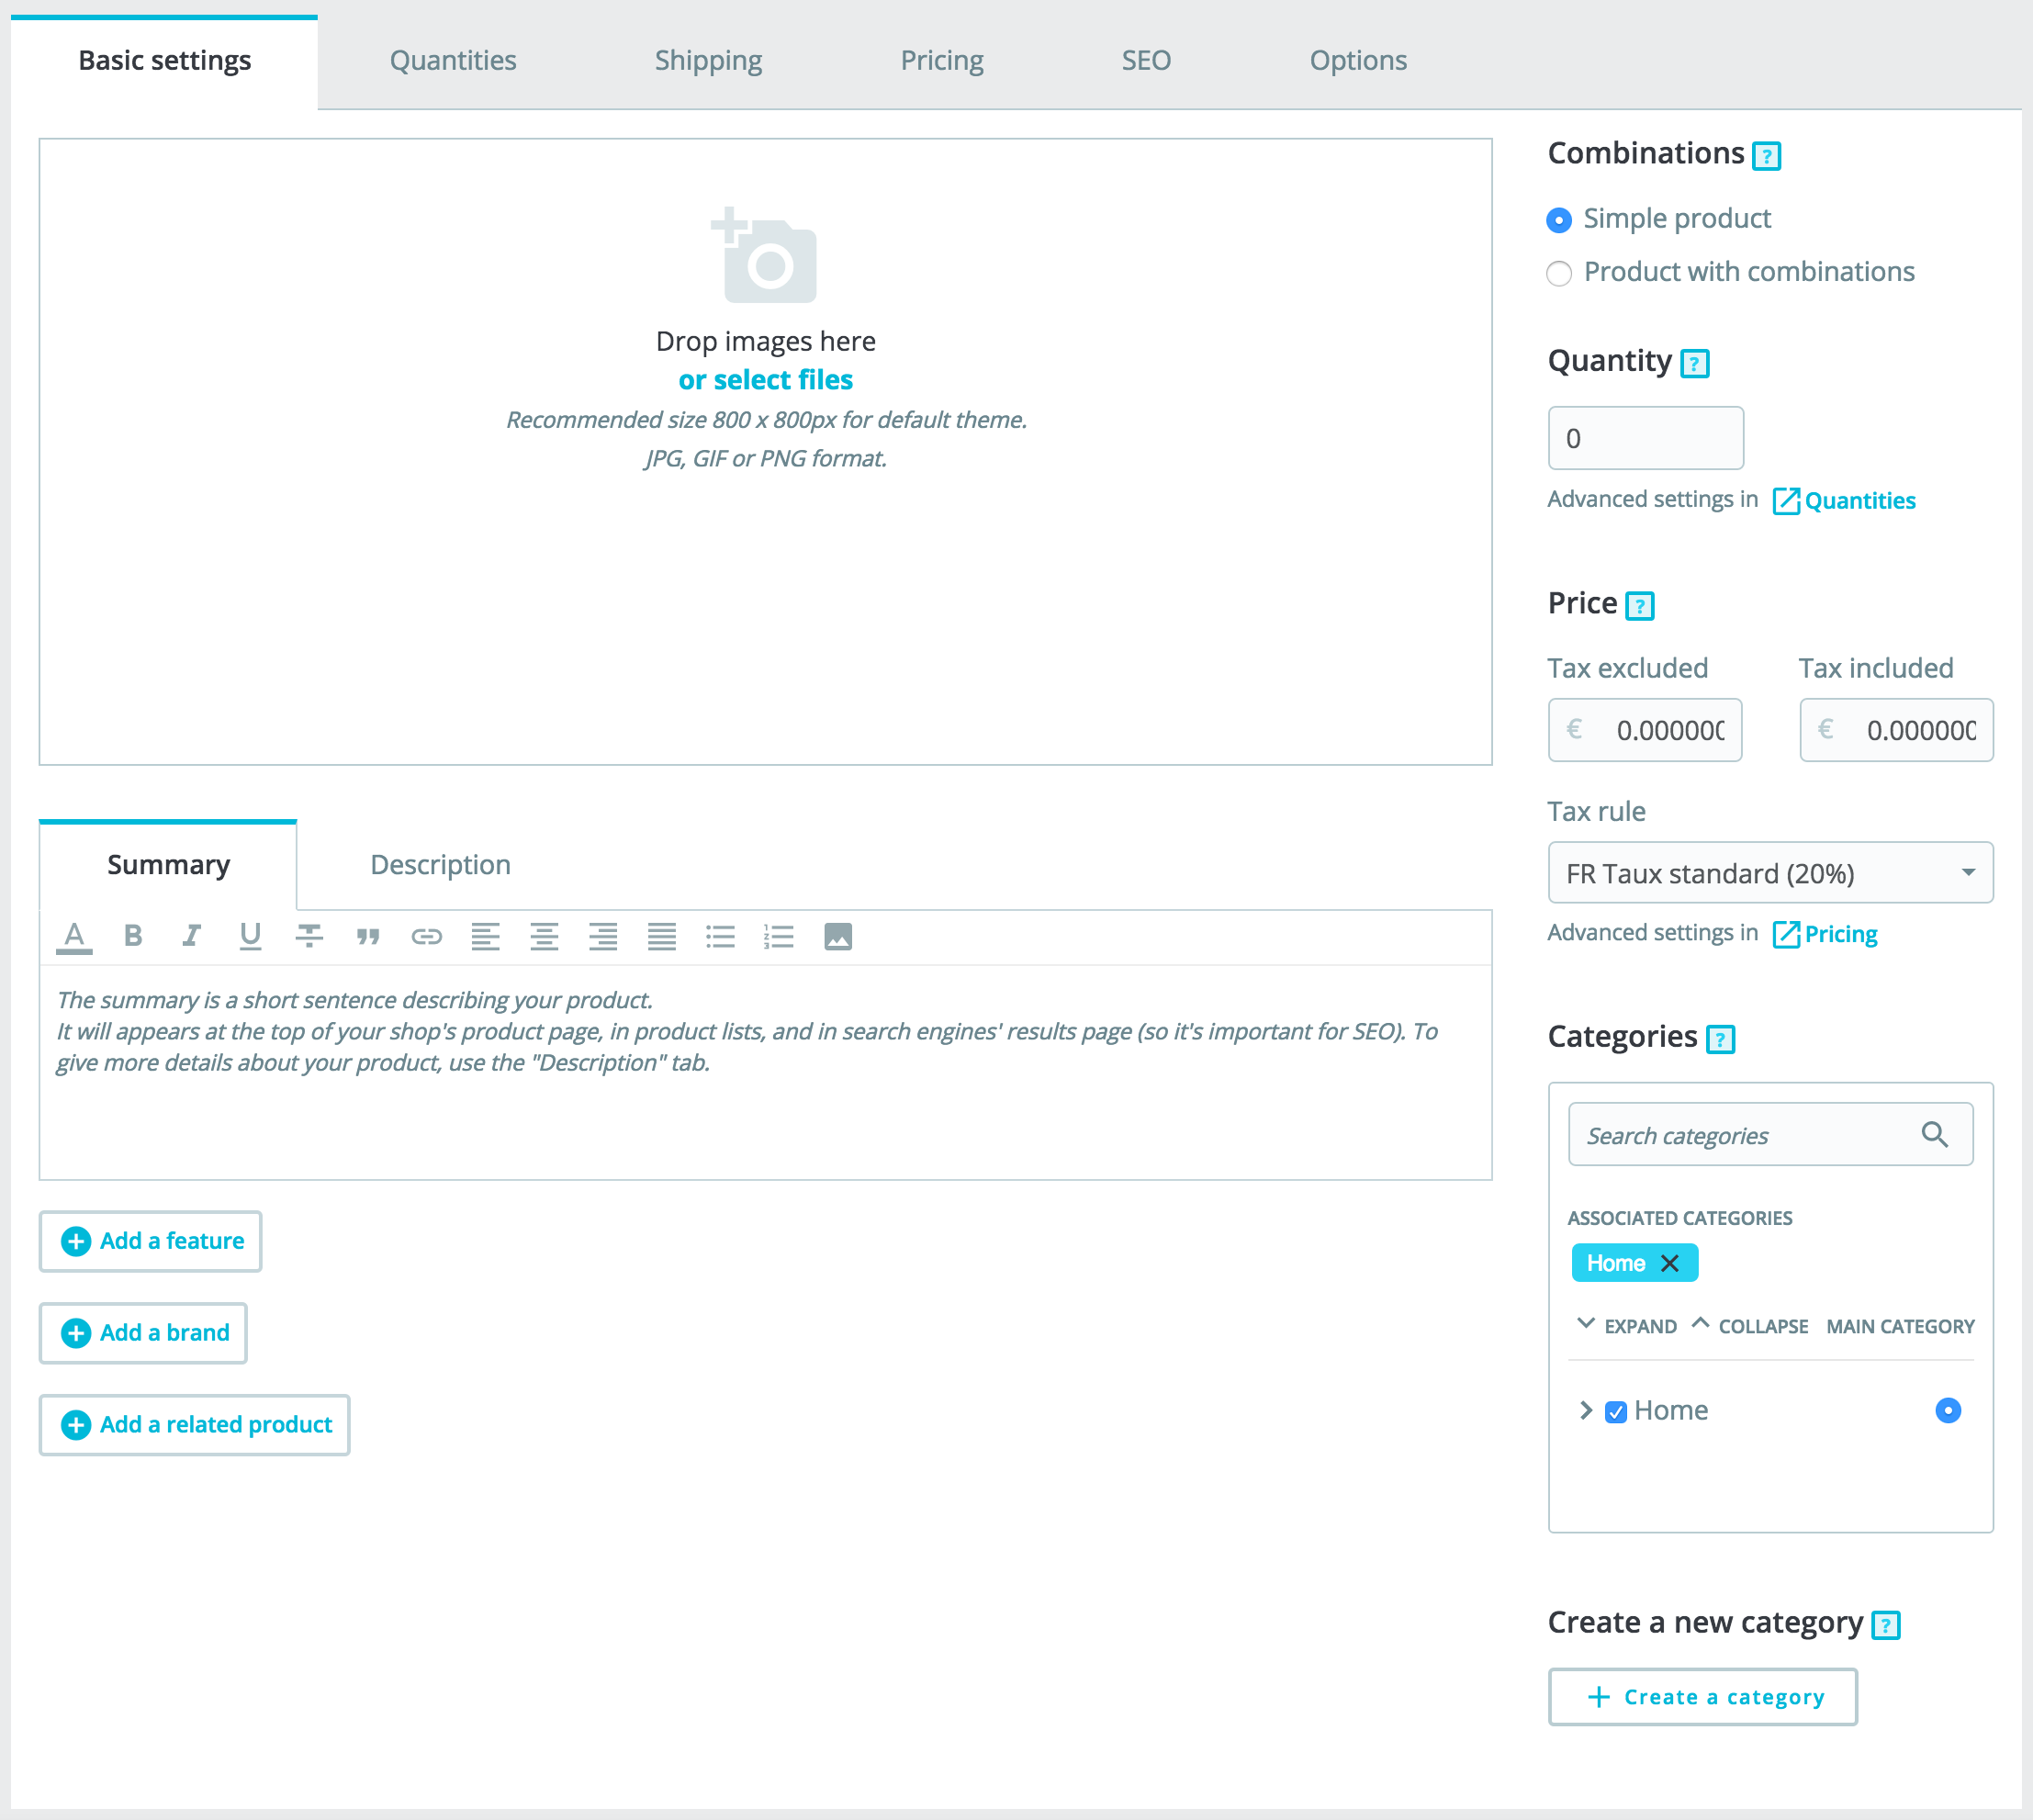
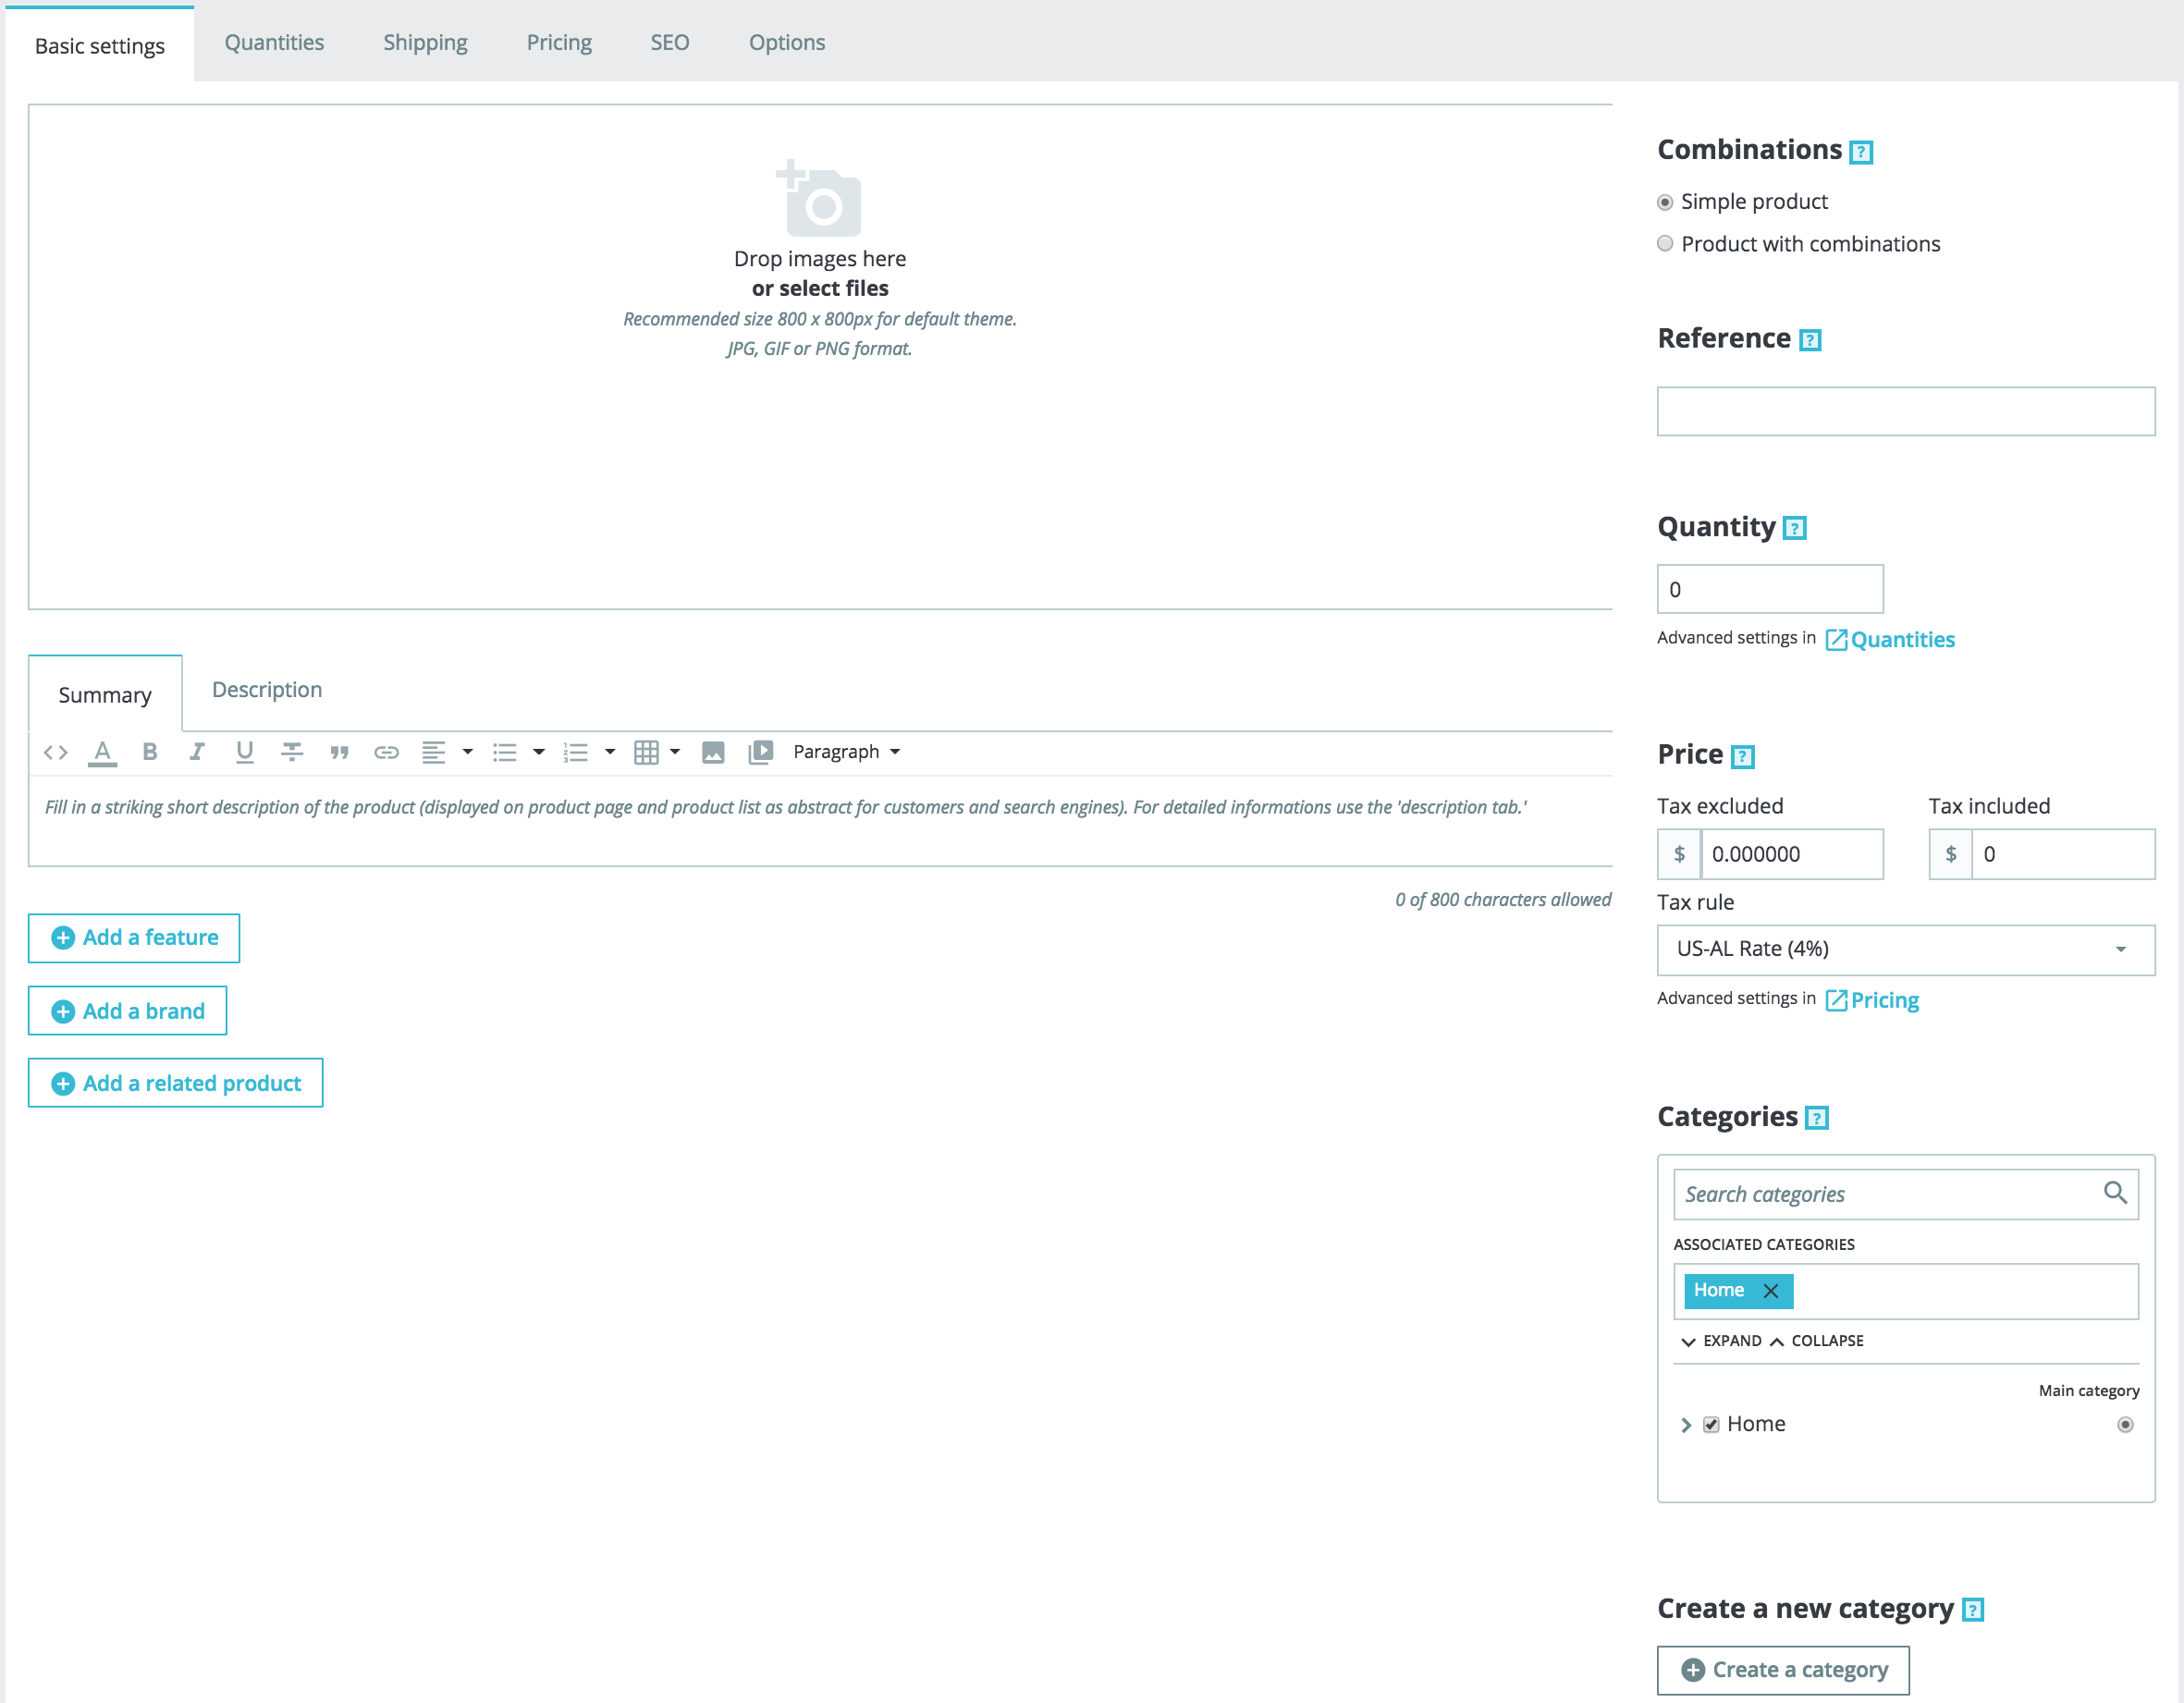
The "Basic Settings" tab provides the main options required to create a basic product: in a few clicks, you'll be able to create a new product. From there you can also browse the other tabs to add further details to your product.
...
Each image can have a caption: use it to briefly describe the image (and the product). If you have several languages, don't forget to translate it!
Sorting images
Once you have uploaded all your product images, you can modify their order by drag-and-dropping each image. You can also add more images by clicking on the "+" icon, or dropping it.
...
When clicking on "Add a feature", a drop-down menu appears, listing all of your shop's features. Select which feature you want to add. Next, you can either assign one of the pre-defined values (as set when creating the feature) if there are any available , or set a value manually in the "Customized value" field.
...
Remember: If a feature does not have any value assigned to it, it will not be taken into account for this product, and will not be visible on in your shop.
Brand
The same way you can add a feature, you can add a brand. Click on "Add a brand" and choose a brand in the dropdown drop-down menu.
If the brand you want isn't available in the drop-down menu, go to the "Brands & Suppliers" page to create a new brand.
...