...
Table of content
| Table of Contents | ||
|---|---|---|
|
Browsing the front-office
...
- (if the visitor is not logged in) The authentication screen, where the visitor can either go to the account creation page, or log in.
The delivery address page. If the user account has no registered address, the customer is directly taken to the address creation form.
Note Two addresses are necessary for an order:
- The delivery address, where the order should be sent.
- The billing address, which should be the one that is tied to the payment method.
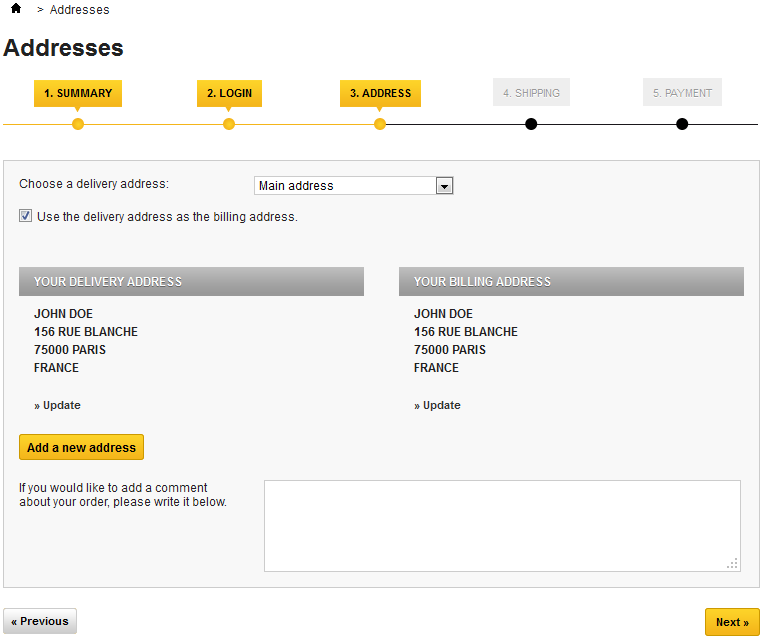
If the customer needs to have the order billed to an address other than the delivery one, he or she can deselect the "Use the delivery address as the billing address" box and either select an address from the currently registered ones, or create a new one.
If an address turns out to be wrong, the customer can use the "Update" link to correct it.
- The shipping page.
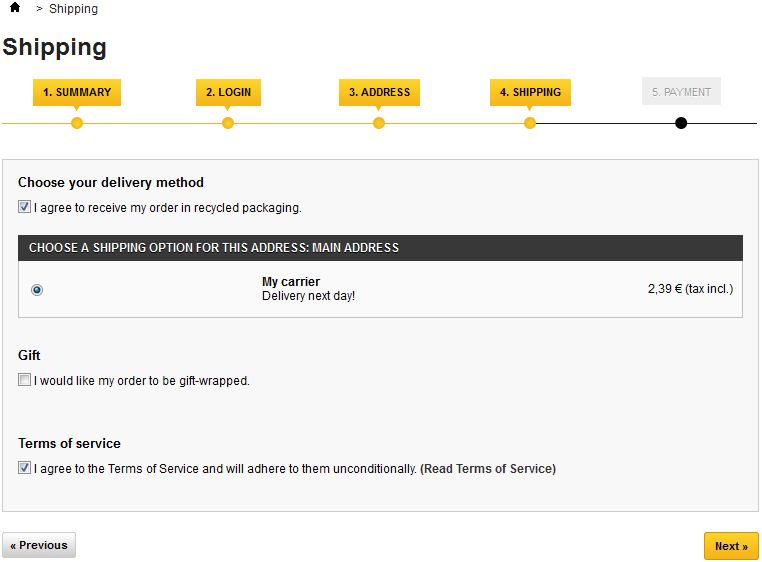
This is where the customer can choose from different shipping- and packaging-related options:- Agreeing to the shop's terms of service is a requirement.
- Depending on what the shop can offer, the customer may be able to choose recycled packaging and gift-wrapping (with an optional gift note)
- The customer MUST choose a carrier in order to reach the next step.
The payment page.
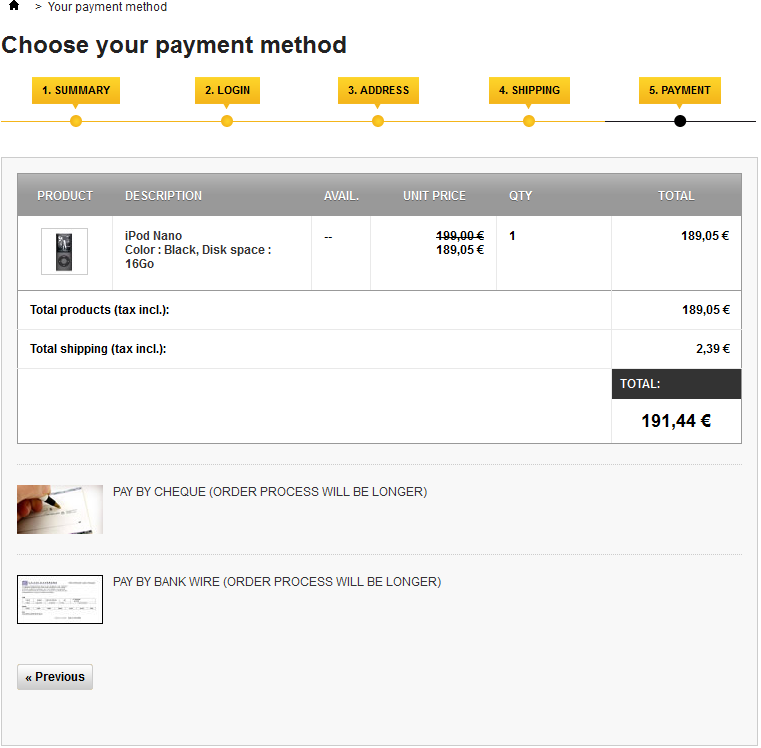
The customer can choose many payment options, depending on what the shop owner has set up. The customer clicks on the chosen method and depending on the method, is either sent over to the chosen third-party handler or continues to one of PrestaShop's pages where he or she can enter the needed details, such as a validation before displaying check or bank wire information.Note Check and bank wire are installed by default, but PrestaShop makes it easy to offer payment through PayPal, Google Checkout Hipay or any other 3rd party providers. See the modules installed by default in PrestaShop's back-office, or check the Addons marketplace for even more modules: http://addons.prestashop.com/.
- Once the customer has validated everything, the summary page is displayed.
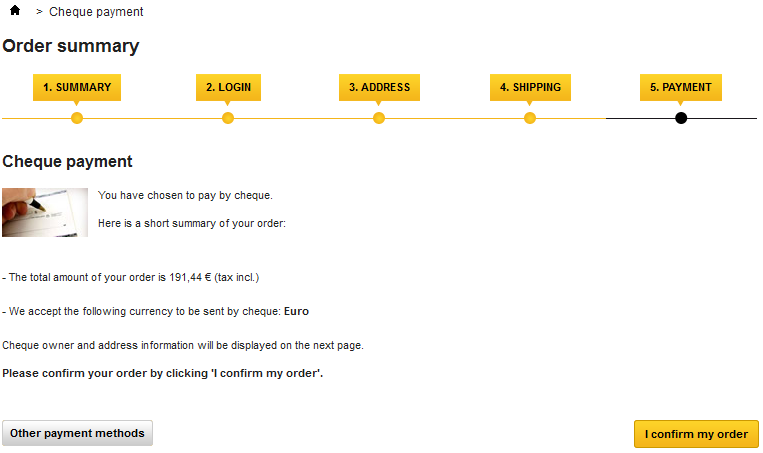
It begins with "Your order on (name of the shop) is complete". Depending on the chosen method of payment, some final information should be provided to the customer, along with a notification that a confirmation e-mail has been sent and a link to the customer support page. The customer must click on the "I confirm my order" button in order to have it validated
...