...
| Warning |
|---|
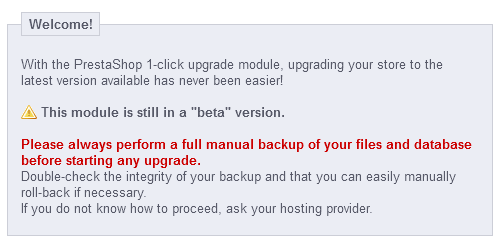
You should never update your online shop right away. The automatic upgrade tool can fail in some situations, and you might not be able to revert to the previous version. The safest way is to have an exact copy of your shop available, either on your local computer or in another folder of your web server. It should contain all your products, categories, themes, modules, translations, settings, etc. Make a trial upgrade on that copy of your shop. Once the upgrade is done, browse your front- and back-office thoroughly to make sure that everything is as expected. If not, then the upgrade tool has an issue with your configuration, and you should use the manual upgrade method, which is now deprecated and takes longer, but safer which may help in your situation. |
Downloading and installing the 1-Click Upgrade module
...
- Download the 1-Click Upgrade module from PrestaShop Addons: http://addons.prestashop.com/en/administration-tools/5496-autoupgrade.html. Save the Zip file to your desktop.
- In your PrestaShop administration panel, go to the main "Modules" tabpage of the "Modules" menu.
Click on the "Add a module" button, located at the top right of the list of available modules.
Tip If updating from version 1.4, click on the "Add a module from my computer" link, located at the top left.
- In the form that opens, click on the "Browse..." button, then find and select the module's Zip file that you just downloaded.
- Click the "Upload this Module" button. PrestaShop will put the module on your server, unzip it, and place the files in the
/modulesfolder.
...
- In the "Modules" tab, find the 1-Click Upgrade module: type "1-click upgrade" or "autoupgrade" in the module search box (not the global search at the top). A direct link to the module should appear as you type. Click it.
- PrestaShop then displays the module you just installed in the main module list.
- Click the module's "Install" button.
The module is now ready to configure and use.
The
...
configuration Screen
The module's configuration screen is available from the "Modules" list, by clicking on the module's "Configure" link.
...
This process is explained in details in the "Making and restoring your own backup" chapter of this guide: http://doc.prestashop.com/display/PS15/Making+and+restoring+your+own+backup.
Note that the 1-Click Upgrade module performs its own set of backup in order to allow for reverting of the whole upgrade. Nevertheless, you should rely on your own backups.
...
All these indicators must be green for the upgrade to work. Otherwise, the upgrade button will not appear.
| Note |
|---|
When your store is hosted on your local server ( |
Start your Upgrade
This section compares your version of PrestaShop with the latest stable one. You can quickly see whether you need to update or not. If you know that there is a newer version available than the one presented, you can trigger a version check by clicking the "Check if new version available" button.
...
- Server performance. Some shared hosted offer poor performance, which might hinder the performance of the upgrade process, or even make it fail. "Low" is thus selected by default, but if you know you have a powerful server, you can choose "Medium" or even "High".
- Disable non-native modules. It is recommended to choose "Yes" for this option, as some module might prove a hindrance when upgrading PrestaShop.
- Upgrade the "default" theme. The upgrade process overwrites the default theme with its latest incarnation. If you have made changes to the theme directly, you can protect these changes by choosing "YesNo". As a reminder, it is NOT recommended to edit the default theme! You should make a copy of the theme, and make changes to that copy.
- Upgrade the default e-mails. An update might bring new default e-mail templates. By default, the upgrade will replace the existing ones with the ones from the newer archive, and add the new templates. If you have customized your templates, it is recommended you keep them. You would then have to customize the new templates in order to fit the general style of your shop.
- Step-by-step mode. PrestaShop 1.5 Dev mode only. If enabled, the module will stop at each step to ask you for confirmation.
- Display PHP errors. PrestaShop 1.5 Dev mode only. If enabled, the module will displays PHP errors, which could help you discover server issues that would otherwise stay hidden from view.
...
- Removed files: only the sample files are removed, such as empty override classes and controllers.
- Name of the backup archive: the name follows the
auto-backupfiles_V1.45.8.2_2012062720130127-100310120310-798d3a69.zipform. - Files added to the backup archive: all the remaining files of your current installation are put into the Zip archive.
- Database tables added to the backup archive: your files are important, but your whole catalog is stored in your database, and is therefore saved in the same archive.
- Removed files: mostly modules, controllers, classes, CSS and JavaScript files. Now that all the files have been saved in the backup archive, they can be safely removed.
- Files copied from the new archive: all the existing files are replaced by their new version.
- Merged translation files.
- Created, deleted, altered and updated database tables.
- Emptied temporary folders: if possible, the upgrader will try and delete the content of the cache folders.
...
| Info |
|---|
When you upgrade from version 1.4 to version 1.5, your menus will not be arranged the way they would be if you made a fresh install.installation of version 1.5. That is because PrestaShop 1.4 tabs got reorganized into 1.5 menus, and a lot of pages were moved around in order to create consistent menus. Additionally, the upgrader assumes that your 1.4 tab tabs may have been customized or moved around, either by a module or by your own action. Therefore, rather than breaking the existing settings, the upgrader takes the tabs as-is, and does not re-arrange them into the 1default 1.5 menu order. If you want to change the position of options pages within a menu once you have updated to version 1.5, go the to "TabsMenus" page under the "Administration" menu, and start fiddling with positions. |
...
Is everything working fine? Congratulations, you know have successfully upgraded your PrestaShop install!installation!
| Warning | ||||
|---|---|---|---|---|
In some server configurations, an error message might be displayed, saying "Javascript error (parseJSON) detected for action "upgradeNow". Starting restoration...". Follow these steps to solve the error, :
After you have done all this, start the autoupgrade process again. |
Going back to the previous version: rollbacks
...
This is explained in details in the "Making and restoring your own backup" of this guide: http://doc.prestashop.com/display/PS15/Making+and+restoring+your+own+backup.