...
The first line is an essential one: indicate whether the product is a pack (a combination of at least two existing products), a virtual product (downloadable file, service, etc.), or simply a classic, mail-sent product. For now, we will only explore the classic product, and deal with packs and virtual products in their own sections of this chapter.
Product List
Tabs
...
Global Buttons
By default, the product creation page has two buttons that you will find on most the administration pages: "Recommended modules and Services" and "Help".
- Sales. Redirects you to the "Product detail" page of the statistics dashboard ("Stats" menu), which gives you a graphic of both the visits to this product's page, and also its sales.
- Product list.
- Help
At the bottom of each page, there are several actions posisblepossible:
- Delete (trash icon). Removes all the data for the current product and deletes it, including its images, combinations, features, etc.
- Preview. Displays the front office page of your product. This is very handy, as it works even if the product is disabled.
- Offline. This is where you enable or disable your product. By default it is enabledisabled, so your customers won't be able to see it in your shop.
Duplicate. Creates Save the current product, then creates an exact copy of the current product and takes you to the new product page. This is very useful when you'd rather use the current product's data as a template for another new product, and not have to create every data of the new product by hand. For instance, two products might be very different, but could share the same associations, carriers or supplier settings.
Note title Don't over-duplicate! If you need to create different versions of the same product, because of its variety of colors, capacity, size, etc., then you should create product combination for the current product rather than duplicating it X times. See the "Combinations" tab on the left, which is explained in the "Adding Product Combinations" section of this chapter.
- Go to Catalog. This saves any change you have made to any of the data for the current product, and takes you back to the product list.
- Add new product.
- Save. This saves any change you have made to any of the data for the current product, and keeps you on the current tab. This is particularly useful when you want to switch tabs without losing your changes to the current tab, or in order to see your changes get applied immediately.
- Sales. Redirects you to the "Product detail" page of the statistics dashboard ("Stats" menu), which gives you a graphic of both the visits to this product's page, and also its sales.
- Recommended modules. Opens a modal window suggesting you to install some popular modules from PrestaShop's Addons marketplace.
Tabs
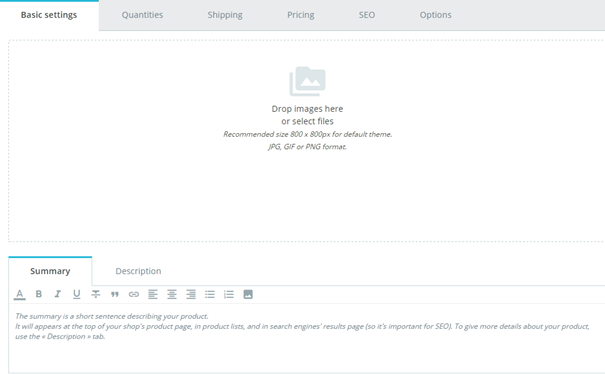
Basic settings
Images
The "Images" tab on the left is for including photos on your product page. You should upload all the images for this product, including all of its combinations (color, size, shape, etc.).
...