...
Finally, the top of the product list presents four five buttons:
![]()
![]()
- Add new product. Creates a new product.
- Export. Downloads a CSV file of all the products in your catalog.
- Import. Sends you to the CSV Import option page, from where your can import your CSV files.
- Refresh List. Reloads the list of products to display the latest changes.
- Export to SQL Manager. Opens PrestaShop's SQL Manager tool (in the "Advanced Parameters") menu, from which you can query PrestaShop's database with SQL statements ("
SELECT ... FROM ... WHERE ...").
If your list of product was filter (by name, for instance), then the default SQL statement will take this into account (for instance, "WHERE 1 AND b.`name` LIKE '%blouse%'").
You can add new products by clicking on "Add new". A form appears, with several tabs in the left column and two buttons at the top: "Back to list" and "Help".
...
- Preview. Displays the front-office page of your product. This is very handy, as it works even if the product is disabled ("Information" tab).
Duplicate. Creates an exact copy of the current product. This is very useful when you'd rather use the current product's data as a template for another new product, and not have to create every data of the new product by hand. For instance, two products might be very different, but could share the same associations, carriers or supplier settings.
Note title Don't over-duplicate! If you need to create different versions of the same product, because of its variety of colors, capacity, size, etc., then you should create product combination for the current product rather than duplicating it X times. See the "Combinations" tab on the left, which is explained in the "Adding Product Combinations" section of this chapter.
- Product sales. Redirects you to the "Product detail" page of the statistics dashboard ("Stats" menu), which gives you a graphic of both the visits to this product's page, and also its sales.
- Delete this product. Removes all the data for the current product, including its images, combinations, features, etc.
- Recommended modules. Opens a modal window suggesting you to install some popular modules from PrestaShop's Addons marketplace.
![]()
Filling out the Product Information
...
This is all done in the "Prices" tab on the left. The pricing section can be quite intimidating, with fields influencing each other and taxes to take into account – but it is in fact quite simple.

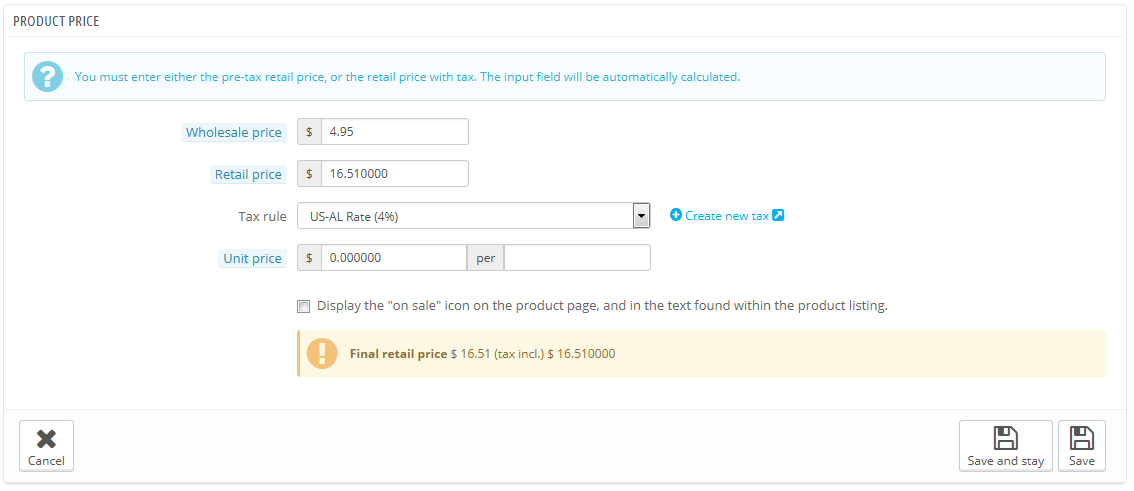
Set the price that will appear in your store by following the instructions below:
- Pre-tax wholesale Wholesale price. Enables you to instantly know your wholesale, factory price, and thus compare it to your selling price in order to easily calculate your profit.
- Pre-tax retail Retail price. The price of your product before taxes.
- Tax rule. The tax applicable to the product. Choose between the different rates that you have registered.
If you need to create new tax rates, click the "Create New Tax" button. Tax creation is done in the "Localization" menu, "Taxes" page; it is fully explained in the "Understanding Local Settings" chapter of this guide. - Eco-tax (tax incl.). The value of the ecotax for this product. This value is already included in your retail price. You are supposed to declare that tax to your country's tax agency.
Note that this field is not displayed by default. If you have to include an ecotax, you must first enable it: go to the "Localization" menu, "Taxes" page, "Tax options" section (bottom of the page), and choose "Yes" for the "Use ecotax" option. - Retail price with tax. Displays the price of the product with taxes included. You can edit the value, and it will automatically update the "Pre-tax retail price" field according to the tax rule that you chose.
- Unit price. Enables you to conform to local legislations that require products to be displayed with their unit price.
For instance, if you are selling a pack of 6 cans of soda, then you should fill this field with the price per can, and indicate "can" in the text field. The description on the same line will update accordingly. - Display the "on sale" icon on the product page and in the text found within the product listing. Check that box to show that your product is on sale, both on the product page and in the text on the product listing. An "On sale" icon will appear under the product. You can modify this logo by changing the following file:
themes/default/img/onsale_en.gif - Final retail price. This price, including the discount taken, will update as you type.
...
The "Images" tab on the left is for including photos on your product page. You should upload all the images for this product, including all of its combinations (color, size, shape, etc.).
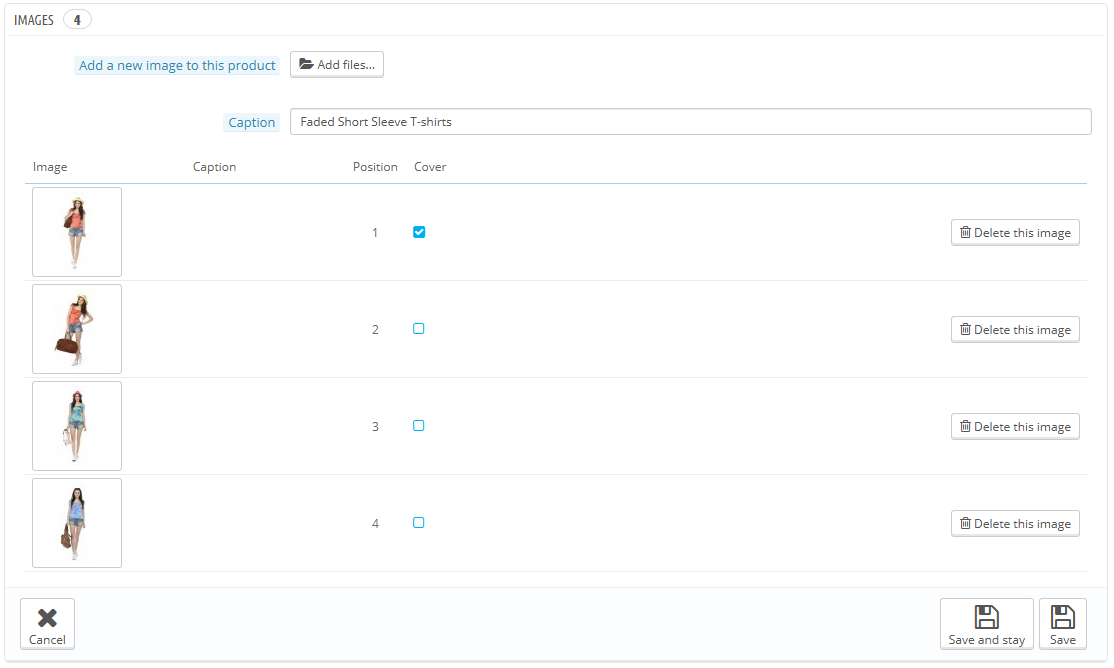
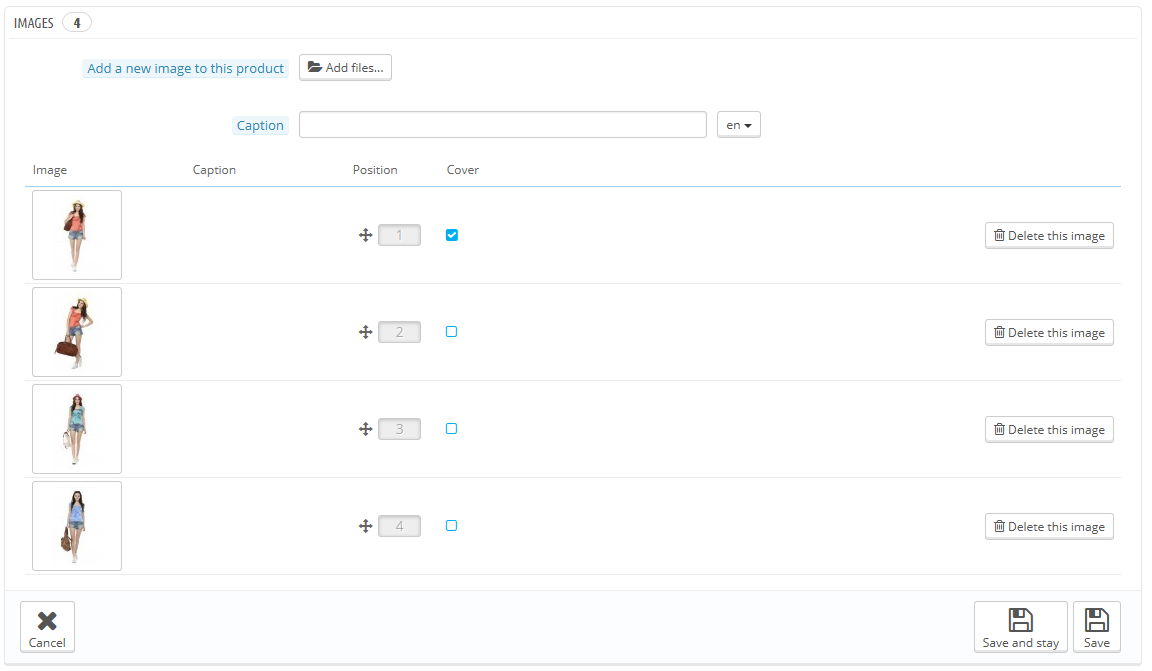
To add one or more images to your product:
...