...
| Table of Contents | ||||
|---|---|---|---|---|
|
The Product List
Clicking on the "Products" option of the "Catalog" menu takes you to the list of your current products, displayed with their main details: ID, photo, name, reference, category, etc.
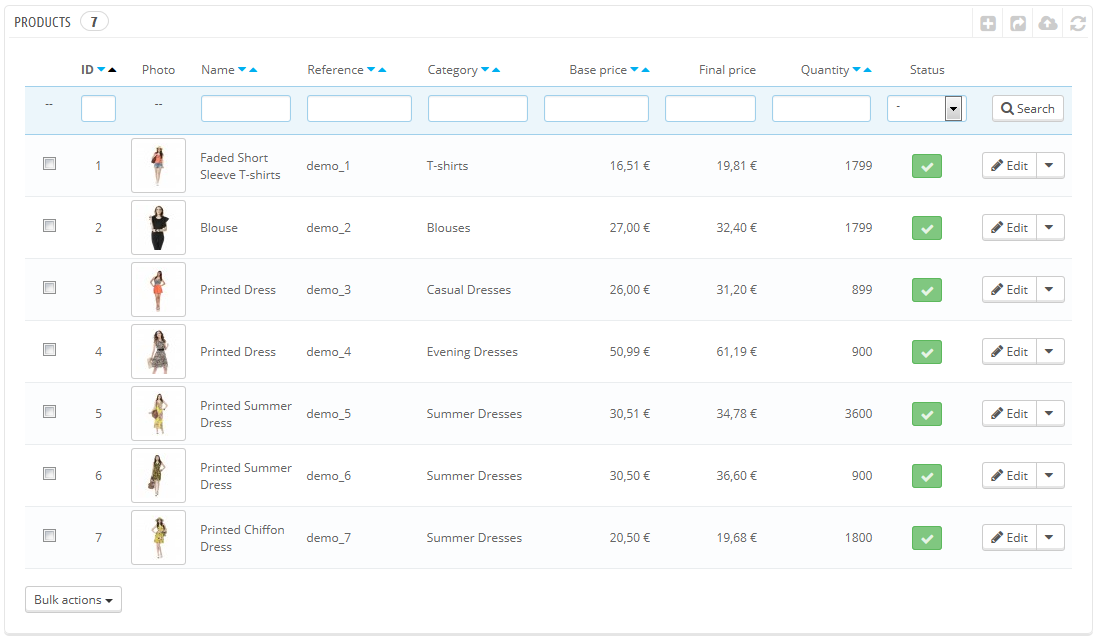
Beside the product list, this page presents you with four statistics from your store:
...
| Info | ||
|---|---|---|
| ||
You cannot reorganize the whole list of products. The products are displayed as is in your store (by increasing ID number), and the customer can choose the product's order using the available sorting algorithms: lowest price first, highest price first, product name A to Z, product name Z to A, in-stock first, lowest reference first, highest reference first. You can organize products on a per-category basis by clicking on the "Filter by category" checkbox. This opens a small interface listing all your categories and sub-categories. Selecting one category automatically filters the list of products to only display products from the selected category. It also adds a "Position" column to the table, with which you can order the product on the category page. This is done either by moving the rows up and down, or by clicking the arrows. Your product order can then be overridden by the user's sorting choice. Note that when you change the display order in the product list in the back - office (by clicking on column name's arrow in order to sort products according to that column), the "Position" column does not display arrows nor can you use it to move rows around anymore. Instead, it displays the position number of the product. In order to be able to position products again, click on the "Reset" button. |
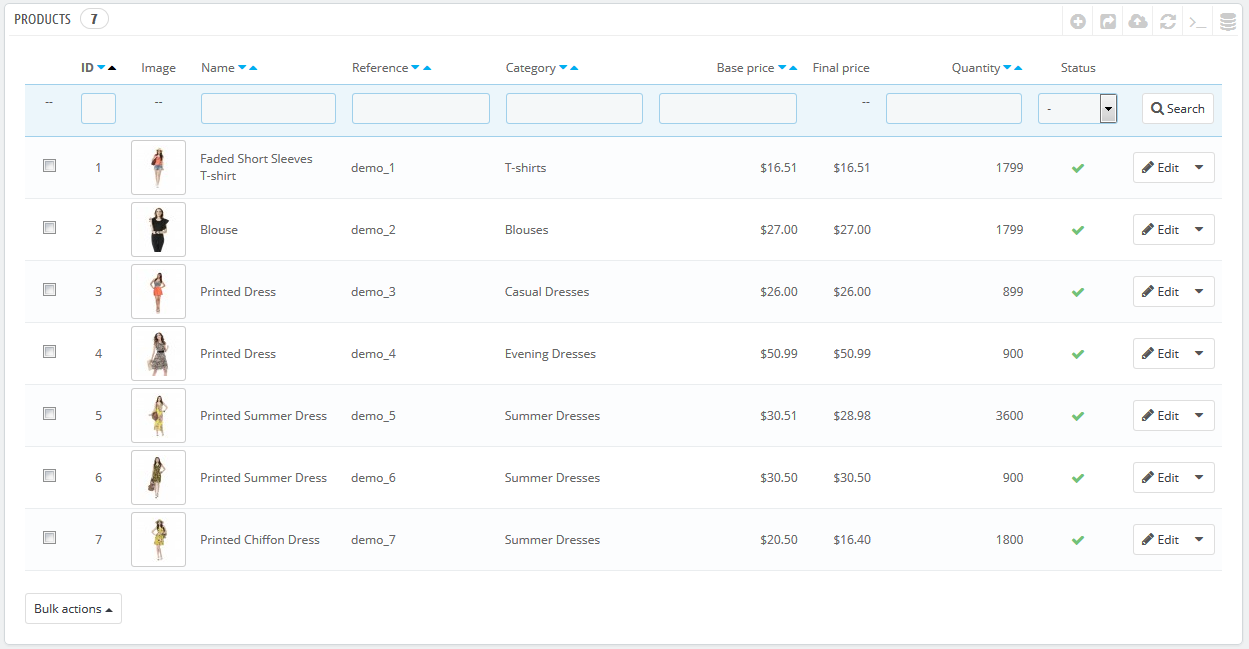
Finally, the top of the product list presents four five buttons:
![]()
![]()
- Add new product. Creates a new product.
- Export. Downloads a CSV file of all the products in your catalog.
- Import. Sends you to the CSV Import option page, from where your can import your CSV files.
- Refresh List. Reloads the list of products to display the latest changes.
- Show SQL Query. Provides the SQL query to reproduce your product search or filter in your own SQL manager.
- Export to SQL Manager. Opens PrestaShop's SQL Manager tool (in the "Advanced Parameters") menu, from which you can query PrestaShop's database with SQL statements ("
SELECT ... FROM ... WHERE ...").
If your list of product was filtered (by name, for instance), then the default SQL statement will take this into account (for instance, "WHERE 1 AND b.`name` LIKE '%blouse%'").
You can add new products by clicking on "Add new". A form appears, with several tabs in the left column and two buttons at the top: "Back to list" and "Help".
...
By default, the product creation page has two buttons that you will find on most the administration pages: "Recommended modules and Services" and "Help".
At the bottom of the each page are three each page, there are three buttons:
- Save. This saves any change you have made to any of the data for the current product, and takes you back to the product list.
- Save and stay. This saves any change you have made to any of the data for the current product, and keeps you on the current tab. This is particularly useful when you want to switch tabs without losing your changes to the current tab, or in order to see your changes get applied immediately.
- Cancel. It simply takes you back to the list of product, without saving any change you have made in any of the tab from this page.
...
- Preview. Displays the front -office page page of your product. This is very handy, as it works even if the product is disabled ("Information" tab).
Duplicate. Creates an exact copy of the current product. This is very useful when you'd rather use the current product's data as a template for another new product, and not have to create every data of the new product by hand. For instance, two products might be very different, but could share the same associations, carriers or supplier settings.
Note title Don't over-duplicate! If you need to create different versions of the same product, because of its variety of colors, capacity, size, etc., then you should create product combination for the current product rather than duplicating it X times. See the "Combinations" tab on the left, which is explained in the "Adding Product Combinations" section of this chapter.
- Product sales. Redirects you to the "Product detail" page of the statistics dashboard ("Stats" menu), which gives you a graphic of both the visits to this product's page, and also its sales.
- Delete this product. Removes all the data for the current product, including its images, combinations, features, etc.
![]()
- Recommended modules. Opens a modal window suggesting you to install some popular modules from PrestaShop's Addons marketplace.

Filling out the Product Information
The first tab contains the basic information about the product.
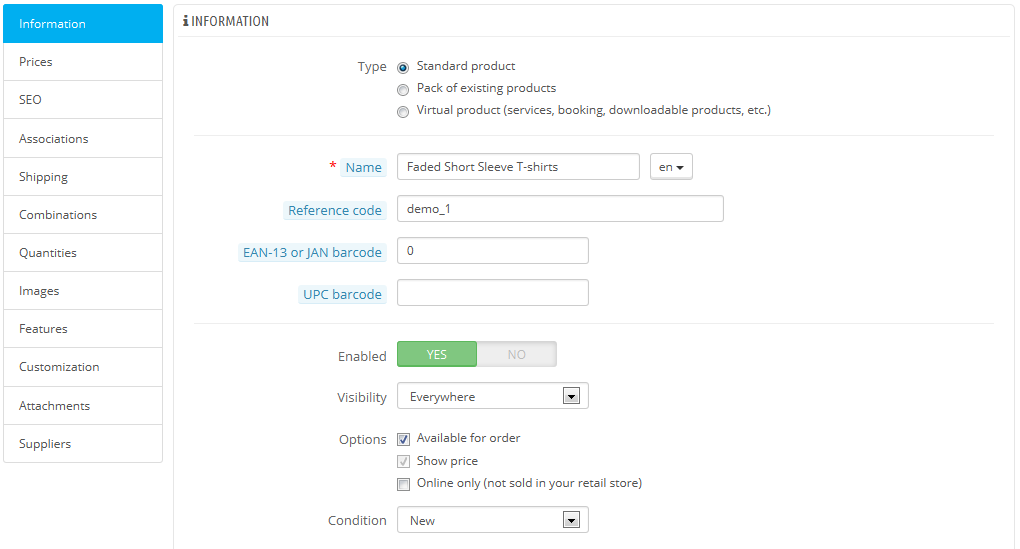
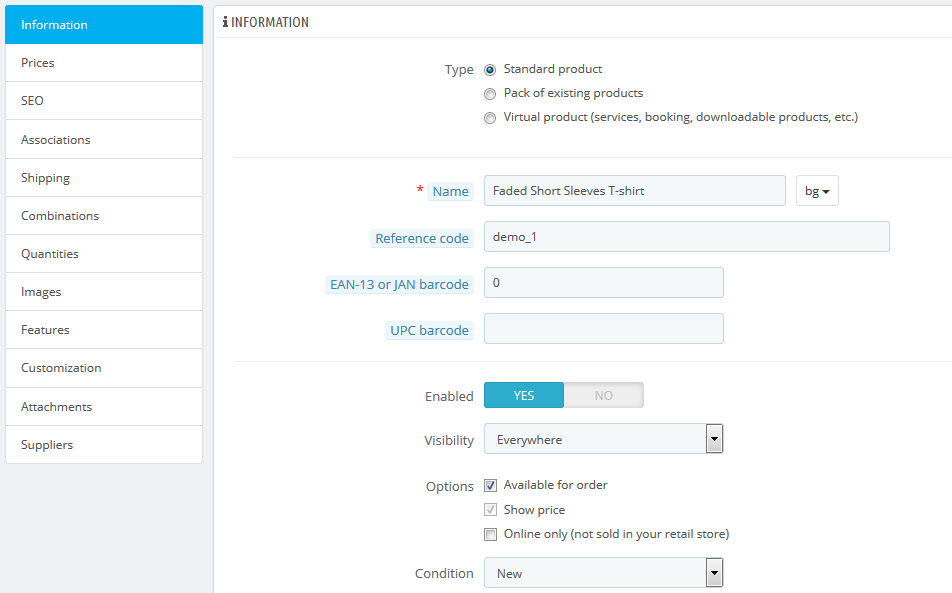
The first line is an essential one: indicate whether the product is a pack (a combination of at least two existing products), a virtual product (downloadable file, service, etc.), or simply a classic, mail-sent product. For now, we will only explore the first option of these threeclassic product, and deal with packs and virtual products in their own sections of this chapter.
...
Simply select the image you want, choose its position according to the text and its size, and PrestaShop will generate a an image tag which you can then put right into the description (preferably between two paragraphs, or at the very beginning of a paragraph).
...
This is all done in the "Prices" tab on the left. The pricing section can be quite intimidating, with fields influencing each other and taxes to take into account – but it is in fact quite simple.

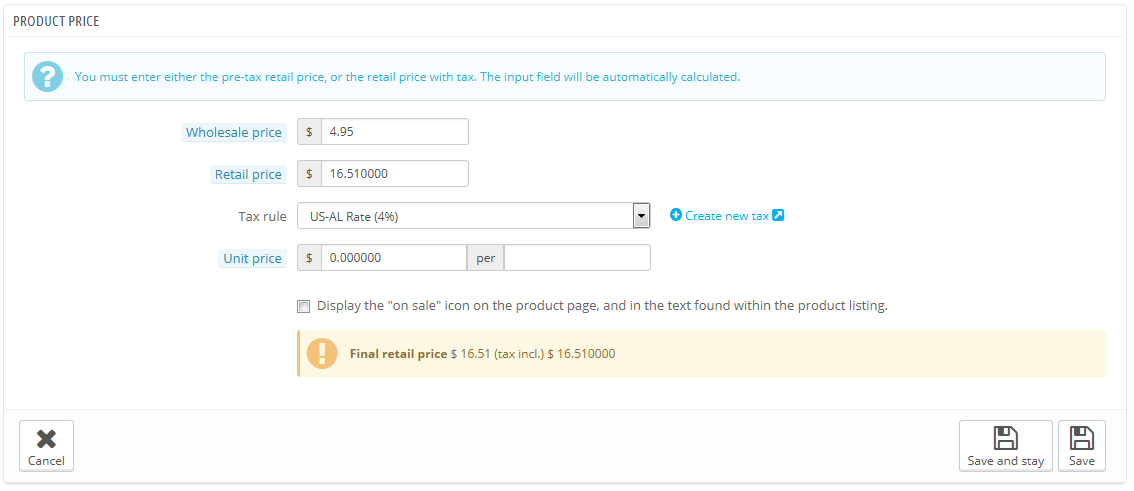
Set the price that will appear in your store by following the instructions below:
- Pre-tax wholesale Wholesale price. Enables you to instantly know your wholesale, factory price, and thus compare it to your selling price in order to easily calculate your profit.
- Pre-tax retail Retail price. The price of your product before taxes.
- Tax rule. The tax applicable to the product. Choose between the different rates that you have registered.
If you need to create new tax rates, click the "Create New Tax" button. Tax creation is done in the "Localization" menu, "Taxes" page; it is fully explained in the "Understanding Local Settings" chapter of this guide. - Eco-tax (tax incl.). The value of the ecotax for this product. This value is already included in your retail price. You are supposed to declare that tax to your country's tax agency.
Note that this field is not displayed by default. If you have to include an ecotax, you must first enable it: go to the "Localization" menu, "Taxes" page, "Tax options" section (bottom of the page), and choose "Yes" for the "Use ecotax" option. - Retail price with tax. Displays the price of the product with taxes included. You can edit the value, and it will automatically update the "Pre-tax retail price" field according to the tax rule that you chose.
- Unit price. Enables you to conform to local legislations that require products to be displayed with their unit price.
For instance, if you are selling a pack of 6 cans of soda, then you should fill this field with the price per can, and indicate "can" in the text field. The description on the same line will update accordingly. - Display the "on sale" icon on the product page and in the text found within the product listing. Check that box to show that your product is on sale, both on the product page and in the text on the product listing. An "On sale" icon will appear under the product. You can modify this logo by changing the following file:
themes/default/img/onsale_en.gif - Final retail price. This price, including the discount taken, will update as you type.
...
If you want to build more complex discounts, go read about the "Price rules" menu in the "Creating Price Rules And and Vouchers" chapter of this guide.
...
Package width, height, depth & weight. You should strive to fill each field, because knowing the exact size and weight of a package is not only useful to you, but PrestaShop can also direct specific sizes/weights to specific carriers automatically, based on these settings. The order's final price will appear to the customer once PrestaShop (or the customer) has selected a carrier.
Note These values use the default weight, volume, distance and dimension units, as set in the "Localization" page of the "Localization" menu.
These values do not have to be integers. If your products weight less than 1 lbs, you can simply use a period (.) to indicate the fractions:
- 123 lbs
- 1.23 lbs
- 0.23 lbs (equals 3.68 oz)
- etc.
- Additional shipping fees. This can prove very useful to you for specific products that are particularly tricky to package, or really heavy.
- Carriers. You can choose to have the current product only be shipped by a selection of carriers. If no carrier is selected then all the carriers will be available for customers customer orders.
Adding Product Combinations
...
- Attribute-value pair.
- From the drop-down menu, choose a group of attributes, such as "Color" for example. The content of the "Value" dropdown list updates accordingly.
- Choose the attribute value that you would like to include, for example "Blue".
- Click on the "Add" button and it will appear in the selector.
You can add as many attribute-value pairs as necessary to one combination.
You can only add one pair per attribute to one combination: it is impossible to have both "Color: Blue" and "Color: Red" in your pairs; if this is necessary, you will have to create new attributes, for instance "Primary color" and "Secondary color".
You can delete an attribute-value pair by selecting it and clicking on the "Delete" button.
- Reference, EAN-13 & UPC. If necessary, indicate the combination's reference, EAN-13 and/or UPC numbers into each field, as if you were creating a brand new product in PrestaShop. These numbers may be used by your warehouse or your carrier, so make sure to fill these fields, they are often essential to your business.
- Wholesale price. This field is useful if the original price of the product changes simply because this is a combination.
- Impact on price/weight/unit price. If the combination is supposed to have an impact on the product's original price/weight/unit price, choose the appropriate dropdown menu, select "Increase" or "Reduction" depending on the context, and fill the field that appears with the value of that impact.
- Ecotax. The specific ecotax for this combination (if the ecotax option is enabled).
- Minimum quantity. You might prefer this combination to only be sold in bulk. Use this field to set the number of items to be sold in bulk.
- Available date. If this is a temporary or promotional product combinationproduct is out of stock, you can indicate when the date at which this product should not product will be available for sale anymoreagain.
- Image. The images that are linked to the original product (as uploaded using the form in the "Images" tab on the left) are displayed. Check the box for the images that best represent this combination.
- Default. Check this box if you want the combination you are creating to actually be the main one for this product.
...
The "Images" tab on the left is for including photos on your product page. You should upload all the images for this product, including all of its combinations (color, size, shape, etc.).
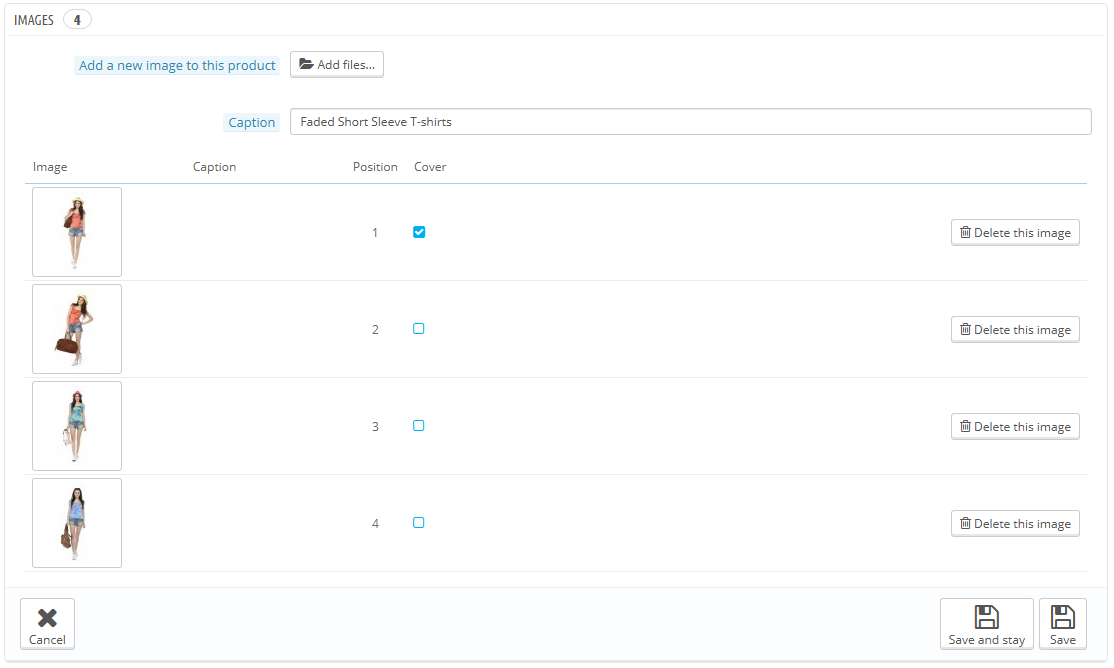
To add one or more images to your product:
- Click the "Add files" button and then select at least one image file from your computer to upload. You can select as many images as necessary by keeping the Ctrl-key pressed while selecting files, or you can make your selection one by one. PrestaShop will display the chosen images in a list, with their size and a button to remove some.
The default maximal size for an image file is set by PrestaShop according to your server's PHP settings. This size can be lowered in the "Images" preference page, "Product images" section. - Give the image a caption. It will be displayed if the image cannot be displayed – which can be very good for your search engine optimization.
- Click on the upload button to put your file online.
- The uploaded images appear in a table below the button. If you have more than one image, you can choose which image is to be used as the default/cover image by clicking on the red "no entry" button and turn it into a checkmark. That cover image will also appear automatically on the product page of your shop.
You can click on a thumbnail to display the image in full size.
Pour ajouter une ou plusieurs images à votre produit :
- Cliquez sur le bouton "Ajouter des fichiers", puis sélectionnez dans votre ordinateur au moins un fichier d'image à charger. Vous pouvez sélectionner autant d'images que nécessaire en maintenant pressée la touche Ctrl tout en faisant votre sélection de fichiers, ou les ajouter une à une. PrestaShop vous affichera la liste des images choisie, avec leur taille et la possibilité d'en retirer certaines.
La taille maximale est réglée par PrestaShop en fonction de la configuration PHP de votre serveur. Cette taille peut être baissée dans la page de préférences "Images", dans la section "Images produit". - Donnez une légende aux images mises en ligne. Elle sera affichée si l'image ne s'affiche pas.
- Cliquez sur le bouton "Télécharger des fichiers vers le serveur" pour mettre vos images en ligne.
- Les images apparaissent dans un tableau sous le formulaire. Si vous avez plus d'une image, vous pouvez indiquer l'image qui doit être utilisée comme image principale. Cette image de couverture sera celle par défaut sur la page produit de votre boutique.
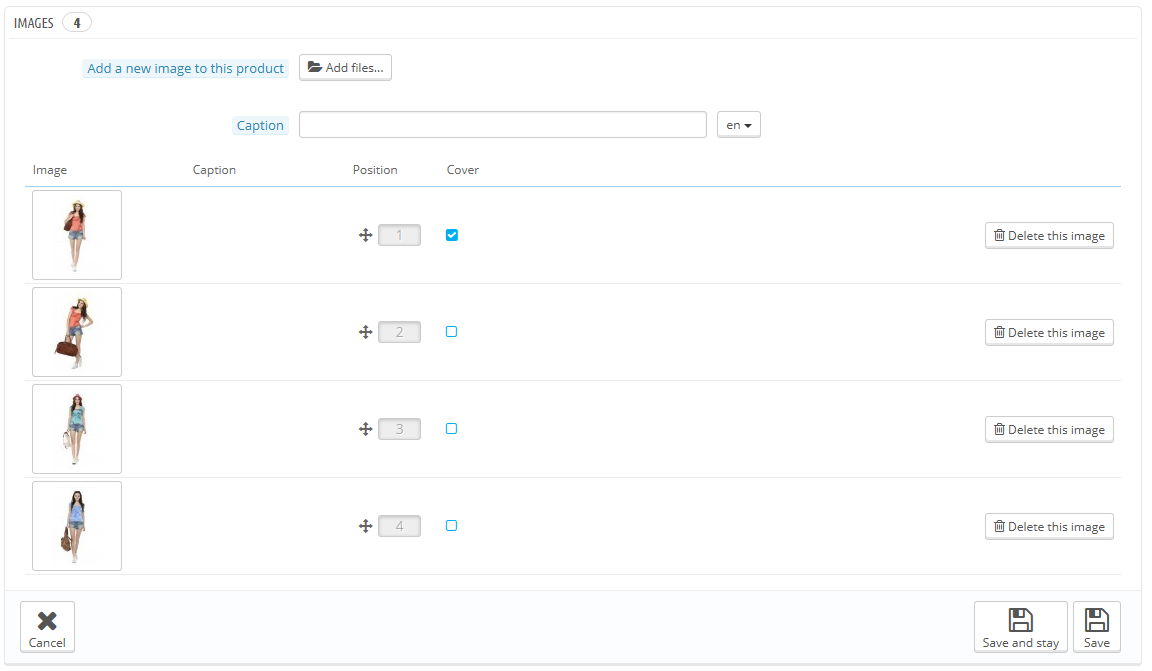
The "Legend" field enables you to add a short descriptive text for the images – which can be very good for your search engine optimization.
Once you have uploaded all your product images, you can modify the image order by drag-and-dropping each table row when the mouse cursor changes to a "movable" cursor.
...
The "Features" tab is where you specify your products' features (i.e. weight, material, country of origin, etc.).
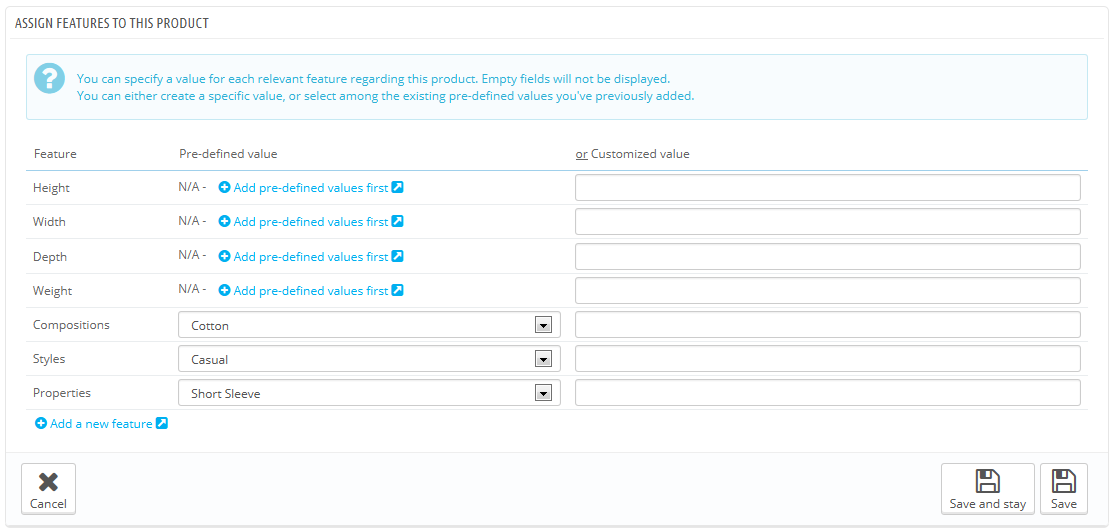
When you create features and values (i.e. wool knit and micro-fiber materials), you assign them to the products when it is appropriate. This means that you do not have to fill out the features fields for each of your products but instead simply fill in the necessary values and apply them later.
...
Feature and feature value creation are explained in details in the next chapter dedicated section of this guide, "A Look Inside the Catalog"the guide.
Assigning a value and feature to a product
...
Let's look at how to configure this function. In the "Customization" tab on the left, you can indicate what type of context (file and/or text) can be personalized.
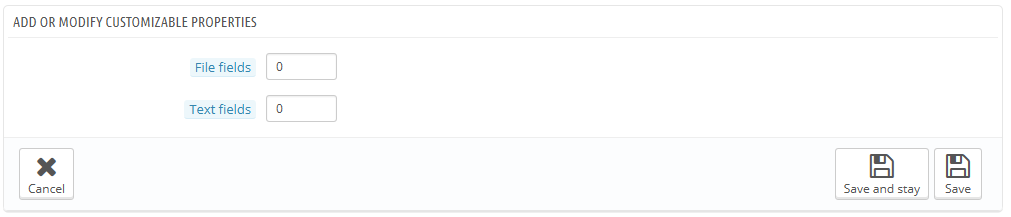
- File fields. Puts the indicated number of file upload buttons on the order page. Each button accepts only one file, so put as many field as you allow your customers to upload.
- Text fields. Puts the indicated number of text fields on the order page. You can add as many text fields as necessary.
Example: If you allow your customer to use a 5-line text with each line limited to 14 characters, you can add 5 fields and indicate the number of allowed characters in the field's label. You cannot limit the number of characters in the string.
...
Once the order has been validated by the customer, the merchant gets a notification of the order in the back - office.
He can then check on the order, which will indicate the image(s) and the text(s) in the list of products, for each product. The merchant then simply has to download the image(s) (simply by clicking on the image in the order) or copy/paste the text and use that in its customization tool.
...
PrestaShop enables you to make some files available to your customers before their purchase. This is done in the "Attachments" tab on the left.

For example, let's say you sell electronics, and you would like to urge your customers to read a document on how a product works. You can upload a document for that purpose.
You could also simply have the product's PDF manual directly available for download right on the product page.
...
- Fill out the file name of your attachment (it doesn't have to be the same as the original file name).
- Give it a description. This will help you distinguish between your uploaded files with certainty.
- Click on "Choose a Add file" to select a file on your computer to upload. As soon as you choose the file, PrestaShop uploads it, then displays it in the list
- The attachment appears in the "Available attachments" list: you have to select it then click on the "Add" to move it to the "Attachments for this product" list.
- Save your product with either the "Save" button or the "Save and stay" one.
...
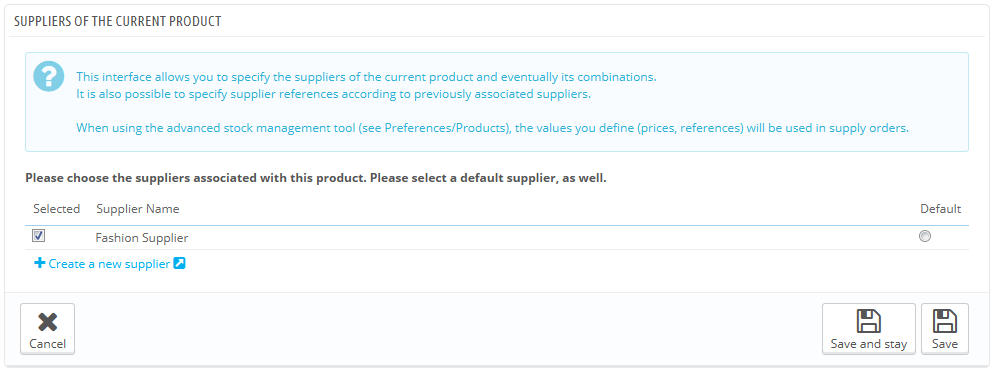
Indicating the product's supplier is not really important to your customers (very much less so than its manufacturer in any case), but it may turn out to be an essential part of your own internal management, not the least when managing your stock: you simply need to know who you bought the product from. The supplier of the current product is to be set from the "Suppliers" tab on the left.
| Info |
|---|
You cannot use this feature if you do not already have at least one supplier registered in your shop. Suppliers are created from the "Suppliers" page, under the "Catalog" menu. The complete supplier registration process in explained in details in the current chapter of this guide. |
...
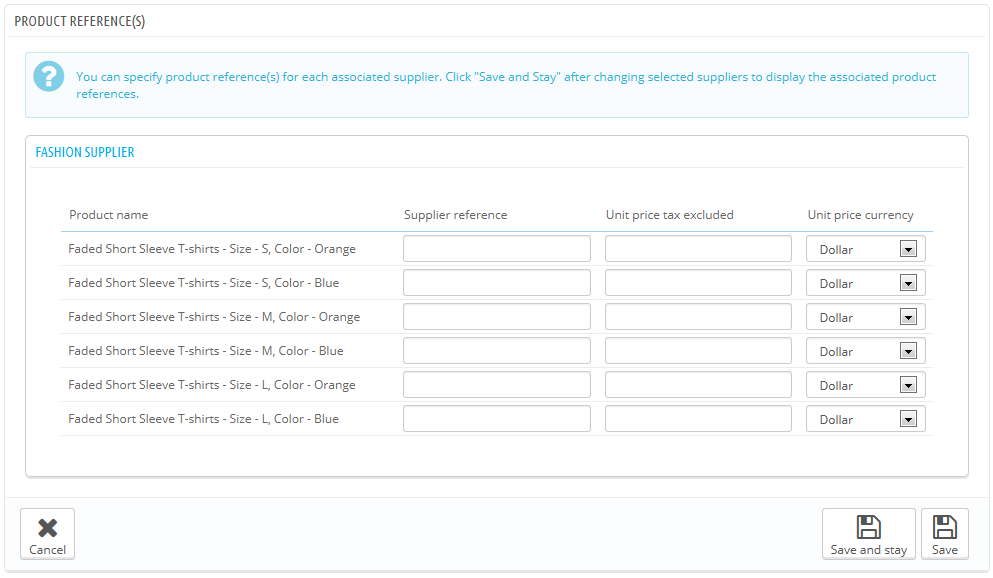
The product's supplier page also features a table that enables you to set the precise reference and unit price/currency for each product combination. If the product has more than one supplier, the table only opens the combination tied to the first supplier, the others being closed by default. Click on a supplier's name in order to open its references table, and close the others.
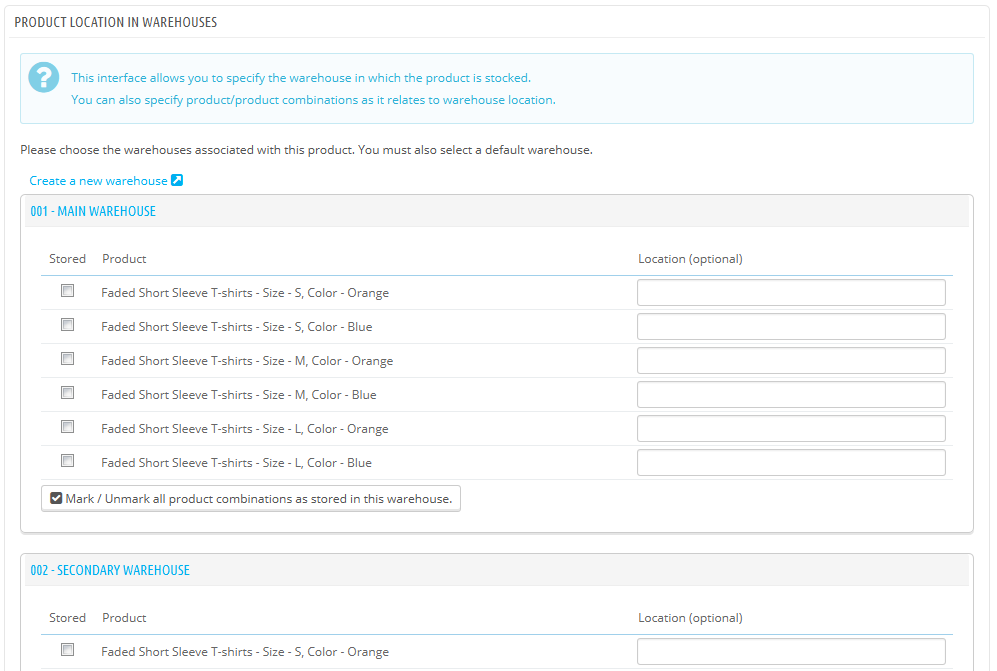
Managing Warehouses (advanced)
Once you have enabled the advanced stock management option (in the "Products" preference page), this new tab gets available for all products, and enables you to indicate in which warehouse the current product is stored.
| Info |
|---|
You cannot use this feature if you do not already have at least one warehouse registered in your shop. Warehouses are created from the "Warehouses" page, under the "Stock" menu. The complete warehouse registration process in explained in details in another chapter of this guide, "Managing Stock". |
...
- Go to the "Products" page, under the "Catalog" menu.
- Click the "Add New" button.
- From the "Information" tab on the left, change the product type to "Pack of existing products ".
A new tab appears on the left, titled "Pack", to which you are redirected as soon as you change the product type. This tab Below the "Type" option, a new section will appear. It only features two text fields and a button:
- The first field is used to search for products that are already registered in your shop.
- The second field is used to indicate the quantity of chosen product should be added to the pack.
- The button adds the product to the pack.
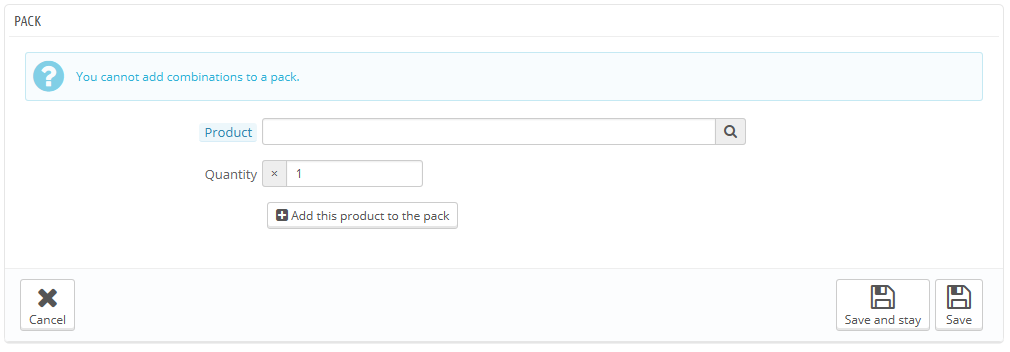
You can add as many products as you would like to the pack.
You can remove a product from the pack simply by clicking the trashcan icon next to it.
A new option will also appear in the "Quantities tab": it is to help you manage your pack quantities.
Pack quantities
When you are creating a pack of products, PrestaShop needs to know how to handle the stock. In the "Quantities" tab, under "Pack quantities", you must choose one of the following options:
- Decrement pack only (default behavior). When a pack is sold, only the stock for the pack will be impacted.
- Decrement products in pack only. When a pack is sold, only the stock for each product will be impacted.
- Decrement both. When a pack is sold, both the stock for the pack and the stock for each product will be impacted.
- Default behavior. This is the default behavior as set at the shop level in your Product preferences. By default you will have "Decrement pack only" but it will change according to your choice.
Once you are done with the "Pack" tab, you can edit the content of all the other available tabs as if you would for a regular product.
...
- If not, leave it at that: you are selling a service, and nothing needs to be downloaded.
- If yes, click the "Yes" option.
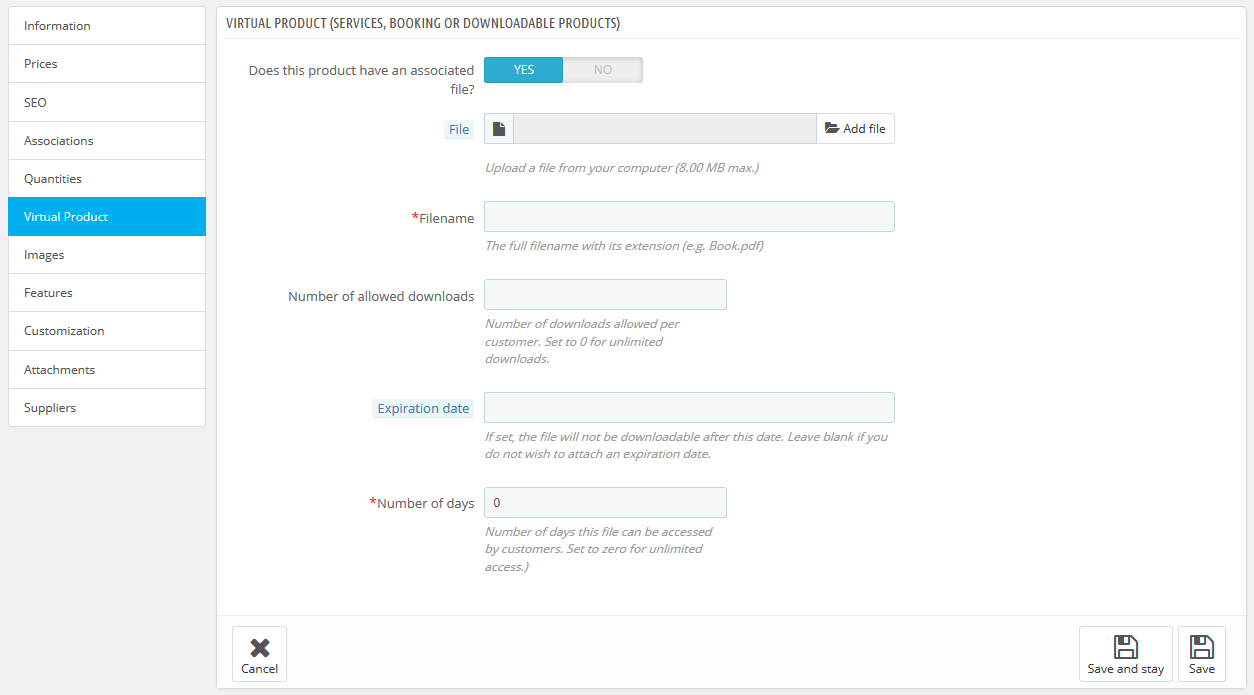
When you click "Yes", PrestaShop opens a new form within the tab, from which you can upload the file you intend to sell:
...