...
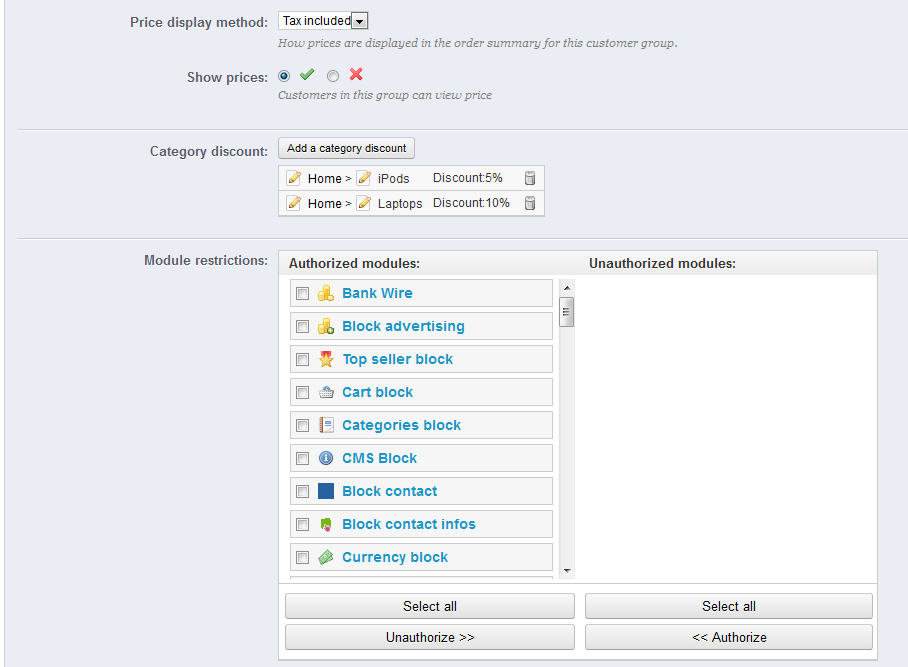
- Category discount. Click on the "Add a category discount" to bring up a new window, which contains a list of all your categories. You can pick one, and apply a specific discount which will apply for that group of customers only, and to that category only.
Note that:- This category discount will replace any other discount that members of this group would otherwise enjoy on this category.
- You can add as many category discounts for this customer group as you need – thereby enabling to entirely give this group a whole set of different discounts if you feel the need.
- Modules restrictions. This section enables you to block members of this group to access and use some of your shop's modules. For instance, you might prefer some customers to not be able to see your top-sellers or to your specials. You can move modules from the left panel ("Authorized panel") to the right one ("Unauthorized panel") by either drag-and-dropping them with your mouse cursor, or by select many modules at a time and clicking on the "Unauthorize" button at the bottom.
You can add a customer to a group of your choice by editing a customer's details: from the list of customers (in the "Customers" page under the "Customers" menu), click on the Edit icon on the customer's line. Then, on the "Groups" table, select the group(s) to which you want your customer to belong.
...
- Name. You can choose anything, from the very common ("Sir", "Lady", "Gentleman", etc.) to the very unusual ("Jedi", "Magnificent One", "Money carrier"...). The important thing when departing from the commonly accepted titles is to reflect your shop's true identity.
- Type. Some names may apply to both male and female customers. Be sure to set that option to "Neutral" then.
- Image. A 16*16 image file representing the title. Classic gender symbol are the Mars and Venus one ones (? ♂ and ?♀), but there are many other possibilities. PrestaShop enables you to characterize your creation with a unique image.
- Image width and Image height. PrestaShop works best with 16*16 image, and will resize your image if it bigger than that. Nevertheless, you might feel necessary to use bigger images, and these two options enable you to set the exact size required by your image. If you enter "0", PrestaShop will simply use the image's original size.