Table of contents
| Table of Contents | ||
|---|---|---|
|
Managing Customers
The “Customers” You have to take good care of your customers. That means making sure their profile contains all the information you need to have a package shipped to them, following up on their support requests, creating special discount groups, knowing which orders have been completed and which have been abandoned, and much more.
The "Customers" tab allows you to follow the creation of user accounts on your site.
You can edit the account of information for each of your customers, and even disable them, by clicking on the green tick
checkmark or red cross"X", respectively, in the table shown. You can enable or disable an account, subscribe or
unsubscribe them to an email e-mail list, or subscribe or unsubscribe a customer from the email e-mail list of a
partner group.
Customers options
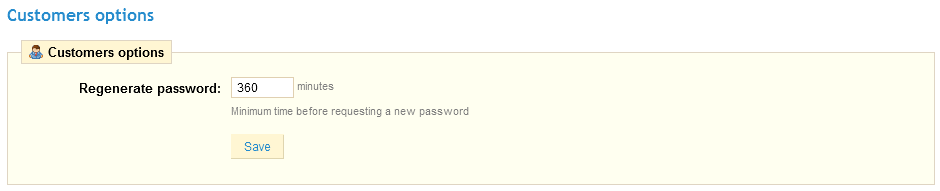
At the bottom of the tab, you can find a "Customers options" section with a single option: "Regenerate password". You can choose to limit the frequency at which a customer can generate a new password for his or her account. By default, it is set at 360 minutes – 6 hours.
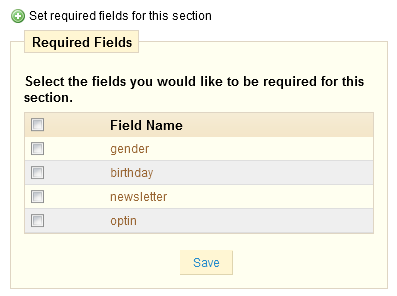
One last section is available: "Set required fields for this section". Clicking the link opens a form where you can select additional fields to mark as required when a user creates an account.
Creating a new user
To create a user account manually select “Add New” formula appears requesting the following
, select "Add New". A form appears, requesting information about the customer: .
Fill out the customer’s customer's information and choose a password, at least 5 characters long. Type in the email e-mail address and choose the date of birth. Choose whether or not this customer has the right to log in, whether or not he is subscribed to your newsletter or not, and finally, if he accepts to receive advertisements from your partners. Assign your customer to a group so that he may receive some certain benefits. We will learn more about groups later in this section.
Consulting a Customer's Information
In the case that you would like to have more information on the next page. a given customer, you can click on the "view" button. You will see this button at the end of the row in the customer's list. A new page will appear.
The various sections provide you with some key data on the user:
- Customer information, first and last name, e-mail address, sex, sign-up date, last site visit.
- Information regarding his subscription to the store's newsletter and subscription to ads from partnering companies, his age, date of last update, and whether or not the account is active.
- Private notes from the store's employees (i.e. you or your team)
- Messages sent by the customer to the store's team.
- The group to which the customer belongs.
- Summary of customer's past purchases. Amount spent, type of payment, order status. For more information about each order, click on the button in the "Actions" column.
- Entered addresses.
- Available vouchers.
- When your customer is on your site, you can see what he is adding to his cart in real time.
- Previous connection to the shop.
Addresses
By clicking on the “Addresses” "Addresses" sub-tab you will have access to the list of your customer’s customer's home addresses. You can edit them at will using the "Edit" button, or delete them altogether.
You also have the possibility to create them yourself with the “Add New” "Add New" button.
Below the addresses table is a button, titled "Set required fields for this section". This gives you access to a form where you can indicate if a database field is necessary or not , by tick checking the appropriate boxboxes, and click clicking "Save" once you're done.
Groups
PrestaShop offers the option of giving gives you the ability to offer your customers certain privileges, by assigning them to Groups. You can create as many customer groups as you like.
To use this feature, click on the “Groups” "Groups" sub-tab. The page below will appear.
...
To create more groups, click the “Add New” "Add New" button: you will get the following a creation form:.
- In the "Name" field, indicate the name that you would like to give this group.
- In the "Discount" reduction, indicate the discount to apply to members of this group , for
all of your products. - PrestaShop is frequently used in the Business to Business (B2B) sector. Therefore, you can
create a group of customers who can buy products without paying the tax. The “Price Display
Method” "Price Display Method" drop-down menu gives you a choice between “tax included” and “tax excluded”"tax included" and "tax excluded". - Validate your settings by clicking “Save”"Save".
You can add a customer to a group of your choice by clicking on the Edit icon on the corresponding line. Then, on the “Groups” "Groups" table, select the group to which you want your customer to belong to.
Searching for a Customer
Searching for a customer on your PrestaShop store can be done in two different methodsways.
The first method is to enter the information you have into the PrestaShop search bar, which is found in the top left of your Back Office. You can indicate:
- His ID (the numbers that he is assigned to the customer in the database).
- His first First or last name.
- His email E-mail address.
Select “customers” "customers" from the drop-down menu and then click “Search "Search".
The results, if any, are then presented as such:.
You can see his ID, his gender, his emaile-mail, his birthday, his registration date, the number of times he’s ordered, orders and whether his status or not the customer is active or not.
The second method consists of going to the customer tab, and listing all of your customers.
From there, you can complete the fields to filter your results according to the following criteria: ID, Sex, First Name, Last Name, email e-mail address, age, registration date, subscription to the newsletter, subscription to partnering ads, last connection date. Enter your criteria and click the "Filter" button at in the top right-hand corner of the table.
Click the "Reset" button to go back to the complete list.
Consulting a Customer’s Information
We now have learned two methods to search for a customer. Now let's see how to consult a customer’s profile.
In the case that you would like to have more information on a given customer, you can click on the "view" button. You will see this button appear after tackling either one of the two previous research methods. The following structure will appear:
The various sections give you some interesting data on the user:
- Customer information, first and last Name, email address, sex, sign-up date, last site visit.
- Information regarding his subscription to the store's newsletter and subscription to ads from partnering companies, his age, date of last update, and whether the account is active or not.
- Private note from the store's employees (ie. you or your team)
- Messages sent be the customer to the store's team.
- The group the customer belongs to
- Summary of customer’s past purchases. Amount spent, type of payment, order status. For more information about each order, click on the button in the "Actions" column.
- His various addresses.
- His available vouchers.
- When your customer is on your site, you can see what he is adding to his cart in real time.
- His previous connection.
Shopping Carts
PrestaShop contains some very powerful marketing features that enable you to see the products that customers are adding to their carts in real time. There are two ways to achieve this.
- Consult their carts in detail directly from the customer information file by clicking on the button from the customer profile in the "carts" section.
- Go to the "Carts" sub-tab, under the "Customer" tab. You will see all of the shopping carts that have items in them. For instance, you can filter your results by the date that they were added. You can see the profile of the customers who check your site out, and, if you wish, use this information to improve your commercial performance.
In both cases, you can consult the details of a customer's shopping cart.
The most important information is presented in the "Cart Summary" section. You can see what products the customer purchased, the price of each item, the quantity they desire, and the total value of their cart.