...
When the multistore feature is enabled for your PrestaShop 1.5 installation, many aspects of PrestaShop are customizable on a per-shop basis.
In the following table, we indicate if the item can also be customized within a group of shops, or for shops at once.
...
- Log-in to your shop's administration
- Go to the "Preferences" menu and select the "General" page.
- For the "Enable multishop" option, select "Yes".
- Save.

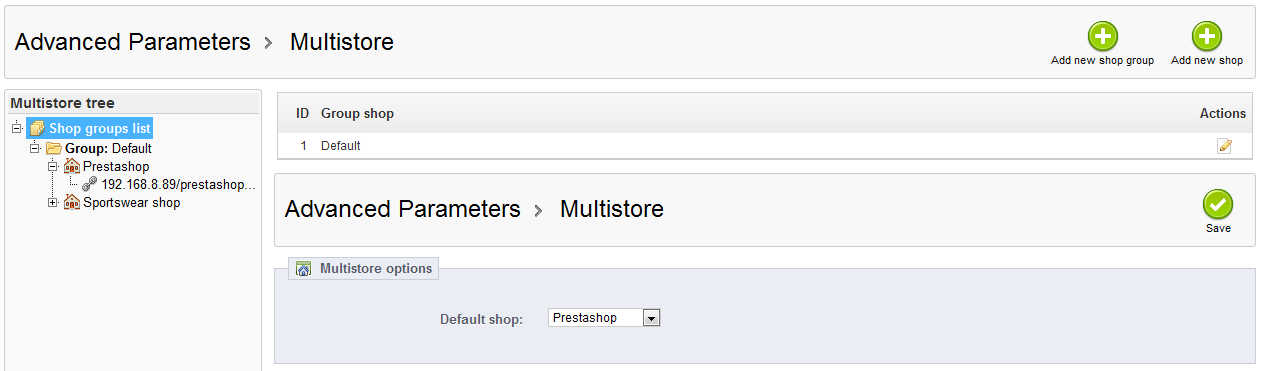
There you go: the multistore feature is now in place, starting with the "Multistore" page under the "Advanced parameters" tab. This is the page were you will manage the various shops associated with this PrestaShop installation.
...
- Multishop tree. Gives you a bird's eye view of your shop groups, their shops, and even the various URLs tied to a single shop.
By default, there is only one shop, in the default group: the main shop. - Shop groups table. Lists the available shop groups. You can edit them by click on the 'edit' icon on the right.
- Multishop options. Lists the available options for the existing shops.
- Default shop. The default is the one which will serve a central hub for all the other ones, shares its details with other shops (products, carriers, etc.), and is the one that appears when you log in the administration.
Creating a new shop group
Having shop groups enables you to share certain characteristics between the groups in that shop: catalog, employees, carriers, modules, etc. It allows you to manage a set of shops as easily as you would a single shop, while still being able to fine-tune the details of each shop manually.
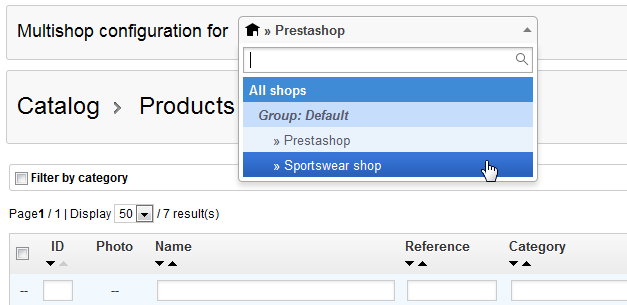
Applying new parameters to all the shops in a group only require a single action. When in multistore mode, a drop-down menu is available on most of the feature configuration pages, and enables you to filter your changes by shop or shop group.

| Info |
|---|
Technically speaking, when selecting a shop group in the multistore drop-down menu, the displayed entities reflect the union of the entities pertaining to the shops in that group. Generally speaking, parameters are applied to all the entities belonging to the selected entity in the multistore drop-down menu. This is explained in details later in this chapter. |
...
The shop creation tool, located in the "Multistore" page, enables you to simply and precisely define both the front-office appearance of your shop (namely, its theme) and the elements you wish to import from your main shop into this new one.
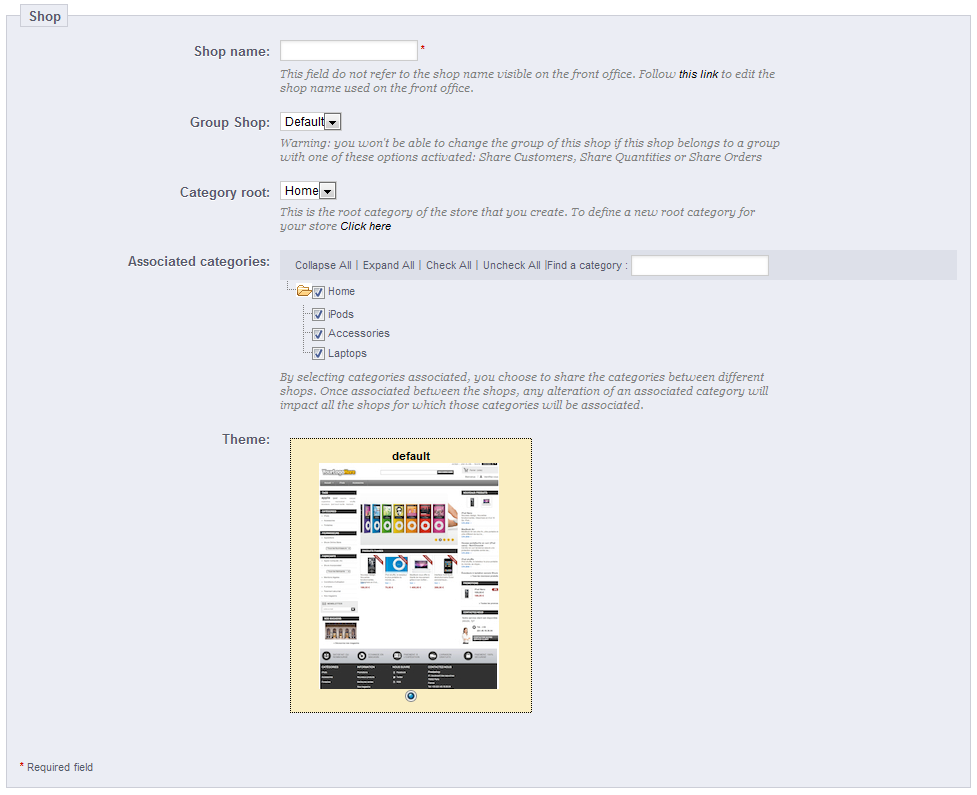
Clicking the "Add new shop" button opens brings a form with two sections. The first one has 5 options:
...
The second section, "Import data from another shop", is where you define which data of the main shop you want to use as the data of this new shop.

It has two options:
- Import data. If disabled, your two shops will not share anything. While this is helpful when you to manage two entirely different shops with a single installation of PrestaShop, this also means you will have to configure both shops from A to Z, whereas sharing data means you would not have to recreate carries, currencies or modules, for instance. Make sure to think your choice through, as you will not be able to revert back.
- Choose the shop (source). If you do wish to import data, you can indicate from which of the existing shops you want to import data from. If you already have defined a sub-shop of the main shop, this can help you make a "copy" of that sub-shop, instead of having to set the various import options again.
- Choose data to import. This is where you decide what kind of data you want to import from the source shop. At the very least, you should import all the modules, even if it means disabling some, as the whole front-office is displayed through modules and some major parts of the back-office also rely on modules.
...