...
- Handling charges. Enter the per-order handling expenses, which will be added to the final purchase price. This is separate from your shipping costs: it is really the cost of you or your employee having to fetch the products, package them and have them shipped. If there is no such cost, leave it at 0.
- Free shipping starts at (currency) and Free shipping starts at (weight). Enter the price or weight after which your customers will receive free shipping. For instance, you might choose to offer free shipping when the order exceeds $250. A message will appear to your customers indicating how much more money they need to spend in order to receive free shipping.
If you do not want to offer free shipping and you do not want this message to appear, leave these values at 0.
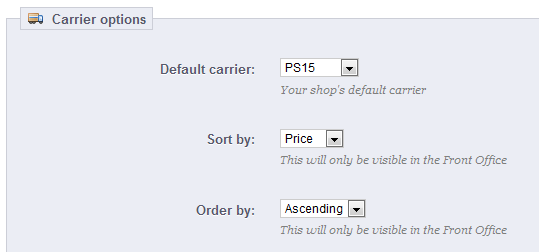
The "Carrier options" section gives you access to 3 settings, which impact the front-office in order to help the customer make a choice:
- Default carrier. If you have more than one carrier in your system, you might want to promote one to your customers. Besides the carriers themselves, this drop-down list has two contextual options:
- Best price. Depending on the amount of the order, on its weight and its delivery zone, PrestaShop will choose the cheapest price for the customer.
- Best grade. Speed grades make it easier to identify the fasted carriers. PrestaShop will display the carrier which, within the context of the order, will have the shortest shipping delay.
- Sort by. When customers are presented with a choice of carriers, you can choose to either sort the list by shipping price or by their position, as set in the carrier list on the "Carriers" page.
- Order by. This enables to set the order in which the carriers are sorted:
- If sorted by shipping fee and with an ascending order, then carriers will be displayed from the cheapest to the most expensive.
- If sorted by position and with a descending order, then carriers will be displayed from the top position of the list, to the bottom position.
Carriers
You must have carriers added to your PrestaShop installation – that is, a clear indicator of who will deliver your products. It might be just yourself or your shop (for instance if you are selling downloadable products, or only work locally), but as soon as you are actually sending packages using stamps and a 3rd-party delivery such as your local postal service, or FedEx, UPS and such, then you must have their details added to your shop's database. This will enable your customers to better choose which carrier to use, based on their delivery ranges, fees and dates.
...
It is up to you to remove these default carriers and add new ones for your customers. At the very least, you should edit the "My carrier" carrier and replace its data with that of a real carrier: name, details, and ranges.
At the bottom of the page, the "Carrier options" section gives you access to 3 settings, which impact the front-office in order to help the customer make a choice:
- Default carrier. If you have more than one carrier in your system, you might want to promote one to your customers. Besides the carriers themselves, this drop-down list has two contextual options:
- Best price. Depending on the amount of the order, on its weight and its delivery zone, PrestaShop will choose the cheapest price for the customer.
- Best grade. Speed grades make it easier to identify the fasted carriers. PrestaShop will display the carrier which, within the context of the order, will have the shortest shipping delay.
- Sort by. When customers are presented with a choice of carriers, you can choose to either sort the list by shipping fee or by their position, as set with the list above.
- Order by. This enables to set the order in which the carriers are sorted:
- If sorted by shipping fee and with an ascending order, then carriers will be displayed from the cheapest to the most expensive.
- If sorted by position and with a descending order, then carriers will be displayed from the top position of the list, to the bottom position.
Creating a New Carrier
In this section, we are going to create a complete carrier, from A to Z, using the Carrier Wizard. You can create as many carriers as you wish.
If one carrier has different shipping services, you should create as many carriers in PrestaShop, and differentiate them with their names.
...
- Carrier name. The name is public, so you should use the official name. If you have create one PrestaShop carrier per shipping services from a single carrier, the name will help you differentiate them.
You could also add a description of the service. For instance, you could fill in "PrestaShipping – 500 lbs and over".
You must add a name in order to - Transit time. The estimated time it takes this carrier to deliver your products, written in plain language. This is displayed to customers during checkout. It will help them select their carrier according to the amount of time they are willing to wait to receive their shipment. Customers can often accept to pay more for a faster carrier.
You must fill this field in all the available languages, especially the default one. - Speed grade. Since the "Transit time" field can contain any text, it cannot be used to compare the carriers' transit times. The "Speed grade" setting enables you to give the carrier a grade, from 0 (very slow) to 9 (very fast). This is then used to sort carriers by their speed grade, and help customers choose the one they prefer.
- Logo. Having a logo helps customers choose between different carriers more easily. PrestaShop will resize your image in order to fit in the order form.
The logo will appear in each panel of the Carrier Wizard, as a reminder of which carrier you are editing/creating. - Tracking URL. This field must be filled with the tracking URL provided by your carrier (if there exists one). For example, France's postal service (La Poste) offers this URL:
http://www.colissimo.fr/portail_colissimo/suivreResultat.do?parcelnumber=@. When customers finish their purchase, they will receive that URL with the "@" replaced by the tracking number provided by the carrier, making it possible to click that link and see where the delivery process is at.
...
- Shipping and handling. Include or exclude shipping & handling costs in this carrier's price, as set in the "Shipping" page.
- Apply shipping cost. If enabled, the final order price will include both the carrier's regular shipping fee, along with specific per-product fees, if there are any.
If disabled, the final order price will only include the product's shipping fee – making this carrier basically free.
Per-product fees are configured on each product's "Shipping" tab, with the "Additional shipping cost (per quantity)" field. - Billing. Choose whether you want to calculate the shipping costs by total price or total weight. This depends on the way your carrier handles billing, so make sure to check their documentation about this.
- Tax. Indicates if this carrier requires a local tax in order to deliver, and if so, which one. The tax must already exist in PrestaShop (which can be done in the "Taxes" page of the "Localization" menu).
Then comes the important part: the creation of the carrier's range. This is a very important steps, as PrestaShop needs this information to present the customer with carriers which can actually deliver the ordered package. Indeed, depending on the order's total price or total weight, some carrier options will not be available while others will only appear at a certain value. You must be very precise when filling these values, and preferably those suggested by each carrier's documentation.
...