...
The "Preferences" administration page contains general options and settings on the way PrestaShop itself works. It has four section
General
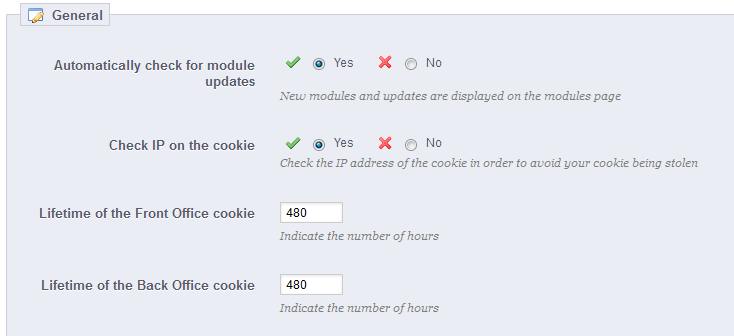
This section are the more general settings:
...
This page helps you define the authorized size of uploaded files from your own team – not from your customers.
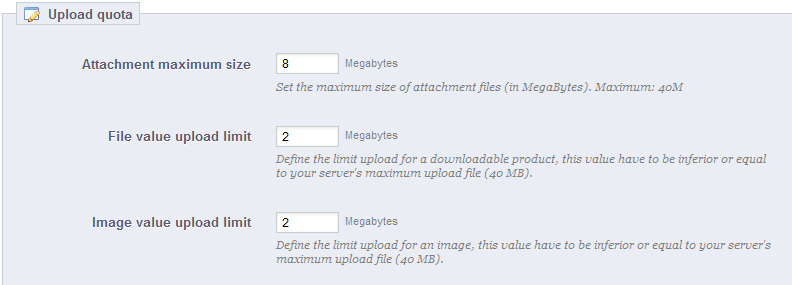
There are three options, one being general and the two others being more specific:
...
To help you with your everyday usage of PrestaShop, the development team has added many tips & tricks within the interface.
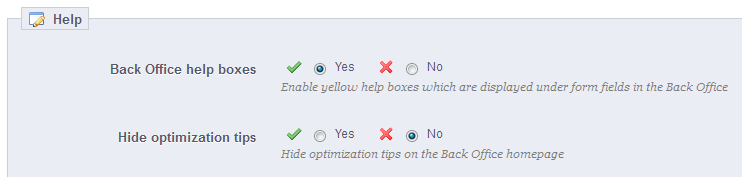
You can have them displayed using one of these two options:
...
Notifications are numbered bubbles that are displayed at the very top of a page when you have loaded it, right next to the shop's name. They display the number of new items since the last you clicked on them.

You can choose not to receive them using these three options:
...
The "Quick Access" administration page enables you to create customized shortcuts, and make your navigation within the admin area even more relevant to you and your team.

The page displays all the shortcuts that have already been created. By default, they are
...
Let's create a shortcut the order creation page, from which you can create a new order, and even add new customers and their addresses on the fly.
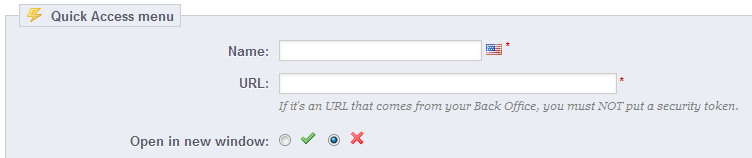
As usual, clicking the "Add New" button takes you to the creation form:
- Name. Give the shortcut a unique name. Make it short and descriptive.
- URL. Indicate the page's address. Here is how you can use even pages with complex links as quick links:
- While keeping the link creation page open, go to the "Orders" page under the "Orders" menu in a new browser tab.
- Copy its web address from the browser's address bar. For instance, http://www.myprestashop.com/admin/index.php?controller=AdminOrders&token=f326b0419984706791c03f7e96599147.

- Remove the whole
&token=xxxpart and keep the important bits (i.e., not the domain and admin folder). In our case:index.php?controller=AdminOrders. - Paste the result in the "URL" field of the creation form.
- Open in new window. Indicate whether you want to have this tab open in a new window or not. In general, link to the back-office should be kept within the same tab/window, and links leading outside of the back-office (front-office, other site altogether) should open in a new window/tab.
...
The "Employees" administration page lists all the user accounts that have access to your shop's back-office. By default you will find the account that was created during the store's installation, which is automatically set as SuperAdmin. The SuperAdmin has access to all of PrestaShop's features without restriction.

You should make sure to create a new employee account for every actual employee that has anything to do you with your online business. This means that you should never have a general use account that everyone can use, because you need to keep track of who did what on your shop. Indeed, employees can edit orders, accept payments and refund customers, and you need to know who did what. Having a personal administration account is a for you to ensure that your team manages your shop responsibly.
...
The "Add New" button takes you to the employee creation form.
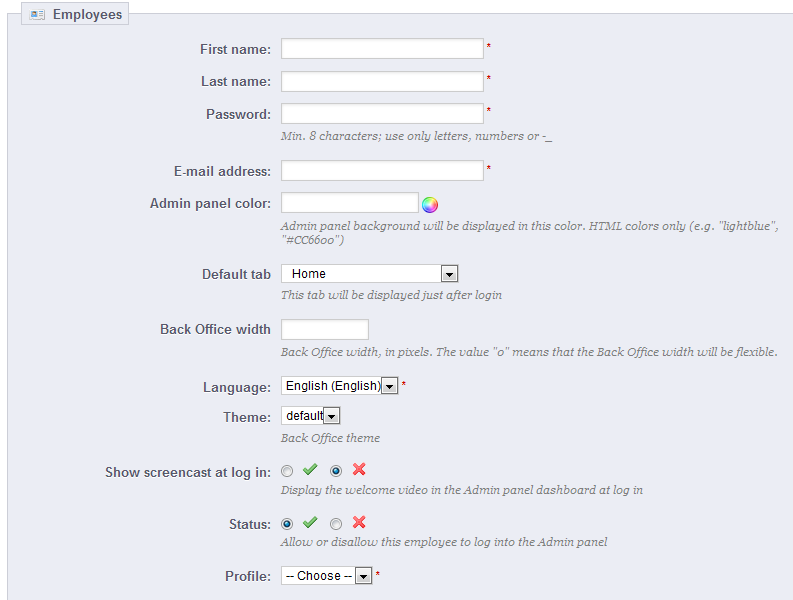
It has a dozen settings:
- First name and Last name. The name does not appear to customers, but is very helpful when you need to know who did what on your shop.
- Password. Try your best to not make it obvious. You do not want an employee's account to be used by unknown people.
- E-mail address. If allowed to, the employee will receive customer's e-mails and PrestaShop's notifications on this address. It is also used as the account's login identifier.
- Admin panel color. A bit of a cosmetic setting, which can serve as a reminded of which account you are currently logged with. For instance, you could make it so that SuperAdmin accounts have green background color, while logisticians or friends use a yellow color. When you log in using on of your company's computer, this helps you know right away which account (or type of account) you are using, and decide whether you should use it or switch to another.
- Default tab. You can decide which page the use sees right after logging-in. This could be the stats page for SuperAdmins, and the orders page for salespersons.
- Back Office width. By default, PrestaShop's back-office interface is as wide as your screen allows. When you have a really wide screen, this can prove a problem. Use this setting to limit the interface's width to a given size, in pixels.
- Language. The default language, since your business might be done in English, but your logisticians might be from another country. Make sure to add the necessary languages, using the "Languages" page under the "Localization" menu.
- Theme. The back-office of PrestaShop can use a different theme than the default one. You can choose which one to use here.
- Show screencast at log in. When enabled, PrestaShop will display a welcome video on the back-office home-page, which tells about the improvement and features of your current version of PrestaShop.
- Status. You can temporarily and definitively disable an account. This enables you to create temporary accounts, for instance when you need help during the holidays or the shopping season.
- Profile. It is very important that you assign a correct profile to each employee account. A profile is tied to a set of permissions and access rights, and you should get to know the existing ones, listed in the "Profiles" page under the "Administration" menu (see below for more information). The profile determines which part of your shop's back-office the employee has access to; for instance, when the employee logs in, only the tabs that have been configured as accessible to his or her profile will be displayed. This is a very important setting.
Employees option
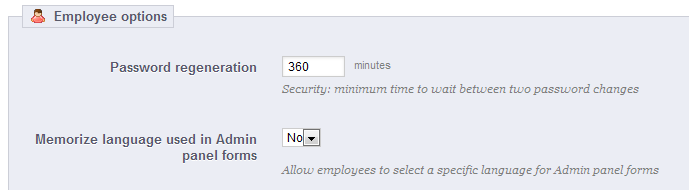
The section at the bottom of the "Employees" page, right below the employees list, has two options available:
...
PrestaShop enables you to assign specific duties and rights to each employee who helps you manage the online shop. For example, the administrator will have access to the entire store, without restriction, while an employee can only have access to the catalog or orders.

By default, PrestaShop has 5 profiles ready to use:
...
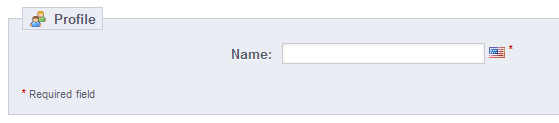
Adding a new profile is pretty straightforward: simply click the "Add new" button, enter a unique name for the new profile, and save.
The more complex part comes when setting the new profiles access rights. This is done in the "Permissions" page (see below).
...
Permissions are the central part of PrestaShop's profiles. They enable you to see very precisely what an employee account can and cannot do on your shop.
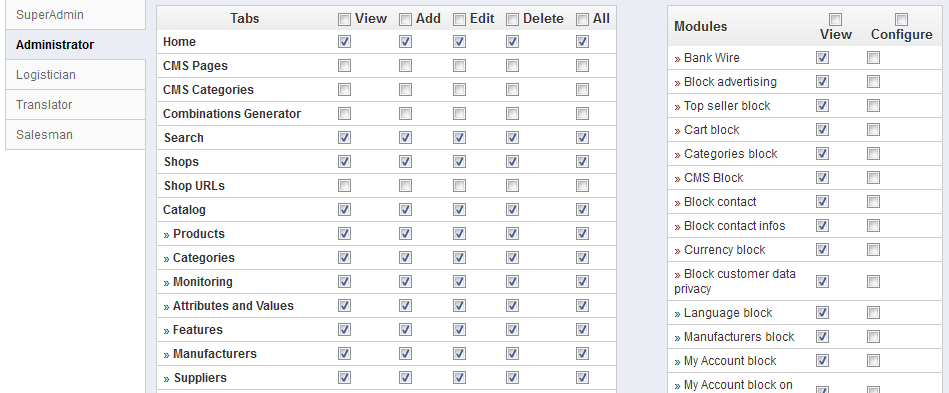
The "Permissions" administration page is built using tabs:
...
PrestaShop's back-office menu organization is not set in stone: while the default arrangement is built in order to have the most useful pages readily available, you might have a different opinion, and may want to change the organization, in part or in full.
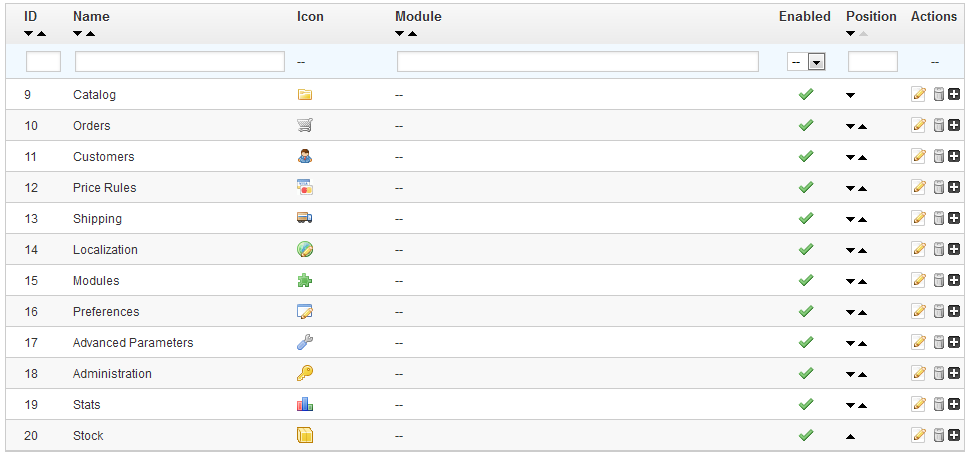
This page enables you to move, edit, disable and even create pages.
...
Pages can be moved within a menu directly from the list. You can either click on the arrows in the "Position" column, or drag the row itself and drop it in the position you want it to have. As soon as you drop the row, PrestaShop saves the location automatically. You can drag the row when the mouse cursor is over the "Position" column.
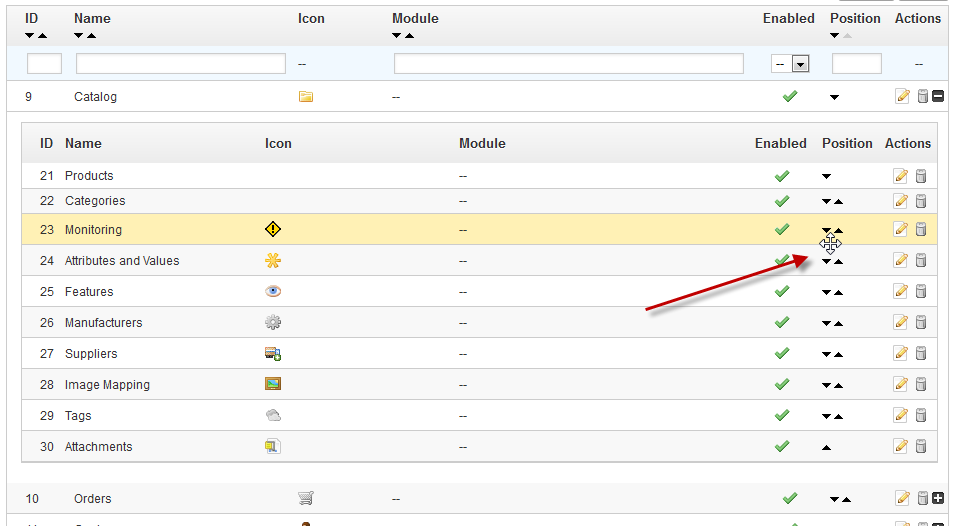
You can also move a page to a different menu altogether. This cannot be done directly from the list; you must open the page's editing form, where you will find the "Parent" option. Change that option to another menu name, save your changes, and when returning to the "Tabs" page, the page will have moved menu.
You can disable a page simply by clicking on the green checkmark in the "Enabled" column. Note that this will disable the page for all back-office users. If you want to hide a page from a specific set of users, edit their profile's permissions, in the "Permissions" administration page.
...
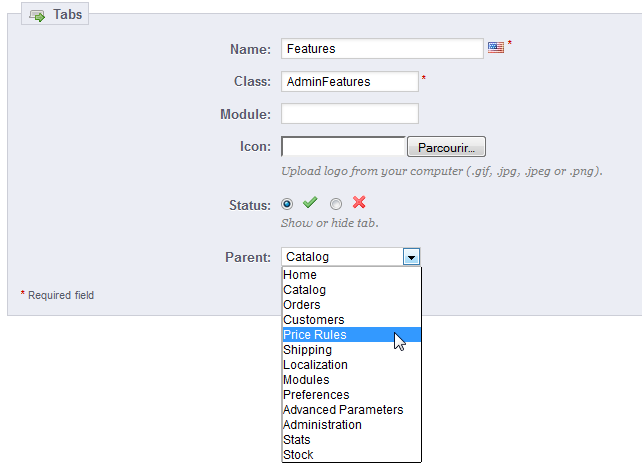
Click on "Add New" to reach the page creation form.
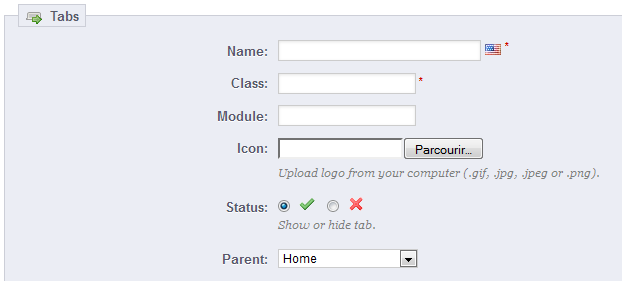
This form has a handful option, some of which might prove complicated:
- Name. Give it a unique name, because it will serve as an internal identifier.
- Class. In short, a PrestaShop back-office page is based on specific internal PHP files, which are called "admin controllers", and are most often stored in the
/controllers/adminfolder of your PrestaShop installation. When creating a new page, you must know which controller to target, and most importantly the name of its class – which is the name of its PHP file.
For instance, if you want to create a page displaying PrestaShop's backup administration page, you must first find its controller name (here,AdminBackupController, and copy it in the "Class" field. - Module. In some cases, the administration controller for which you want to create a page comes from a module. In that case, you must also indicate the identifier for the module (in most cases, its folder name) and copy it in the "Module" field, in lowercase. This way, PrestaShop will know that it should not look for the controller in the
/controllers/adminfolder, but rather in the/modules/NAME-OF-THE-MODULE/folder. - Icon. You can use any 16*16 icon; for instance, the excellent and free FamFamFam Silk icon set: http://www.famfamfam.com/lab/icons/silk/.
- Status. You can disable a page at any, but do note that it affects all the back-office users.
- Parent. You can choose any top-menu, but for consistency's sake, make sure to pick one to which the page you are creating is relevant.
...